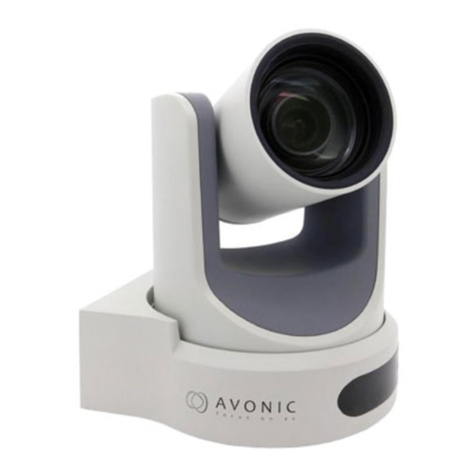
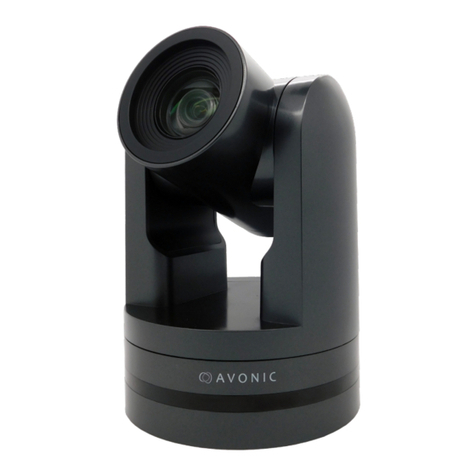
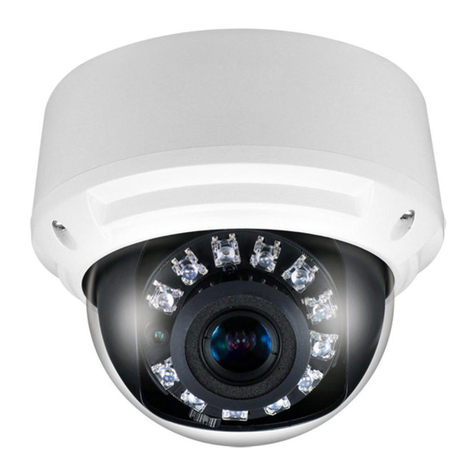
Avonic AV-CM22-VCU User manual

www.avonic.com | User Manual | Version 1.0.1
Avonic 4K Conference Camera USB3.0
AV-CM22-VCU

2www.avonic.com
CONTENTS
Introduction................................................................................................................................................. 3
Contact. .. .. .. .. .. .. .. .. .. .. .. .. .. .. .. .. .. .. .. .. .. .. .. .. .. .. .. .. .. .. .. .. .. .. .. .. .. .. .. .. .. .. .. .. .. .. .. .. .. .. .. .. .. .. .. .. 3
Join Avonic .. .. .. .. .. .. .. .. .. .. .. .. .. .. .. .. .. .. .. .. .. .. .. .. .. .. .. .. .. .. .. .. .. .. .. .. .. .. .. .. .. .. .. .. .. .. .. .. .. .. .. .. .. .. 3
Safety Notes................................................................................................................................................ 4
Package contents and Accessories.................................................................................. 6
Contents.. .. .. .. .. .. .. .. .. .. .. .. .. .. .. .. .. .. .. .. .. .. .. .. .. .. .. .. .. .. .. .. .. .. .. .. .. .. .. .. .. .. .. .. .. .. .. .. .. .. .. .. .. .. .. .. 6
Handling precautions .. .. .. .. .. .. .. .. .. .. .. .. .. .. .. .. .. .. .. .. .. .. .. .. .. .. .. .. .. .. .. .. .. .. .. .. .. .. .. .. .. .. .. .. .. .. 6
Product Overview.................................................................................................................................. 7
Features .. .. .. .. .. .. .. .. .. .. .. .. .. .. .. .. .. .. .. .. .. .. .. .. .. .. .. .. .. .. .. .. .. .. .. .. .. .. .. .. .. .. .. .. .. .. .. .. .. .. .. .. .. .. .. .. 7
Applications .. .. .. .. .. .. .. .. .. .. .. .. .. .. .. .. .. .. .. .. .. .. .. .. .. .. .. .. .. .. .. .. .. .. .. .. .. .. .. .. .. .. .. .. .. .. .. .. .. .. .. .. .. 7
Installation.................................................................................................................................................... 8
Connections .. .. .. .. .. .. .. .. .. .. .. .. .. .. .. .. .. .. .. .. .. .. .. .. .. .. .. .. .. .. .. .. .. .. .. .. .. .. .. .. .. .. .. .. .. .. .. .. .. .. .. .. .. 8
Camera placement .. .. .. .. .. .. .. .. .. .. .. .. .. .. .. .. .. .. .. .. .. .. .. .. .. .. .. .. .. .. .. .. .. .. .. .. .. .. .. .. .. .. .. .. .. .. .. 8
Operation...................................................................................................................................................... 10
Remote controller .. .. .. .. .. .. .. .. .. .. .. .. .. .. .. .. .. .. .. .. .. .. .. .. .. .. .. .. .. .. .. .. .. .. .. .. .. .. .. .. .. .. .. .. .. .. .. .. .. 11
Quick Codes list. .. .. .. .. .. .. .. .. .. .. .. .. .. .. .. .. .. .. .. .. .. .. .. .. .. .. .. .. .. .. .. .. .. .. .. .. .. .. .. .. .. .. .. .. .. .. .. .. .. .. 12
OSD Menu...................................................................................................................................................... 13
First Operation. .. .. .. .. .. .. .. .. .. .. .. .. .. .. .. .. .. .. .. .. .. .. .. .. .. .. .. .. .. .. .. .. .. .. .. .. .. .. .. .. .. .. .. .. .. .. .. .. .. .. .. 14
Menu. .. .. .. .. .. .. .. .. .. .. .. .. .. .. .. .. .. .. .. .. .. .. .. .. .. .. .. .. .. .. .. .. .. .. .. .. .. .. .. .. .. .. .. .. .. .. .. .. .. .. .. .. .. .. .. .. .. .. 14
Exposure.. .. .. .. .. .. .. .. .. .. .. .. .. .. .. .. .. .. .. .. .. .. .. .. .. .. .. .. .. .. .. .. .. .. .. .. .. .. .. .. .. .. .. .. .. .. .. .. .. .. .. .. .. .. .. .. 14
Color . .. .. .. .. .. .. .. .. .. .. .. .. .. .. .. .. .. .. .. .. .. .. .. .. .. .. .. .. .. .. .. .. .. .. .. .. .. .. .. .. .. .. .. .. .. .. .. .. .. .. .. .. .. .. .. .. .. .. 16
Image.. .. .. .. .. .. .. .. .. .. .. .. .. .. .. .. .. .. .. .. .. .. .. .. .. .. .. .. .. .. .. .. .. .. .. .. .. .. .. .. .. .. .. .. .. .. .. .. .. .. .. .. .. .. .. .. .. .. 17
Noise Reduction .. .. .. .. .. .. .. .. .. .. .. .. .. .. .. .. .. .. .. .. .. .. .. .. .. .. .. .. .. .. .. .. .. .. .. .. .. .. .. .. .. .. .. .. .. .. .. .. .. .. 19
Setting. .. .. .. .. .. .. .. .. .. .. .. .. .. .. .. .. .. .. .. .. .. .. .. .. .. .. .. .. .. .. .. .. .. .. .. .. .. .. .. .. .. .. .. .. .. .. .. .. .. .. .. .. .. .. .. .. .. 19
Information.. .. .. .. .. .. .. .. .. .. .. .. .. .. .. .. .. .. .. .. .. .. .. .. .. .. .. .. .. .. .. .. .. .. .. .. .. .. .. .. .. .. .. .. .. .. .. .. .. .. .. .. .. .. 20
Restore Default .. .. .. .. .. .. .. .. .. .. .. .. .. .. .. .. .. .. .. .. .. .. .. .. .. .. .. .. .. .. .. .. .. .. .. .. .. .. .. .. .. .. .. .. .. .. .. .. .. .. .. 20
Maintenance.............................................................................................................................................. 21
Camera Maintenance . .. .. .. .. .. .. .. .. .. .. .. .. .. .. .. .. .. .. .. .. .. .. .. .. .. .. .. .. .. .. .. .. .. .. .. .. .. .. .. .. .. .. .. .. .. 21
Unauthorized Use .. .. .. .. .. .. .. .. .. .. .. .. .. .. .. .. .. .. .. .. .. .. .. .. .. .. .. .. .. .. .. .. .. .. .. .. .. .. .. .. .. .. .. .. .. .. .. .. .. 21
Troubleshooting...................................................................................................................................... 21
General advise .. .. .. .. .. .. .. .. .. .. .. .. .. .. .. .. .. .. .. .. .. .. .. .. .. .. .. .. .. .. .. .. .. .. .. .. .. .. .. .. .. .. .. .. .. .. .. .. .. .. .. 21
Power Issues.. .. .. .. .. .. .. .. .. .. .. .. .. .. .. .. .. .. .. .. .. .. .. .. .. .. .. .. .. .. .. .. .. .. .. .. .. .. .. .. .. .. .. .. .. .. .. .. .. .. .. .. .. 21
Image.. .. .. .. .. .. .. .. .. .. .. .. .. .. .. .. .. .. .. .. .. .. .. .. .. .. .. .. .. .. .. .. .. .. .. .. .. .. .. .. .. .. .. .. .. .. .. .. .. .. .. .. .. .. .. .. .. .. 22
Control .. .. .. .. .. .. .. .. .. .. .. .. .. .. .. .. .. .. .. .. .. .. .. .. .. .. .. .. .. .. .. .. .. .. .. .. .. .. .. .. .. .. .. .. .. .. .. .. .. .. .. .. .. .. .. .. .. 22
Appendix A - Dimensions.............................................................................................................. 23
Appendix B - CMOS Image Sensor Characteristics........................................... 24
3www.avonic.com
www.Facebook.com/
avonicPTZ
INTRODUCTION
Thank you for your Avonic purchase. Before operating this product, please read the manual thoroughly and
retain it for future reference. The manual can be downloaded on www.avonic.com. Save this manual for future
reference.
CONTACT
For any questions or suggestions, contact your reseller or the local distributor of Avonic. Find the local distri-
butor on the website of Avonic. For the most recent version of the manual or datasheet, look at the Avonic
website: www.avonic.com.
JOIN AVONIC
www.Linkedin.com/company/
avonic
www.twitter.com/
avonic
Back to top

4www.avonic.com
SAFETY NOTES
Important safety information
WARNING: Failure to follow these safety instructions could result in fire, electric shock, injury, or damage to
this Product or other property. Read all the safety information below before using
this Product.
WARNING: Before operating this product, please read the manual thoroughly and retain it for future
reference. The manual can be downloaded on www.avonic.com.
Handling
Handle this Product with care. It is made of metal, glass, and plastic and has sensitive electronic components
inside. this Product can be damaged if dropped, burned, punctured, or crushed, or if it comes in contact with
liquid. If you suspect damage to this Product, discontinue use of this Product, as it may cause overheating or
injury.
WARNING: Do not pick up and move the unit while a tripod is attached. The fitting may break under the
weight of the tripod, which may result in injury.
Installation
Set up this Product on a hard, stable surface or mount it to a wall or ceiling. Use the connected Avonic mount
for mounting to a wall or ceiling. Ensure the mounting construction is capable of supporting four times the
weight of the Product. (See ‘General Specifications > Weight product’ in the Product Datasheet for the exact
weight.) Make sure to make use of a safety loop or drop protection that is capable of preventing the Product
from falling if the mounting construction fails. Never install a product above persons to prevent any risk on
injuries when it falls down.
WARNING: In order to maintain adequate ventilation, do not install or place this unit in a bookcase, built-in
cabinet or any other confined space. To prevent risk of electric shock or fire hazard due to overheating, ensure
that curtains and any other materials do not obstruct the ventilation.
WARNING: Check the installation at least once a year. An improper installation could cause the unit to fall
off resulting in damage to the product, or personal injury.
Repairing
Don’t open this Product and don’t attempt to repair this Product yourself. Disassembling this Product may
damage it or may cause injury to you. If this Product is damaged, malfunctions, or comes in contact with liquid,
contact Avonic or an Avonic Authorized Service Provider. Repairs by service providers other than Avonic or an
Avonic Authorized Service Provider may not involve the use of Avonic genuine parts and may affect the safety
and functionality of the device. You can find more information about repairs and service at www.avonic.com.
Power
Power this Product with the included USB cable.. Other adapters may not meet applicable
safety standards, and connecting with such adapters could pose a risk of death or injury.
WARNING: Using damaged cables, or using the Product when moisture is present, can cause fire, electric
shock, injury, or damage to this Product or other property. When you power this Product, make sure the cable is
fully inserted into the power adapter before you plug the adapter into a power outlet. It’s important to keep this
Product, the cable, and the power adapter in a well-ventilated area when in use.
Back to top

5www.avonic.com
USB cable and Power supply
To operate the Avonic Power adapter and USB cable safely and reduce the possibility of heat-related injury
or damage, plug the Power adapter and/or USB cable directly into Power outlet or an USB port of a computer.
Don’t use the Power supply and USB cable in wet locations, and don’t connect or disconnect the Power supply
or USB cable with wet hands. Stop using the Power supply and cable if any of the following conditions exist:
• The Power supply and/or USB cable plug or prongs are damaged.
• The Power supply and/or cable becomes frayed or otherwise damaged.
• The Power supply and/or USB cable is exposed to excessive moisture, or liquid is spilled into the power
adapter.
• The Power Supply and/or USB cable has been dropped, and its enclosure is damaged.
Intended use
This Product shall not be used in the home environment and shall only be installed and operated by
experienced technicians.
Not a medical device
This Product is not a medical device and should not be used as a substitute for professional medical judgment.
It is not designed or intended for use in the diagnosis of disease or other conditions, or in the cure, mitigation,
treatment, or prevention of any condition or disease. Please consult your healthcare provider
prior to making any decisions related to your health.
Explosive and other atmospheric conditions
Using this Product in any area with a potentially explosive atmosphere, such as areas where the air contains
high levels of flammable chemicals, vapours, or particles (such as grain, dust, or metal powders), may be
hazardous. Exposing this Product to environments having high concentrations of industrial chemicals,
including near evaporating liquified gasses such as helium, may damage or impair this Product functionality.
Obey all signs and instructions.
High-consequence activities
This device is not intended for use where the failure of the device could lead to death, personal injury, or severe
environmental damage.
Back to top

6Back to topwww.avonic.com
Be cautious to take the camera by its base and
do not touch the lens. See the pictures below.
No. Quantity Description Avonic SKU
1 1 pc CM22 Camera AV-CM22-VCU
2 4 pc USB Power Adaptor (EU, UK,
US, AUS)
AV-CM20-PSU
3 1 pc Remote Control CM-RC
4 1 pc USB 3.0 cable AV-USB30-AB
Handling precautions
Contents
PACKAGE CONTENTS AND ACCESSORIES
12
3
4

7Back to topwww.avonic.com
• Lens: fixed focus focus lens with 120° Horizontal FOV.
• Crystal Clear Image: : 4K Progressive CMOS sensor 2160P UltraHD
• Output: HDMI and USB3.0 up to 4K30 or 1080p30 when using USB 2.0
• Audio: Built in noise cancelling micorphones with 4 meter pick up range
• Control: Control the camera via any UVC based videoconference application or
the included IR remote control
• Presets: 10 User definable presets with Digital Pan Tilt and Zoom including startup
preset
• Mount: The CM22 comes with an included detachable integration mount with
the ability to secure and mount the camera above or below a screen
The Avonic CM22-VCU boasts a 4K, wide angle lens up to 120 degrees FOV that makes sure you can capture all
attendees. It’s Smart automatic and fully user configurable modes guarantee crystal clear video even under
the most challenging light conditions. Built in user configurable dual microphones allow for easy audio capture.
A true integration product with a discrete design and mount developed for PRO-AV installations. It can be easily
mounted either on top of or below a screen for optimal line of sight during a meeting. The mount can be used
in combination with modern thin-bezel screens.
Designed to last the CM22-VCU comes with 3 year warranty.
Features
PRODUCT OVERVIEW
Applications
• Huddle Rooms
• Telemedicine
• Desktop Video Conferencing
• Small and Medium Size meeting rooms

9Back to topwww.avonic.com
3. Wall mounted below a screen
The minimum (depending on connector type used) and maximum depth are indicated, due to the
dual articulated sliding mount design there are numerous variations to make.
2. Wall mounted above a screen
The minimum (depending on connector type used) and maximum depth are indicated, due to the
dual articulated sliding mount design there are numerous variations to make.
207mm 174mm
207mm 174mm
70mm
70mm
207mm
174mm
207mm 174mm
70mm
70mm
207mm 174mm
207mm
174mm
70mm
70mm
207mm 174mm
207mm 174mm
70mm
70mm

10Back to topwww.avonic.com
10. Camera IR Selection Key
11. #Key
12. IR Channel ProgramKey
13. Reset Key
14. PTZ control key
15. Menu Key
16. Backlight Key
17. PTZ reset key
Remote controller
OPERATION
1. Standby Key
2. Number Key
3. *Key
4. Preset Key
5. Home key
6. Return Key
7. Zoom Button
8. Left/Right
Setting Key
9. Focus Key

11Back to topwww.avonic.com
1. Standby Key
This button has no function with this camera.
2. Number Key
Call preset PTZ position.
3. *Key
Used with other keys.
4. Preset Key
Preset memory in combination with numeric keys (0-9)
5. Home Key
The PTZ camera/image will go back to the center position, or “enter” function in “On Screen Display (OSD)”
menu.
6. Return Key
Return back tot the previous level of the menu.
7. Zoom + -
Zoom the camera with these buttons. Slow zoom in and out/ fast zoom in and out.
8. Left/Right Setting Key
This button has no function with this camera.
9. Focus Key
This button has no function with this camera.
10. Selection Key
Select IR channel 1 to 4 to control multiple cameras individually.
11. # Key
Used with other keys.
12. IR Channel Program Key
[* ] + [#] + [F1]/ [F2] / [F3] / [F4]: program camera to IR channel 1 to 4
13. Reset Key
Delete the memory preset in combination with the numeric keys (0-9).
14. PTZ Control Key
When zoomed in, move the image with the up/down/left/right keys.
15. Menu Key
This Menu button opens of closes the the OSD menu. If the menu is not in English, please press
[*]+[#]+[1] to change the Menu language to English.
16. Backlight Key
This button has no function with this camera.
17. PTZ Reset Key
This button has no function with this camera.

12Back to topwww.avonic.com
Quick Codes list
[*]+[#]+[1] : OSD menu default English
[*]+[#]+[4] : 1080P@30fps default hdmi resolution
[*]+[#]+[5] : Disable microphone, setting is persistant even after power cycle
[*]+[#]+[6]: Factory default
[*]+[#]+[7]: 1080P@60fps default resolution
[*]+[#]+[9]: Enable microphone, setting is persistant even after power cycle

13Back to topwww.avonic.com
The OSD menu can be accessed by using the IR
Remote Control and a third party UVC based
videoconference application; such as many
Media players like VLC or Potplayer, the standard
windows camera application etc.
In the following pages, the navigation is
described for using the IR Remote Control.
OSD Menu

14Back to topwww.avonic.com
First Operation
1. Install and/or open a third party UVC based videoconference application (VLC, Potplayer, Standard
Windows Camera Application etc.)
2. Connect the USB or HDMI cable to your computer. If you use the HDMI cable, do not forget to connect
the USB cable and the USB Power adaptor to the power net. (See chapter Package Contents and
Assesoiries)
3. In your Third Party software the camera will automatically appear as “HD Camera”. Select this
camera. For a crystal clear image we recommend to change the Video Format to to 1920x 1080
or higher when using full screen mode of your monitor.
4. When you can see the image of the CM22 (HD Camera), you can use the IR Remote Control to open
the OSD Menu.
Menu
Press [MENU] button to display the main menu on the screen. Use the arrow buttons to move the cursor to
the item to be set. Press the [HOME] button to enter the corresponding sub-menu. The sub-menu’s have,
beside the underlying settings, also a [RETURN] option. By selecting [RETURN] and pressing the HOME
button on the remote control, it is possible to return to the main menu.
Note that, when you are zooming in to the picture, the text of the OSD menu will be enlarged. Make first
your adjustments in the OSD Menu before you are zooming in.
MENU
Exposure
Color
Image
Noise Reduction
Setting
Information
Restore Default
Select Item
Change Value
[Home] Enter
[Menu] Exit
EXPOSURE
EXPOSURE
Mode Full Auto / Bright / Shutter Priority
ExpCompMode ON / OFF
Exposure Compensation -7 ~ 7
Gainlimit 0 ~ 15
Backlight ON / OFF
DRC Strength 0 ~ 8
Antiflicker 50hz / 60hz / OFF
Select Item
Change Value
[Menu] Back

15Back to topwww.avonic.com
Gainlimit
Gain limit is the maximum level of artificial brightness and contrast that the camera may add to the image
automatically. This setting will make a significant difference to the overall picture. Make sure that this setting is
kept ‘within reason’ as it can add noise to the picture in dark areas and produce a washed out greyish picture.
Backlight
Note that the camera will do nothing when this setting is “ON”. Despite there is a Backlight button on the IR
Remote Control and a Backlight option in the OSD menu, the camera itself has no Backlight function.
DRC Strength
Dynamic Range Compression Strenght has a similar effect on the picture as the above mentioned gain limit. The
DRC works by compressing the natural dynamic range of the image by taking out the darkest and lightest parts
of the image. This can be a particular helpful setting when the light conditions are challenging. The differences
should be clearly visible in dark parts of the image, they will become lighter/more grey once the level of DRC is
increased.
Shutter Priority
In this mode the shutter speed is user adjustable, the camera itself decides the best iris F-stop value for an
optimal exposure setting.
Keep in mind that the shutter speed is the amount of time that each frame of the sensor has been exposed to
light.
To compensate for poor lighting conditions, it is possible to adjust the DRC Strength. See the DRC Strength
paragraph on this page for more information.
DRC Strength and Gainlimit with decreased settings DRC Strength and Gainlimit with increased settings
Antiflicker
This setting is to set your camera up in such a way that it’s able to cope with the flickering of artificial lighting in
the space where it has to operate. The options are 50Hz, 60Hz and OFF.
Mode: Full Auto
The camera determines the iris and shutter settings. There are a couple of settings to present the camera
with some limits as to what it may do to the image:
ExpCompMode (Exposure Compensation Mode)
The Exposure Compensation Mode is to create a quick adjustment to your current exposure settings, if the
light conditions require this without actually changing the fundamental values like shutter and brightness.
Set this mode ON to make changes to the Exposure Compensation.

16Back to topwww.avonic.com
COLOR
COLOR
WB Mode auto / indoor / outdoor / One Push / manual / VAR
AWB Sense low / middle / high
Colortemp 2500K ~ 8000K
RG Tuning -10 ~ 10
BG Tuning -10 ~ 10
Saturation 60 % ~ 200%
Hue 0 ~ 14
Select Item
Change Value
[Menu] Back
The color mode inside the camera is designed in such a way that the video output of the camera can match
the current light conditions to produce accurate colors. There are several automatic preset modes and a
manual mode to set the colors to the preference of the user.
WB mode: auto
The camera continuously measures and defines the light conditions and acts accordingly. In this mode there
are some adjustments that can be made to tune the image to the preference of the user.
AWB Sense or Auto White Balance Sensitivity
how quickly the camera responds to changing light settings.
RG Tuning
Red Gain Tuning, increase or decrease red
RG: Set the intensity of the red you want
BG Tuning
Blue Gain Tuning, increase or decrease blue
BG: Set the intensity of blue you want
Saturation
How saturated the image colors are. 0% would produce a black and white image.
Hue or tint
The balance between green and red. 0 is green, 14 is red.
WB mode: Indoor/ Outdoor
Select these modes when you are filming inside (indoor) or outside rooms or buildings (outdoor). It is possible
to change saturation (saturation of image colors) and Hue settings (balance between green and red).
Bright mode
This mode is to try and create a decent image when the light conditions are exceptionally poor. In this mode keep
the Bright level, Gainlimit and DRC Strength as low as possibly acceptable to avoid too much noise in the picture.
If the level of noise in the image becomes unacceptable, noise reduction is available to smooth the
picture over. It is also possible to reduce flickering in the image with the AntiFlicker (see Antiflicker above).

17Back to topwww.avonic.com
IMAGE
IMAGE
Luminace 0 ~ 14
Contrast 0 ~ 14
Sharpness 0 ~ 14
Flip-H ON / OFF
Flip-V ON / OFF
Gamma 0.45 / 0.50 / 0.56 / 0.63 / EXT / Default
Style Default / Normal / Clarity / Bright / PC / Clarity (LED) / Face
LDC -10 ~ 10
Select Item
Change Value
[Menu] Back
WB Mode: VAR
This mode allows you to change the color temperature settings. Beside RG/ BG Tuning, Saturation and hue
settings, you can change also the color temperature (Colortemp). 2500K will give the image cold (blue)
colors, while 8000K will give the image warm (yellow) colors.
The image section of the camera consists of settings that have an effect on the image post-processing.
Basically these settings are all artificial, they don’t affect the optical parts of the camera itself.
Luminance
This setting will enlighten the image and change the amount of detail that is visible in darker areas of the
image. Be careful not to set this setting too high as you will see that the image becomes ‘milky-white’.
Contrast
The amount of detail that is visible in lighter areas of the image.
Sharpness
Artificial contrast, be careful no to set this too high as it will create a sort of halo around sharp edges of filmed
objects. The setting of sharpness coincides with the setting of noise reduction.
Flip-H, Flip-V
The Flip-H mode turns the picture horizontally, while the Flip-V mode turns it vertical by 180 degrees.
WB Mode: One Push
This mode will focus once on an object or person in the image and will keep the focus in that position until
another command to focus again is send. This allows you to change the color settings in such a way that
it is optimal for that camera position. The same settings can be changed as is described under “WB mode
auto” (see above).
WB Mode: Manual
In this mode you can change manually the color settings such as R Gain (amount of red), B Gain (amount of
blue), saturation (how saturated the colors are) and the Hue (Balance between green and red).

18Back to topwww.avonic.com
Image - continued
Gamma
The gamma curve selection has to do with the perception of the human eye to lighter and darker. If you
select a higher rate of gamma, you will see that the picture become darker, but you get also more detail.
Lens Distortion Correcten on -10 Lens Distortion Correction on 10
Style
Here you can choose the style you want, such as default (standard setting), normal (which makes the
picture more ‘natural’), clearity (makes the picture more clear), bright (wich makes the picture more
bright), PC (optimal setting for a computer screen), clarity (led) (for filming under Led light), Face (optimal
setting for filming faces.)
LDC
LDC or Lens Distortion Correction will correct distortions in the picture by giving the picture a “fisheye” look
(making the picture ball). It can also be used to widen the angle of the image. Settings range from -10 to
“off” and from “off” to 10.
Gamma on Default Gamma on 0.63

19Back to topwww.avonic.com
SETTING
SETTING
Language English / Chinese
DPTZ ON / OFF
Zoom Limit 1.5x / 2x / 3x / 4x / 8x
HDMI Enable On / Off
DVI Mode DVI /HDMI
HDMI Format 4K30 / 1080p30 / 1080i60 / 1080i50
Auto Framing OFF/ ON
Uvc EXT setting
H264 Enable ON/ OFF
Audio Enable ON/ OFF
Select Item
Change Value
[Menu] Back
Under setting it is possible to change the language, the DVI mode (change between DVI and HDMI), HDMI
Format and Auto Framing options. You can change also DPTZ and Uvc EXT settings.
Language
It is possible to change the language to English or Chinese.
NOISE REDUCTION
NOISE REDUCTION
2D NR Close / Auto / 1 ~ 5
3D NR Close / Auto / 1 ~ 8
Select Item
Change Value
[Menu] Back
Noise reduction can be used to soften the image when noise is present due to poor lighting conditions. The
higher the amount of noise reduction, the softer the image will get, ultimately losing details. Be careful when
adjusting the noise reduction, it can take away the natural ‘crispness’ of the image.
The same is applicable for a low Contrast and high Gain. The higher the Gain and the lower the
Contrast, the more noise will become visible (see also Exposure/Gain and Image/Contrast in this manual).
Better practice is to add light to the filmed object to avoid this.
NR-2D
Is used for still standing objects.
NR-3D
Is used for moving objects.

20Back to topwww.avonic.com
RESTORE DEFAULT
INFORMATION
Read out of (Firmware) Version, (Product) Model and (installation) date
RESTORE DEFAULT
Restore default? YES / NO / RETURN
Select Item
Change Value
[Menu] Back
[Home] OK
Here you can restore the factory default settings.
Setting - Continued
DPTZ and Zoom Limit
When Digital PTZ is “ON”, the camera will automatically zoom in and out on the amount of people
before the camera and will shift the filmed picture if the person or persons before the camera will
move to another position in the room or area. It is also possible to limit how far the camera shall
zoom in (Zoom Limit). To use the DPTZ option, select the AUTO FRAMING option and change it to
“ON” (See also the AUTO FRAMING paragraph below).
HDMI and DVI
You can use the CM22, beside using the USB port of the camera, also over HDMI. To do that,
change the DVI Mode to HDMI. When using the camera over HDMI, you must set the HDMI enable
to “ON”. Than you can change the HDMI Format to the Format you want.
Auto Framing
When the Auto Framing option is “ON”, the camera will automatically detect the amount of people
before the camera. In demo position it will track individual persons before the camera and will
(when the DPTZ option is ON) zoom in on one of the persons if another persons are walking out of
the frame.
Uvc EXT setting
By selecting Uvc EXT setting it is possible to change video coding settings such as H264.
Other manuals for AV-CM22-VCU
2
Table of contents
Other Avonic IP Camera manuals

Avonic
Avonic CM60-IP User manual

Avonic
Avonic AV-CM44-VCUC-B User manual

Avonic
Avonic AV-CM44-VCUC User manual

Avonic
Avonic CM63-IP User manual

Avonic
Avonic AV-CM22-VCU User manual

Avonic
Avonic CM44-VCUC-B User manual

Avonic
Avonic CM60-IP-BOX User manual

Avonic
Avonic AV-CM22-VCU User manual

Avonic
Avonic CM50-IP User manual