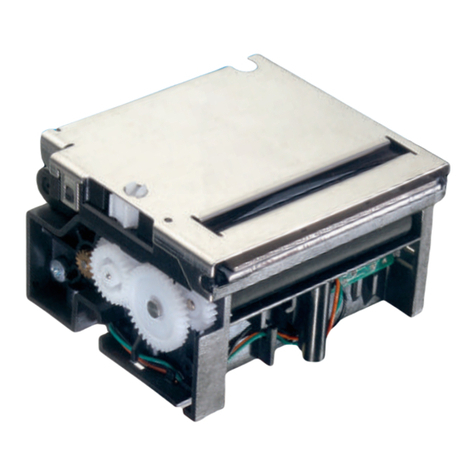
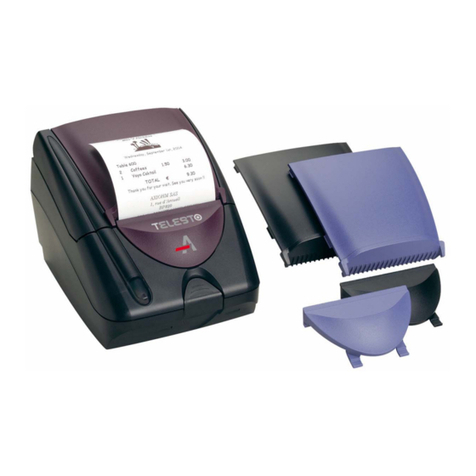
Axiohm APM-90 User manual

Users’ Manual
for
APM-90
Panel Mount Type Printer
February 25, 1998
AXIOHM S. A.
AXIOHM JAPAN

1
<Contents>
1. Precautions for Use..........................................................................................................................2
2. Unpacking........................................................................................................................................5
2.1 Unpacking ..................................................................................................................................5
2.2 Names of Each Part.....................................................................................................................6
3. How to Operate................................................................................................................................7
3.1 Preparation..................................................................................................................................7
3.2 Paper Setting...............................................................................................................................7
3.3 Test Printing...............................................................................................................................7
3.4 DIP Switch Setting .....................................................................................................................8
3.5 Cable Connection .....................................................................................................................10
4. How to Treat This Product.............................................................................................................11
4.1 Paper Empty Detection .............................................................................................................11
4.2 Paper End Signal......................................................................................................................11
4.3 Error Signal..............................................................................................................................11
5. Specifications.................................................................................................................................13
5.1 General Specifications ..............................................................................................................13
5.2 Interface Specifications.............................................................................................................14
6. Control Codes................................................................................................................................18
6.1 List of Control Codes................................................................................................................18
6.2 Function of Each Control Code ................................................................................................21
7. Trouble Shooting of the Printer......................................................................................................42
Appendix 1: Character Code Table....................................................................................................43
Appendix 2: Dimensions and Panel Cut Dimensions.........................................................................45
2
1. Precautions for Use
When you use this printer, please treat it correctly taking care of the following points.
*Please Check !
Please check the sticker attached this equipment. There are 2 kinds depending on the model.
The sticker is different depending on the interface.
On the case of Parallel:
On the case of Serial:
*Cautions on Installation
Please install this equipment in the places as follows;
Stable place
Places capable to keep temperature range 0 50
Places within humidity range 25%RH85%RH (no condensing)
Don’t install in the places as follows;
Unstable places and vibrating places
Places exposed to the direct sunlight and dusty places
Places out of temperature or humidity range and places easy to be wet
Near electromagnetic things (motor etc.) and places producing corrosive gas
Places of sudden temperature fluctuation and cause condensing
A P M -90 MP
No.
MADE IN JAPAN
Interface
P: Parallel
S: Serial
Font
M: Mincho
G: Gothic

3
*Caution to Treat the Product
Please take care of the following points on use of this equipment.
Don’t drop it and don’t give it any shock.
Don’t dissolve or repair it by yourself.

4
*Caution on Maintenance
When the surface gets dirty, please wipe it with soft and dry cloth. Or after wiping with soft cloth wet with
neutral detergent, wipe it with dry cloth.
Don’t use chemicals such as thinner etc.
Don’t wet inside of the printer by water.
*Power Supply
Don’t use any other power supply or cables than the recommended ones.
By using junction connector, putting in/out becomes easy for power supply.
Please use stabilizing power supply of DC5±0.25V, and 4.3A on full black printing, 2.6A or less on print
ratio 25% or less.
Depending on print contents, the current fluctuates largely, so please keep the fluctuation of the power
supply voltage within 5±0.25V even if the current fluctuates.
*Thermal Paper
Please use the recommended thermal paper.
Mitsubishi Seishi: P220AG
Oji Seishi: PD160R
Recommended Thermal
Paper Nippon Seishi: TF50KS-E2C
TW80KK (double copy paper)
There are other kinds of thermal paper capable to be used.
Please contact to Axiohm Japan.
*Input/Output Connector
D-SUB (25 pin) is used for connector, as it can be used for various purposes.

5
2. Unpacking
2.1 Unpacking
Please check if there are found all of the following things in the package.
*APM-90 Printer 1 unit
*Thermal Paper 1 roll
*Users’ Manual 1 (this manual)
*Power Supply Connector Housing: 1 pc
Contact: 2 pcs

6
2.2 Names of Each Part
Paper Feed Switch (FEED)
Feeds the paper during putting this switch.
Power Supply/Error Lamp
Normally turns on as power supply lamp.
When some error happens, blinks as error lamp.
Concerning contents of errors, please see “Error Signals”.
Connectors for Parallel/Serial Input/Output
Pins to input the data from outside.
Power Supply Connector
Loaded Connector: ELR-02V (JST)
Suitable Housing: ELP-02V (JST)
Suitable Contact: LLF-01T-1.3E (JST)
Pressing Tool: YC202 (JST)
Pin Number Signal Function
1Vcc +5V
2GND GND
3NC NC
DIP Switches for Function Setting
Set each function of the printer. (See 3.4.)
<Front> <Back>

7
3. How to Operate
3.1 Preparation
When you use the printer for the first time, as the paper is not loaded, please set the attached paper.
3.2 Paper Setting
On this printer, paper setting is very easy.
Please set as follows.
Open the cover taking care about the paper cutter.
Pull out the paper some cm from the paper cutter.
Put the pulled out paper on the paper cutter lightly, and close the cover.
Then paper setting has finished.
! Outside of the thermal paper is the surface to print.
! Please check if the paper roll can rotate smoothly.
3.3 Test Printing
Pushing paper feed switch, turn
on the power supply.
Prints test printing as follows.
Print Example

8
3.4 DIP Switch Setting
Set each function of the printer by DIP switches on the board inside the case.
Contents set by DIP switches will be valid when turned on or Reset is input from outside.
Please follow the process below.
Turn off the printer.
Depending on the interface that you selected on purchasing, it is set to
parallel or serial.
When you want to change it, please use sharp-point thing such as driver to set DIP switch. Don’t
apply too strong force on DIP switches, or it may damage the switches. See the table below about
DIP switch setting.
Here DIP switch setting has finished.
If turned on, the printer operates with the specified contents.*1
Table 3-1: Functions and Setting Contents of DIP Switches
No. Functions ON Side OFF Side
1Input Mode Selection*2 Serial Parallel
2
3Baud Rate Selection See Tale 3-2
4
5Print Density Selection*3 See Table 3-3
6Print Mode Selection HEX Printing Normal Printing
7Head Model Selection HTP-4050/4150 HTP-9050/9150
8Serial Communication
Error*4 Prints “!”or “” Ignored
*1: APM-90 is set to be initialized on power supply turning on or by inputting outside reset to read setting of DIP Switch. So even
if you change the switch during use, the contents of setting will not be changed.
*2: At present condition, SW-1 has no significant meaning (always possible to receive). By setting a command it is possible to print
parallel or serial setting status.
*3: Print density can be changed by the control code DC2+S+n.
*4: On serial communication, decides to print “!” or “?”, or to ignore the data which caused reception error.
Table 3-2: Baud Rate Setting

9
SW2 SW3
2400 ON OFF
4800 OFF ON
9600 OFF OFF
19200 ON ON
Table 3-3: Print Density
Print Density SW4 SW5
Standard OFF OFF
Thin -10%ON OFF
Thick +10%OFF ON
Thicker +20%ON ON
Table3-4: Head Models
Head Model Resolution Number of
Dots DotsOE
Simultaneous
Current
Transmission
HTP-4050 3.8 dots 192 64/64/0/64 64
HTP-4150 3.8 dots 192 64/64/0/64 64
HTP-9050 8.0 dots 384 64/128/128/64 128
HTP-9150 8.0 dots 384 64/128/128/64 128
When exits the factory, setting of DIP Switches is as Table below shows.
Parallel Serial
No. Switch Contents No. Switch Contents
1OFF Parallel Communication 1OFF Serial Communication
2OFF 2OFF
3OFF Baud Rate9600 *5 3OFF Baud Rate9600
4OFF 4OFF
5OFF Print DensityNormal 5OFF Print DensityNormal
6OFF Normal Printing 6OFF Normal Printing
7OFF HTP-9050 7OFF HTP-9050
8OFF Serial Communication Error
Ignored*5
8OFF Serial Communication
ErrorIgnored*6
*5: It has no meaning on parallel. *6: See “Error Signals”.

10
3.5 Cable Connection
1) Interface Cable Connection
There are 2 types of printers depending on the interface specifications.
Please prepare the suitable cable for each interface specification (model).
*Parallel Interface (APM-90MP)
*Serial Interface (APM-90MS)
Connect taking care about the direction of connector.
Connect the printer to the host device and fix it.
mm screw nut is used for locking on the printer side.
Connect the power supply cable seeing the following item.
Turn on the power supply.
When you finish connection, print test printing.
If the print data is sent from the host device to print correctly, connection is completed.
If it doesn’t print, See “7. Trouble Shooting of the printer”.
2) Connection of Power Supply Cable
Make a cable by the attached power supply connector and connect the power supply.
Connect the cable to the printer to fit the polarity of each.
Connect the other side of the cable to the stabilized power supply.
Suitable electric wire: AWG#18#22
(When you use AWG#22, please make it as short as possible.)
If the wire becomes thin, it becomes hard to ignore the resistance value of the cable.
1: +5V
2: GND
! Make the power supply cable and the connection cable to the host device as short as possible and
connect it smoothly.
4. How to Treat This Product
4.1 Paper Empty Detection

11
When the paper ends, LED blinks.
When it blinks, set the paper as soon as possible seeing item 3.2.
When you close the cover, print will start again.
By setting the control code “Reprint position setting”, it is possible to print from the beginning.
4.2 Paper End Signal
When the paper ends, power supply/error lamp blinks, and Paper End signal (active “H”) form input/output
connector, the status from TXD by serial communication will be output.
On the host device side, detect paper empty recognizing this signal.
When you finish setting paper, paper end signal will stop output.
4.3 Error Signals
When some error happens, ERR signal (active “L”) will be output.
At the same time power supply/error lamp blinks.
On the host device side, detect errors recognizing this signal.
When an error happens, turn off the power supply switch immediately.
Errors happen on the following cases.
1) Temperature of the thermal head is -10or less, or 61or more.
Use the printer within the specified temperature range.
2) Foreign substance entered into the printer.
Consult the agent.
3) Cover is not correctly closed.
Close the cover correctly.
4) Paper sensor detects paper empty.
Set the paper.
5) Others
Consult the agent.
After removing the cause of error, turn on the printer.
The following errors are output regardless selection of parallel or serial interface.
Pin No. Signal Function Output Conditions
CN5-2 Status
Transmission Serial Communication*1

12
CN5-5 Cover Open
Signal Cover Open
CN5-17
*3 Error Signal
CN5-19 Paper End
Signal Paper EndHigh
*1: Concerning contents of automatic status transmission, see the control code GS + “a” + n.
*2: Feed operation is possible during error signal output.
*3: At the same time that error signal(ERR) is output, error lamp blinks.
<Error during Serial Data Reception>
Concerning “Parity Error” and “Fleming Error” in serial interface, as it is not possible to return serial
transmission, it can be indicated by print out setting DIP-SW-8.
When “Parity Error” happens, prints “!”.
When “Fleming Error” happens, prints “?”.
Error Status Feed
Operation*2
Error Lamp Blinks
Control Power Supply
Error
Head Open Short
Head Temperature
High/Low Error
Thermistor
Disconnection Error
Paper End
Cover Open

13
5. Specifications
5.1 General Specifications
1) Printer Specifications
Model APM-90
Printing Method Thermal Line Dot Method
Character Types ANK Characters: Katakana Character Set,
International Characters,
Special Characters
Kanji: JIS Level 1/Level 2 (based on JIS X9052-83)
Character Configuration ANK Characters: 18×16 dots
Kanji Characters: 16×16 dots, 24×24 dots
Maximum Number of
Printable Characters
ANK Characters: 24 characters
Kanji: 16 characters (24×dots)
24 characters (16×dots)
Bar-code Types JAN8/13 (EAN), CODE39, NW-7
Input Buffer 16K bytes
Applicable Paper Thickness 60100m
Printing Width 48mm
Maximum Print Speed 30mm/s*1
Total Number of Dots 384 dots/mm
Dot Density 8 dots/mm
Dimensions 90×106×100 mm (H×W×V)
Weight of Main Body Approx. 735 g*2
Reliability Abrasion Endurance: 30km
Pulse Endurance: 1×10⁸pulse or more
(print ratio: 12.5%)
*1: Print speed changes depending on the temperature of the head and the voltage.
*2: Thermal paper is not included.
2) Operation Conditions
Temperature Range: 0 50
Humidity Range: 25%RH85%RH

14
3) Thermal Paper Specifications (Recommended thermal paper: P220AG)
Paper Width: 60mm
Roll Diameter: 50mm (Max.)
Roll Length: Approx. 25m
4) Power Supply Specifications
*Full black printing
Power Supply: +5.0+5.25V, 4.3A or more
*Print ratio 25% or less
Power Supply: +5.0+5.25V, 2.6A or more
5.2 Interface Specifications
1) Parallel Interface
Specifications
Data Input: 8 bit simple centronics
Hand Shake: STB, BUSY, ACK
Hand Shake Timing (Unit: sec)
TYP.5.0
TYP.5.0
min.0.5
min.0.5
min.0.5
DATA
STB
BUSY
ACK

15
Input/Output Signal Level
Standard Value
Item Symbol MIN TYP MAX Unit
Input “Low”Level Voltage VIL 00.8 V
Input “High”Level Voltage VIH 2.0 Vcc V
Output “Low”Level Voltage VOL 0.4 V
Output “High”Level Voltage VOH 2.4 V
Parallel Input/Output Signal Pins
Connector Printer Side: HDBB-25PF (05) (Hirose)
Locking: HD-LNA (05) Using mm nut(Hirose)
Pin No. Signal Direction Function
1STB Input Data read in
2PD00
3PD01
4PD02
5PD03
6PD04
7PD05
8PD06
9PD07
Input
8-bit parallel data signal
“High”on data “1”
“Low”on data “0”
10 ACK Output Data read in finish
11 BUSY Output Data read in impossible
12 PE Output Paper endHigh*1
13 +Vout Output +5V power supply output
14 RST Input Initialization
15 COP Output Cover OpenLow*1
16 ERR Output Error StatusLow*1
17 TXD Output Status transmission
(Serial communication)*2
18 FGD Frame Ground
1925 SGD Signal Ground
*1: See “Error Signals”.
*2: Concerning contents of automatic status transmission, see the control code
GS + “a” + n.

16
2) Serial Interface
Specifications
Data Input: RS-232C
Hand Shake: DTR, RXD, Level TXD, GND
Synchronism Type: Start/stop synchronism type
Baud Rate: 2400, 4800, 9600, 19200 bps
Start Bit: 1 bit
Data bit: 8 bits (fixed)
Parity Bit: none
Stop Bit: 1 bit (fixed)
Control Chart
Signal Level
Mark=Logic “1” (-3V-9V)
Space=Logic “0” (+3V+9V)
Serial Input/Output Signal Pins
Connector Printer Side: HDBB-25PF (05) (Hirose)
Locking: HD-LNA (05) Using mm nut(Hirose)
Starts Printing Process
Stop Bit
Start Bit
Data of 1 line
DTR
RXD

17
Serial Input/Output Pins
Pin No. Signal Direction Function
1FGD Frame Ground
2TXD Output Status transmission*1
3RXD Inout Data input
46NC Not used
7SGD Signal ground
8NC Not used
9RST Input Initialization
10 COP Output Cover openLow*2
11 ERR Output Error statusHigh*2
1217 NC Not used
18 PE Output Paper endHigh*2
19 NC Not used
20 DTR Output Serial busy output
2125 NCNot used
*1: Concerning contents of automatic status transmission, see the control code GS +
“a” + n.
*2: See “Error Signals”.

18
6. Control Codes
6.1. List of Control Codes
Control Code Function Page
CR Print and feed one line 21
LF Line feed 21
Printing Operation
ESC+"J"+n Print and feed paper forward n-dot line 21
ESC+"0" Set 4-dot line spacing 21
ESC+"1" Set 8-dot line spacing 22
ESC+"2" Set 16-dot line spacing 22
ESC+"3"+n
ESC+"A"+n Set n-dot line spacing 22
ESC+SP+n Set character spacing 22
ESC+"U"+n Select inverse print 22
FS+"J" Select 90deg. turned Kanji characters 23
FS+"K" Cancel 90deg. turned Kanji characters 23
Form Setting
FS+"I"+n Set 90deg. right turned character 23
SO Set double width with automatic reset 23
DC4 Cancel double width with automatic reset 23
SI Set double height with automatic reset 24
ENQ Cancel double height with automatic reset 24
ESC+ "w" + n Set/cancel double height 24
ESC + "W" + n Set/cancel double width 24
FS + "W" + n Set/cancel double width-double height 25
ESC + "I" + n Set/cancel reverse print 25
ESC + "-" + n Set/cancel underline 25
FS + SI Set half width Kanji character 26
Character
Modification
FS + DC2 Cancel half width Kanji character 26
Character Set ESC + "c" + n Select special characters 26
ESC + "R" + n Select the international characters 26
ESC + "&" + n1 +
n2 + DATA Define downloaded characters 27
ESC + "%" + n Select downloaded characters 28
ESC + "K"
FS + "&" Set Kanji mode 28

19
Character Set ESC + "H"
FS + "." Cancel Kanji mode 28
FS + "!" + n Set Kanji font size 28
FS + "C" + n Select Kanji code system 29
FS + "2" + n1
+ n2 + DATA Define extra characters 29
ESC + "V" + n1
+ n2 + DATA Set MSB bit image 30
Bit Image
ESC + "v" + n1
+ n2 + DATA Set LSB bit image 30
DC3 + "A" Select ruler line A 32
DC3 + "B" Select ruler line B 32
DC3 + "V"
+ DATA Write ruler line MSB image 32
DC3 + "v"
+ DATA Write ruler line LSB image 32
DC3 + "D" + n1
+ n2 Set ruler line by dot 33
DC3 + "L" + n1
+ n2 + n3 + n4 Set ruler line by line 33
DC3 + "F" + n1
+ n2 Set ruler line with repeating pattern 33
DC3 + "+" Turn ruler line ON 33
DC3 + "-"Turn ruler line OFF 34
DC3 + "P" Print one dot line after printing 34
DC3 + "C" Clear ruler line 34
Ruler line
DC3 + "(" Continue ruler line control code input 34
Status GS + "a" + n Start/stop automatic status transmission 34
GS + "k" + n + D
+ NUL Print bar code 36
GS + "h" + n Set bar code height 36
GS + "x" + n Set bar code print starting position 37
Bar Codes
GS + "H" + n Select printing position for HRI
characters 37
Print Control DC2 + "S" + n Set print density 38
Table of contents
Other Axiohm Printer manuals

Axiohm
Axiohm APOS PRINTER SERIES User manual

Axiohm
Axiohm A721 User manual

Axiohm
Axiohm PCPR Printer User manual

Axiohm
Axiohm 7156 User manual

Axiohm
Axiohm A794 User manual

Axiohm
Axiohm CMBC-XMBC User manual

Axiohm
Axiohm A758 User manual

Axiohm
Axiohm SKGG5xxx Series User manual

Axiohm
Axiohm A758 User manual

Axiohm
Axiohm A630 User manual

Axiohm
Axiohm TPOSS001 User manual

Axiohm
Axiohm A714 User manual

Axiohm
Axiohm A795 User manual

Axiohm
Axiohm A794 User manual

Axiohm
Axiohm 7193 User manual

Axiohm
Axiohm TELESTO User manual

Axiohm
Axiohm A794-D100 User manual

Axiohm
Axiohm 24V User manual

Axiohm
Axiohm TPOS PRINTER SERIES User manual

Axiohm
Axiohm A795 User manual