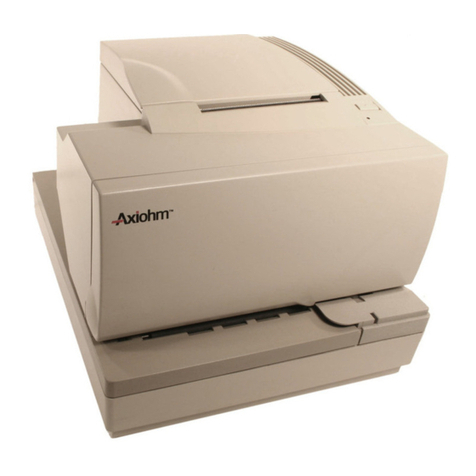
Axiohm SKGG5xxx Series User manual

THERMAL PRINTING SOLUTIONS
AXIOHM S.A , 1-9 Rue d’Arcueil
BP 675, 92542 Montrouge Cedex, France
Tel : (33) (0) 1 47 46 78 11 Fax (33) (0) 1 46 55 13 44
Page 1/53
LOGO KANJI PRINTER
SKGG5xxx Serie
USER MANUAL
DOCUMENT 3103188 -FDE
Issue A
December, 1998

Logo Kanji Printer User Manual Page 2/53 Ref : 3103188 FDE / A
TABLE OF CONTENTS
1. CHAPTER 1 : Setup Page
Unpacking the printer 4
Do you have what you need ? 4
Where to put your printer 5
Identifying printer components 6
Locating Printer Controls 7
Connecting the power 8
Connecting the serial cable 9
Loading labels/papers 10
Removing an empty label/ paper roll 14
2. CHAPTER 2 : Setting up the host
RS232 setting 15
Cabling 15
RS232 signals levels 16
Supplying power to your printer 17
3. CHAPTER 3 : Maintenance and Troubleshooting
Printer Maintenance 18
Exterior Maintenance 19
Interior Maintenance 19

Logo Kanji Printer User Manual Page 3/53 Ref : 3103188 FDE / A
Clearing paper and label jams 20
Troubleshooting 21
Check the printer power 21
Checking the label 23
Checking the connection 23
4. CHAPTER :Appendices
Appendix A Escape Codes 24
Appendix B Printer Specifications 44
Appendix C Paper and Label Specifications 53

Logo Kanji Printer User Manual Page 4/53 Ref : 3103188 FDE / A
CHAPTER 1
SETUP
The SKGG printer better known as the LOGO printer is
ideal for printing on paper rolls and if desired can also
be used to print labels when ordered with the optional
spindle.
This chapter explains how to set up your new
printer for optimum performance.
Unpacking the
printer The first step in setting up your printer is unpacking the
pieces. Be sure to save all the original packing
materials. They are specially designed to protect the
printer and will make repackaging easy if you ever need
to ship the printer.
Do you have
what you need? Having unpacked your printer. You should find the
following items ( shown in figure 1.1).
- SKGG ( Head 2.25") printer (SKGG1xxx is the
standard Logo, SKGG5xxx is the Logo Kanji).
- Serial cable
- Power transformer
- One paper roll (or roll of labels if ordered)
- User manual
- One spindle (if ordered)
Check carefully to see if everything is there. If not,
contact your dealer immediately.

Logo Kanji Printer User Manual Page 5/53 Ref : 3103188 FDE / A
Everything checked ? Let’s set up the printer.
Where to put
your printer Before setting up your printer, take a few moments to
consider where you plan to put it. There are a few
general guidelines you might consider.
- Ensure that there is enough room around the printer to
allow paper to flow out freely.
- Avoid placing the printer in areas where sudden,
severe changes in temperature and humidity occur.
- Avoid areas with direct sunlight, dust and grease.
- Pick a clean area.
- Select a steady source of electricity and check for
other appliances which may be using the same circuit.
Copiers, heaters, air conditioners and other motorised
equipment can cause power fluctuations which may
interfere with you printing.
- Use a surge protector.
Figure 1-1 . The printer is equipped with the following items: printer,
power transformer, serial cable, roll of labels or roll of paper, user
manual and spindle (option)

Logo Kanji Printer User Manual Page 6/53 Ref : 3103188 FDE / A
Identifying printer
components Figures 1-2 and 1-3 highlight the main components of
the printer. Before setting up the printer, let’s see what
these components do:
Figure 1-2. LOGO printer with optional spindle
Cover - the cover protects the internal components of
the printer for dust, moisture and the outside world in
general. The cover is easily opened when changing
paper and label rolls.
- Power light -The power light glows green when the
printer is turned on. It flashes when there is something
wrong with the printer such as when the printer runs out
of paper.
- On/off button - The on/off button turns the printer
on and off.
-Paper feed button - The form feed button feeds the
paper roll through or advances one label at a time when
the button is pressed.

Logo Kanji Printer User Manual Page 7/53 Ref : 3103188 FDE / A
-Optional label spindle -The label spindle is used to
support the roll of labels while operating. It is not
required for the paper roll.
-Tear bar - The serrated tear bar on the exit slot allows
quick, clean paper or label removal.
-Double interface connector - The cable is equipped
with a double interface connector, the DB9 female
serial connector for a PC and the mini-din for the
Macintosh. One end of the special cable that comes
with the printer is plugged into the printer connector and
the other end is attached to your computer.
-Drawer kick out - which looks like a telephone jack,
is a drawer kick out. (see code ESC p)
-Power transformer - The power transformer provides
electrical power to the printer. Connect the transformer
to a standard grounded outlet.
Locating printer control The printer controls allow you to turn the printer on and
off and advance the label roll. Refer to figure 1-3 to
locate the following printer controls on your printer.
The On/ Off Button
The on/off power button is the left button on the front
panel of the printer. Once you have the power cord
plugged in, push the on/off button to turn the printer on,
press it again to turn the button off. (delays).
Logo Kanji Printer User Manual Page 8/53 Ref : 3103188 FDE / A
On/Off
Figure 1-3 LOGO printer components
Power light
When the printer is on, the power light located on the
front panel of the printer will glow green.The light goes
off when you turn the printer off.
Form Feed Button
The form feed button is the right button on the front
panel of the printer and advances the paper roll.
In listing mode : As long as you push this button the
paper advances.
In label mode : For printing labels push this button
once to advance the label roll one label, so the next set
of three guide holes on the label roll aligns with the
label tear bar. The label roll advances one label each
time you press the form feed button.
Connecting the power The power cord is connected to the rear of the printer as
shown in Figure 1- 4. Plug the power transformer into a
standard grounded outlet.

Logo Kanji Printer User Manual Page 9/53 Ref : 3103188 FDE / A
Connecting the Your printer and computer communicate through the
serial cable special serial cable that comes with your printer. The
cable has one connector at one end and that connects to
the printer and two connectors at the other end (one for
PC and one for Macintosh) one of which connects to
the serial port on the back of the computer. Use of the
serial port enables you to continue using your parallel
port for your regular document printer.
Follow the steps below while referring to Figure 1-4 to
make the proper connections:
1-Turn your computer and printer off.
2- Connect the printer end of the serial cable to the rear
of the printer (DB9 Female for a PC or mini-din for a
macintosh)
If you have a 9-pin serial port on computer, attach the
9-pin connector; if you have a 8-pin serial port, attach a
8-pin connector. Secure the connector with the two
screws. The connector you do not use can simply hang
loose. It does not need to be connected and will not
cause any damage to your computer or printer. See
Figure 1-4.
Macintosh or
PC

Logo Kanji Printer User Manual Page 10/53 Ref : 3103188 FDE / A
4- Turn the computer on.
Loading A. Paper roll
B. Roll of labels Both the paper roll and the roll of labels can be quickly
and easily loaded into the printer.
A. Loading the paper roll :
1- Open the cover so that you have access to the interior
of the printer. Remove any packing material.
2- Be certain that the power cord is connected. Now
turn on the printer. The green power light will flash
and you will hear the printer’s motor turning as it
looks for labels to feed.
3- Feed the free end of the roll into the feed slot on the
inside of the printer. The paper roll is placed directly
into the reservoir.
4- Push the end into the slot until you feel a slight
resistance. Continue pushing gently. The feed motor
will grab the end of the paper through the printer and
out the exit slot, stopping automatically.
5- If the motor stops turning while you are still in the
process of loading the paper, just press the form feed
button to get it started again. (To protect itself, the
motor stops turning after a few seconds)
6- Tear off the paper coming out of the printer by
grasping the end and pulling downward and
sideways across the edge of the tear bar.
7- Close the cover. Your printer is ready to go !

Logo Kanji Printer User Manual Page 11/53 Ref : 3103188 FDE / A
B. Loading Labels (with optional spindle) :
Refer to Figure1-5 and 1-6 :
1- Open the cover so that you have access to the interior
of the printer. Remove any packing material.
2- Remove the label spindle by lifting it straight up from
the label spindle holder.The spindle is used uniquemy
for printing labels.
3- Locate your free starter roll of labels and remove the
tape from the end of the roll. Cut the lead label in half
to create a nice straight edge.
Figure 1-5 Loading narrow labels onto the label spindle.
The printer grabs a straight edge much easier.
4-Refer to Figure 1-5 while following these instructions:
For narrow labels, remove the right half of the label
spindle and put the label on the label spindle so that the
end feeds from the bottom of the roll. Reconnect the
right half of the spindle with the label roll snugly
secured between the circular plates of the spindle.
If you’re using wide labels, remove the right half of the
label spindle and turn it around, so that the long end the
spindle is on the inside. An illustration indicating how
to position the spindle is moulded into the back plastic
base inside printer. Put the labels on the label spindle so
that the end feeds from the bottom
of the roll.

Logo Kanji Printer User Manual Page 12/53 Ref : 3103188 FDE / A
Reconnect the right half of the spindle, with the label
roll snugly secured between the circular plates of the
spindle.
Figure 1-6. insert labels into the feed slot before placing the label roll into
the printer.
5- Be certain that the power cord is connected. Now
turn on the printer. The green power light will flash and
you will hear the printer’s motor turning as it looks for
labels to feed.
6- Whilst holding the spindle of labels in one hand, use
your other hand to feed the free end of the roll into the
feed slot on the inside of the printer as shown in Figure
1-6. (If it is easier, you can rest the label spindle on the
top edge of the printer, freeing both hands to help with
getting the label feeding started).
7- Push the end into the slot until you feel a slight
resistance. Continue pushing gently. The label feed
motor will grab the end and carry the labels through
the printer and out the exit slot, stopping
automatically at the end of the first label.

Logo Kanji Printer User Manual Page 13/53 Ref : 3103188 FDE / A
If the motor stops turning while you are still in the
process of loading labels, just press the form feed
button to get it started again. (To protect itself, the
motor stops turning after a few seconds)
8- Return the label roll spindle with the labels to the
spindle holder. The spindle will settle into the raised
shoulder slots in the printer. See Figure 1-7.
Figure 1-7 After the labels have been properly fed past the label tear bar,
rest the label spindle holder and close the cover.
9- Tear off the labels coming out the front of the printer
by grasping the end and pulling downward and
sideways across the edge of the label tear bar.
10- Close the cover.
Your printer is ready !

Logo Kanji Printer User Manual Page 14/53 Ref : 3103188 FDE / A
Removing an
Empty Paper/Label Roll
When the printer runs out of paper or labels the power
light will flash and you will need to remove the used
roll. Follow these instructions to remove a used roll of
labels.
1- Leave the printer turned on. Open the cover and use
scissors to cut the labels between the label roll and the
feed slot.
2- Press the form feed button on the printer’s front
panel and hold it in as the printer ejects the remaining
labels or backing.
3- When the labels or backing stop, pull gently to
remove the material from the printer. Now you can load
a new roll of labels. See the loading label section earlier
in this chapter for instructions on how to load labels.
REMARK: When you switch on, you are in label mode by default.
If you use listing paper, you must change this mode:
- by software with function GS ; "L"; 0; 0
- or with the paper feed button. If a hole is not detected
(after 10cm) the printer will change to listing mode.

Logo Kanji Printer User Manual Page 15/53 Ref : 3103188 FDE / A
CHAPTER 2
SETTING UP THE HOST
RS-232 Setting
In order for the host computer to communicate with the
printer, the communication parameters with the printer,
the communication parameters must be :
Baud Rate : 9600
Data Bits : 8
Stop Bits : 1
Parity : None
On a computer running DOS, use the MODE command
to configure a serial port. To do this, type the following
at the DOS prompt:
MODE COM 1 : 96 , N , 8 , 1 , P
where COM 1 is the serial port you are using.
This could also be COM 2 or any valid comport.
Cabling Cable sould be shielded between the sield of connectors A, B and C
Plastic used for cable must be UL V0
180 cm
A
C
B

Logo Kanji Printer User Manual Page 16/53 Ref : 3103188 FDE / A
PINOUT:
Figure 2-1 . Serial cable pin specifications and wiring chart
RS-232 Signal
Levels
The serial interface uses standard RS-232
signal levels as shown in Table 2-1.
Signal level Input Output
MARK (1) -27v to -5v -5v
SPACE (0) +5v to +27v +12v
Table 2-1.RS-232 signal levels.
ABC
1 NC 1 NC 1 NC
RXD 222 NC
TXD 333
DTR 444
Gnd 555
DSR 666 NC
RTS 777 NC
CTS 888
9 NC 9 NC

Logo Kanji Printer User Manual Page 17/53 Ref : 3103188 FDE / A
Supplying Power
to your printer
Range for input power supply (Japan) : 100 V / 50 Hz to 60 Hz
Range for output power : 20 V to 30 V / 50Hz to 60 Hz
Transformer must be a UL LISTED (QQGQ), class 2 power supply with SELV
(Secondary Extra Low Voltage), non - energy hazard output, limited energy
source.
2
From 100 to 240 V
and from 50 to 60 Hz
(depending on country
power supply)

Logo Kanji Printer User Manual Page 18/53 Ref : 3103188 FDE / A
CHAPTER 3
MAINTENANCE AND
TROUBLE SHOOTING
The printer is designed to provide the user with a long and
trouble free service requiring very little maintenance. You'll
get the best possible performance from your printer if you
follow the instructions in Chapter 1 Setup and the
procedure described here. This appendix also covers
troubleshooting for printer errors.
Printer maintenance
Printer maintenance is quick and very simple. There is
no set procedure for maintenance; simply take the
appropriate measures as described below when
necessary.
The LOGO printhead can be easily cleaned using just a
few simple items. Use these items as often as needed to
keep your printer clean and in good working order.
You'll need these items:
•lint-free cloth
•isopropyl alcohol, diluted dishwashing detergent or
diluted (non-ammonia) glass cleaner
•small, soft brush, such as paint brush
use these items as they are called for in the maintenance
procedures described in this chapter.

Logo Kanji Printer User Manual Page 19/53 Ref : 3103188 FDE / A
Exterior
Maintenance
Cleaning the outside of your printer is as important as
cleaning the inside. Dusting the outside of the printer
occasionally will reduce the incidence of foreign matter
getting inside the printer. Follow these steps to perform
exterior maintenance of your printer:
1-Turn the printer off and disconnect the power cord.
2-Dirt, dust, ink and so on will more than likely be
attracted to the exterior of your printer. Use the lintfree
cloth to wipe the exterior of the printer. Remove dirt and
ink smudges with either isopropyl alcohol diluted
dishwashing detergent or diluted glass cleaner. Avoid
product containing ammonia for cleaning the printer of
plastic cover.
3-Take a minute to clean the work area around the
printer.
4-Reconnect the power cord and turn the printer on.
Interior
Maintenance
The printer's top cover will keep out most of the dust and
dirt which accumulates in operating areas. However, it is
still a good idea to periodically perform some basic
interior maintenance:
1- Turn the printer off and disconnect the power cord.
2- Open the top cover.
3- Use a small, soft paint brush to whisk paper dust or
other stray particles away from the inside of the printer.
Remove the paper or label roll to clean underneath, the
replace the roll.

Logo Kanji Printer User Manual Page 20/53 Ref : 3103188 FDE / A
4- Close the top cover.
5- Reconnect the power cord and turn the printer on.
Clearing paper and
label jams
If you experience jams with paper or labels,
take the following steps.
1- Open the printer's cover and use scissors to cut the
label or paper between the feed slot and the roll.
Figure A-1 clearing label jams
2- Press the form feed button to advance the paper or
labels through the printer. Reload the paper/labels as
described in CHAPTER 1 Set-up.
First, cut the
label/paper between
the feed slot and the
roll.
Second, press the
form feed button to
eject the jammed
paper/ label out of the
printer.
This manual suits for next models
1
Table of contents
Other Axiohm Printer manuals

Axiohm
Axiohm Astrium User manual

Axiohm
Axiohm 24V User manual

Axiohm
Axiohm A794 User manual

Axiohm
Axiohm APOS PRINTER SERIES User manual

Axiohm
Axiohm TPOSS001 User manual

Axiohm
Axiohm A721 User manual

Axiohm
Axiohm CMBC-XMBC User manual

Axiohm
Axiohm A630 User manual

Axiohm
Axiohm PCPR Printer User manual

Axiohm
Axiohm A794 User manual

Axiohm
Axiohm TELESTO User manual

Axiohm
Axiohm A220 User manual

Axiohm
Axiohm A758 User manual

Axiohm
Axiohm A758 User manual

Axiohm
Axiohm TPOS PRINTER SERIES User manual

Axiohm
Axiohm A714 User manual

Axiohm
Axiohm 7193 User manual

Axiohm
Axiohm A794 User manual

Axiohm
Axiohm A795 User manual

Axiohm
Axiohm 7156 User manual