manuals.online logo
Brands
  1. Home
  2. •
  3. Brands
  4. •
  5. Baker Hughes
  6. •
  7. Valve Positioner
  8. •
  9. Baker Hughes Masoneilan SVi 1000 User manual

Baker Hughes Masoneilan SVi 1000 User manual

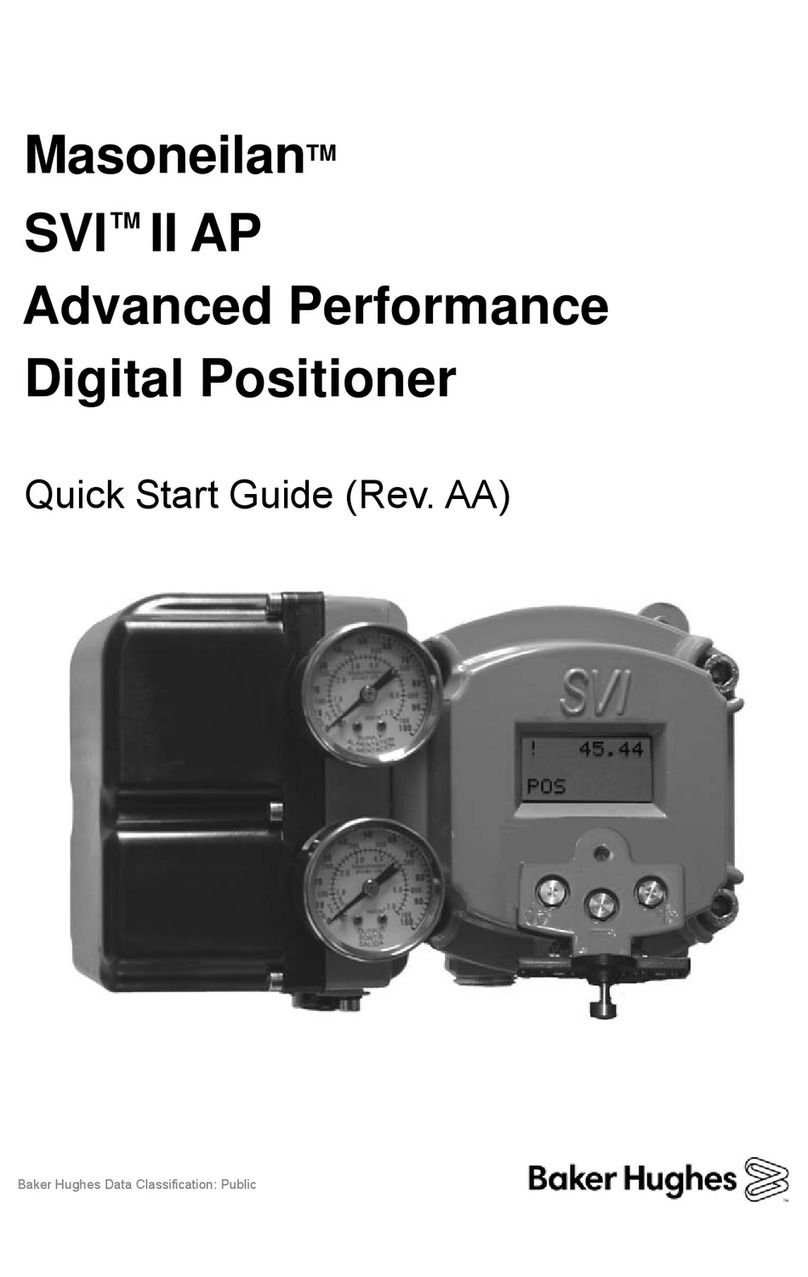
Masoneilan
SVi1000
Advanced
Performance Digital Positioner
Bench Quick Start
Instruction Manual (Rev D)
Baker Hughes Da ta Classifica tion: Public
TM
TM
2 | Baker Hughes. © 2020 Baker Hughes Company. All rights reserved.
About this Guide
This instruction manual applies to the following instruments and approved software:
SVi1000
SVi1000 DTM version 2.00.0 or later
ValVue 3.20.0 or later
The information contained in this manual, in whole or part, shall not be transcribed or copied without Baker
Hughes’ written permission.
In no case does this manual guarantee the merchantability of the positioner or the software or its adaptability to
a specific client needs. Please report any errors or questions about the information in this manual to your local
supplier or visit valves.bakerhughes.com.
DISCLAIMER
THESE INSTRUCTIONS PROVIDE THE CUSTOMER/OPERATOR WITH IMPORTANT PROJECT-SPECIFIC
REFERENCE INFORMATION IN ADDITION TO THE CUSTOMER/OPERATOR'S NORMAL OPERATION AND
MAINTENANCE PROCEDURES. SINCE OPERATION AND MAINTENANCE PHILOSOPHIES VARY, BAKER HUGHES
COMPANY (AND ITS SUBSIDIARIES AND AFFILIATES) DOES NOT ATTEMPT TO DICTATE SPECIFIC
PROCEDURES, BUT TO PROVIDE BASIC LIMITATIONS AND REQUIREMENTS CREATED BY THE TYPE OF
EQUIPMENT PROVIDED.
THESE INSTRUCTIONS ASSUME THAT OPERATORS ALREADY HAVE A GENERAL UNDERSTANDING OF THE
REQUIREMENTS FOR SAFE OPERATION OF MECHANICAL AND ELECTRICAL EQUIPMENT IN POTENTIALLY
HAZARDOUS ENVIRONMENTS. THEREFORE, THESE INSTRUCTIONS SHOULD BE INTERPRETED AND APPLIED
IN CONJUNCTION WITH THE SAFETY RULES AND REGULATIONS APPLICABLE AT THE SITE AND THE
PARTICULAR REQUIREMENTS FOR OPERATION OF OTHER EQUIPMENT AT THE SITE.
THESE INSTRUCTIONS DO NOT PURPORT TO COVER ALL DETAILS OR VARIATIONS IN EQUIPMENT NOR TO
PROVIDE FOR EVERY POSSIBLE CONTINGENCY TO BE MET IN CONNECTION WITH INSTALLATION, OPERATION
OR MAINTENANCE. SHOULD FURTHER INFORMATION BE DESIRED OR SHOULD PARTICULAR PROBLEMS
ARISE WHICH ARE NOT COVERED SUFFICIENTLY FOR THE CUSTOMER/OPERATOR'S PURPOSES THE MATTER
SHOULD BE REFERRED TO BAKER HUGHES.
THE RIGHTS, OBLIGATIONS AND LIABILITIES OF BAKER HUGHES AND THE CUSTOMER/OPERATOR ARE
STRICTLY LIMITED TO THOSE EXPRESSLY PROVIDED IN THE CONTRACT RELATING TO THE SUPPLY OF THE
EQUIPMENT. NO ADDITIONAL REPRESENTATIONS OR WARRANTIES BY BAKER HUGHES REGARDING THE
EQUIPMENT OR ITS USE ARE GIVEN OR IMPLIED BY THE ISSUE OF THESE INSTRUCTIONS.
THESE INSTRUCTIONS ARE FURNISHED TO THE CUSTOMER/OPERATOR SOLELY TO ASSIST IN THE
INSTALLATION, TESTING, OPERATION, AND/OR MAINTENANCE OF THE EQUIPMENT DESCRIBED. THIS
DOCUMENT SHALL NOT BE REPRODUCED IN WHOLE OR IN PART WITHOUT THE WRITTEN APPROVAL OF
BAKER HUGHES.
Copyright
All information contained herein is believed to be accurate at the time of publication and is subject to change
without notice.
Copyright 2020 by Baker Hughes Company. All rights reserved.
PN 720044889-779-0000 Rev. D.
Masoneilan SVi1000 Bench Quick Start Manual =| 3
© 2020 Baker Hughes Company. All rights reserved.
Bench Quick Start
The goal of this procedure is to perform a configuration of the SVi1000 up to running Find
Stops and Autotune on a bench. Additionally, this document also provides guidance on
when to run signatures and produce associated reports. This procedure uses Baker
Hughes’s ValVueTM 3 software (ver. 3.20 or later) and the SVi1000 DTM (ver. 2.20.0 or
later).
This procedure consists of the following major steps:
“1. Physical Setup” on page 4
“2. Software Install and Configuration” on page 5
“3. Perform Setup Wizard” on page 11
“4. Save Settings and Device Baseline” on page 13
Changing the Application to Normal mode may move the
valve. It may be dangerous if someone is still working with the
valve.
WARNING
4 | Baker Hughes. © 2020 Baker Hughes Company. All rights reserved.
1. Physical Setup
1. Buy a kit similar to the one shown in Figure 1. This kit contains a HART®Loop
Calibrator (with wall power supply and loop test lead wires) and either a USB
connector or a serial port connector for your laptop. The setup shown in Figure 1 is a
Baker Hughes product and can be purchased at:
https://www.gemeasurement.com/test-calibration/calibrators/
ups-iii-loop-calibrator-ma-v
2. Download and install software to use HART®loop on your PC. For example,
MACTek®USB or RS232 software (Universal VIATOR Installer v3.1.9 with Drivers for
32 bit Windows XP/Vista/7/8) available at software https://www.mactekcorp.com/
download.php. When installed this software should the serial or USB port into which it
is plugged. If it does not, the VIATOR installation includes a utility called USB View for
viewing USB connections. For a serial connection, you can check using Windows
Device Manager.
3. Prepare the HART®hardware by:
a. Plugging the HART®Loop Power Calibrator power supply in and setting up the
calibrator as per its manual, ensuring the mode is correct to supply a 4 - 20 mA.
b. Plugging the USB plug or serial connector into the appropriate connector on the
laptop/PC. Opening the cover on the SVi1000 and connecting the other end of the
USB/Serial connector to the 4 - 20 mA connections.
c. Connecting the loop calibrator cables to the 4 - 20 mA connections. Maintain
polarity + and -, respectively.
Figure 1 Bench Setup Equipment
4. Mount the SVi1000 on the actuator per instructions in the SVi1000 Quick Start Guide
(GEA19361) or Instruction Manual (GEA19527). These manuals are available for
download at https://valves.bakerhughes.com/resource-center.
Serial DB-9
connector
HART®Loop
Power
USB
Connector
Masoneilan SVi1000 Bench Quick Start Manual =| 5
© 2020 Baker Hughes Company. All rights reserved.
5. Pipe the SVi1000 to the actuator. Ensure:
√The airset provides the SVi1000 with at least 5-10 psig more supply pressure than
required by the actuator (maximum spring pressure). Supply pressure:
15 -100 psi (1.03 - 7 bar) (103 - 690 kPa)
Minimum tubing diameter 1⁄4” (6mm x 4mm)
√Any other pneumatic accessories are correctly piped without restricting the
SVi1000 output(s) to the actuator.
2. Software Install and Configuration
1. Download the SVi1000 DTM and ValVue 3 and install. See “Masoneilan Software” on
page 14 for download site.
2. Download the Codewrights HART®Communication DTM and install. See
“Codewrights HART® Communication DTM” on page 15 for download site.
3. Sign on to ValVue 3 with default values:
√User name admin.
√Password ValVue 3.
For security purposes, you are forced to change your
password during the first use.
Baker Hughes recommends registering your software
immediately. You are required to register after a 30 day trial
period. After the trial period you won’t be able to use the
software until you complete the registration process that the
software guides you through.
NOTE
6 | Baker Hughes. © 2020 Baker Hughes Company. All rights reserved.
4. Click Settings > DTM Library and Figure 2 appears.
Figure 2 DTM Library Management: Before Update
If you have updated ValVue, a dialog appears when you open
ValVue 3:
Click:
√Yes and the library is updated.
√No and you need to manually updated from the DTM Library Management
dialog to access any new functionality.
ValVue version 3.30 or later. For earlier versions continue with manual DTM
Library update.
NOTE
Masoneilan SVi1000 Bench Quick Start Manual =| 7
© 2020 Baker Hughes Company. All rights reserved.
5. Click Update and once the DTM Updates list refreshes, select the HART
Communications and the SVi1000 HART 5 or HART 7.
Figure 3 DTM Library Management: After Update
6. Click Add Sel and then click OK to close DTM Library Management dialog.
8 | Baker Hughes. © 2020 Baker Hughes Company. All rights reserved.
7. Click Settings > Field Networks,click Add and Figure 4 appears. Select HART
Modem and click OK.
Figure 4 Add Field Network
8. Click OK again to add the HART Modem to Network View and Figure 5 appears.
Figure 5 HART Modem Configuration Tab
Masoneilan SVi1000 Bench Quick Start Manual =| 9
© 2020 Baker Hughes Company. All rights reserved.
9. Ensure the Serial Interface pulldown and the Address scan fields are correct. Click
Apply and then OK.
10. Right-click on the HART Modem and do one of the following:
√Selecting Network > Rebuild Network.
or
√Selecting Find New Devices.
or
√Clicking Add New Device, Figure 6 appears, highlighting SVi1000 HART 5 or 7
and clicking OK.
Figure 6 Add New Device
11. Right-click on the SVi1000 in the Project pane and click Connect.
12. Click OK to the DTM evaluation period warning, if it appears. The SVi1000 DTM
opens.
If device is connected (or powered through DCS), set Master
to Secondary Master.
NOTE
10 | Baker Hughes. © 2020 Baker Hughes Company. All rights reserved.
13. Check that the SVi1000 is connected (see red oval in Figure 7).
Figure 7 Connected
If not it does not connect:
√Right-click on the device in the topology pane, select Additional Functions >
Communication and Figure 8 appears. Correct the Polling Address and click
Apply. Disconnect and then reconnect.
Figure 8 Communication Tab
14. Click Upload All Parameters icon (see red box in Figure 7).
Baker Hughes recommends registering your software
immediately. You are required to register after a 30 day trial
period. After the trial period you won’t be able to use the
software until you complete the registration process that the
software guides you through.
Upload means to pull data from the SVi1000 and load data
into DTM on the PC. Download puts data from the DTM into
the SVi1000.
NOTE
NOTE
Masoneilan SVi1000 Bench Quick Start Manual =| 11
© 2020 Baker Hughes Company. All rights reserved.
3. Perform Setup Wizard
Use the Full Wizard tab to configure the basic setup for the SVi1000. This tab gives you
the opportunity to configure the following:
√Device Information: Shown in Figure 9 configures nameplate data.
√Find Stops: Find Stops or Manual Find Stops.
√Auto Tune: PID parameters.
√Position: Position Fault Limits.
√Step Test: Run an initial step test.
√Ramp Test: Run an initial ramp test.
√Change Device Mode: Set the device mode on completion of assigned tasks.
This procedure moves the valve.
Before beginning the Find Stops range calibration, confirm
that the valve is isolated from the process. This procedure
exhausts and then fills the valve actuator to supply pressure
and therefore strokes the valve over its full range.
Supply pressure MUST NOT exceed the actuator pressure
rating marked on the actuator. Positioner supply pressure
MUST BE at least 5 psi higher than the upper spring range of
the valve.
Procedures (e.g. Find Stops, Auto Tune, Step Test or Ramp
Test) should NOT be invoked if the ValVue sequencer is
running. For information on the sequencer, see ValVue 3’s
online help.
Do not Auto Tune if manual tuning has been used. Auto Tune
creates new parameters that override the manual tuning
parameters.
For a successful Auto Tune process, the supply pressure
must be at least 5 psi (34.5 kPa) above the spring range.
WARNING
12 | Baker Hughes. © 2020 Baker Hughes Company. All rights reserved.
1. Select the Full Wizard tab and ensure the mode is in Setup.
Figure 9 Full Wizard Tab
2. Set the Current Slot to either 0for ATO or 8for ATC.
3. Click an item in the Procedure Name list or click Check All.
4. Click and individual line in the Procedure Name list and the items related to that
appear in the Parameter Area.
5. Click and the tab related to the settings appears.
6. Enter values into fields as required.
7. Repeat steps 4, 5and 6 as required.
8. Click and the wizard commences.
This procedure moves the valve.
Procedures (e.g. Find Stops, Auto Tune, Step Test and Ramp
Test) should NOT be invoked if the ValVue sequencer is run-
ning.
Masoneilan SVi1000 Bench Quick Start Manual =| 13
© 2020 Baker Hughes Company. All rights reserved.
4. Save Settings and Device Baseline
1. Perform any needed diagnostic tests and run tests using the Full Wizard or the
Diagnostics functionalities. See the SVi1000 DTM online help for steps to configure
and run diagnostic tests. Save the results.
2. After finishing with the control valve, make sure all saved reports contain all
necessary order information, by:
a. Right-clicking the SVi1000 device in the Project pane and select Additional
Functions > Report and the report appears.
Figure 10 Example Report
b. Clicking the Disconnect icon on the ValVue 3 toolbar.
c. Clicking Network > Exit to close the DTM. If you have unsaved data, click the
Download Parameters to Device icon to save.
3. Connect SVi1000 wires to next item on order. Click Import and Add New Device. Go
to step 10 of “2. Software Install and Configuration” on page 5 and repeat.
Use the Export to PDF button to export the report.
NOTE
14 | Baker Hughes. © 2020 Baker Hughes Company. All rights reserved.
Appendix A: Download Instructions
Masoneilan Software
Download and Install ValVue3
1. Go to the Resource Library (https://valves.bakerhughes.com/resource-center) and
enter ValVue in the search field (arrow in Figure 11).
Figure 11 Resource Center: Search for Valve 3
The results appear (red box in Figure 11).
2. Click Download below ValVue Installer Download and Figure 12 appears.
Figure 12 Opening Dialog
NOTE The dialog that appears for download varies by the program
used.
Masoneilan SVi1000 Bench Quick Start Manual =| 15
© 2020 Baker Hughes Company. All rights reserved.
3. Click Save File, click OK and it saves by default to the Windows Downloads folder.
NOTE For fastest installation, save the download file to your laptop/
PC. Don't install from the website.
4. Open Windows Explorer and click the Windows Downloads folder.
NOTE If you have a previous install of ValVue3 you are prompted to
uninstall first and then you must run the installer again to
finish the upgrade.
NOTE If you are upgrading from ValVue 2.x you must update the
SQL database location to match ValVue3’s.
5. Double-click on the installer and follow the instructions to install.
Codewrights HART®Communication DTM
You must download and install this DTM to use Masoneilan’s HART®-based DTM.
Go to the link: http://www.codewrights.biz/index.php/en/downloads/software and follow
instructions to download and install the CW_CommDTM_HART.
Direct Sales Office Locations
Australia
Brisbane
Phone: +61-7-3001-4319
Japan
Tokyo
Phone: +81-03-6871-9008
South Africa
Phone: +27-11-452-1550
Perth
Phone: +61-8-6595-7018
Korea
Phone: +82-2-2274-0748
South and Central
America and the Caribbean
Phone: +55-12-2134-1201
Melbourne
Phone: +61-3-8807-6002
Malaysia
Phone: +60-3-2161-0322
Spain
Phone: +34-935-877-605
Brazil
Phone: +55-19-2104-6900
Mexico
Phone: +52-55-3640-5060
United Arab Emirates
Phone: +971-4-8991-777
China
Phone: +86-10-5738-8888
Russia
Veliky Novgorod
Phone: +7-8162-55-7898
United Kingdom
Bracknell
Phone: +44-1344-460-500
France
Courbevoie
Phone: +33-1-4904-9000
Moscow
Phone: +7-495-585-1276
United States
Houston, Texas
Phone: +1-713-966-3600
India
Mumbai
Phone: +91-22-8354790
Saudi Arabia
Phone: +966-3-341-0278
New Delhi
Phone: +91-11-2-6164175
Singapore
Phone: +65-6861-6100
Italy
Phone: +39-081-7892-111
Find the nearest local Channel Partner in your area:
valves.bakerhughes.com/contact-us
Tech Field Support & Warranty:
Phone: +1-866-827-5378
[email protected]
valves.bakerhughes.com
Copyright 2020 Baker Hughes Company. All rights reserved. Baker Hughes provides
this information on an "as is" basis for general information purposes. Baker Hughes
does not make any representation as to the accuracy or completeness of the
information and makes no warranties of any kind, specific, implied or oral, to the fullest
extent permissible by law, including those of merchantability and fitness for a particular
purpose or use. Baker Hughes hereby disclaims any and all liability for any direct,
indirect, consequential or special damages, claims for lost profits, or third party claims
arising from the use of the information, whether a claim is asserted in contract, tort, or
otherwise. Baker Hughes reserves the right to make changes in specifications and
features shown herein, or discontinue the product described at any time without notice
or obligation. Contact your Baker Hughes representative for the most current
information. The Baker Hughes logo, SVI, ValVue and Masoneilan are trademarks of
the Baker Hughes Company. Other company names and product names used in this
document are the registered trademarks or trademarks of their respective owners.
BHMN-SVi1000-BenchQS-IOM-32219D-0420
bakerhughes.com

Other manuals for Masoneilan SVi 1000

2

Other Baker Hughes Valve Positioner manuals
Baker Hughes Masoneilan SVIII AP Manual

Baker Hughes

Baker Hughes Masoneilan SVIII AP Manual

Baker Hughes Masoneilan 47 P Series User manual

Baker Hughes

Baker Hughes Masoneilan 47 P Series User manual

Baker Hughes Becker Series User manual

Baker Hughes

Baker Hughes Becker Series User manual

Baker Hughes Masoneilan SVI II AP Series User manual

Baker Hughes

Baker Hughes Masoneilan SVI II AP Series User manual

Baker Hughes Masoneilan SVI II AP User manual

Baker Hughes

Baker Hughes Masoneilan SVI II AP User manual

Baker Hughes Masoneilan SVI3 User manual

Baker Hughes

Baker Hughes Masoneilan SVI3 User manual

Baker Hughes Masoneilan SVi 1000 User manual

Baker Hughes

Baker Hughes Masoneilan SVi 1000 User manual

Baker Hughes Masoneilan SVI3 User manual

Baker Hughes

Baker Hughes Masoneilan SVI3 User manual

Baker Hughes Masoneilan SVI FF User manual

Baker Hughes

Baker Hughes Masoneilan SVI FF User manual

Baker Hughes Masoneilan SVI FF User manual

Baker Hughes

Baker Hughes Masoneilan SVI FF User manual

Baker Hughes Masoneilan 7700P User manual

Baker Hughes

Baker Hughes Masoneilan 7700P User manual

Baker Hughes Masoneilan SVI II AP User manual

Baker Hughes

Baker Hughes Masoneilan SVI II AP User manual

Baker Hughes Masoneilan 4700E User manual

Baker Hughes

Baker Hughes Masoneilan 4700E User manual

Baker Hughes Masoneilan SVI II AP User manual

Baker Hughes

Baker Hughes Masoneilan SVI II AP User manual

Baker Hughes Masoneilan SVi 1000 User manual
Baker Hughes

Baker Hughes Masoneilan SVi 1000 User manual

Baker Hughes Masoneilan 51 Series User manual

Baker Hughes

Baker Hughes Masoneilan 51 Series User manual

Baker Hughes Masoneilan SVI3 User manual
Baker Hughes

Baker Hughes Masoneilan SVI3 User manual
Baker Hughes Masoneilan 4700P User manual
Baker Hughes

Baker Hughes Masoneilan 4700P User manual

Popular Valve Positioner manuals by other brands

Burkert 8694 operating instructions

Burkert

Burkert 8694 operating instructions

rotork YT-3300 Series product manual

rotork

rotork YT-3300 Series product manual

TROVIS 3730-1 quick guide

TROVIS

TROVIS 3730-1 quick guide

Westlock Controls Corporation TECH-385Q operating manual

Westlock Controls Corporation

Westlock Controls Corporation TECH-385Q operating manual

Aerotech ANT95L Series Hardware manual

Aerotech

Aerotech ANT95L Series Hardware manual

MOTEK SG2100 user manual

MOTEK

MOTEK SG2100 user manual

Plast-O-Matic V200 instructions

Plast-O-Matic

Plast-O-Matic V200 instructions

Dresser MASONEILAN ValVue instruction manual

Dresser

Dresser MASONEILAN ValVue instruction manual

Flowserve Logix 420 User instructions

Flowserve

Flowserve Logix 420 User instructions

Bergoz MX-BPM user manual

Bergoz

Bergoz MX-BPM user manual

Johnson Controls V-9502-76 quick start guide

Johnson Controls

Johnson Controls V-9502-76 quick start guide

Westlock ICOT 5400 Technical manual

Westlock

Westlock ICOT 5400 Technical manual

Samson 3730-2 Mounting and operating instructions

Samson

Samson 3730-2 Mounting and operating instructions

halstrup-walcher PSE3**PN series instruction manual

halstrup-walcher

halstrup-walcher PSE3**PN series instruction manual

Will Burt POSITIONIT MM233TX2TXRX2 Operator's manual

Will Burt

Will Burt POSITIONIT MM233TX2TXRX2 Operator's manual

Parker MX80L series product manual

Parker

Parker MX80L series product manual

M2 Antenna Systems FGAE1000-D1-W-COS-A-H manual

M2 Antenna Systems

M2 Antenna Systems FGAE1000-D1-W-COS-A-H manual

Fisher 3570C instruction manual

Fisher

Fisher 3570C instruction manual

manuals.online logo
manuals.online logoBrands
  • About & Mission
  • Contact us
  • Privacy Policy
  • Terms and Conditions

Copyright 2025 Manuals.Online. All Rights Reserved.