2
PARTS LIST (INCLUDED):
IMPORTANT: To watch a step-by-step video on unboxing and assembling the
Contrology Cadillac, please visit the Contrology Support pages at
Contrology.pilates.com/support
DESCRIPTION PART NUMBER QTY.
Base Frame n/a 1
Cotton Loop (pair) 16992 1
Wool Fuzzy (pair) 16993 1
Roll down bar 17110 1
Belly Strap 16996 1
Foot Strap 16994 1
Light Arm Spring ** 17109 2
Light Leg Spring ** 17094 2
Roll Down Bar Spring 16910 2
Push-Through Bar Spring 16912 3
Trapeze Bar Spring 16911 2
Safety Chain, Long 17035 2
Safety Chain, Short 17051 1
Trapeze Bar w/ Sling 17003 1
Trapeze Bar Sleeves n/a 4
Wooden Push Through Bar 17098 1
Kuna Board, Large 16989 1
Leather Handle Assembly (pair) 17115 1
Horizontal Long Tubes Canopy
assembly w/ Slider and corners
n/a 1
Vertical Head End Tube 16965 2
Vertical Foot End Tube 16966 2
Screws 1/4”-20 x 5/8” Long 15223 8
Eye Bolt, 1/4-20 x 2” 13657 2
Finish Washer, #12 10522 2
3/16” Allen Wrench 13777 1
5/32” Allen wrench 13778 1
Leveling Foam Foot Pad 17195 4
**These may be changed out for heavy Springs; Arm: 16937,
Leg: 16908
ASSEMBLE THE TRAPEZE CANOPY
1. Note this frame is very heavy. It is recommended to have a
minimum of (2) people to lift and move the base frame.
2. Unbox the base frame and move it to the desired location. Unbox all
components from the canopy box and match them to the Parts list
ensuring you have all the components before beginning.
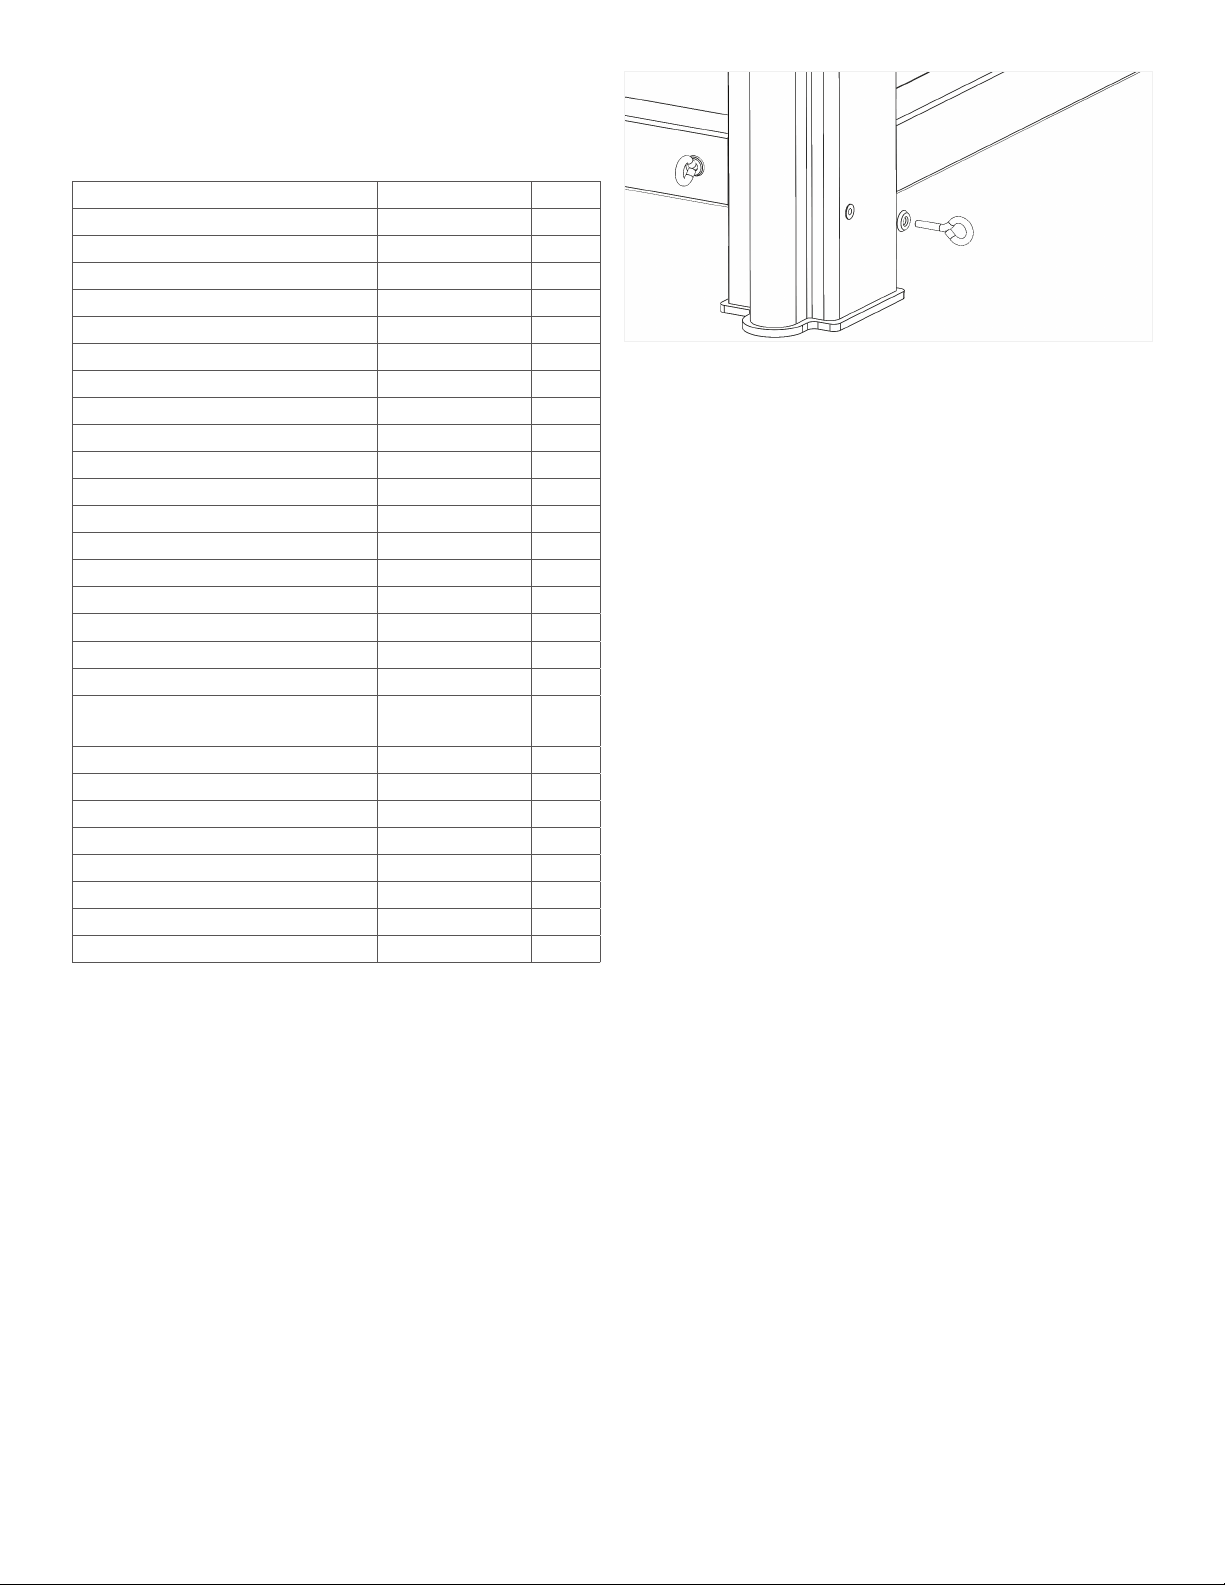
3. Find the provided Eye Bolts and Finish Washer and install in
the legs as shown, one on each Foot End Leg. Tighten the eye
bolts by turning clockwise. Once the bolts start to get tight,
continue to spin them and orientate them so they are vertical.
See Figure 2.
4. Remove the two vertical head end tubes from the box with the
Push-through Bar system. When picking up this assembled
tube set, be careful of the PTB, it may swing. On one side of the
vertical tubes, on the lower half, there will be two screws installed
in threaded holes. Remove these screws, these holes line up
with holes in legs. Place the tubes into the frame leg extrusion
openings opposite the legs you just installed the eye bolts in.
See Figure 1.
5. Insert the tubes all the way to the bottom of the legs. Once
installed the holes in the tubes will line up with the holes in
the legs, if necessary lift the tubes just slightly to align. Use
the provided 5/32” Allen wrench and 1/4”-20 x 5/8” screws to
lock the tubes into position.
6. Install the foot end vertical tubes into the other two leg
openings. Ensure that the upper eye bolts are facing away
from the upholstery mat. Tighten using the 5/32” Allen
wrench and 1/4”-20 x 5/8” screws. See Figure 1.
7. Now set the canopy top onto the four vertical tubes. You will
need help with this. The end of the canopy frame with the (3)
eye bolts goes over the Push-through Bar. Be certain all four
corner fittings fit securely over the tubes. See Figure 1.
8. Using the 3/16” Allen wrench, tighten the set screws in all
four corner fittings and in the flanges around the frame.
After tightening all set screws in all the corner fittings, test
the movement of the Trapeze Bar slider. To do this, ensure
the knobs on the outside are loose, push the Bar assembly
horizontally. This system should move easily and not stick
when uniform pressure is applied. Run the Trapeze Bar
assembly the entire length of canopy. If the slider sticks when
moving the position, simply loosen the set screws that are
holding the horizontal tubes, rotate the tubes as necessary
until the sliders move freely. Be sure to re-tighten all set
screws when complete.
9. Attach the Arm, Leg, Roll Down Bar, Push-through Bar and
Trapeze Bar springs to their appropriate locations. See Figure 1 for
locations of springs. See Figure 3, 4 for pictures of springs.
Figure 2: Eye Bolts and Finish Washer


