manuals.online logo
Brands
  1. Home
  2. •
  3. Brands
  4. •
  5. Balanced Body
  6. •
  7. Fitness Equipment
  8. •
  9. Balanced Body Konnector Instruction Manual

Balanced Body Konnector Instruction Manual

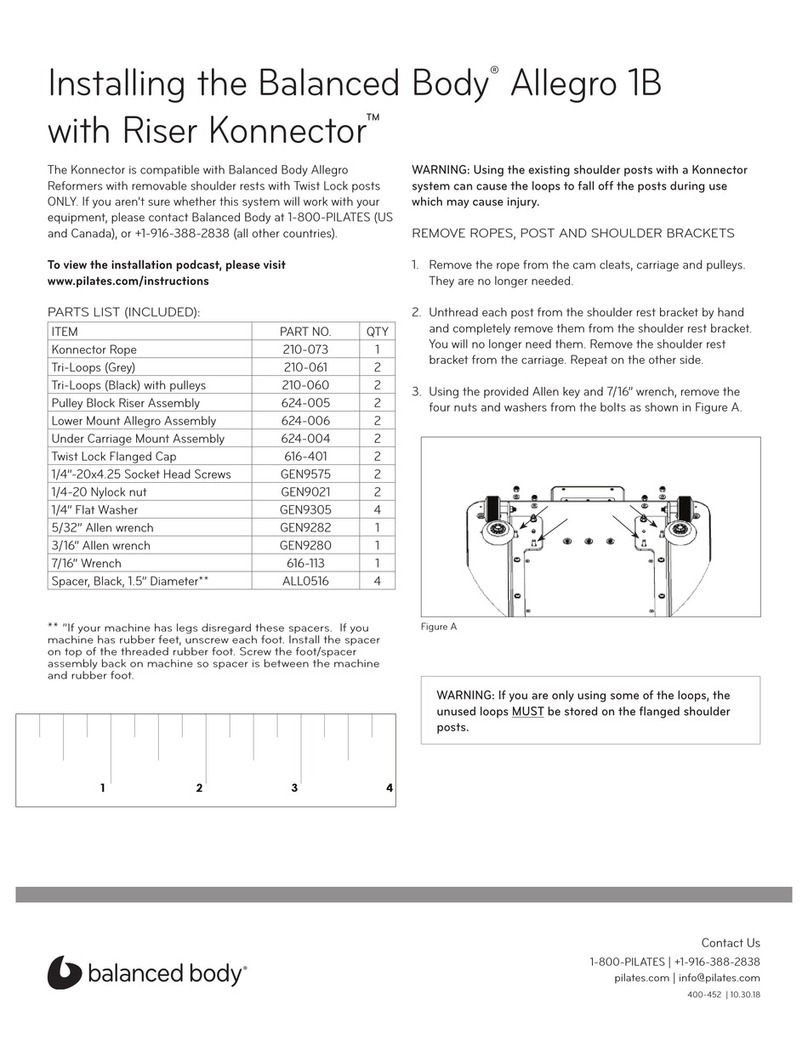
Installing the Balanced Body®Konnector™
The Konnector is compatible with Balanced Body Studio
Reformers with wooden risers and removable shoulder rests
ONLY. If you aren’t sure whether this system will work with your
equipment, please contact Balanced Body at 1-800-PILATES (US
and Canada), or +1-916-388-2838 (all other countries).
To view the installation podcast, please visit
www.pilates.com/instructions
TOOLS REQUIRED (NOT INCLUDED):
»7/16” wrench or socket (recommended)
PARTS LIST (INCLUDED):
ITEM PART NO. QTY
Konnector Rope 210-054 1
Konnector Riser Assembly 707-257 2
2-3/4” Allen bolts GEN8032 4
1/4” Flat Washer GEN9204 6
1/4” Fender Washer GEN9952 2
Tri-Loops (Grey) 210-053 2
Tri-Loops (Black) with pulleys 210-052 2
Hair Guard 616-187 1
1/4-20x3/8” Button head screw GEN9943 4
1/4-20 Nylock nut GEN9021 4
5/32” Allen wrench GEN9282 1
3/16” Allen wrench GEN9280 1
1/4-20x1-1/2” Flat head screw GEN7313 2
Twist Lock™ Shoulder Post 616-400 2
Twist Lock Flanged Cap 616-401 2
Left Pulley Bracket Assembly N/A 1
Right Pulley Bracket Assembly N/A 1
Bolt/Washer/Nut Assembly N/A 2
WARNING: Using the existing shoulder posts with a Konnector
system can cause the loops to fall off the posts during use
which may cause injury.
REMOVE POST AND SHOULDER BRACKETS
1. Unthread each post from the shoulder rest bracket by hand
and completely remove them from the shoulder rest bracket.
You will no longer need them. Remove the shoulder rest
bracket from the carriage. Repeat on the other side.
2. Using the provided Allen wrench, remove the two flat head
screws as shown in Figure A. Replace these two removed
screws with the two flat head screws (1/4”-20 x 1-1/2” long)
provided.
WARNING: If you are only using some of the loops, the
unused loops MUST be stored on the flanged shoulder
posts.
1 2 3 4
Figure A
Contact Us
1-800-PILATES | +1-916-388-2838
pilates.com | info@pilates.com
400-317 | 04.04.17
INSTALL THE HAIR GUARD AND CARRIAGE
PULLEY BRACKETS
1. Bolt the hair guard to the two carriage pulley brackets using
the 1/4-20x3/8” long flanged button head screws. Make sure
the threaded holes are facing inward, and the hair guard is
aligned as in Figure B. Fully tighten the bolts that are through
the circular holes in the hair guard, and finger-tighten the
bolts that are through the slotted holes.
2. Unhook all of the springs from the springbar. Remove the
rope from the cam cleats and
carriage. Lift the carriage out of the
frame, turn it upside down, and rest
it across the Reformer frame with the
underside facing up.
3. Align the hair guard and pulley bracket assembly with holes
on the underside of the carriage as shown in Figure C.
Make sure the pulleys point toward the headrest. Install the
1/4” fender washer and 1/4”-20 nylon nut over the screw that
protrudes up in to the pulley bracket. Finger tighten. Repeat
with the other carriage pulley bracket. See Figure F for a
finished view.
4. Find the pre-assembled bolt, washer and nut (Figure D).
5. Put the bolt with washer and nut into the 5/8” hole (where
the original rope passed through) from the padded side of
the carriage (Figure E). It should slide through a slot in the
carriage pulley bracket (refer back to Figure C). Apply a 1/4”
washer and nylock nut under the carriage and finger tighten.
See Figure F for a finished view.
6. Repeat steps 5 and 6 for the other carriage pulley bracket.
7. Make sure the front edge of the carriage pulley bracket is flush
along the edge of the wooden beam on the carriage. Tighten all
nylock nuts with a wrench (socket wrench, preferred) to secure
the brackets in place.
8. Tighten the 4 button head screws to secure the hair guard to
the pulley brackets.
9. Turn the carriage back over onto its wheels and place it on the
rails with the headrest toward the risers.
10. Make sure the springbar is in the position closest to the foot
end of the reformer (“first gear”). Attach at least one red
spring to keep the carriage in place.
Figure D
Figure B
Circular holes
Slotted holes
Threaded holes
Step 3
Step 5 Step 5 Step 3
Figure C
Figure F
(Rope hole) Step 5
Step 3
Step 8
Figure E
2
11. Install the shoulder rests back onto the carriage by sliding
them into the slots and away from the carriage pad.
12. Install new flanged shoulder posts onto the protruding
threads of the shoulder rests. Turn the flanged shoulder posts
clockwise to tighten. Hand tighten so the shoulder rest does
not move. Repeat on the other side. See Figure G.
INSTALL RISERS
1. Remove the ropes and loops
from your Reformer, they are no
longer needed.
2. Remove the pulleys from your
existing risers by loosening the
black knobs on the back of the
risers.
3. Take the pulleys you removed
from the original risers and
insert them into the lower holes on
the new risers, facing the pulleys
the same direction as the existing pulleys. Use one fender
washer and a black knob to secure the eyebolt. When you are
done the risers should look like Figure H.
4. Using the provided 5/32” Allen wrench, loosen the two bolts
on each wooden riser and remove them from the frame.
Discard the bolts and risers, you will no longer need them.
5. Take the two new wooden risers and install them where the
old wooden risers were on the outside of the frame using 1/4”
flat washers, 2-3/4” Allen bolts and the 5/32” Allen wrench
(Figure I). Make sure the pulleys face the carriage.
INSTALL ROPE AND LOOPS
1. Place the black loops with
pulleys on the shoulder posts
(Figure J).
2. Thread one end of the rope
through both pulleys under
the carriage and pull the ends
evenly toward the risers (Figure
K).
Figure H
Figure I
Figure J
Loop Pulley
Figure K
Figure M
Figure L
Figure G
3
3. Take one end of the rope and thread up through the lowest
pulley on the riser. Continue threading the rope up through
the upper, inner pulley on the riser block and pull toward
the carriage (Figure L).
4. Thread the rope through the pulley attached to the black Tri-
loop with pulley on the same side of the Reformer as the riser
and pull back toward the riser (Figure M).
5. Thread the rope through the upper, outer pulley on the riser
block and pull back toward the carriage (Figure N). See Figure
O for a detailed view of the riser pulley block rope routing.
6. Using a Soft-Touch connection (Figure P), secure each end of
the rope to a grey Tri Loop on the same side of the Reformer
as the riser.
7. Repeat steps 3-6 for the other side of the Reformer.
IMPORTANT SAFETY NOTE: Use of the Konnector system in a manner for which it is not intended may result in equipment damage
and/or injury to the user. Intense cardio work utilizing jarring movements may overload the system. Balanced Body is not responsible
for injuries caused by equipment misuse.
Questions? Call Balanced Body Technical Support at 1-800-PILATES (US and Canada), or +1-916-388-2838 (all other countries).
WARNING: Using the existing shoulder posts with a Konnector system can cause the loops to fall off the posts during use which
may cause serious injury.
Figure P
Figure N
Figure O
Grey Tri Loops
Black Tri Loops with pulley
Under carriage
pulley bracket
Contact Us
1-800-PILATES | +1-916-388-2838
pilates.com | info@pilates.com
400-317 | 04.04.17

Other Balanced Body Fitness Equipment manuals
Balanced Body CoreAlign User manual

Balanced Body

Balanced Body CoreAlign User manual

Balanced Body Konnector LITE Instruction Manual
Balanced Body

Balanced Body Konnector LITE Instruction Manual

Balanced Body Wall Tower Administrator Guide

Balanced Body

Balanced Body Wall Tower Administrator Guide

Balanced Body Rialto with Tower Konnector Instruction Manual

Balanced Body

Balanced Body Rialto with Tower Konnector Instruction Manual

Balanced Body Contrology Cadillac User manual

Balanced Body

Balanced Body Contrology Cadillac User manual

Balanced Body Cadillac Trapeze Table Administrator Guide
Balanced Body

Balanced Body Cadillac Trapeze Table Administrator Guide

Balanced Body Konnector User manual

Balanced Body

Balanced Body Konnector User manual

Balanced Body Contrology User manual

Balanced Body

Balanced Body Contrology User manual

Balanced Body Studio Reformer User manual

Balanced Body

Balanced Body Studio Reformer User manual

Balanced Body Allegro Instruction sheet
Balanced Body

Balanced Body Allegro Instruction sheet

Balanced Body Reformer Trapeze Combination Administrator Guide

Balanced Body

Balanced Body Reformer Trapeze Combination Administrator Guide

Balanced Body CenterLine Tower Retrofit Instruction Manual

Balanced Body

Balanced Body CenterLine Tower Retrofit Instruction Manual

Balanced Body Reformer with Tower Instruction sheet

Balanced Body

Balanced Body Reformer with Tower Instruction sheet

Balanced Body Allegro User manual

Balanced Body

Balanced Body Allegro User manual

Balanced Body Pilates Arc User manual

Balanced Body

Balanced Body Pilates Arc User manual

Balanced Body CenterLine Pole System Programming manual

Balanced Body

Balanced Body CenterLine Pole System Programming manual

Balanced Body CenterLine Reformer User manual

Balanced Body

Balanced Body CenterLine Reformer User manual

Balanced Body Contrology User manual

Balanced Body

Balanced Body Contrology User manual

Balanced Body F.I.T. Quick start guide

Balanced Body

Balanced Body F.I.T. Quick start guide

Balanced Body MOTR Installation instructions

Balanced Body

Balanced Body MOTR Installation instructions

Balanced Body Rialto Reformer User manual

Balanced Body

Balanced Body Rialto Reformer User manual

Balanced Body Reformer with Tower Instruction sheet

Balanced Body

Balanced Body Reformer with Tower Instruction sheet

Balanced Body Pilates IQ Reformer Manual

Balanced Body

Balanced Body Pilates IQ Reformer Manual

Balanced Body Allegro Reformer User manual
Balanced Body

Balanced Body Allegro Reformer User manual

Popular Fitness Equipment manuals by other brands

BRONZE GYM MT-013A user manual

BRONZE GYM

BRONZE GYM MT-013A user manual

Stamina AIR ROWER 1413 owner's manual

Stamina

Stamina AIR ROWER 1413 owner's manual

Magene T300 quick start guide

Magene

Magene T300 quick start guide

Norwell NW101 Chest installation manual

Norwell

Norwell NW101 Chest installation manual

Hoist Fitness CF-3753 owner's manual

Hoist Fitness

Hoist Fitness CF-3753 owner's manual

Insportline homegym in 133 easy user manual

Insportline

Insportline homegym in 133 easy user manual

BRONZE GYM H-40A manual

BRONZE GYM

BRONZE GYM H-40A manual

CAPITAL SPORTS 10032205 manual

CAPITAL SPORTS

CAPITAL SPORTS 10032205 manual

INTERSPORT B 2.1 English Manual

INTERSPORT

INTERSPORT B 2.1 English Manual

Taurus TB-9350-PRO operating instructions

Taurus

Taurus TB-9350-PRO operating instructions

Domyos ST 270 operating instructions

Domyos

Domyos ST 270 operating instructions

HMS BSX10 Manual instruction

HMS

HMS BSX10 Manual instruction

Align-Pilates Ladder Barrel Mk II Assembly instructions

Align-Pilates

Align-Pilates Ladder Barrel Mk II Assembly instructions

Mobiclinic X-BIKE EVEREST user manual

Mobiclinic

Mobiclinic X-BIKE EVEREST user manual

Stamina Hyperextension Bench 2014 owner's manual

Stamina

Stamina Hyperextension Bench 2014 owner's manual

Matrix G7-S21 user manual

Matrix

Matrix G7-S21 user manual

MINOURA V100 - V1.2 3-2010 manual

MINOURA

MINOURA V100 - V1.2 3-2010 manual

SPORTSTECH VC300 manual

SPORTSTECH

SPORTSTECH VC300 manual

manuals.online logo
manuals.online logoBrands
  • About & Mission
  • Contact us
  • Privacy Policy
  • Terms and Conditions

Copyright 2025 Manuals.Online. All Rights Reserved.