manuals.online logo
Brands
  1. Home
  2. •
  3. Brands
  4. •
  5. Bartscher
  6. •
  7. Dispenser
  8. •
  9. Bartscher IRS 1L-W User manual

Bartscher IRS 1L-W User manual

This manual suits for next models

1

Other Bartscher Dispenser manuals

Bartscher MultiTherm A200050 User manual

Bartscher

Bartscher MultiTherm A200050 User manual

Bartscher PS 1L-W User manual

Bartscher

Bartscher PS 1L-W User manual

Bartscher 500.377 User manual

Bartscher

Bartscher 500.377 User manual

Bartscher 900004 User guide

Bartscher

Bartscher 900004 User guide

Bartscher 191005 User guide

Bartscher

Bartscher 191005 User guide
Bartscher 900004 User manual

Bartscher

Bartscher 900004 User manual

Bartscher 850009 User manual

Bartscher

Bartscher 850009 User manual

Bartscher 200065 User manual

Bartscher

Bartscher 200065 User manual

Bartscher 100.321 User manual

Bartscher

Bartscher 100.321 User manual

Bartscher 850.007 User manual

Bartscher

Bartscher 850.007 User manual

Bartscher 190124 User manual

Bartscher

Bartscher 190124 User manual

Bartscher PS 1L-W User guide

Bartscher

Bartscher PS 1L-W User guide

Bartscher 850006 User guide

Bartscher

Bartscher 850006 User guide

Bartscher 850008 User manual

Bartscher

Bartscher 850008 User manual

Bartscher DEW5 User manual

Bartscher

Bartscher DEW5 User manual

Bartscher 500379 User manual

Bartscher

Bartscher 500379 User manual

Bartscher 850008 User manual

Bartscher

Bartscher 850008 User manual

Bartscher 190135 User manual

Bartscher

Bartscher 190135 User manual
Bartscher 850006 User manual

Bartscher

Bartscher 850006 User manual
Bartscher 150982 User manual

Bartscher

Bartscher 150982 User manual
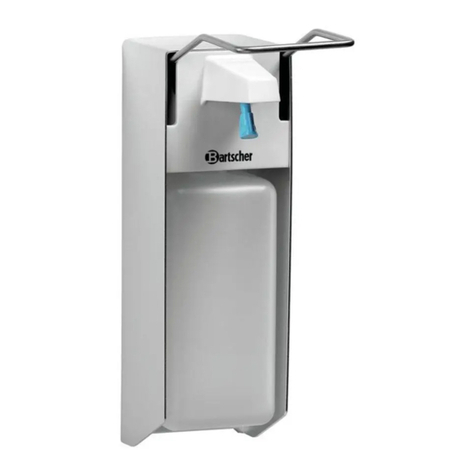
Bartscher 191004 User guide

Bartscher

Bartscher 191004 User guide

Bartscher MultiTherm User manual

Bartscher

Bartscher MultiTherm User manual

Bartscher 150981 User manual

Bartscher

Bartscher 150981 User manual

Bartscher 200063 Quick start guide

Bartscher

Bartscher 200063 Quick start guide

Popular Dispenser manuals by other brands

BOWMAN CL003-0111 manual

BOWMAN

BOWMAN CL003-0111 manual

SIKA Power Cure operating instructions

SIKA

SIKA Power Cure operating instructions

Silver King Majestic SK12MAJ Technical manual and replacement parts list

Silver King

Silver King Majestic SK12MAJ Technical manual and replacement parts list

Franke F3Dn Twin Service manual

Franke

Franke F3Dn Twin Service manual

HURAKAN HKN-MT1 manual

HURAKAN

HURAKAN HKN-MT1 manual

STIEBEL ELTRON UltraHot Plus Operation and installation instructions

STIEBEL ELTRON

STIEBEL ELTRON UltraHot Plus Operation and installation instructions

Bobrick B-828 troubleshooting guide

Bobrick

Bobrick B-828 troubleshooting guide

DAN DRYER 282 installation guide

DAN DRYER

DAN DRYER 282 installation guide

Essity Tork 473208 manual

Essity

Essity Tork 473208 manual

CBS SD300BU-88 COMPONENT MAINTENANCE MANUAL WITH ILLUSTRATED PARTS LIST
CBS

CBS SD300BU-88 COMPONENT MAINTENANCE MANUAL WITH ILLUSTRATED PARTS LIST
Sealey MK77 manual

Sealey

Sealey MK77 manual

Fluid Management Accutinter 1600 End user guide

Fluid Management

Fluid Management Accutinter 1600 End user guide

Franke DVS SD99-010 Installation and operating instructions

Franke

Franke DVS SD99-010 Installation and operating instructions

Graco Dispensit 1053-10C operation & maintenance

Graco

Graco Dispensit 1053-10C operation & maintenance

DPR SED02 user manual

DPR

DPR SED02 user manual

ITALTINTO i50 user manual

ITALTINTO

ITALTINTO i50 user manual

Coca-Cola FREESTYLE 9000 user guide

Coca-Cola

Coca-Cola FREESTYLE 9000 user guide

Hewi 805.06.150 Mounting instructions

Hewi

Hewi 805.06.150 Mounting instructions

manuals.online logo
manuals.online logoBrands
  • About & Mission
  • Contact us
  • Privacy Policy
  • Terms and Conditions

Copyright 2025 Manuals.Online. All Rights Reserved.

IRS 1L-W
850027
Bartscher GmbH
Franz-Kleine-Str. 28
D-33154 Salzkotten
Germany
Phone: +49 5258 971-0
Fax: +49 5258 971-120
Service hotline: +49 5258 971-197
www.bartscher.com
Version: 1.0
Date of preparation: 2020-11-16
Original instruction manual
EN
850027 3 / 8
EN
Technical Data
Name:
Disinfectant dispenser IRS 1L-W
Article number
850027
Material:
plastic
Volume, in l:
1
Dosing, in ml:
0,4 - 0,8 / 0,8 - 1,6
Dimensions (W x D x H), in mm:
123 x 114 x 262
Weight, in kg:
0,73
We reserve the right to implement technical modifications.
Version / Characteristics
•Version: wall-mounting
•Refillable
•Filling level check: sight glass
•Operation: contact-free (infrared sensor)
•Dosing: infrared sensor, 2-level preset adjustment available
•Battery powered: 4x 1.5 V AA or 8x 1.5 V AA
•Lockable
•Features
–user-friendly
–hygienic
–cartridge-free
–efficient
•The set includes:
–1 key
–attachment material
•The set does not include:
–batteries
–filling
4 / 8 850027
EN
B
List of Components of the Appliance
Fig. 1
1. Key
2. Key-hole
3. Housing
4. Front cover
5. Filling level check sight glass
6. Spraying setting 1 button
7. Spraying setting 2 button
8. ON/OFF button
9. LED indicator light
10.Pump
11.Battery chamber
12.Disinfectant container
13.Infrared sensor (2 pcs)
14.Outlet opening
850027 5 / 8
EN
User Instructions
•Do not expose the appliance to sunlight to avoid its deformation.
•If the disinfectant dispenser will not be used for a longer period of time, remove
batteries and empty the disinfectant container.
•Keep the appliance away from fire.
•Do not fill the disinfectant container with corrosive chemicals, etc.
•Do not attempt to fix nor modify the appliance, etc., as this may lead to incorrect
operation.
Assembly
(A –1)
(A –2)
(A –3)
(A –4)
Fig. 2
1. Introduce the key into the lock of the disinfectant dispenser. (A –1)
2. Lower the front cover. (A –2)
3. Remove the container with the pump from the disinfectant dispenser's housing.
(A –3)
4. Using the rear cover, use a pencil to mark 2 points for bores to be drilled in the
wall at the required height.
Bore 2 holes in the wall and put the supplied pegs inside.
Fix screws in pegs, and then hang the disinfectant dispenser on them. (A –4)
6 / 8 850027
EN
Inserting Batteries
Fig. 3
1. Use the key to open the disinfectant dispenser and lower the front cover.
Remove the disinfectant container with the pump from the housing.
2. Remove the cover from the battery chamber.
3. Insert correctly the batteries: 4x 1.5 V AA or 8x 1,5 V AA.
Filling with Disinfectant
(A –5)
(A –6)
(A –7)
(A –8)
Fig. 4
1. Fix the cover on the battery chamber. (A –5)
2. Unscrew the disinfectant container and fill it with the proper disinfectant. Re-
screw the cover on the container. (A –6)
3. Insert the disinfectant container with the pumping system vertically and in
parallel with the housing. (A –7)
4. Make sure the pump's head is correctly locked in the U-shaped bracket. (A –8)
850027 7 / 8
EN
Switching the Appliance On / Setting Dosing Volumes
1. Switch the disinfectant dispenser with the ON/OFF
button (8).
The LED indicator light (9) will blink twice in green.
2. Set the selected dosing for the disinfectant by
pressing the corresponding (6) or (7) button.
The following settings are available:
–0.4–0.8 ml with button
–0.8–1.6 ml with button
After setting the dosed amounts, the LED control
light (9) will blink once or twice in green.
Fig. 5
NOTE!
The disinfectant dispenser does not work, when the front cover is open.
3. Close the front cover by lifting it.
In the Standby mode, the LED indicator light blinks in green every five seconds.
LED Indicator Light
•Depending on the set dosing amount, the LED indicator light (9) blinks once or
twice in green during dispensing of the disinfectant.
•The LED indicator light (9) blinks in red, when batteries are low on power.
•The LED indicator light (9) blinks interchangeably in red and green, when
batteries are low on power or depleted.
•The LED indicator light (9) blinks interchangeably in red and green, when there
are interferences in operation (e.g., filter clogging, disinfectant is not dosed,
etc.).
•When the batteries are replaced or operation malfunctions remedied, re-start the
appliance. To this end, switch the appliance off with the ON/OFF button (8), and
then switch it on again.
Switching the Appliance Off
1. If the disinfectant dispenser is not used any more, open it with the key and lower
the front cover.
2. Press the ON/OFF button (8) to switch the appliance off.
The LED indicator light (9) will blink once in red.
8 / 8 850027
EN
Dispensing the Disinfectant
1. Dispense the disinfectant as needed, holding
your palm underneath the disinfectant dispenser.
Owing to the infrared sensor, exact dosing of the
disinfectant is effected: depending on the settings,
the spraying i effected once or twice.
The LED indicator light (9) blink once or twice in
green.
The front cover sight glass makes it possible to
verify the filling level of the disinfectant container.
Fig. 6
Cleaning and Disinfecting
ATTENTION!
For cleaning, never use any scrubbing nor acute cleaning agents,
neither cleaning agents that contain chlorine, as they may damage the
surface.
Do not wash the disinfectant dispenser under running water.
1. Regularly perform disinfecting cleaning by wiping external surfaces of the
disinfectant dispenser.
2. Before each refilling of the disinfectant dispenser thoroughly clean it manually.
Follow the below described steps.
3. Remove the disinfectant container from the housing.
4. Use a soft, damp cloth to wipe the inside and the outside surface of the housing.
5. Dry all cleaned surfaces thoroughly.
6. Fill the disinfectant container and place it in the housing.
7. Lift the front cover and close the disinfectant dispenser with the key.
8. Use a disinfectant tissue to wipe the outside of the housing.