manuals.online logo
Brands
  1. Home
  2. •
  3. Brands
  4. •
  5. Bayco
  6. •
  7. Work Light
  8. •
  9. Bayco SL-1006 User manual

Bayco SL-1006 User manual

Bayco Products, Inc. • 640 South Sanden Blvd. • Wylie, TX 750 8
INS-1006-13
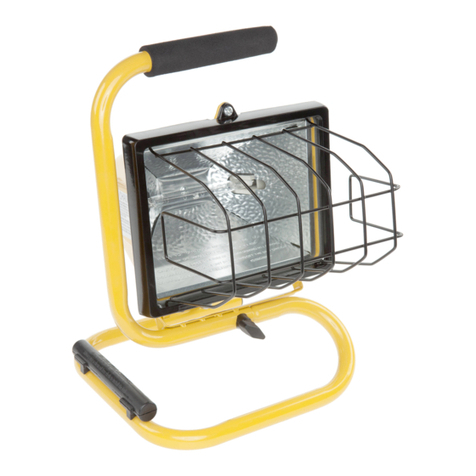
1000 Watt (2 x 500 watt) Halogen Work Light
Important safety instructions
W RNING: Read all instructions carefully
S VE THESE INSTRUCTIONS
C UTION: RISK OF ELECTRIC L SHOCK
•Do not use with extension cord near water or where water may
accumulate.
•Keep plugs and receptacles dry.
•For use only on GFCI protected circuits.
•Risk of burns, do not operate without guard. (See assembly instructions.)
•Lighted lamp is hot. Keep away from combustibles. Unplug to change
bulb. Do not touch bulb
W RNING RISK OF FIRE, ELECTRIC SHOCK, EXPOSURE
TO EXCESSIVE UV R DI TION OR INJURY TO PERSONS
•Unit operates on 120V AC 60 Hz only
•Unplug and allow cooling before replacing bulb.
•Bulb gets HOT quickly
•Do not touch hot lens guard or enclosure.
•Do not remain in light if skin feels warm.
•Do not look directly at lighted lamp.
•Keep lamp away from materials that may bum.
•Use only with a 500 Watt or smaller type T bulb.
•Do not touch the bulb at any
time; use a soft cloth or gloves.
Oil from skin may damage bulb.
•Do not operate the lamp with
missing or damaged guard,
lamp containment barrier or UV
light filter.
S VE THESE INSTRUCTIONS
W RNING: When using outdoor use work lights, basic safety precautions
should always be followed to reduce the risk of fire, electrical shock, and
personal injury, including the following:
•Use only three-wire outdoor extension cords that have three-prong
grounding plug and receptacles that accept the appliance's plug.
•Ground Fault Circuit Interrupter (GFCl) protection should be provided on
the circuit(s) or outlet(s) to be used for the wet location work light.
Receptacles are available having built-in GFCI protection and are able to
be used for this measure of safety.
•Use only an extension cord for outdoor use, such as an extension cord of
cord type SW, SW-A, SOW, SOW -A. STW, STW-A, STOW. STOW-A.
SlW, SlW-A. SlOW. SlOW-A. SJTW. SJTW-A. or SJTOW, SJTOW-A.
BULB INST LL TION ND REPL CEMENT
DO NOT TOUCH BULB WITH B RE H NDS
1. Turn the light off and unplug from the power source.
2. Allow the fixture to fully cool before proceeding.
3. Always wear gloves or use a clean cloth to handle bulb. The natural oil
from skin will leave a residue that will cause the light to burn out
immediately.
4. To remove the lens cover, remove the retaining screw on the back of the
cover. The lens cover will then swing open exposing the bulb.
5. To remove the bulb, grip one end of the bulb and gently push towards the
other end and pull outward to release the bulb.
6. Using a clean cloth or wearing gloves to hold the bulb, gently insert one
end of the bulb into the receptacle and press firmly into place. Place the
other end of the bulb into the opposite receptacle and gently press into
place. Make sure bulb is seated properly.
7. Close the lens cover and replace the retaining screw.
8. Do not test light without lens cover properly attached.
W RNING: Read all instructions carefully
S VE THESE INSTRUCTIONS
C UTION: RISK OF ELECTRIC L SHOCK
W RR NTY
PRODUCTS COVERED UNDER THIS LIMITED W RR NTY:
This product is warranted to the original purchaser for 1 year and only covers
failures due to defects in materials or workmanship. If this product is used for
rental purposes, the warranty term is reduced to 0 days from the date of
purchase.
NOT COVERED
The warranty does not cover normal wear and tear or cosmetic damage. The
Limited Warranty also does not cover damages which occurred in shipment or
failures which are caused by accidents, misuse, abuse, faulty installation and
lightning damage. Consequential damages, incidental damages or incidental
expenses, including damage to property. Some states do not allow the
exclusion or limitation of incidental or consequential damages, so the above
limitation or exclusion may not apply to you. This warranty gives you specific
legal rights, which may vary from state to state. This warranty does not apply to
certain Bayco professional products that carry a specific warranty unique to
those products.
W RR NTY CL IMS - US
Contact Bayco for USA warranty claims. Call 800-233-2155 and Bayco
Customer Service will provide a Return Goods Authorization (RGA) to facilitate
rapid warranty action. After receiving the RGA, send the product (shipping
prepaid) to BAYCO • 640 S. SANDEN BLVD • WYLIE, TEXAS • 750 8. Include
a dated proof of purchase and a brief description of the defect with your name,
address and phone number. Your product will either be repaired or replaced at
the option of Bayco and returned as soon as practical, but no later than 45
days after being received by Bayco.
W RR NTY CL IMS - C N D
Return the product to the place where purchased with a dated proof of
purchase and a brief description of the defect with your name, address and
phone number. Your product will either be replaced or purchase price
refunded.
REQUEST FOR W RR NTY CTION
If you have any questions about this warranty or any other Bayco product
inquiries contact BAYCO • 640 S. SANDEN BLVD • WYLIE, TEXAS • 750 8 or
call 800-233-2155
Bayco Products, Inc. • 640 South Sanden Blvd. • Wylie, TX 750 8
1000 Watts (2 x 500 watts) Lampe de Travail Halogene
Lire toutes les intructions attentivement
VERTISSEMENT: LISEZ TTENTIVEMENT TOUTES LES INSTRUCTIONS
CONSERVEZ CES INSTRUCTIONS
TTENTION: RISQUE DE CHOC ELECTRIQUE
•Ne pas utiliser avec une rallonge pres d'un point d'eau ou d'accumulation
d 'cau
•Garder les fiches et les prises de courant seches
•Utiliser uniquement sur Ies circuits proteges GFCI
•Risques de brulures. Ne pas utiliser sans I 'entourage (voir les
instructions d'assemhlage)
•Risques d 'incendie / de blessurre. Tenir la lampe eloignee des
proudits combustibles Debrancher pour changer l' ampoule. Ne pas
toucher I' ampoule.
VERTISSEMENT RISQUE D'INCENDIE, DE CHOC ÉLECTRIQUE,
EXPOSITION U R YONNEMENT UV EXCESSIVE OU DE BLESSURES
•Fonctionne sur du l20V AC / 60 HZ uniquement
•Debrancher et laisser refroidir avant de remplacer I' ampoule.
•L'ampoule devient CHAUDE rapidement
•Ne pas toucher la lentille, l’entourage le tout etant chaud.
•Ne pas rester dans la lumiere si la peau devient chaude au toucher.
•Ne pas reganrder la lampe allumee directement.
•Tenir la lampe eloignee des produits inflammables.
•Utiliser uniquement une ampoule de 500 Watts ou moins l'utilisation de
type T ampoule
•Ne jamais toucher ampoule, a aucun moment; utiliser un chiffon doux ou
des gants. Les huiles naturelles de la peau peuvent endommager la
lampe.
•Ne pas faire fonctionner la lampe si tout ou partie de l'entourage, du
boitier (ou du flltre lumiere UV) est mamquany ou abime.
CONSERVEZ CES INSTRUCTIONS
VERTISSEMENT: Quand une lampe de travail pour usage exterieur est
utilisee, les precautions basiques de securite doivent toujours etre suivies pour
reduire Ie risque d' incendie, de choc electrique et de blessure sur soi ou
autrui.
•Utiliser uniquement des rallonges d'exterieur a triple fils qui ont des prises
de courant femelles qui acceptent la prise de I’apparell
•Le disjoncteur de terre (GFCI) doit eIre present sur Ie ci rcuil(s) ou la
prise(s) qui sera utilisee pour la lampe de location mouillee.Les prises de
courant avec Ie disjoncteur de terre inclus sont disponibles et peuvent
etre utilisees par mesure de securite.
•Uliliser uniquement une rallonge pour I'exterieur type: SW, SW-A, SOW,
SOW-A, STW, STW· A, STOW, STOW-A, SJW. SJW-A, SJTW, SJTW-A,
ou bien SJTOW, SJTOW-A.
INST LL TION ET REMPL CEMENT DE L' MPOULE
NE P S TOUCHER L' MPOULE M INS NUES
1. Eteindre la lumiere et debrancher la prise.
2. Laisser refroidir Ie lout completement avant de proceder
3. Toujours porter des gants ou utiliser un chiffon propre pour manipuler
I'ampoule. Les huiles naturelles de la peau Iaissent un residu qui fera
griller I'ampoule immediatement.
4. Pour retirer le couvercle d'objectif, retirer la vis de fixation sur le dos de la
couverture de l'objectif. Le couvercle de l'objectif sera alors s'ouvrir
exposant le bulbe.
5. Pour retirer I'ampoule, l'attraper, pousser doucement el ensuite tirer vers
l’exterieur pour la sortir.Utiliser un chiffon propre ou des gants pour tenir
l'ampoule, inserer doucement l'ampoule dans Ie receptacle et presser
6. Fermement pour mettre en place. Placer l' autre cote de I'ampoule dans
Ie receptacle oppose et presser doucement pour mettre en place.
S'assurer que I' ampoule est installe convenablement.
7. Fenner la lentille et revisser.
8. Ne pas tester la lumiere si la lentille n'est pas allachee correctement
VERTISSEMENT: LISEZ TTENTIVEMENT TOUTES LES INSTRUCTIONS
CONSERVEZ CES INSTRUCTIONS
TTENTION: RISQUE DE CHOC ELECTRIQUE
DIRECTIVES POUR
La baladeuse est munie d'un interrupteur à bascule à deux sens qui permet
d'allumer le projecteur à faisceau large ou uniquement le projecteur. La
position centrale éteint la baladeuse. Le crochet magnétique peut être placé
sur le dessus ou le côté de la baladeuse.
CE PRODUIT EST COUVERT P R UNE G R NTIE LIMITÉE :
Ce produit est garanti pour une période d'un an contre toutes défectuosités
matérielles et de fabrication. Cette garantie est seulement applicable à
l'acheteur d'origine. Si ce produit est utilisé à des fins de location, la garantie
est réduite à 0 jours à partir de la date d'achat.
NON COUVERT
La garantie ne couvre pas l'usure normale et les dommages cosmétiques. La
garantie ne couvre pas les dommages survenus en cours d'expédition ou les
défectuosités causées par un accident, une utilisation abusive, une mauvaise
installation ou la foudre.
Dommages indirects, consécutifs ou frais accessoires, y compris les
dommages à la propriété. Certains états ne permettent pas l'exclusion ou la
limitation des dommages indirects ou consécutifs, la limitation ou l'exclusion
peut ne pas s'appliquer à vous. Cette garantie vous donne des droits légaux
précis qui peuvent varier d'un état à l'autre.
Cette garantie ne s'applique pas à certains produits Bayco pour professionnels
qui bénéficient d'une garantie unique.
RÉCL M TIONS U TITRE DE L G R NTIE - États-Unis
Communiquez avec Bayco pour les réclamations au titre de la garantie aux
États-Unis. Appelez au 1 800 233-2155 pour obtenir un numéro d'autorisation
de retour de marchandises afin de faciliter le traitement de la réclamation. Une
fois le numéro d'autorisation reçu, expédiez le produit (port payé) à BAYCO •
640 S.SANDEN BLVD • WYLIE, TEXAS • 750 8. Incluez une brève description
du problème ainsi que vos coordonnées, en incluant le numéro de téléphone.
Le produit sera remplacé ou réparé, à la discrétion de Bayco, puis expédié dès
que possible, sans toutefois dépasser la limite de 45 jours après réception
chez Bayco.
RÉCL M TION U TITRE DE L G R NTIE – Canada
Retournez le produit ainsi qu'une preuve d'achat datée, une brève description
du problème et vos coordonnées, en incluant le numéro de téléphone, à
l'emplacement où il a été acheté. Le produit sera remplacé ou le prix d'achat
sera remboursé.
RÉCL M TION D' CTION EN G R NTIE
Si vous avez des questions au sujet de cette garantie ou au sujet des produits
Bayco, communiquez avec nous à l'adresse BAYCO, 640 S. SANDEN BLVD,
WYLIE (TEXAS), 750 8 ou par téléphone au 1 800 233-2155
Bayco Products, Inc. • 640 South Sanden Blvd. • Wylie, TX 750 8
1000 Vatios (2 x 500 vatios) Lampara de Haogeno
Para Tarbajo
Instrucciones importantes de seguridad
DVERTENCI : LE TENT MENTE L S INSTRUCCIONES
GU RDE EST S INSTRUCCIONES
PREC UCION: RIESGO DE DESC RG ELECTRIC :
•No utilizar con cable de extensión cerca del agua o donde el agua se
puede acumular.
•Mantener los enchufes y los recipientes secos.
•Para su uso en circuitos protegidos GFCI.
•Riesgo de quemaduras, no funcionan sin guardia. (Vea las instrucciones
de montaje.)
•Lámpara encendida está caliente. Mantener alejado de materiales
combustibles. Desenchufe para cambiar la bombilla. No toque la bombilla
DVERTENCI RIESGO DE INCENDIOS, EXPOSICIÓN L R DI CIÓN
UV EXCESIV O LESIONES PERSON S
•Esta unidad opera en 120V AC / 60Hz unicamente.
•Deconecte y espere que se refresque antes de reemplazar el bombillo.
•EI bombillo se calienta rapidamente.
•No toque el lente caliente. Proteccion o coborura.
•No permanezca en la luz si piel se siente tibia.
•No mire directamente a la lampra cuando esta encendida.
•Mantenga la iampara alejada de materiales que quemen.
•Uselo umicamente con bombillo de 500 Watts o un bombillo mas
pequeño utilice el tipo de bombilla T
•No toque el bombillo en ningun memento; utilice un pano suave o
guantes. EI aceite natural de la piel podria danar el bombiIlo.
•No opere la lampara si Ie faltara o estuviera danada la proteccion,
barrera de contencion de la lampara (o el filtro de la luz ultravioleta).
GU RDE EST S INSTRUCCIONES
DVERTENCI : Cuando las lamparas de trabajo son para uso exterior,
simples precauciones deben ser tomadas en cuenta para envitar el riesgo de
fuego, descarga elctrica, y lesiones personales, incluyendo las siguientes:
•Utilice solamente toma corriente de 3 cables para uso extemo y que
tenga enchiufe y receptaculo-a tierra de 3 puntas que sea compatible con
el enchufe del aparato.
•EI protector del interruptor de circuito de falla tierra (GFCI) debe estar
disponible en los circuito(s) o enchufe(s) cuando se utilice las lamparas
de trabajo en areas mojadas. Los recept:aculos estan disponibles con el
protector de circuito de falla a tierra (GFCI) incorporada y pueden ser
utilizados para esta medida de seguridad.
•Utilice cordones de extension ullicamente para uso externo, cordones de
extension o tipo de cordon tales como SW, SW-A, SOW, SOW-A, STW,
STW-A, STOW, STOW-A, SJW, SJW-A, SJOW, SJOW-A, STJW, STJW-
A, SJTOW, SJTOW-A.
INST L CION Y REEMPL ZO DE EL ROMBlLLO
NO TOQUE EL BOMBILLO SIN GU NTES
1. Apague la luz y desconectese de la energia central.
2. Asegurese que el accesorio esta completamente fresco antes de
proceder.
3. Siempre utilice guantes o un pano suave. cuando Irabaje can bombillos.
EI aceite natural del cuerpo despide un residuo que podria quemar el
bombillo de inmediato.
4. Para quitar la tapa del objetivo, quitar el tornillo de sujeción en la parte
posterior de la tapa del objetivo. La tapa del objetivo entonces abren la
exposición del bulbo.
5. Utilizando un pano suave o usando guantes para sostener el bombillo,
coloque suavemente un lado de el bombillo a el receptaculo y presione
firmemente para que quede en su lugar.
6. Cierre la cubierta que reemplaza el tornillo de retencion.
7. No pruebe la luz sin no tiene la cubierta instalada debidamente
DVERTENCI : LE TENT MENTE L S INSTRUCCIONES
GU RDE EST S INSTRUCCIONES
PREC UCION: RIESGO DE DESC RG ELECTRIC
POLÍTIC DE G R NTÍ
PRODUCTOS CUBIERTOS CONFORME EST G R NTÍ LIMIT D
Estos productos son garantizados al comprador original por 1 año y
únicamente cubren fallas debido a defectos en materiales o habilidad. Si este
producto es usado para objetivo de alquiler, el término de garantía es reducido
hasta 0 días de la fecha de la compra.
NO CUBIERTO
La garantía no cubre el desgaste normal o el daño cosmético. La Garantía
Limitada tampoco cubre daños que ocurrieron durante el embarque o fallas
causadas por accidentes, mal uso, abuso, instalación defectuosa y daño de
iluminación. Daños consiguientes, daños secundarios o gastos incidentes,
incluyendo daño a la propiedad. Algunos estados no permiten la exclusión o la
limitación de daños secundarios o consiguientes, de tal manera que dicha
limitación o la exclusión pueden no aplicar a usted. Esta garantía le da
derechos legales específicos, los cuales pueden variar de estado a estado.
RECL M CIONES DE G R NTÍ
Póngase en contacto con Bayco para reclamaciones de garantía. Llame al
800-233- 2155 y el Departamento de Servicio al Cliente de Bayco le
proporcionará una Autorización de Regreso de Mercancía (RGA) para facilitar
la acción de garantía rápida. Después de recibir la Autorización de Regreso de
Mercancía (RGA), envíe el producto (embarque prepagado) a BAYCO • 640 S.
SANDEN BLVD • WYLIE, TEXAS • 750 8. Incluya una prueba de compra
fechada y una breve descripción del defecto con su nombre, dirección y
número de teléfono. Su producto será ya sea reparado o
reemplazado a la opción de Bayco y será regresado tan pronto como sea
práctico, pero no después de 45 días de ser recibido por Bayco.
RECL M CIONES DE G R NTÍ - C N DÁ
Devuelva el producto al lugar donde lo compró con una prueba de compra
fechada y una breve descripción del defecto con su nombre, dirección y
número de teléfono. Su producto será ya sea reemplazado o el precio de
compra reembolsado.
SOLICITUD DE CCIÓN DE G R NTÍ
Por favor dirija todas las solicitudes para acción en esta garantía o cualquier
otra pregunta del producto a: BAYCO • 640 S. SANDEN BLVD • WYLIE,
TEXAS • 750 8 • llame al 800-233-2155
Bayco Products, Inc. • 640 South Sanden Blvd. • Wylie, TX 750 8
Model 1006 ssembly Instructions for
1000 Watt Halogen Tripod Light
1. Attach halogen light assemblies (A) to light bar (D) using light bar nob/bolt
(E)
2. Attach portable light handle (F) to light bar (D) using light bar knob/bolts
(G)
3. Fasten connection box (L) to portable light handle (F) using connection
box screw (M)
4. Slide support pole H into the base of tripod stand (J) and tighten tripod
stand knob/bolt (K)
5. Position light bar (D) on top of support pole (H) and attach with support
pole knob/bolt (I)
6. Snap grill guard cover (C) over the lens of the halogen light assembly (A).
Convert to portable light
•Remove support pole knob/bolt (I)
•Lift assembly at portable light handle (F) to separate the unit
Modele 1006 Fixez l'assemblage Léger
1000 Watt Halogènes Trépied
600 watt halogen light assembly
600 watts de lumière halogène
Halógena de 600 vatios conjunto de la luz
2
B
Light handle
Poignée Lumière
Manejar la luz
2
C
Grill guard
Grill gardes
Grill guardia
2
D
Light bar
Barre lumineuse
Bar Luz
1
E
Light bar knob/bolt
Lumière barre de bouton / vis
Luz bar botón / tornillo
2
F
Portable light handle
Gérer la lumière Portable
Manejar luz portátil
1
G
Portable light
bar
bolts
Portable boulons barre lumineusePortable
Pernos barra de luz
2
I
Support
pole
bolt / knob
Poteau de soutien de boulon / bouton
Apoyo polo perno / botón
1
J
Tripod stand
Trépied debout
Trípode
1
K
Tripod stand knob/bolt
Bouton Trépied / boulon
Trípode botón / tornillo
2
L
Connection box
Boîte de raccordement
Caja de conexión
1
M
Connection box screw
Vis de la boîte de connexion
Caja de conexión de tornillo
1
N
Spare bulb holder
Support de l'ampoule de rechange
Soporte de la bombilla de repuesto
1
Bayco Products, Inc. • 640 South Sanden Blvd. • Wylie, TX 750 8
1. Fixez assemblées Une lumière halogène pour éclairer bar (D) en utilisant
la lumière barres nob / boulon (E)
2. Fixez portables (F) Poignée de lumière à la lumière bar (D) avec le
bouton barre de lumière / boulons (G)
3. (L) Fixez la boîte de connexion à (F) voyant de la poignée portables en
utilisant la connexion boîte à vis de (M)
4. Faites glisser le soutien pôles (H) dans la base de (J) trépied et serrez
trépied bouton / boulon (K)
5. Barre lumineuse position (D) sur le dessus du mât porteur (H) et fixez-le
avec le bouton poteau de soutien / boulon (I)
6. Couvrir les gardes snap griller (C) sur la lentille de la lampe halogène de
montage (A)
Convertir à la lumière portative
•Enlevez le bouton poteau de soutien / Je vis
•Soulevez l'assemblage à (F) voyant de la poignée portative de séparer
l'unité
Modelo 1006Instrucciones de Montaje
1000 Vatios de Luz Halógeno Triopde
1. Coloque las asambleas de luz halógena (A) la luz de barras (D) con barra
de luz de nob / perno (E)
2. Adjuntar (F) portátil manejar la luz a la luz (D) bar con la perilla barra de
luz / tornillos (G).
3. Fije el cuadro de conexión (L) a (F) portátil manejar la luz con caja de
conexión de tornillo (M)
4. Deslice el apoyo poste (H) en la base del trípode (J) y apriete la perilla
trípode / perno (K)
5. Posición de la barra de luz (D) en la parte superior de apoyo poste (H) y
conectar con el mando de apoyo poste / (I) perno
6. Ajustar la parrilla de guardia (C) sobre la lente de la luz halógena
demontaje (A).
Convertir a la luz portátil
•Retire el mando del apoyo polo / perno que
•Levante el montaje en F portátil manejar la luz para separar la unidad
C UTION-RISK OF BURNS DO NOT OPER TE WITHOUT GRILL GU RD
INST LL TION INSTRUCTION OF GRILL GU RD
Step 1:
Unscrew the lens cover in order to have enough space to insert the grill guard
into the four corners around lens cover.
Step 2:
The grill guard must be inserted between the lens cover and glass lens
Step 3:
Screw the lens cover back on to light housing and tighten it gently
The light is ready for use.
TTENTION RISQUE DE BRULURES NE P S UTILISER S NS G RDE
GRILL
INSTRUCTIONS D'INST LL TION DE G RDE GRILL
Étape 1
Dévissez le capuchon de l'objectif afin d'avoir un espace suffisant pour insérer
la garde grill dans les quatre coins autour de couvre-objectif.
Étape 2
Le gardien de grille doit être inséré entre le couvercle d'objectif et lentille en
verre
Étape 3
Visser le couvercle sur l'objectif d'un logement de lumière et de le serrer
doucement
La lumière est prête à l'emploi.
.
PREC UCIÓN: RIESGO DE QUEM DUR S NO FUNCION N SIN
GU RDI GRILL
INST L CIÓN DE INSTRUCCIÓN DE GU RDI GRILL
Paso 1
Desenroscar la tapa del objetivo con el fin de tener un espacio suficiente para
introducir el protector en la parrilla de las cuatro esquinas de la tapa del
objetivo.
Paso 2
El protector de la parrilla debe ser insertado entre la cubierta del lente y el
lente de vidrio
Paso 3
Tornillo de la tapa del objetivo de nuevo en cubierta de la luz y apriete
suavemente
La luz está listo para su uso.
1
3
2

Other Bayco Work Light manuals

Bayco BAR-2372 User manual

Bayco

Bayco BAR-2372 User manual

Bayco UVR-9014 User manual

Bayco

Bayco UVR-9014 User manual

Bayco SL-2125 User manual
Bayco

Bayco SL-2125 User manual

Bayco Nightstick NSR 2166 Series User manual

Bayco

Bayco Nightstick NSR 2166 Series User manual

Bayco 918 User manual

Bayco

Bayco 918 User manual

Bayco Innovation Made Better SL-2135 User manual

Bayco

Bayco Innovation Made Better SL-2135 User manual

Bayco SL-864 User manual

Bayco

Bayco SL-864 User manual

Bayco SL-2135 User manual

Bayco

Bayco SL-2135 User manual

Bayco 675 User manual

Bayco

Bayco 675 User manual

Bayco SL-868 User manual

Bayco

Bayco SL-868 User manual

Bayco BAR-2372 User manual

Bayco

Bayco BAR-2372 User manual

Bayco 825 User manual

Bayco

Bayco 825 User manual

Bayco Night Stick NSP-1202 User manual

Bayco

Bayco Night Stick NSP-1202 User manual

Bayco 827 User manual

Bayco

Bayco 827 User manual

Bayco 2116 User manual

Bayco

Bayco 2116 User manual

Bayco SL-866 User manual

Bayco

Bayco SL-866 User manual

Bayco 2134 User manual

Bayco

Bayco 2134 User manual

Bayco SL-1022 User manual

Bayco

Bayco SL-1022 User manual

Bayco SL-1522 User manual

Bayco

Bayco SL-1522 User manual

Bayco CT-964 User manual

Bayco

Bayco CT-964 User manual

Bayco INS-1005-12 User manual

Bayco

Bayco INS-1005-12 User manual

Bayco SL-1514 User manual

Bayco

Bayco SL-1514 User manual

Bayco NightStick XPR-5580G User manual

Bayco

Bayco NightStick XPR-5580G User manual

Bayco 623 User manual

Bayco

Bayco 623 User manual

Popular Work Light manuals by other brands

ABC Home Lightings 15533 Assembly instruction

ABC Home Lightings

ABC Home Lightings 15533 Assembly instruction

Clarke SMD42T Assembly & user instructions

Clarke

Clarke SMD42T Assembly & user instructions

GreenWorks WL24B00 Operator's manual

GreenWorks

GreenWorks WL24B00 Operator's manual

BorMann HOME BRL8000 owner's manual

BorMann

BorMann HOME BRL8000 owner's manual

Larson Electronics EHL-LED-120X12V-XGFI Series instruction manual

Larson Electronics

Larson Electronics EHL-LED-120X12V-XGFI Series instruction manual

Daewoo DALL18-1 user manual

Daewoo

Daewoo DALL18-1 user manual

Klein Tools PowerHub instructions

Klein Tools

Klein Tools PowerHub instructions

VIPOW LED0200 owner's manual

VIPOW

VIPOW LED0200 owner's manual

Signaworks USB Tower Light manual

Signaworks

Signaworks USB Tower Light manual

Night Stick NSR-1516 instruction manual

Night Stick

Night Stick NSR-1516 instruction manual

ThePondguy LEDPro Rock Lights – 3 Pack Installation & maintenance

ThePondguy

ThePondguy LEDPro Rock Lights – 3 Pack Installation & maintenance

PowerSmith PWLD080T Operator's manual

PowerSmith

PowerSmith PWLD080T Operator's manual

CO/Tech JF8100-5-UK owner's guide

CO/Tech

CO/Tech JF8100-5-UK owner's guide

LIVARNO LUX 275248 Operation and safety notes

LIVARNO LUX

LIVARNO LUX 275248 Operation and safety notes

LIVARNO LUX 103745-14-01-BS Operation and safety notes

LIVARNO LUX

LIVARNO LUX 103745-14-01-BS Operation and safety notes

LIVARNO LUX 285386 Operation and safety notes

LIVARNO LUX

LIVARNO LUX 285386 Operation and safety notes

Festool SYSLITE STL 450 instruction manual

Festool

Festool SYSLITE STL 450 instruction manual

Schumacher Electric SL176 Series owner's manual

Schumacher Electric

Schumacher Electric SL176 Series owner's manual

manuals.online logo
manuals.online logoBrands
  • About & Mission
  • Contact us
  • Privacy Policy
  • Terms and Conditions

Copyright 2025 Manuals.Online. All Rights Reserved.