manuals.online logo
Brands
  1. Home
  2. •
  3. Brands
  4. •
  5. Bayco
  6. •
  7. Work Light
  8. •
  9. Bayco SL-1002 User manual

Bayco SL-1002 User manual

Bayco Products, Inc. • 640 South Sanden Blvd. • Wylie, TX 75098 • 1-800-233-2155 • 1-469-326-9400 • www.mybayco.comBayco Products, Inc. • 640 South Sanden Blvd. • Wylie, TX 75098 • 1-800-233-2155 • 1-469-326-9400 • www.mybayco.com
INS-1002-14
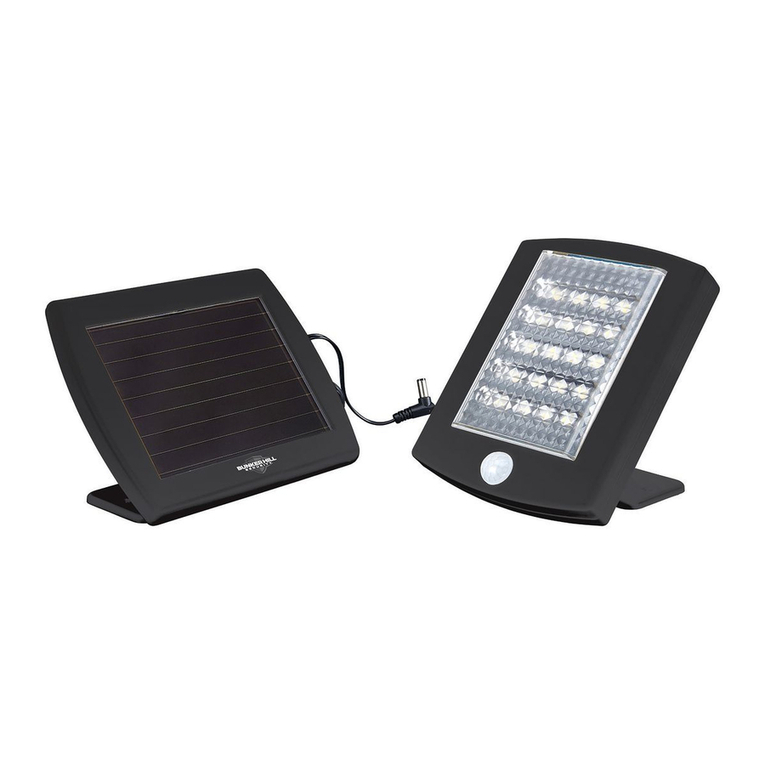
500 Watt Halogen Work Light
Important Safety Instructions
WARNING: Read all instructions carefully
SAVE THESE INSTRUCTIONS
CAUTION: RISK OF ELECTRICAL SHOCK
•Do not use with extension cord near water or where water may
accumulate.
•Keep plugs and receptacles dry.
•For use only on GFCI protected circuits.
•Risk of burns, do not operate without guard. (See assembly instructions.)
•Lighted lamp is hot. Keep away from combustibles. Unplug to change
bulb. Do not touch bulb
WARNING RISK OF FIRE, ELECTRIC SHOCK, EXPOSURE
TO EXCESSIVE UV RADIATION OR INJURY TO PERSONS
•Unit operates on 120V AC 60 Hz only
•Unplug and allow cooling before replacing bulb.
•Bulb gets HOT quickly
•Do not touch hot lens guard or enclosure.
•Do not remain in light if skin feels warm.
•Do not look directly at lighted lamp.
•Keep lamp away from materials that may bum.
•Use only with a 500 Watt or smaller type T bulb.
•Do not touch the bulb at any time; use a soft cloth or gloves. Oil from skin
may damage bulb.
•Do not operate the lamp with missing or damaged guard, lamp
containment barrier or UV light filter.
SAVE THESE INSTRUCTIONS
WARNING: When using outdoor use work lights, basic safety precautions
should always be followed to reduce the risk of fire, electrical shock, and
personal injury, including the following:
•Use only three-wire outdoor extension cords that have three-prong
grounding plug and receptacles that accept the appliance's plug.
•Ground Fault Circuit Interrupter (GFCl) protection should be provided on
the circuit(s) or outlet(s) to be used for the wet location work light.
Receptacles are available having built-in GFCI protection and are able to
be used for this measure of safety.
•Use only an extension cord for outdoor use, such as an extension cord of
cord type SW, SW-A, SOW, SOW -A. STW, STW-A, STOW. STOW-A.
SlW, SlW-A. SlOW. SlOW-A. SJTW. SJTW-A. or SJTOW, SJTOW-A.
BULB INSTALLATION AND REPLACEMENT
DO NOT TOUCH BULB WITH BARE HANDS
1. Turn the light off and unplug from the power source.
2. Allow the fixture to fully cool before proceeding.
3. Always wear gloves or use a clean cloth to handle bulb. The natural oil
from skin will leave a residue that will cause the light to burn out
immediately.
4. To remove the lens cover, remove the retaining screw on the front of the
lens cover. The lens cover will then swing open exposing the bulb.
5. To remove the bulb, grip one end of the bulb and gently push towards the
other end and pull outward to release the bulb.
6. Using a clean cloth or wearing gloves to hold the bulb, gently insert one
end of the bulb into the receptacle and press firmly into place. Place the
other end of the bulb into the opposite receptacle and gently press into
place. Make sure bulb is seated properly.
7. Close the lens cover and replace the retaining screw.
8. Do not test light without lens cover properly attached.
WARNING: Read all instructions carefully
SAVE THESE INSTRUCTIONS
CAUTION: RISK OF ELECTRICAL SHOCK
WARRANTY
1 YEAR WARRANTY
Bayco Products, Inc. warrants this product to be free from defects in workmanship and
materials to the original purchaser for 1 year from the date of purchase, and includes the
LEDs, housing, lenses, electronics, switches, rechargeable batteries and chargers. Bulbs
(other than LEDs) are covered for 90 days from the date of purchase.
We will repair or replace this product should we determine it to be defective. This is the
only warranty, expressed or implied, including any warranty of merchantability or fitness
for a particular purpose.
For a complete copy of the warranty, go to www.nightstick.com/nightstick-product-
support/warranties. Retain your receipt for proof of purchase.
For a complete copy of the warranty, go to www.baycoproducts.com/bayco-product-
support/warranties. Retain your receipt for proof of purchase.
500W Lampe de Travail Halogenes
Lire toutes les intructions attentivement
AVERTISSEMENT: LISEZ ATTENTIVEMENT TOUTES LES INSTRUCTIONS
CONSERVEZ CES INSTRUCTIONS
ATTENTION: RISQUE DE CHOC ELECTRIQUE
•Ne pas utiliser avec une rallonge pres d'un point d'eau ou d'accumulation
d 'cau
•Garder les fiches et les prises de courant seches
•Utiliser uniquement sur Ies circuits proteges GFCI
•Risques de brulures. Ne pas utiliser sans I 'entourage (voir les
instructions d'assemhlage)
•Risques d 'incendie / de blessurre. Tenir la lampe eloignee des
proudits combustibles Debrancher pour changer l' ampoule. Ne pas
toucher I' ampoule.
AVERTISSEMENT RISQUE D'INCENDIE, DE CHOC ÉLECTRIQUE,
EXPOSITION AU RAYONNEMENT UV EXCESSIVE OU DE BLESSURES
•Fonctionne sur du l20V AC / 60 HZ uniquement
•Debrancher et laisser refroidir avant de remplacer I' ampoule.
•L'ampoule devient CHAUDE rapidement
Bayco Products, Inc. • 640 South Sanden Blvd. • Wylie, TX 75098 • 1-800-233-2155 • 1-469-326-9400 • www.mybayco.comBayco Products, Inc. • 640 South Sanden Blvd. • Wylie, TX 75098 • 1-800-233-2155 • 1-469-326-9400 • www.mybayco.com
INS-1002-14
•Ne pas toucher la lentille, l’entourage le tout etant chaud.
•Ne pas rester dans la lumiere si la peau devient chaude au toucher.
•Ne pas reganrder la lampe allumee directement.
•Tenir la lampe eloignee des produits inflammables.
•Utiliser uniquement une ampoule de 500 Watts ou moins l'utilisation de
type T ampoule
•Ne jamais toucher ampoule, a aucun moment; utiliser un chiffon doux ou
des gants. Les huiles naturelles de la peau peuvent endommager la
lampe.
•Ne pas faire fonctionner la lampe si tout ou partie de l'entourage, du
boitier (ou du flltre lumiere UV) est mamquany ou abime.
CONSERVEZ CES INSTRUCTIONS
AVERTISSEMENT: Quand une lampe de travail pour usage exterieur est
utilisee, les precautions basiques de securite doivent toujours etre suivies pour
reduire Ie risque d' incendie, de choc electrique et de blessure sur soi ou
autrui.
•Utiliser uniquement des rallonges d'exterieur a triple fils qui ont des prises
de courant femelles qui acceptent la prise de I’apparell
•Le disjoncteur de terre (GFCI) doit eIre present sur Ie ci rcuil(s) ou la
prise(s) qui sera utilisee pour la lampe de location mouillee.Les prises de
courant avec Ie disjoncteur de terre inclus sont disponibles et peuvent
etre utilisees par mesure de securite.
•Uliliser uniquement une rallonge pour I'exterieur type: SW, SW-A, SOW,
SOW-A, STW, STW·A, STOW, STOW-A, SJW. SJW-A, SJTW, SJTW-A,
ou bien SJTOW, SJTOW-A.
INSTALLATION ET REMPLACEMENT DE L'AMPOULE
NE PAS TOUCHER L'AMPOULE A MAINS NUES
1. Eteindre la lumiere et debrancher la prise.
2. Laisser refroidir Ie lout completement avant de proceder
3. Toujours porter des gants ou utiliser un chiffon propre pour manipuler
I'ampoule. Les huiles naturelles de la peau Iaissent un residu qui fera
griller I'ampoule immediatement.
4. Pour retirer la lentille protectrice, devisser la vis de devant. La lentille
tounera alors, exposant I' ampoule.
5. Pour retirer I'ampoule, l'attraper, pousser doucement el ensuite tirer vers
l’exterieur pour la sortir.Utiliser un chiffon propre ou des gants pour tenir
l'ampoule, inserer doucement l'ampoule dans Ie receptacle et presser
6. Fermement pour mettre en place. Placer l' autre cote de I'ampoule dans
Ie receptacle oppose et presser doucement pour mettre en place.
S'assurer que I' ampoule est installe convenablement.
7. Fenner la lentille et revisser.
8. Ne pas tester la lumiere si la lentille n'est pas allachee correctement
AVERTISSEMENT: LISEZ ATTENTIVEMENT TOUTES LES INSTRUCTIONS
CONSERVEZ CES INSTRUCTIONS
ATTENTION: RISQUE DE CHOC ELECTRIQUE
GARANTIE
GARANTIE LIMITÉE DE 1 AN
Bayco Products, Inc. garantit que ce produit est exempt de défauts de matériaux et de
fabrication à l’acheteur original pour une période d’un (1) an à partir de la date d’achat, et
inclut les DEL, les boîtiers, les lentilles, les électroniques, les interrupteurs, les batteries
rechargeables et les chargeurs. Les ampoules (autres que les DEL) sont couvertes pour
une période de 90 jours à partir de la date d’achat.
Ce produit sera réparé ou remplacé si nous déterminons qu’il est défectueux. Ceci est la
seule garantie explicite ou implicite, y compris toute garantie de qualité marchande ou
d’adéquation à un usage particulier.
Pour une copie détaillée de la garantie, vous rendre sur le site
www.nightstick.com/nightstick-product-support/warranties. Gardez ce reçu comme
preuve d’achat.
Pour une copie détaillée de la garantie, vous rendre sur le site
www.baycoproducts.com/bayco-product-support/warranties. Gardez ce reçu comme
preuve d’achat.
500W Lampara de Halogeno Para Trabajo
Instrucciones importantes de seguridad
ADVERTENCIA: LEA ATENTAMENTE LAS INSTRUCCIONES
GUARDE ESTAS INSTRUCCIONES
PRECAUCION: RIESGO DE DESCARGA ELECTRICA:
•No utilizar con cable de extensión cerca del agua o donde el agua se
puede acumular.
•Mantener los enchufes y los recipientes secos.
•Para su uso en circuitos protegidos GFCI.
•Riesgo de quemaduras, no funcionan sin guardia. (Vea las instrucciones
de montaje.)
•Lámpara encendida está caliente. Mantener alejado de materiales
combustibles. Desenchufe para cambiar la bombilla. No toque la bombilla
ADVERTENCIA RIESGO DE INCENDIOS, EXPOSICIÓN A LA
RADIACIÓN UV EXCESIVA O LESIONES A PERSONAS
•Esta unidad opera en 120V AC / 60Hz unicamente.
•Deconecte y espere que se refresque antes de reemplazar el bombillo.
•EI bombillo se calienta rapidamente.
•No toque el lente caliente. Proteccion o coborura.
•No permanezca en la luz si piel se siente tibia.
•No mire directamente a la lampra cuando esta encendida.
•Mantenga la iampara alejada de materiales que quemen.
•Uselo umicamente con bombillo de 500 Watts o un bombillo mas
pequeño utilice el tipo de bombilla T
•No toque el bombillo en ningun memento; utilice un pano suave o
guantes. EI aceite natural de la piel podria danar el bombiIlo.
•No opere la lampara si Ie faltara o estuviera danada la proteccion,
barrera de contencion de la lampara (o el filtro de la luz ultravioleta).
GUARDE ESTAS INSTRUCCIONES
ADVERTENCIA: Cuando las lamparas de trabajo son para uso exterior,
simples precauciones deben ser tomadas en cuenta para envitar el riesgo de
fuego, descarga elctrica, y lesiones personales, incluyendo las siguientes:
•Utilice solamente toma corriente de 3 cables para uso extemo y que
tenga enchiufe y receptaculo-a tierra de 3 puntas que sea compatible con
el enchufe del aparato.
•EI protector del interruptor de circuito de falla tierra (GFCI) debe estar
disponible en los circuito(s) o enchufe(s) cuando se utilice las lamparas
de trabajo en areas mojadas. Los recept:aculos estan disponibles con el
protector de circuito de falla a tierra (GFCI) incorporada y pueden ser
utilizados para esta medida de seguridad.
•Utilice cordones de extension ullicamente para uso externo, cordones de
extension o tipo de cordon tales como SW, SW-A, SOW, SOW-A, STW,
STW-A, STOW, STOW-A, SJW, SJW-A, SJOW, SJOW-A, STJW, STJW-
A, SJTOW, SJTOW-A.
INSTALACION Y REEMPLAZO DE EL ROMBlLLO
NO TOQUE EL BOMBILLO SIN GUANTES
1. Apague la luz y desconectese de la energia central.
2. Asegurese que el accesorio esta completamente fresco antes de
proceder.
3. Siempre utilice guantes o un pano suave. cuando Irabaje can bombillos.
EI aceite natural del cuerpo despide un residuo que podria quemar el
bombillo de inmediato.
4. Para remover la cubierta de lente, remueva el tornillo de retencion en el
frente de la cubierta. La cubierta del lente se abrira y expondra el
bombillo.
Bayco Products, Inc. • 640 South Sanden Blvd. • Wylie, TX 75098 • 1-800-233-2155 • 1-469-326-9400 • www.mybayco.comBayco Products, Inc. • 640 South Sanden Blvd. • Wylie, TX 75098 • 1-800-233-2155 • 1-469-326-9400 • www.mybayco.com
INS-1002-14
5. Para remover el bombillo, agarre un lado del bombillo y empuje
suavemente hacia el frente el otro lado y tire hacia afuera para remover
el bombillo.
6. Utilizando un pano suave o usando guantes para sostener el bombillo,
coloque suavemente un lado de el bombillo a el receptaculo y presione
firmemente para que quede en su lugar.
7. Cierre la cubierta que reemplaza el tornillo de retencion.
8. No pruebe la luz sin no tiene la cubierta instalada debidamente
ADVERTENCIA: LEA ATENTAMENTE LAS INSTRUCCIONES
GUARDE ESTAS INSTRUCCIONES
PRECAUCION: RIESGO DE DESCARGA ELECTRICA:
GARANTÍA
GARANTÍA LIMITADA DE 1 AÑO
Bayco Products, Inc. garantiza que este producto está libre de defectos de mano de obra
y materiales para el comprador original durante un año a partir de la fecha de compra e
incluye los LED, la carcasa, los lentes, la electrónica, los interruptores, las pilas
recargables y los cargadores. Las bombillas (excepto los LED) están cubiertas durante
90 días a partir de la fecha de compra.
Repararemos o reemplazaremos este producto si lo determinamos como defectuoso.
Esta es la única garantía, expresa o implícita, incluyendo cualquier garantía de
comerciabilidad o idoneidad para un propósito particular.
Para obtener una copia completa de la garantía, visite www.nightstick.com/nightstick-
product-support/warranties. Conserve su recibo para comprobar la compra.
Para obtener una copia completa de la garantía, visite www.baycoproducts.com/bayco-
product-support/warranties. Conserve su recibo para comprobar la compra.
Model 1002 Assembly Instructions for
Single 500 Watt Halogen Light
A – Grill guard
B – Stand
C – Light assembly knob
D – Handle assembly
E – Tilt-adjustment screws
1. Attach 500 Watt halogen light assembly.
2. Slide handle assembly (D) into stand (B)
3. Secure by tightening light assembly knob (C)
4. Snap grill guard (A) over the light lens
5. Tighten 2 tilt-adjustment screws (E)
Modele 1002 Fixez l'assemblage Léger
Seule 500 Watt Halogènes
A- Grill gardes
B - Debout
C - Bouton assemblage léger
D - Poignée assemblee
E- Inclinez-vis de réglage
1. Fixez l'assemblage léger 500 watts halogène.
2. Coulisser ensemble de poignée (D) dans le support (B)
3. Serrez la lumière de l'Assemblée le bouton (C)
4. Aligner la garde grill (A) sur la lentille de lumière
5. Serrer deux vis de réglage d'inclinaison (E)
Modelo 1002 Instrucciones de Montaje
Solo 500 Vatios de Luz Halógena
A - Grill guardia
B - Stand
C - el mando conjunto de la Luz
D - El conjunto de mango
E - Ajuste de la inclinación-tornillos
1
2
3
Bayco Products, Inc. • 640 South Sanden Blvd. • Wylie, TX 75098 • 1-800-233-2155 • 1-469-326-9400 • www.mybayco.comBayco Products, Inc. • 640 South Sanden Blvd. • Wylie, TX 75098 • 1-800-233-2155 • 1-469-326-9400 • www.mybayco.com
INS-1002-14
1. Adjuntar 500 Watt halógeno conjunto de la luz.
2. Deslice el conjunto del mango (D) en el soporte (B)
3. Asegúrela apretando el mando conjunto de la luz (C)
4. Ajustar la parrilla de guardia (A) sobre la lente de la luz
5. Apretar 2 tornillos de ajuste de la inclinación (E)
CAUTION-RISK OF BURNS DO NOT OPERATE WITHOUT GRILL GUARD
INSTALLATION INSTRUCTION OF GRILL GUARD
Step 1:
Unscrew the lens cover in order to have enough space to insert the grill guard
into the four corners around lens cover.
Step 2:
The grill guard must be inserted between the lens cover and glass lens
Step 3:
Screw the lens cover back on to light housing and tighten it gently
The light is ready for use.
ATTENTION RISQUE DE BRULURES NE PAS UTILISER SANS GARDE
GRILL
INSTRUCTIONS D'INSTALLATION DE GARDE GRILL
Étape 1
Dévissez le capuchon de l'objectif afin d'avoir un espace suffisant pour insérer
la garde grill dans les quatre coins autour de couvre-objectif.
Étape 2
Le gardien de grille doit être inséré entre le couvercle d'objectif et lentille en
verre
Étape 3
Visser le couvercle sur l'objectif d'un logement de lumière et de le serrer
doucement
La lumière est prête à l'emploi.
.
PRECAUCIÓN: RIESGO DE QUEMADURAS NO FUNCIONAN SIN
GUARDIA GRILL
INSTALACIÓN DE INSTRUCCIÓN DE GUARDIA GRILL
Paso 1
Desenroscar la tapa del objetivo con el fin de tener un espacio suficiente para
introducir el protector en la parrilla de las cuatro esquinas de la tapa del
objetivo.
Paso 2
El protector de la parrilla debe ser insertado entre la cubierta del lente y el
lente de vidrio
Paso 3
Tornillo de la tapa del objetivo de nuevo en cubierta de la luz y apriete
suavemente
La luz está listo para su uso.

Other Bayco Work Light manuals

Bayco INS-1005-12 User manual

Bayco

Bayco INS-1005-12 User manual

Bayco 2134 User manual

Bayco

Bayco 2134 User manual

Bayco SL-1006 User manual

Bayco

Bayco SL-1006 User manual

Bayco 506-507-520-550 User manual

Bayco

Bayco 506-507-520-550 User manual

Bayco UVR-9014 User manual

Bayco

Bayco UVR-9014 User manual

Bayco SL-868 User manual

Bayco

Bayco SL-868 User manual

Bayco SL-2135 User manual

Bayco

Bayco SL-2135 User manual

Bayco SL-866 User manual

Bayco

Bayco SL-866 User manual

Bayco BAR-2372 User manual

Bayco

Bayco BAR-2372 User manual

Bayco 908 User manual

Bayco

Bayco 908 User manual

Bayco Nightstick NSR 2166 Series User manual

Bayco

Bayco Nightstick NSR 2166 Series User manual

Bayco SL-1512 User manual

Bayco

Bayco SL-1512 User manual

Bayco SL-864 User manual

Bayco

Bayco SL-864 User manual

Bayco Innovation Made Better SL-2135 User manual

Bayco

Bayco Innovation Made Better SL-2135 User manual

Bayco 9000 User manual

Bayco

Bayco 9000 User manual

Bayco SL-1003 User manual

Bayco

Bayco SL-1003 User manual

Bayco Nightstick 2166 User manual

Bayco

Bayco Nightstick 2166 User manual

Bayco BAR-2372 User manual

Bayco

Bayco BAR-2372 User manual

Bayco 2116 User manual

Bayco

Bayco 2116 User manual

Bayco 675 User manual

Bayco

Bayco 675 User manual

Bayco 623 User manual

Bayco

Bayco 623 User manual

Bayco SL-866 User manual

Bayco

Bayco SL-866 User manual

Bayco Night Stick NSP-1202 User manual

Bayco

Bayco Night Stick NSP-1202 User manual

Bayco SL-1022 User manual

Bayco

Bayco SL-1022 User manual

Popular Work Light manuals by other brands

Elation Artiste REMBRANDT user manual

Elation

Elation Artiste REMBRANDT user manual

Staudte SH-5.100 instruction manual

Staudte

Staudte SH-5.100 instruction manual

Parkside PAL 2200 A1 manual

Parkside

Parkside PAL 2200 A1 manual

TaoTronics TT-DL069 user guide

TaoTronics

TaoTronics TT-DL069 user guide

Sirena E-LITE INSTALLATION AND APPLICATION INSTRUCTIONS

Sirena

Sirena E-LITE INSTALLATION AND APPLICATION INSTRUCTIONS

OSA Opto OLM-034 Air Series manual

OSA Opto

OSA Opto OLM-034 Air Series manual

NOMA 052-9322-6 instruction manual

NOMA

NOMA 052-9322-6 instruction manual

Performance Tool W2251 owner's manual

Performance Tool

Performance Tool W2251 owner's manual

Pro-Elec PELL0017 quick start guide

Pro-Elec

Pro-Elec PELL0017 quick start guide

BATO 6536 instruction manual

BATO

BATO 6536 instruction manual

Schwaiger ALK25 user guide

Schwaiger

Schwaiger ALK25 user guide

REV Ritter JR0410MR Instructions for installation and use

REV Ritter

REV Ritter JR0410MR Instructions for installation and use

BENEITO FAURE KORA 25W LED Instructions for use

BENEITO FAURE

BENEITO FAURE KORA 25W LED Instructions for use

Marmitek Glow XSE manual

Marmitek

Marmitek Glow XSE manual

SP tools SP81456 user manual

SP tools

SP tools SP81456 user manual

Surtek 136108 quick start guide

Surtek

Surtek 136108 quick start guide

ATD Tools Saber ATD-80365 owner's manual

ATD Tools

ATD Tools Saber ATD-80365 owner's manual

Forch 5424 10 instructions

Forch

Forch 5424 10 instructions

manuals.online logo
manuals.online logoBrands
  • About & Mission
  • Contact us
  • Privacy Policy
  • Terms and Conditions

Copyright 2025 Manuals.Online. All Rights Reserved.