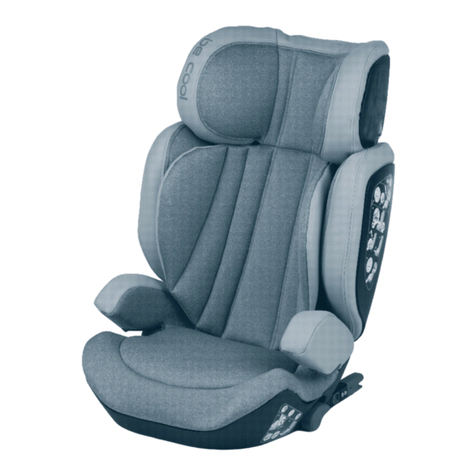
Be Cool PickUp User manual

INSTRUCCIONES
GEBRAUCHSANWEISUNG
INSTRUÇÕES
INSTRUCTIONS
INSTRUCTIONS
ISTRUZIONI
•
•
•
GRUPO II+III
15-36 KG

2
E
ADVERTENCIA
•Precaución: Nunca deje a su hijo solo en el coche.
•Precaución: Las alteraciones o incorporaciones realizadas a la silla
Pick Up sin la autorización adecuada de BE COOL pueden dar lugar a
daños o lesiones.
•Precaución: No seguir las instrucciones atentamente para garantizar el
uso correcto del sistema de control puede ser peligroso para el niño.
•Precaución: La silla Pick Up no se puede utilizar sin la funda, ni se puede
cambiar esta por otra que no sea la original, ya que forma parte de las
funciones de seguridad del sistema.
•Precaución: No pasar los cinturones como se muestra en las instrucciones
puede ser extremadamente contraproducente y peligroso.
•Precaución: Después de un accidente, la silla Pick Up no se puede seguir
utilizando. Aunque pueda parecer que no presente daños, es posible
que en otro accidente no proporcione la misma protección que original-
mente.
RECOMENDACIONES Y MANTENIMIENTO
•Conserve este libro de instrucciones para futuras consultas. .
•Mantenga siempre este libro de instrucciones en el compartimento
situado bajo la base de la silla para el coche.
•Asegúrese de que el equipaje u otros objetos sueltos estén correcta-
mente sujetos o almacenados. Incluso los elementos pequeños pueden
provocar lesiones en las colisiones.
•La silla para el coche Pick Up se debe sujetar debidamente con los cin-
turones de seguridad, incluso cuando no se utilice. En caso de acciden-
te, una silla sin sujetar puede provocar lesiones.
•Recuerde no utilizar la silla Pick Up en el asiento delantero de los vehícu-
los con AIRBAG DELANTEROS, a menos que se puedan desconectar o
desactivar.
•Compruebe con su fabricante o vendedor la presencia de airbags en el
asiento del copiloto.
•Asegúrese de que la silla Pick Up no quede atrapada entre los asientos
plegados o las puertas del coche.
•No exponga la funda a la luz del sol durante largos periodos de
tiempo y mientras no utilice la silla, cúbrala o guárdela en el maletero
del vehículo.
•Lave las piezas de plástico con agua caliente y jabón, y séquelas bien.

3
GB
WARNING
•Caution:Neverleaveyourchildunattendedinthecar.
•Caution:AnyalterationsoradditionsmadetothePickUpcarseat
without the proper authorisation of BE COOL may result in damage
or injury.
•Caution:Failuretofollowtheinstructionscarefullytoensurethe
correct usage of the restraining system may be dangerous to the child.
•Caution:ThePickUpcarseatcannotbeusedwithoutitscover,orhave
its cover replaced with another that is not the original, as it forms
an integral part of the safety features of the system.
•Caution:Notthreadingthebeltsasshownintheinstructionsmay
be extremely counterproductive and dangerous.
•Caution:Afteranaccident,thePickUpcarseatcannotcontinue
to be used. Although it may look undamaged, in another accident the
seat may not be able to provide the same protection as it would do
originally.
RECOMMENDATIONS AND MAINTENANCE
•Keep this instruction book for future consultation.
•Always keep this instruction book in the compartment under the car
seat’s base.
•Ensure that any luggage or other loose objects are properly secured or
stored away. Even small items can cause injuries in collisions.
•The Pick Up car seat must be duly fastened with the safety belts, even
when not in use. In the event of an accident, an unsecured car seat can
cause injuries.
•Remember not to use the Pick Up car seat in the front seat of vehicles
with front AIR BAGS, unless they can be disconnected or deactivated .
•Please check with your manufacturer or dealer about the presence of
front passenger-side air bags.
•Ensure that the Pick Up car seat is not caught between folding seats or
car doors.
•Do not expose the cover to sunlight for prolonged periods, and while
the seat is not in use cover it or store in the boot of the vehicle.
•Wash plastic parts with warm, soapy water and dry thoroughly.

4
D
HINWEIS
•Vorsicht: Lassen Sie Ihr Kind nie allein im Auto.
•Vorsicht: Am Pick Up-Sitz durchgeführte Veränderungen oder Einfügun-
gen ohne passende Genehmigung von BE COOL können zu Schäden
oder Verletzungen führen.
•Vorsicht: Die nicht sorgfältige Einhaltung der Anweisungen, um die rich-
tige Verwendung des Kontrollsystems zu gewährleisten, kann Ihr Kind
gefährden.
•Vorsicht: Der Pick Up-Sitz darf nicht ohne Bezug verwendet und auch
nicht durch einen anderen, nicht originalen, ersetzt werden, da er zu den
Sicherheitsfunktionen des Systems gehört.
•Vorsicht: Ein Abweichen von der in den Anweisungen gezeigten Gurt-
führung kann extrem kontraproduktiv und gefährlich sein.
•Vorsicht: Nach einem Unfall darf der Pick Up-Sitz nicht weiter verwendet
werden. Obwohl er unbeschädigt zu sein scheint, ist es möglich, dass
er bei einem weiteren Unfall nicht mehr den gleichen Schutz wie zuvor
bietet.
EMPFEHLUNGENUNDPFLEGE
•Bewahren Sie diese Bedienungsanleitung für zukünftige Nachfragen auf.
•Bewahren Sie diese Bedienungsleitung immer im sich unter der Basis
desAutokindersitzesbendendenFachauf.
•Stellen Sie sicher, dass das Gepäck oder andere lose Gegenstände
immer richtig befestigt oder gelagert sind. Insbesondere kleine Teile
können beim Aufprall Verletzungen verursachen.
•Der Autokindersitz Pick Up muss mit den Sicherheitsgurten ordnungs-
gemäß befestigt werden, auch wenn er nicht verwendet wird. Bei einem
Unfall kann ein unbefestigter Sitz Verletzungen verursachen.
•DenkenSiedaran,denPickUp-SitznichtaufdemVordersitzvonFahr-
zeugenmitFRONTAIRBAGSzuverwenden,wennsienichtabgeschaltet
oder deaktiviert werden können. Überprüfen Sie mit Ihrem Hersteller
oder Verkäufer das Vorhandensein von Airbags im Beifahrersitz.
•Stellen Sie sicher, dass der Pick Up-Sitz nicht zwischen den zurückge-
klappten Sitzen oder den Autotüren eingeklemmt wird.
•Setzen Sie den Bezug nicht lange Zeit dem Sonnenlicht aus und decken
Sie den Sitz ab oder bewahren Sie ihn im Kofferraum auf, wenn Sie ihn
nicht verwenden.
•Waschen Sie die Kunststoffteile mit heißem Wasser und Seife und trock-
nen Sie sie gut ab.

5
F
AVERTISSEMENTS
•Précaution : ne laissez jamais votre enfant seul dans la voiture.
•Précaution : les modifications ou ajouts effectués sur le siège rehausseur
Pick Up sans l’autorisation de BE COOL peuvent provoquer des dom-
mages ou des risques de blessures.
•Précaution : le non-respect des instructions visant à garantir la bonne
utilisation du système de contrôle peut être dangereux pour l’enfant.
•Précaution : le siège rehausseur Pick Up ne peut pas être utilisé sans la
housse. Il ne faut pas la remplacer car elle fait partie des éléments de
sécurité du système.
•Précaution : le fait de ne pas passer les ceintures de sécurité selon les
indications peut être contre-productif et dangereux.
•Précaution : après un accident, le siège rehausseur ne doit plus être
utilisé. Même s’il ne présente aucun dommage apparent, il peut ne pas
apporter la même protection qu’auparavant en cas de nouvel accident.
RECOMMANDATIONS ET ENTRETIEN
•Veuillez conserver la notice pour toute consultation ultérieure.
•Conservez toujours la notice dans le compartiment situé sous la base du
siège rehausseur.
•Assurez-vous que les bagages et les autres objets soient bien attachés
ou convenablement rangés. Les petits objets peuvent provoquer des
blessures en cas de collisions.
•Le siège rehausseur Pick Up doit être correctement attaché à l’aide des
ceintures de sécurité même s’il n’est pas utilisé. En cas d’accident, un siège
rehausseur qui n’est pas attaché peut entraîner un risque de blessures.
•Rappelez-vous de ne pas utiliser le siège rehausseur Pick Up sur le siège
avant des véhicules équipés d’AIRBAG AVANT sauf ci ce dernier a été
débranché.
•Vérifiez la présence d’airbags sur le siège du passager avant avec votre
fabricant ou vendeur.
•Assurez-vous que le siège rehausseur Pick Up ne soit pas coincé entre
des sièges qui ont été basculés ou dans les portes de la voiture.
•Évitez d’exposer la housse au soleil lors de périodes prolongées et si
vous n’utilisez pas le siège rehausseur, couvrez-le ou rangez-le dans votre
coffre.
•Nettoyez les parties en plastique à l’eau chaude et au savon puis séchez-
les correctement.

6
P
ADVERTÊNCIAS
•Precaução: Nunca deixe o seu filho sozinho no carro.
•Precaução: As alterações ou incorporações realizadas na cadeira Pick
Up sem a autorização adequada da BE COOL podem dar lugar a danos
ou lesões.
•Precaução: Não seguir as instruções atentamente de modo a garantir o
uso correto do sistema de controlo pode ser perigoso para a criança.
•Precaução: A cadeira Pick Up não pode ser utilizada sem a fronha, nem
se pode trocar esta por outra que não seja a original, já que forma parte
das funções de segurança do sistema.
•Precaução: Não passar os cintos como se mostra nas instruções pode
ser extremamente contraproducente e perigoso.
•Precaução: A cadeira Pick Up não se pode continuar a ser utilizada de-
pois de um acidente. Ainda que aparentemente não apresente danos,
é possível que noutro acidente não proporcione a mesma proteção que
no início.
RECOMENDAÇÕES E MANUTENÇÃO
•Conserve este livro de instruções para futuras consultas.
•Mantenha sempre este livro de instruções no compartimento situado
sob a base da cadeira.
•Certifique-se de que a bagagem ou outros objetos soltos estão correta-
mente seguros ou guardados. Os pequenos elementos também podem
provocar lesões nas colisões.
•A cadeira para o carro Pick Up deve ir devidamente presa com os cintos
de segurança, incluindo quando não se use. Em caso de acidente, uma
cadeira que não esteja presa pode provocar lesões.
•Lembre-se de não utilizar a cadeira Pick Up no assento dianteiro dos
veículos com AIRBAG DIANTEIROS, a menos que se possam
desconectar ou desativar.
•Comprove com o seu fabricante ou vendedor a presença de airbags no
assento do copiloto.
•Assegure-se de que a cadeira Pick Up não fique entalada entre os as-
sentos dobrados ou entre as portas do carro.
•Não exponha a fronha à luz do sol durante longos períodos de tempo;
quando não estiver a utilizar a cadeira cubra-a ou guarde-a no porta-
-bagagens do veículo.
•Lave as peças de plástico com água quente e sabão, secando-as bem.

7
I
AVVERTENZA
•Precauzione: Non lasciare mai il bambino da solo in auto.
•Precauzione: Le modifiche o aggiunte realizzate sul seggiolino Pick Up
senza la relativa autorizzazione di BE COOL possono provocare danni o
lesioni.
•Precauzione: Non seguire le istruzioni attentamente per garantire l’uso
corretto del sistema di controllo può essere pericoloso per il bambino.
•Precauzione: Il seggiolino Pick Up non può essere utilizzato senza il suo
rivestimento, e questo non può essere cambiato con un altro diverso
dall’originale, dato che fa parte delle funzioni di sicurezza del sistema.
•Precauzione: Non posizionare le cinture come indicato nelle istruzioni
può essere estremamente controproducente e pericoloso.
•Precauzione: Dopo un incidente il seggiolino Pick Up non può più essere
utilizzato. Anche se all’apparenza non presenta danni, è possibile che
in caso di un altro incidente non fornisca la stessa protezione che nelle
condizioni originarie.
RACCOMANDAZIONI E MANUTENZIONE
•Conservare il presente libretto di istruzioni per consultazioni future.
•Mantenere sempre il presente libretto di istruzioni nello scompartimen-
to che si trova sotto la base del seggiolino per auto.
•Assicurarsi che i bagagli o altri oggetti liberi siano correttamente fissati
o riposti. Anche gli elementi piccoli possono provocare lesioni in caso di
collisione.
•Il seggiolino per auto Pick Up deve essere fissato correttamente con le
cinture di sicurezza anche quando non viene utilizzato. In caso di inci-
dente un seggiolino non fissato può provocare lesioni.
•Ricordare di non utilizzare il seggiolino Pick Up sul sedile anteriore
dei veicoli con AIRBAG ANTERIORI, a meno che non si possano
disconnettere o disattivare.
•Verificare con il fabbricante o il venditore la presenza di airbag sul sedile
dell’accompagnatore.
•Assicurarsi che il seggiolino Pick Up non rimanga bloccato tra i sedili
piegati o le portiere dell’auto.
•Non esporre il rivestimento alla luce del sole per lunghi periodi di tempo
e quando il seggiolino non viene utilizzato coprirlo o riporlo nel bagagliaio
dell’auto.
•Lavare le parti in plastica con acqua calda e sapone e asciugarle bene.

8
1
2
3
4
5
6
7
8

9
1. Low back rest
2. Armrest
3. Seat cushion
4. Base
5. Belt guide (for lap belt use)
6. Isofix ajuster button
7. Isofix anchors
8. Instruction manual storage
1. Respaldo bajo
2. Reposabrazos
3. Cojín
4. Base
5. Guía del cinturón (para cinturón abdominal)
6. Botón del adaptador Isofix
7. Anclajes Isofix
8. Almacenamiento para el manual de instrucciones
1. Niedrige Rückenlehne
2. Armlehne
3. Polster
4. Basis
5. Gurtführung (für den Beckengurt)
6. Knopf des Isofix-Adapters
7. Isofix-Befestigungen
8. Platz für Bedienungsanleitung
1. Encosto baixo
2. Apoio para os braços
3. Almofada
4. Base
5. Guia do cinto (para cinto abdominal)
6. Botão do adaptador Isofix
7.FixaçõesIsox
8. Compartimento para o manual de instruções
1. Dossier
2. Accoudoirs
3. Coussin
4. Base
5. Guide de la ceinture (pour ceinture abdominale)
6. Manette de l’adaptateur Isofix
7. Ancrages Isofix
8. Compartiment pour conserver la notice
1. Schienale basso
2. Braccioli
3. Cuscino
4. Base
5. Guida della cintura (per cintura addominale)
6. Pulsante adattatore Isofix
7. Ancoraggi Isofix
8. Scompartimento per il manuale di istruzioni
E
D
PT IT
GB
FR

10
Figure 1. Forward facing
installation
Figure 2. Positioning
in the car
Figure 5
Figure 6 Figure 7 Figure 8
Figure 3 Figure 4

11
Figure 9
Figure 11
Figure 12
Figure 10
Figure 13

12
E
1
INTRODUCCIÓN
La silla de seguridad Pick Up está diseñada
para su instalación en la mayor parte de ve-
hículos equipados con los puntos de anclaje
Isofix, siempre junto con los cinturones de
seguridad del coche. Si desea comprobar la
compatibilidad con su vehículo, consulte la
Lista de compatibilidad.
Importante: De acuerdo con la clasificación
europea, la silla de seguridad Pick Up es una
silla semiuniversal, lo que significa que solo se
debe usar en los vehículos indicados en la Lis-
ta de compatibilidad.
LEA ESTE MANUAL ATENTAMENTE ANTES
DEL USO Y CONSÉRVELO PARA FUTURAS
REFERENCIAS
Información del producto
Esta silla de seguridad ha sido diseñada y pro-
bada para cumplir con las últimas normas eu-
ropeas para las sillas de seguridad del Grupo
2 y 3.
Se ha diseñado para niños que pesen de 15 a
36 kg, de aproximadamente 4 a 11 años.
Todas las edades proporcionadas son aproxi-
madas ya que cada niño crece de forma dife-
rente. Sin embargo, los pesos proporcionados
son la principal cuestión de seguridad.
Para mejorar la seguridad de su hijo, la silla de
seguridad Pick Up cuenta con:
-Conectores ISOFIX, para adaptar los puntos
de anclaje Isofix.
-Guías de cinturón para los cinturones de se-
guridad de asientos de adultos.
-Respaldo bajo para apoyo lumbar.
Información general
Para proteger a su hijo de forma adecuada y
asegurarse de que está cómodo y seguro en
el coche, debe seguir las siguientes instruc-
ciones:
-La silla de seguridad Pick Up ha sido diseña-
da para instalarse tanto en la parte delantera
como trasera del coche, siempre que dispon-
ga de cinturones de seguridad de tres pun-
tos y que NO HAYA AIRBAG DELANTERO. A
pesar de ello, le recomendamos encarecida-
mente que instale la silla de seguridad Pick Up
solamente en los asientos traseros, ya que así
se garantiza la máxima seguridad.
Figura 1. Instalación hacia delante
Figura 2. Colocación en el coche
Solamente válido para coches con cinturones
de seguridad automáticos de tres puntos,
aprobados de acuerdo con la norma ECE-16 u
otras normas equivalentes (Figura 3).
NO la utilice con un cinturón de seguridad de
dos puntos (Figura 4). Son muy peligrosos si
frena de repente y en caso de accidente.
-En algunos coches, el cierre del cinturón de
seguridad puede estar en una posición muy
alta y puede entrar en contacto con el borde
de la silla, haciendo que esta posición no sea
segura. En este caso, intente mover la silla del
coche Pick Up hacia delante o instálela en un
asiento diferente. Si tiene dudas, póngase en
contacto con su distribuidor local.
-No todos los sistemas de seguridad son
exactamente iguales, así que le recomenda-
mos que, siempre que sea posible, pruebe
primero la silla Pick Up en el coche.
-Es muy importante que no utilice productos
de segunda mano, ya que BE COOL solamen-
te puede garantizar la seguridad completa
para los artículos utilizados por el comprador
inicial.
-BE COOL recomienda que cambie la silla de
seguridad Pick Up por una nueva si ya ha sufri-
do algún accidente.
-Cerciórese de que todos los cinturones se en-
cuentren en la posición correcta y de que no
estén enroscados.
Asegúrese de que el niño comprende que no

13
E
debe tocar los cinturones ni los cierres bajo
ninguna circunstancia.
-La silla Pick Up se ha diseñado para su uso
solamente en vehículos de pasajeros y no se
debe utilizar en ningún otro lugar.
-Para obtener más información sobre cómo
usar e instalar la silla Pick Up, póngase en con-
tacto con su distribuidor o tienda local.
Instalación
Instalación de la silla de seguridad para niños
que pesan de 15 a 36 kg.
Fije la silla de seguridad Pick Up en los puntos
de anclaje Isofix del coche.
Nota: La norma de seguridad Isofix se ha de-
sarrollado para garantizar un cierre sencillo
y seguro de los sistemas de control del niño
en los vehículos de pasajeros. No todos los
coches cuentan con puntos de anclaje Isofix,
aunque cada vez son más comunes. Consulte
la lista adjunta de coches en la que se ha ve-
rificado que se puede instalar correctamente
en los asientos Isofix.
1. Si su vehículo cuenta con puntos de an-
claje Isofix, se deben usar para obtener una
instalación más estable.
Estos coches tendrán elementos de plástico
que sirven de guía para que los anclajes Isofix
de la silla se adapten en la posición correcta.
Si su vehículo no tiene estos elementos guía,
puede usar las guías de plástico proporciona-
das en la silla Pick Up. (Las guías del conector
Isofix se deben colocar según se muestra en
la Figura 5).
Precaución: Si los asientos del coche cuen-
tan con puntos de anclaje Isofix, instale la
silla Pick Up usando SIEMPRE los puntos de
anclaje ISOFIX y SOLAMENTE junto con los
cinturones de seguridad del coche. Consulte
la lista de vehículos.
2. Conecte el gancho del respaldo bajo a la
parte trasera de la base en posición horizon-
tal o vertical, para asegurarse de que el res-
paldo bajo está completamente conectado
a la base.
1. Coloque la silla Pick Up en la posición ade-
cuada del asiento del vehículo, orientada ha-
cia delante.
2. Gire el botón del adaptador hacia la izquier-
da y tire simultáneamente de los conectores
Isofix hacia fuera todo cuanto pueda, y ase-
gúrese de que no se puede mover hacia atrás
(Figura 6).
3. Coloque la silla de seguridad Pick Up orien-
tada hacia delante en el asiento del vehículo
con puntos ISOFIX.
4. Adapte los conectores ISOFIX al punto de
anclaje del vehículo hasta que escuche un
“clic” (Figura 7)
5. Gire el botón del adaptador hacia la izquier-
da y tire simultáneamente de la silla para que
no quede espacio libre entre el asiento del ve-
hículo y la silla para el coche.
¡ATENCIÓN!
Los conectores de ISOFIX son un sistema de
adaptación adicional para fijar la silla de segu-
ridad Pick Up y no son adecuados para sujetar
al niño.
Los niños deben estar siempre sujetos con el
cinturón de seguridad de tres puntos del co-
che. (Figura 6-7)
RETIRADA DE LA Pick Up DE BE COOL
Para retirar la silla de seguridad Pick Up, tire
del botón gris hacia fuera en los anclajes Isofix
para liberar la silla Pick Up de los puntos de
anclaje Isofix del vehículo. (Figura 8)
¡ATENCIÓN!
Si tiene dificultades para liberar los conecto-
res Isofix, intente aplicar un poco más de fuer-
za a la Pick Up en contra del asiento del ve-
hículo y tirar simultáneamente del botón gris
hacia fuera en los conectores Isofix para soltar
la silla Pick Up. Si esto no ayuda, consulte al
fabricante o distribuidor.

14
E
Sujetar a su hijo en la silla de seguridad Pick
Up
1. Coloque a su hijo en la silla Pick Up y ase-
gúrese de que está bien sentado.
2. Pase el cinturón de seguridad del vehículo
sobre el hombro del niño y la guía del cintu-
rón bajo el reposabrazos de la silla.
2.1. Pase la sección diagonal del cinturón a tra-
vés del cinturón que pasa sobre el hombro del
niño y asegúrese de que el cinturón no toca el
cuello del niño.
2.2. Pase la sección abdominal del cinturón de
seguridad a través de la guía del asiento bajo
el reposabrazos al lado del broche del cintu-
rón de seguridad (Figura 10).
2.3. Asegúrese de que no haya ninguna parte
del cinturón torcida ni atrapada y de que el
tejido de la silla no impida el movimiento o la
adaptación adecuada del cinturón de seguri-
dad.
3. Asegúrese de que el cinturón diagonal se
extiende ligeramente sobre el hombro del
niño y el cinturón abdominal sobre las cade-
ras. Apriete la sección diagonal del cinturón
de seguridad tirando hacia arriba hasta que
desaparezca la flojedad y el cinturón man-
tenga al niño bien sujeto en posición (Figura
11).
4. Para sacar al niño de la silla, basta con
desabrochar el cinturón y retirar la guía del
cinturón que pasa por encima del hombro.
Ajustar el respaldo bajo
Hay tres posiciones ajustables para el respal-
do bajo de la Pick Up.
Para ajustar el respaldo bajo de la silla Pick
Up, simplemente presione la parte superior
del respaldo bajo o tire de ella, podrá escu-
char un clic de una posición a otra. Cuando
se encuentre en la posición bloqueada, el res-
paldo bajo no se caerá, de forma que podrá
continuar con la instalación. (Figuras 12-13).
Precaución: La silla Pick Up sin ocupar se debe
fijar en su sitio con el cinturón de seguridad
del vehículo (y los conectores Isofix en caso
aplicable).
Precaución: Asegúrese de que el equipaje y
otros objetos estén bien sujetos.
Precaución: Asegúrese de que el cinturón no
esté retorcido.
Precaución: El cinturón abdominal se debe co-
locar sobre las caderas.
Retirada de la funda para el lavado
La funda de la silla Pick Up también es una fun-
ción de seguridad. No utilice nunca la silla Pick
Up sin la funda.
Antes de retirar la funda de la silla, debe re-
tirar el respaldo bajo de la base, bajando el
respaldo y tirando de él por la base.
- Respaldo bajo: retire la funda de plástico de
la parte trasera del respaldo y retire la banda
elástica del gancho, a continuación, extraiga
el cojín del respaldo bajo.
- Cojín: retire las fundas tirando de los bordes
del tapizado desde el espacio que hay entre
la base superior y la inferior, tirando simple-
mente de la funda hacia delante y hacia arriba.

15
1
INTRODUCTION
The Pick Up car seat is designed for instal-
lation in most vehicles equipped with Isofix
anchor points, always in combination with the
safety belts of the car. Your vehicle’s compat-
ibility can be verified by checking the Com-
patibility list.
Important: According to European classifica-
tion, the Pick Up car seat is Semi-universal
seat. This means that they must only be used
in the vehicles indicated on the Compatibility
list.
READ THIS MANUAL CAREFULLY BEFORE
USE AND RETAIN FOR FUTURE REFERENCE
Product information
This car seat has been designed and tested to
comply with the latest European standards for
Group 2 & 3 car seats.
This car seat has been designed for children
weighting from 15 to 36 kg, of approximately
4 to 11 years of age.
All ages given are approximate since all chil-
dren grow at different rates. However, the
weights given are the main safety issue.
To improve your child’s safety, the Pick Up car
seat is fitted with:
-ISOFIX connectors, to fit Isofix anchor points.
-Belt guides for adult seat belts.
-Low back rest to support your child’s lumbar.
General Information
In order to protect your child adequately and
make sure that they are comfortable and se-
cure inside the car, you must follow these in-
structions:
-Your Pick Up car seat has been designed to
be installed in either the front or rear of a car,
providing that you have three-point safety
belts and that there is NO FRONT AIR BAG.
Despite this, we strongly recommend that you
install your Pick Up car seat in rear seats only,
as this will ensure maximum safety.
Figure 1. Forward facing installation
Figure 2. Positioning in the car
Only valid for cars fitted with automatic,
three-point safety belts, approved in accord-
ance with the ECE-16 standard or other equiv-
alent standards ( Figure 3) .
Do NOT use with a two-point safety belts
(Figure 4). These are very dangerous should
you brake suddenly or in the event of an
accident .
In some cars, the safety belt clasp might be in
a very high position and may come into contact
with the edge of the booster seat, making this
position unsafe . In this case, trying to move
the Pick Up car seat forwards, or installing it
on a different seat . If you have any doubts,
contact your local distributor or retailer.
-Not all safety systems are exactly the same,
so we recommend that, where possible, you
first try the Pick Up car seat in the car in which
you are going to install it.
-It is very important not to use second-hand
products, as BE COOL can only guarantee
complete safety for items used by the initial
buyer.
-BE COOL recommends that you replace your
Pick Up car seat with a new one following any
accidents.
-Ensure that all the belts are in their correct
positions and make sure that no belt is coiled up.
Make sure the child understands that under
no circumstances should they interfere with
the belts and fastenings.
-The Pick Up car seat has been designed to be
used in passenger vehicles only, and must not
be used anywhere else.
-For more information on how to use and in-
stall the Pick Up car seat, please contact your
local distributor or retailer.
GB

16
Installation
Installing the car seat for children weighing
from 15 to 36 kg.
Securing the Pick Up car seat to the Isofix an-
chor points in your car.
Note: The Isofix safety standard was devel-
oped to ensure secure and easy fastening
of child restraint systems inside passenger
vehicles. Not all cars have Isofix anchor points,
although they are becoming more common.
Consult the attached list of cars in which it
has been verified that Isofix seats can be
correctly installed.
1. If your vehicle is equipped with Isofix an-
chor points, these should be used to obtain
a more stable installation.
These cars will have plastic elements that
guide the seat’s Isofix anchors into their cor-
rect positions. If your vehicle does not have
these guide elements, you can use the plastic
guides provided with the G Ofix car seat. (The
Isofix connector guides should be positioned
as shown in Figure 5).
Caution: When the seats of your car are
equipped with Isofix anchor points, install
your Pick Up car seat using your vehicle’s ISO-
FIX anchor points ALWAYS and ONLY in com-
bination with the car’s safety belts. See the
vehicle list.
2. Match the low-back rest hook to the rear
side of base from lying position to upright
position, to make sure the low-back rest is
fully matched into the base.
1. Place the Pick Up car seat in the appropri-
ate position on the vihicle’s seat, facing in the
direction of travel.
2. Rotate the adjuster button in anti-clock
wise direction, and simultaneously pull the
isofix connectors outwards as far as it goes,
make sure it cannot be push backwards (Figure 6)
3. Position the Pick Up car seat facing for-
wards on the vehicle seat with ISOFIX points.
4. Match the ISOFIX connectors to the vehi-
cle’s anchoring point until hear a “click” (Figure
7)
5. Rotate the adjuster button in anti-clock
wise direction, and simultaneously push the
seat against the vehicle to eliminate the gap
between Pick Up and vehicle’s seat.
ATTENTION!
ISOFIX connectors are an additional fitting
system for securing the Pick Up car seat and
not suitable for securing a child.
Children must always be secured by means of
the car’s three-point safety belt. Figures 6-7
REMOVING THE BE COOL Pick Up
To remove the Pick Up car seat, pull the grey
button backwards on the Isofix anchors to re-
lease the Pick Up from vehicle’s Isofix anchor
points. (Figure 8)
ATTENTION!
If you have difficulty to release the Isofix con-
nectors. Try to give a bit more force to the
Pick Up against the vehicle’s seat and simulta-
neously to pull the grey button backwards on
the Isofix connectors to release the Pick Up.
This may help, if not, please consult manufac-
turer or your retail stores.
Securing your child in the Pick Up car seat
1. Place your child in the Pick Up seat and
make sure they are sitting well back.
2. Thread the vehicle’s seat belt over the
child’s shoulder and the belt guide under
the armrest of the seat.
2.1. Pass the diagonal section of the seat belt
through the belt over the child’s shoulder,
make sure the belt us not touches to child’s
neck.
2.2. Pass the lap section of the seat belt
through the seat belt guide under the armrest
GB

17
GB
next to the seat belt buckle (Figure 10).
2.3. Ensure that no part of the seat belt has
become twisted or trapped and that the
car seat’s fabric cover is not impeding the
movement or correct fitting of the seat belt .
3. Ensure that the diagonal belties gently on
the child’s shoulder and the lap belt is worn
over the hips . Tighten the diagonal section
of the seat belt by pulling it upwards until
there is no slack and the belt holds the child
firmly in place (Figure 11).
4. To take the child out of the seat, simply
unfasten the seat belt and undo the shoul-
der belt guide.
Adjusting the low-back rest
There are three adjustable positions for the
low-back rest of Pick Up.
To adjust the low-back rest of the Pick Up, just
simply pull or push the top part of the low-
back rest, you can hear the clicking voice from
the position to position. When in locking posi-
tion, the low-back rest will not falling off, so
you can make the installation for next step.
Caution: Unoccupied Pick Up car seats s
hould still be secured in place by the vehicle’s
adult seat belt (and Isofix con-nectors where
applicable).
Caution: Make sure luggage or other objects
are properly secured.
Caution: Make sure the belt is not twisted.
Caution: The lap belt should be worn over the
hips. Figures 12 & 13
Removing the cover for washing
The Pick Up car seat’s cover is also a safety
feature. Never use the Pick Up car seat with-
out its cover.
Before removing the cover from the seat, you
need to remove the low back rest from the
base first, by lying the low back rest down and
take it off from the base.
- Low back rest - Remove the plastic cover in
the rear side of the back rest, and remove the
elastic band from the hook, then take the in-
sert cushion off from the low back rest.
- Booster cushion - Remove the covers by pulling
the edges of upholstery from the gap between
upper base and lower base, simply pull the cover
forward and upward.

18
D
1
EINFÜHRUNG
Der Autokindersitz Pick Up ist für den Einbau
in die meisten mit Isofix-Verankerungspunk-
ten ausgestatteten Fahrzeuge, immer zusam-
men mit den Sicherheitsgurten des Autos, be-
stimmt. Wenn Sie die Kompatibilität mit Ihrem
Fahrzeug überprüfen wollen, sehen Sie in der
Kompatibilitätsliste nach.
Wichtig: Gemäß der europäischen Klassifi-
kation ist der Autokindersitz Pick Up ein Se-
mi-Universal-Sitz, was bedeutet, dass er nur in
den auf der Kompatibilitätsliste angegebenen
Fahrzeugen verwendet werden darf.
LESEN SIE DIESE BEDIENUNGSANLEITUNG
VOR GEBRAUCH SORGFÄLTIG DURCH
UND BEWAHREN SIE SIE FÜR ZUKÜNFTIGE
NACHFRAGAN AUF
Produktinformationen
Dieser Autokindersitz wurde entworfen und
getestet, um die neuesten europäischen Nor-
men für die Autokindersitze der Gruppe 2 und
3 zu erfüllen.
Er ist für Kinder mit einem Gewicht ab 15 bis
36 kg und einem Alter ab ungefähr 4 bis 11
Jahre bestimmt.
Alle angegebenen Altersgruppen sind unge-
fähre Angaben, da jedes Kind unterschiedlich
wächst. Trotzdem sind die angegebenen Ge-
wichtsangaben die wichtigste Sicherheitsfrage.
Um die Sicherheit Ihres Kindes zu verbessern,
verfügt der Autokindersitz Pick Up über:
-ISOFIX-Stecker, um die Isofix-Verankerungs-
punkte anzupassen.
-Gurtführungen für die Sicherheitsgurte der
Erwachsenensitze.
-Niedrige Rückenlehne als Lendenwirbelstütze.
Allgemeine Informationen
Um Ihr Kind passend zu schützen und sicher-
zustellen, dass es sich im Auto bequem und
sicher fühlt, müssen Sie folgende Anweisun-
gen befolgen:
-Der Autokindersitz Pick Up wurde sowohl für
den Einbau auf dem Vorder- als auch auf dem
Rücksitz des Autos entworfen, wenn es über
3-Punkt-Sicherheitsgurte verfügt und KEI-
NEN FRONTAIRBAG hat. Trotzdem wird nach-
drücklich empfohlen, den Autokindersitz Pick
Up nur auf den Rücksitzen einzubauen, da auf
diese Weise höchste Sicherheit gewährleistet
wird.
Abbildung 1. Einbau in Fahrtrichtung
Abbildung 2. Anbringen im Auto
Gilt nur für Autos mit automatischen und nach
der ECE-Norm 16 oder anderen gleichwerti-
gen Normen zugelassenen 3-Punkt-Sicher-
heitsgurten (Abbildung 3).
Verwenden Sie ihn NICHT mit einem
2-Punkt-Sicherheitsgurt (Abbildung 4). Sie
sind beim plötzlichen Bremsen und bei einem
Unfall sehr gefährlich.
-Bei einigen Autos kann sich der Sicherheits-
gurt in einer sehr hohen Position befinden und
in Berührung mit dem Rand des Sitzes kom-
men, so dass diese Position nicht sicher ist. In
diesem Fall versuchen Sie, den Autokindersitz
Pick Up nach vorne zu bewegen oder bringen
ihn auf einem anderen Sitz an. Setzen Sie sich
bei Fragen mit ihrem örtlichen Händler in Ver-
bindung.
-Nicht alle Sicherheitssysteme sind exakt
gleich, weshalb empfohlen wird, wenn immer
möglich, den Pick Up-Sitz zuerst im Auto zu tes-
ten.
-Es ist sehr wichtig, keine gebrauchten Pro-
dukte zu verwenden, da BE COOL vollständige
Sicherheit nur für die vom Erstkäufer verwen-
deten Artikel gewährleisten kann.
-BE COOL empfiehlt, den Autokindersitz
G0fix nach einem Unfall durch einen neuen zu
ersetzen.
-Überzeugen Sie sich, dass sich alle Gurte in
der richtigen Position befinden und nicht ver-
dreht sind.
Stellen Sie sicher, dass Ihr Kind versteht, dass
es unter keinen Umständen weder Gurte noch

19
D
Schlösser berühren darf.
-Der Pick Up-Sitz wurde nur zur Verwendung
in Pkws entworfen und darf nirgendwo sonst
verwendet werden.
-Um weitere Informationen über Verwendung
und Einbau des Pick Up-Sitzes zu erhalten,
setzen Sie sich mit Ihrem Händler oder dem
örtlichen Laden in Verbindung.
Einbau
Einbau des Autokindersitzes für Kinder zwi-
schen 15 und 36 kg.
Befestigen Sie den Pick Up-Sitz an den Iso-
fix-Verankerungspunkten des Autos.
Anmerkung: Die Isofix-Sicherheitsnorm wur-
de zur Gewährleistung eines einfachen und
sicheren Verschlusses der Systeme zur Kon-
trolle des Kindes in Pkws entwickelt. Nicht
alle Autos verfügen über Isofix-Verankerungs-
punkte, obwohl sie immer häufiger werden.
Sehen Sie in der beigefügten Fahrzeugliste
nach, in der überprüft wurde, was auf den Iso-
fix-Sitzen richtig eingebaut werden darf.
1.Wenn Ihr Fahrzeug Isofix-Verankerungs-
punkte hat, müssen diese zum Erhalt eines
stabileren Einbaus verwendet werden.
Diese Autos haben Kunststoffteile, die als
Führungen dienen, damit sich die Isofix-Ver-
ankerungen des Sitzes an die richtige Position
anpassen. Wenn Ihr Fahrzeug diese Führungs-
teile nicht besitzt, können Sie die im Pick Up-
Sitz bereitgestellten Kunststoffführungen
verwenden. (Die Führungen des Isofix-Ste-
ckers müssen wie in der Abbildung 5 gezeigt
angebracht werden).
Vorsicht: Wenn die Autositze über Isofix-Ver-
ankerungspunkte verfügen, bauen Sie den
Pick Up-Sitz IMMER unter Verwendung der
ISOFIX-Verankerungspunkte und NUR zusam-
men mit den Autosicherheitsgurten ein. Se-
hen Sie in der Fahrzeugliste nach.
2. Verbinden Sie den Haken der niedrigen
Rückenlehne mit der Rückseite der Basis in
waagerechter oder senkrechter Position, um
sicherzustellen, dass die niedrige Rückenleh-
ne vollständig mit der Basis verbunden ist.
1. Bringen Sie den Pick Up-Sitz in die passen-
de Position des Fahrzeugsitzes und in Fahr-
trichtung an.
2. Drehen Sie den Adapterknopf nach links
und ziehen Sie gleichzeitig die Isofix-Stecker
so stark wie möglich nach außen und stellen
Sie sicher, dass sich der Sitz nicht nach hinten
bewegen lässt. (Abbildung 6).
3. Bringen Sie den Autokindersitz Pick Up in
Fahrtrichtung auf dem Fahrzeugsitz mit ISO-
FIX-Punkten an.
4. Passen Sie die ISOFIX-Stecker an den Ver-
ankerungspunkt des Fahrzeuges an, bis Sie
ein Klicken hören. (Abbildung 7)
5. Drehen Sie den Adapterknopf nach links
und ziehen Sie gleichzeitig am Sitz, damit kein
Freiraum zwischen Fahrzeug- und Autokin-
dersitz bleibt.
ACHTUNG!
Die ISOFIX-Stecker sind ein zusätzliches adap-
tives System zur Befestigung des Autokinder-
sitzes Pick Up und nicht zur Befestigung eines
Kindes geeignet. Die Kinder müssen immer
mit dem 3-Punkt-Sicherheitsgurt des Autos
angeschnallt sein. Abbildung 6-7
ENTFERNEN DES Pick Up VON BE COOL
Um den Pick Up-Autokindersitz zu entfernen,
ziehen Sie den grauen Knopf in den Isofix-Ver-
ankerungen nach außen, um den Pick Up-
Sitz aus den Isofix-Verankerungspunkten des
Fahrzeugs zu lösen. (Abbildung 8)
ACHTUNG!
Wenn Sie Schwierigkeiten beim Lösen der Iso-
fix-Stecker haben, versuchen Sie etwas stär-
ker gegen den Fahrzeugsitz zu drücken und
ziehen Sie gleichzeitig den grauen Knopf in
den Isofix-Steckern nach außen, um den Pick
Up-Sitz zu lösen. Wenn dies nicht hilft, setzen
Sie sich mit dem Hersteller oder dem Händler
in Verbindung.

20
D
Befestigung Ihres Kindes im Autokindersitz
Pick Up
1. Setzen Sie Ihr Kind in den Pick Up-Sitz und
stellen Sie sicher, dass es richtig sitzt.
2. Führen Sie den Sicherheitsgurt des Fahr-
zeugs über die Schulter Ihres Kindes und die
Gurtführung unter der Armlehne des Sitzes
durch.
2.1. Führen Sie den diagonalen Gurtabschnitt
über den Gurt, der über die Schulter Ihres
Kindes läuft und stellen Sie sicher, dass der
Gurt nicht den Hals Ihres Kindes berührt.
2.2. Führen Sie den Beckenabschnitt des Si-
cherheitsgurtes durch die Führung des Sitzes
unter der Armlehne auf der Seite der Sicher-
heitsgurtschnalle durch (Abbildung 10).
2.3. Stellen Sie sicher, dass kein Teil des Gur-
tes verdreht oder eingeklemmt ist und dass
der Stoff des Sitzes nicht die Bewegung oder
passende Anpassung des Sicherheitsgurtes
verhindert.
3. Stellen Sie sicher, dass sich der Diagonal-
gurt leicht über die Schulter Ihres Kindes
und der Beckengurt über seine Hüften ers-
treckt. Drücken Sie den diagonalen Absch-
nitt des Sicherheitsgurtes zusammen, indem
Sie ihn nach oben ziehen, bis er nicht mehr
locker sitzt und der Gurt Ihr Kind richtig fest
in der Position hält (Abbildung 11).
4. Um Ihr Kind aus dem Sitz herauszuneh-
men, genügt es, den Gurt zu öffnen und die
über die Schulter laufende Gurtführung zu
entfernen.
Einstellung der niedrigen RückenlehneHay
Es gibt drei verstellbare Positionen für die
niedrige Rückenlehne des Pick Up.
Um die niedrige Rückenlehne des Pick Up-Sit-
zes einzustellen, drücken Sie einfach auf die
Oberseite der niedrigen Rückenlehne oder
ziehen an ihr und können ein Klicken von einer
zur anderen Position hören. Wenn sie sich in
der verriegelten Position befindet, kippt die
niedrige Rückenlehne nicht um, so dass sie
mit dem Einbau fortfahren können.
Abbildung 12-13
Vorsicht: Der nicht benutzte Pick Up-Sitz muss
mit dem Fahrzeugsicherheitsgurt (und gege-
benenfalls mit den Isofix-Steckern) an seinem
Platz befestigt werden.
Vorsicht: Stellen Sie sicher, dass das Gepäck
und andere Gegenstände richtig befestigt
sind.
Vorsicht: Stellen Sie sicher, dass der Gurt nicht
verdreht ist.
Vorsicht: Der Beckengurt muss über den Hüf-
ten angebracht werden.
Entfernen des Bezugs zum Waschen
Der Bezug des Pick Up-Sitzes besitzt auch
eine Sicherheitsfunktion. Verwenden Sie den
Pick Up-Sitz nie ohne Bezug. Bevor Sie den
Bezug vom Sitz abziehen, müssen Sie die Rüc-
kenlehne unter der Basis entfernen, indem Sie
sie neigen und an ihr von der Basis aus ziehen.
- Niedrige Rückenlehne: Entfernen Sie den
Kunststoffbezug von der Rückseite der Rüc-
kenlehne und ziehen Sie das Gummiband vom
Haken ab. Anschließend entfernen Sie das
Polster von der niedrigen Rückenlehne.
- Polster: Entfernen Sie die Bezüge durch Zie-
hen an den Rändern der Polsterung vom Zwis-
chenraum aus, der sich zwischen der oberen
und unteren Basis befindet und ziehen Sie den
Bezug einfach nach
Table of contents
Languages:
Other Be Cool Car Seat manuals
Be Cool
Be Cool mars User manual
Be Cool
Be Cool All Aboard User manual
Be Cool
Be Cool Thunder ISO-FIX User manual
Be Cool
Be Cool STORM User manual
Be Cool
Be Cool box User manual
Be Cool
Be Cool Saturn User manual
Be Cool
Be Cool Sun User manual

Be Cool
Be Cool JET i-fix User manual

Be Cool
Be Cool Star User manual

Be Cool
Be Cool Thunder ISO-FIX User manual

Be Cool
Be Cool foldy User manual
Be Cool
Be Cool easy User manual
Be Cool
Be Cool SPACE User manual
Be Cool
Be Cool wagon User manual

Be Cool
Be Cool STORM isofix User manual

Be Cool
Be Cool JET User manual
Be Cool
Be Cool Flow Iso-Fix User manual
Be Cool
Be Cool pivot User manual
Be Cool
Be Cool atomic User manual

Be Cool
Be Cool Fit User manual
