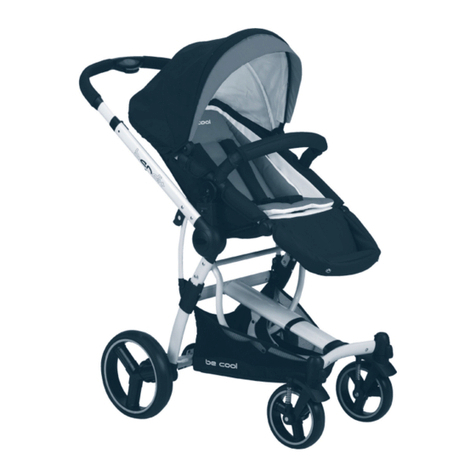
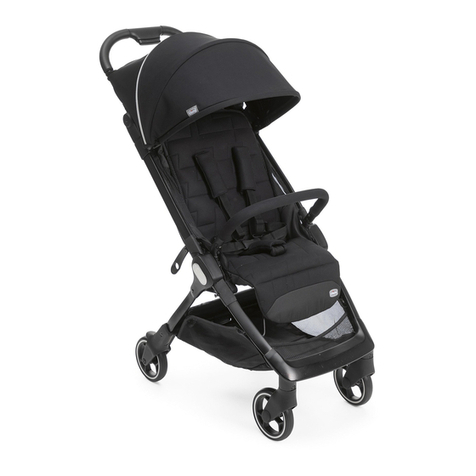
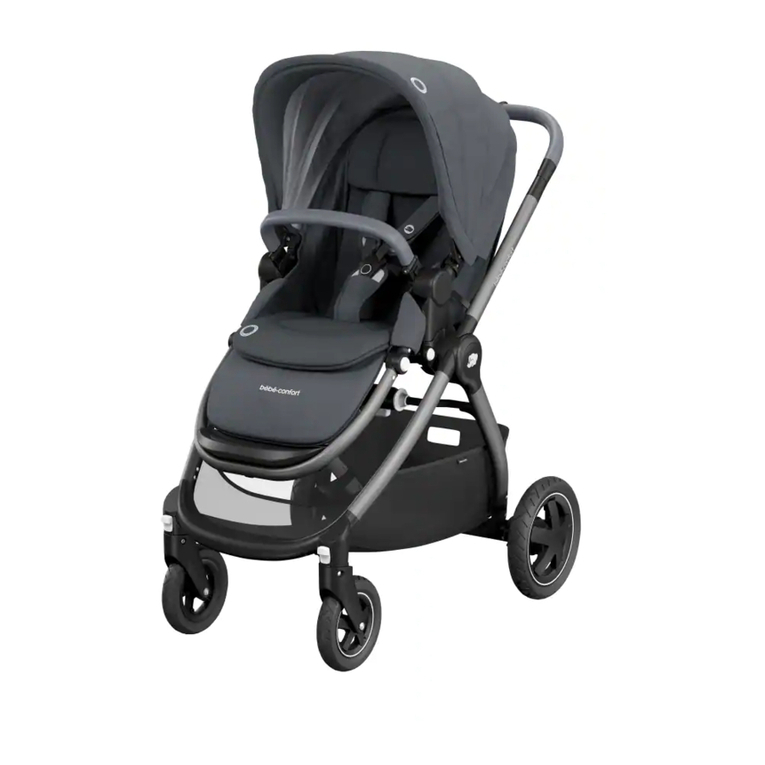
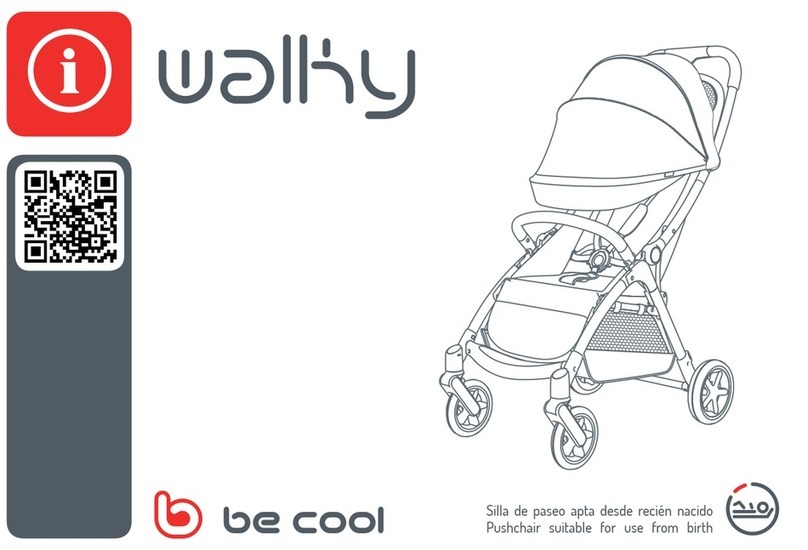
Be Cool CABIN User manual

Silla de paseo apta desde recién nacido
Pushchair suitable for use from birth


LANGUAGES
03
ESPAÑOL
11
ENGLISH 15
FRANÇAIS 19
PORTUGUÊS 23
ITALIANO 27

PARTLIST
04
2
4
3
5
6
7
8
19
10
11
12

05
PARTLIST
PARTES
1. Botón de plegado
2. Manillar
3. Cierre de seguridad
4. Palanca de freno
5. Seguro de plegado
6. Rueda trasera
7. Cesta
8. Rueda delantera
9. Capota
10. Barra protectora
11. Asiento
12. Reposapiés
PARTES
1. Botão de dobragem
2. Guiador
3. Fecho de segurança
4. Alavanca de travagem
5. Travão de dobragem
6. Roda traseira
7. Cesto
8. Roda dianteira
9. Capota
10. Barra protetora
11. Assento
12. Apoio para os pés
PARTIES
1. Bouton de pliage
2. Guidon
3. Fermeture de sécurité
4. Levier de frein
5. Sécurité de pliage
6. Roue arrière
7. Panier
8. Roue avant
9. Capote
10. Barre de protection
11. Siège
12. Repose-pieds
COMPONENTI:
1. Pulsante di chiusura
2. Manubrio
3. Chiusura di sicurezza
4. Leva del freno
5. Sicura della chiusura
6. Ruota posteriore
7. Cestino
8. Ruota anteriore
9. Capottina
10. Barra di protezione
11. Seduta
12. Poggiapiedi
PARTS NAME
1. Folding button
2. Handle
3. Safety Buckle
4. Break Lever
5. Folding Latch
6. Rear Wheel
7. Basket
8. Front Wheel
9. Canopy
10. Bumper Bar
11. Seat unit
12. Footrest
ESPAÑOL ENGLISH
FRANÇAIS PORTUGUÊS ITALIANO

PARTLIST
06
1
2 3

07
PARTLIST
4
78
56

INSTRUCTIONS
08
9
10
11

INSTRUCTIONS
09
12

ES
10

ES
11
ADVERTENCIAS
¿CÓMO DESPLEGAR Y MONTAR LA SILLA?
INSTRUCCIONES DE USO
ACCESORIOS DE LA SILLA (SI SE INCLUYEN)
CUIDADO Y MANTENIMIENTO
INFORMACIÓN SOBRE LA GARANTÍA
12
13
13
14
14
14

ES
12
“Importante - Leer detenidamente y
mantenerlas para futuras consultas.”
ADVERTENCIA: Debe accionarse el dispositivo de
frenado durante la carga y descarga de los niños.
ADVERTENCIA: Cualquier carga jada al manillar
y/o a la parte trasera del respaldo y/o a los laterales
del vehículo afectará a la estabilidad de éste.
ADVERTENCIA: Solo deben utilizarse los repuestos
suministrados o recomendados por el distribuidor
o BE COOl.
ADVERTENCIA: No dejar nunca al niño desatendido.
“ADVERTENCIA: Asegurarse de que todos los dis-
positivos de cierre están engranados antes del uso.”
“ADVERTENCIA: Para evitar lesiones, asegúrese de
que el niño se mantiene alejado durante el desple-
gado y el plegado de este producto.”
ADVERTENCIA: No permita que el niño juegue con
este producto.
ADVERTENCIA: Use un arnés tan pronto como el
niño se pueda sentar por sí mismo.
ADVERTENCIA: Usar siempre el sistema de retención.
ADVERTENCIA: Este producto no es adecuado para
correr o patinar.
No utilice nunca accesorios que no hayan sido
aprobados por BE COOL.
Este cochecito sólo puede ser usado por un niño.
La masa máxima permitida de la cestilla portaob-
jetos nunca puede superar lo indicado en la cestilla
(4 kg).
Tenga cuidado al bajar escaleras mecánicas, ya que
podría desbloquearse el seguro trasero.
ADVERTENCIA: No utilice nunca la tira entrepiernas
sin el cinturón abdominal.
ADVERTENCIA: Mover la posición del arnés según
la edad del niño, utilizar la posición más baja del
respaldo y ajustar ambos para niños menores de
6 meses.
“Este vehiculo es para niños desde 0 meses y hasta
22kg. o 4 años (La que primero se alcance)”
CUMPLE CON LAS NORMAS DE SEGURIDAD EURO-
PEA UNE-EN 1888-2:2018
ADVERTENCIA Comprobar que los dispositivos de
sujeción del capazo, del asiento o de la silla de co-
che están correctamente activados antes de su uso.

ES
13
¿CÓMO DESPLEGAR Y MONTAR LA SILLA?
1. Despliegue el chasis de la silla (1), tire hacia afuera del seguro
de plegado para soltar el chasis como se muestra en la imagen
A; (2) sujete el manillar y tire hacia arriba para desplegar la silla
hasta que escuche un “clic”. Compruebe que la silla se bloquea
en la posición totalmente abierta antes de utilizarla.
2. Cómo montar la barra protectora: Para montar la barra
protectora alinee las piezas de enganche laterales con los
oricios de la parte delantera del asiento e introdúzcalas hasta
que escuche un “clic”.
3. Para desmontarla, presione los botones de la barra protectora
y tire hacia fuera.
INSTRUCCIONES DE USO
4. Para activar el freno presione la palanca de freno hacia abajo.
Para desbloquearlo levante la palanca de freno hacia arriba.
Siempre que active el freno, compruebe que lo ha hecho
correctamente intentando empujar la silla.
5. Tire hacia delante o empuje hacia atrás la capota para abrirla o
cerrarla respectivamente.
6. Para montar la capota presiónela sobre el manillar en la
dirección “B”. Tire directamente de la capota para retirarla.
7. Cómo ajustar el respaldo: Para colocarlo en posición vertical,
empuje el respaldo hacia arriba con la mano, sujete el cinturón
y tire hacia arriba del cierre ajustable. Para reclinarlo, sujete y
tire del cierre ajustable hacia abajo.
8. Uso del sistema de retención: Para soltar el arnés, pulse el
botón central y tire por cada lado. Para volverlo a cerrar,
introduzca cada una de las partes del arnés de nuevo en el
cierre hasta que se escuche un “clic”.
9. Cómo ajustar el cinturón abdominal: Para acortar, tire hacia
abajo de la vuelta inferior de la correa (2) y después, tire hacia
arriba del nal de la correa (1). Para alargar, tire hacia arriba de
la vuelta superior de la correa (3) y después tire del cierre.
10. Cómo ajustar el reposapiés: Como indica la imagen A, tire del
soporte metálico situado en la parte trasera del reposapiés
para extenderlo. Como indica la imagen B, empuje el soporte
metálico para recoger el reposapiés.
Si el niño tiene menos de 6 meses, las correas del pecho
deben insertarse en los oricios inferiores del respaldo y luego
en los oricios inferiores del respaldo del colchón acolchado.
11. Cómo plegar el chasis: 1) Abra la capota totalmente como se
muestra en la imagen A); 2) coloque las ruedas en posición
giratoria, presione el botón pequeño de la parte trasera del
manillar y, al mismo tiempo, apriete el botón de plegado y
empuje hacia delante la capota lo máximo posible, hasta que
esté totalmente bloqueada, como se muestra en la imagen B;
3) cierre los seguros de plegado como en la imagen C.

ES
14
ACCESORIOS DE LA SILLA (SI SE INCLUYEN)
Mosquitera:
Como se indica en la imagen A, despliegue la mosquitera y
colóquela desde la base del acolchado del asiento hasta la capota.
Finalmente, abroche bien las cintas en ambos lados.
Cubrepiés:
Como se indica en la imagen B, coloque los botones del cubrepiés
alrededor de la barra protectora frontal y abróchelos.
Protector de lluvia:
Como se indica en la imagen C, encaje el protector sobre la silla
con la capota totalmente extendida. El protector puede utilizarse
en todos los modos. Hay una ventana en la parte delantera del
protector que puede abrirse desabrochando el velcro del borde,
después enróllelo hacia arriba y sujételo.
Uso de la bolsa para transporte:
Como en la imagen D, introduzca la silla plegada en la bolsa y
cuélguela del hombro.
CUIDADO Y MANTENIMIENTO
• Guarde la silla siempre en un lugar limpio y seco.
• Limpie el chasis con un trapo húmedo.
• No utilice limpiadores abrasivos, lejía ni detergentes fuertes.
• Limpie los tejidos con agua templada y jabón neutro.
• Compruebe que el tejido está completamente seco antes de
guardarlo.
• Limpie y lubrique de vez en cuando las ruedas y los ejes con
aceite lubricante suave.
• Compruebe regularmente si se ha soltado alguna pieza y
apriétela cuando sea necesario.
• Se deben reemplazar las piezas rotas o dañadas.
INFORMACIÓN SOBRE LA GARANTÍA
Este artículo dispone de garantía según lo estipulado en el R.D.
Legislativo 1 / 2015 de 24 de julio.
Quedan excluidos de la presente garantía todos los defectos o
averías producidos por un uso inadecuado del artículo o por el
incumplimiento de las normas de seguridad o mantenimiento
descritas en las instrucciones.
Es imprescindible la presentación de la factura de compra con
la fecha para justicar la validez de la garantía.

EN
15
WARNINGS
TO UNFOLD AND ASSEMBLE
USE INSTRUCTIONS
STROLLER ACCESSORIES (LF SUPPLIED)
CARE AND MAINTENANCE
INFORMATION ABOUT THE GUARANTEE
16
17
17
18
18
18

EN
16
¡IMPORTANT! Keep these instructions
for future reference
WARNING! Never leave your child unattended.
WARNING! Ensure that all the locking devices are
enganged before use.
WARNING! To avoid injury ensure that your child is
kept away when unfolding and folding this product.
WARNING! Do not let your child play with this product.
WARNING! Use a harness as soon as your child can sit
unaided.
WARNING! Always use the restraint system.
WARNING! This product is not suitable for running or
skating.
Suitable for children under 6 months old only with
accessories approved by BE COOL.
This pushchair may only be used by one child at the
same time.
The maximum load carried in the basket must never
exceed the limit indicated on the basket (4 kg).
Take care when going down escalators as the rear
safety catch may come undone.
The parking device shall be engaged when placing
and removing the children.
Any load attached to the handle and/or on the back
of the backrest and/or on the sides of the vehicle will
affect the stability of the vehicle.
Only replacement parts supplied or recommended by
BE COOL shall be used.
WARNING: Move the position of the harness according
to the child’s age and use the lowest, tightest position
for children under 6 months old.
“This vehicle is intended for children from 0 months
up to 22 kg or 4 yeard old (whichever happens rst).”
WARNING: Never use the strap between the legs
without using the lap belt.
COMPLIES WITH EUROPEAN SAFETY STANDARD EN
1888-2:2018.
WARNING! Check that the pram body or seat unit or
car seat attachment devices are correctly engaged
before use.

EN
17
TO UNFOLD AND ASSEMBLE
1 . Unfold the stroller frame (1 )Pull out the folding latch to release
the frame as Fig A; (2) Grip the handle and lift up to unfold the
stroller until hear the”click” sound. Check to make sure the
stroller is locked in the fully open position before using it.
2. To assemble bumper bar: Assemble: Align the bumper bar
pegs with holes in the front of seat unit and insert into until
hear clicks.
3. Disassemble: Press down both buttons on bumper bar and
pull out.
USE INSTRUCTIONS
4. To apply the brake: press the brake lever down. To unlock the
brake: lift the brake lever up. Always lock brake, make sure
brake is engaged by trying to push the stroller.
5. To adjust canopy: pull forward or press backward the canopy
wire to open or close canopy.
6. To assemble the Canopy: Press the canopy xture onto the
handles in the direction of “B” Pull out the canopy xture
directly to disassemble it.
7. To adjust backrest: To set upright position, push backrest
up with back of hand, hold the belt, grasp and push up the
adjustable buckle. To recline the backrest down, grasp and pull
down the adjustable buckle.
8. To use Restraint System: To unlock buckle, press in on center
button and pull harness out from each side. To buckle, push
each side of harness back into buckle until each clicks in place.
9. To adjust waist strap length: To shorten, pull bottom loop (2)
down, then pull on strap end (1). To lengthen, pull out top
loop(3), then pull out on buckle.
10. To adjust the footrest: As g A, pull down the mental support
bracket on the back of footrest to extend. As g B push up the
metal support bracket to not extend.
If the child is under 6 months, the chest straps must be
inserted into the lower holes of the backrest and then into the
lower holes of the padded mattress backrest.
11 . To fold stroller frame: 1) Fully open the canopy as Fig A);
2) Make the wheel in swivel mode, press down the small
button on the back of handle, at the sametime, squeeze the
folding button on hand and push forward the canopy to the
end until the frame is fully locked as Fig B; 3) Engage the
folding lock as Fig C.

EN
18
STROLLER ACCESSORIES (IF SUPPLIED)
Mosquito net:
Fig. A, unfold the mosquito, and install from the base of the seat
pad, then canopy. Finally fasten the straps well on two sides.
Footcover:
Fig. B, put the buttons of foot cover round over front bar and then
lock them.
Rain cover:
Fig. C, t the raincover by placing it over the stroller with the hood
fully extended. The raincover can be used in all modes. There is
a viewing window in the front of the raincover that can be opened
by unfastening the velcro around the edge then rolled up and
kept open with the fastener.
To use Backpack:
Fig D, put the folded stoller into the backpack and hang it on the
shoulder.
CARE AND MAINTENANCE
• Always store in a clean and dry place.
• Clean the frame by wiping with a damp cloth.
• Do not use abrasives, bleach or strong detergents.
• Spot clean fabrics with warm water and mild soap.
• Ensure fabric is dry before storing.
• Occasionally clean and lubricate wheels and axles with a light
lubricating oil.
• Regularly check for loose parts and tighten when required.
• Damaged or broken parts should be replaced.
GUARANTEE INFORMATION
This article comes with guarantee in accordance with Royal
Legislative Decree 1 / 2015 of 24 July.
Keep your receipt as proof of purchase, you need to show it at
the store where you purchased the product to prove validity in
the event of any type of claim.
This guarantee does not cover any faults or breakages caused
by misuse of the article or by not following the safety and
maintenance information listed in the instructions and on the
care labels.

FR
19
AVERTISSEMENTS
COMMENT DÉPLIER ET MONTER LA POUSSETTE ?
INSTRUCTIONS D’UTILISATION
ACCESSOIRES DE LA POUSSETTE (S’ILS SONT INCLUS)
ENTRETIEN
INFORMATION SUR LA GARANTIE
20
21
21
22
22
22

FR
20
IMPORTANT ! Conservez ces instructions
pour toute référence ultérieure
AVERTISSEMENT : Ne laissez jamais l ’enfant sans
surveillance.
AVERTISSEMENT : Vériez que tous les dispositifs
de verrouillage sont correctement enclenchés avant
usage.
AVERTISSEMENT : An d’éviter toute blessure, veuillez
tenir les enfants éloignés du produit lors des opéra-
tions de pliage et de dépliage.
AVERTISSEMENT : Ne laissez pas votre enfant jouer
avec ce produit.
AVERTISSEMENT : Utilisez le harnais dès que l’enfant
peut tenir assis tout seul.
AVERTISSEMENT : Utilisez toujours le dispositif de
retenue.
AVERTISSEMENT : N’utilisez pas ce produit lorsque
vous faites du jogging ou des promenades en rollers.
N’utilisez jamais des accessoires non approuvés par
BE COOL.
Cette poussette peut uniquement être utilisée par un
seul enfant à la fois.
Le contenu du panier porte-objets ne doit jamais
dépasser le poids maximal indiqué (4 kg).
Lorsque vous empruntez des escalators, veillez à ce
que le système de blocage arrière reste verrouillé.
Conservez ce mode d’emploi pour toute consultation
future.
AVERTISSEMENT: Positionner le harnais en fonction
de l’âge de l’enfant et pour les enfants de moins de 6
mois utiliser la position la plus basse et la plus ajustée.
“Cette poussette convient pour des enfants à partir
de 0 mois et jusqu’à un poids maximum de 22 kg
ou 4 ans (le premier atteint).”
CONFORME AUX NORMES DE SÉCURITÉ EUROPÉEN-
NES UNE-EN 1888-2:2018
AVERTISSEMENT : Vériez que les dispositifs de
xation de la nacelle ou du siège sont correctement
enclenchés avant usage.
This manual suits for next models
1
Table of contents
Languages:
Other Be Cool Stroller manuals
Be Cool
Be Cool LIGHT User manual
Be Cool
Be Cool quantum User manual
Be Cool
Be Cool slide flex User manual
Be Cool
Be Cool bi-baby User manual
Be Cool
Be Cool Pleat User manual

Be Cool
Be Cool STREET User manual
Be Cool
Be Cool outback User manual
Be Cool
Be Cool ATTIC User manual
Be Cool
Be Cool ZAS User manual
Be Cool
Be Cool ultimate User manual
Be Cool
Be Cool Bubble User manual
Be Cool
Be Cool stratos User manual
Be Cool
Be Cool trolley User manual

Be Cool
Be Cool CHIC User manual
Be Cool
Be Cool SLIDE User manual
Be Cool
Be Cool WAVE User manual

Be Cool
Be Cool LIGHT User manual
Be Cool
Be Cool fancy User manual

Be Cool
Be Cool LIFT User manual
Be Cool
Be Cool walhy User manual
