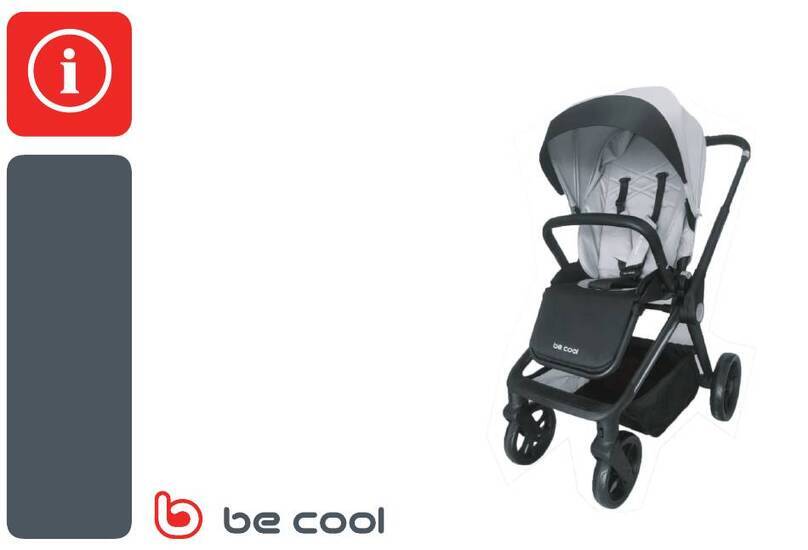
Be Cool WAVE User manual

INSTRUCCIONES
GEBRAUCHSANWEISUNG
INSTRUÇÕES
INSTRUCTIONS
INSTRUCTIONS
ISTRUZIONI
•
•
•
Ancho del chasis del cochecito de 32,5 a 43 cm
Diámetro del chasis del cochecito de 17 a 27 mm
Rahmenbreite des Buggys 32,5 bis 43 cm
Rahmendurchmesser des Buggys 17 bis 27 mm
Largura do chassis do carrinho de 32,5 a 43 cm
Diâmetro do chassis do carrinho de 17 a 27 mm
Width of the pushchair chassis from 32,5 to 43 cm
Diameter of the pushchair chassis from 17 to 27 mm
Largeur du châssis de la poussette de 32,5 à 43 cm
Diamètre du châssis de la poussette de 17 à 27 mm
Larghezza del telaio del passeggino da 32,5 a 43 cm
Diametro del telaio del passeggino da 17 a 27 mm

2

3
E
ADVERTENCIA: No intente ensamblarla en ningún otro cochecito diferente de los mencio-• nados en estas instrucciones.
ADVERTENCIA: está diseñada para niños hasta 12 meses y hasta 20 kg de peso.• ADVERTENCIA: No utilice el WAVE hasta que su hijo pueda andar de manera independiente• y sin ayuda. El niño debe ir de pie en la parte central de la plataforma y sujetarse fuerte con
ambas manos al manillar del cochecito.
ADVERTENCIA: Esta plataforma no está diseñada para correr ni patinar.• ADVERTENCIA: No se pueden subir dos niños al mismo tiempo.• ADVERTENCIA: Cuando no se pueda fijar con seguridad el producto al cochecito, no utilizar• la plataforma.
ADVERTENCIA: Puede ser peligroso de jar al niño sin vigilancia.• ADVERTENCIA: Asegúrese de que to dos los mecanismos de bloqueo están activados antes• de su uso. No realizar transformaciones en el producto.
ADVERTENCIA: Es imprescindible ase gurarse que el niño se mantiene aleja do de la silla du-• rante las acciones de plegado y desplegado. La aparición de puntos de corte y compresión
y atrapamientos son inevitables durante estas operacio nes.
ADVERTENCIA: Lea las instrucciones detenidamente antes de usar este pro ducto y guárde-• las para futuras consul tas. La seguridad de sus hijos puede verse afectada si no sigue estas
instrucciones.
ADVERTENCIA: Esta plataforma no esta diseñada para subir o bajar escalo nes. Se recomien-• da bajar al niño de la plataforma en caso de tener que subir/bajarlos.
ADVERTENCIA: En caso de inclinaciones, terrenos desiguales o desniveles, el niño no debe• estar de pie.
ADVERTENCIA: Antes de empezar cada uso del WAVE, asegúrese que la plataforma y el• cochecito están unidos correctamente.
ADVERTENCIA: Durante el montaje, se deben mantener las piezas pequeñas fuera del al-• cance de los niños. Las bolsas de plástico y los embalajes se deben desechar inmediata-
mente para evitar el riesgo de asfixia.
ADVERTENCIA: No deje nunca al niño desatendido.• ADVERTENCIA: WAVE no es apropiado para utilizar en la nieve o en superficies blandas.• No use nunca accesorios que no estén aprobados por NURSE.S.A.• Este producto se debe instalar y utilizar correctamente tal y como se especifica en el manual• del usuario.
En caso de cualquier posible daño en el mecanismo, sólo se deberán utilizar los recambios• originales.• WAVE no es apropiado para utilizar en la nieve o en superficies blandas.•

4
GB
WARNING: Do not try to fit the product onto any pushchair other than those mentioned• in these instructions.
WARNING: This product is designed for children up to 12 months old and up to 20 kg• in weight.
WARNING: Do not use the WAVE until your child can walk by himself without help. The• child should stand up on the central part of the platform and firmly hold onto the push-
chair handles with both hands.
WARNING: This platform is not designed for running or skating.• WARNING: Do not let two children use the platform at the same time.• WARNING: If the platform can not be safely fastened onto the pushchair, do not use it.• WARNING: It can be dangerous to leave the child unsupervised.• WARNING: Make sure that all the locking mechanisms are activated before using the• product. Do not make alterations to the product.
WARNING: It is essential to keep the child away from the pushchair when folding or• unfolding it. It is unavoidable that there are sharp points and places where fingers could
get trapped during these operations.
WARNING: Read the instructions carefully before using this product and keep them for• future reference. Your children’s safety may be at risk if these instructions are not fol-
lowed.
WARNING: This platform is not designed to go up and down steps. If you have to go up• or down steps it is advisable to take the child off the platform.
WARNING: The child should not stand up if travelling over sloping or uneven ground.• WARNING: Before using the WAVE each time, make sure that the platform and the push-• chair are connected properly.
WARNING: While fitting the WAVE keep the small parts out of the reach of children.• The plastic bags and packaging should be disposed of immediately to avoid the risk of
suffocation.
WARNING: Never leave the child unattended.• WARNING: WAVE is not suitable for use in snow or on soft surfaces.• Never use accessories that have not been approved by NURSE.S.A.• This product should be fitted and used correctly as specified in the user manual.• If there is any damage to the mechanism, only use the original replacement parts.•
WAVE is not suitable for use in snow or on soft surfaces.•

5
D
WARNUNG: Versuchen Sie nicht, das Board mit einem Buggy zu verbinden, der in die-• ser Gebrauchsanleitung nicht aufgeführt ist.
WARNUNG: Dieses Modell eignet sich für Kinder ab 12 Monaten und bis 20 kg.• WARNUNG: Verwenden Sie das WAVE Board erst, wenn Ihr Kind alleine, ohne Hilfe• gehen kann. Das Kind muss in der Mitte des Boards stehen und sich mit beiden Händen
am Schieber des Buggys festhalten.
WARNUNG: Dieses Board ist weder zum Rennen noch zum Rollschuhlaufen gedacht.• WARNUNG: Es darf sich nur ein Kind auf das Board stellen.• WARNUNG: Verwenden Sie das Board nicht, wenn es nicht sicher am Buggy befestigt• werden kann.
WARNUNG: Es kann gefährlich sein, das Kind unbeaufsichtigt zu lassen.• WARNUNG: Vergewissern Sie sich vor dem Gebrauch, dass die mechanische Verriege-• lung aktiviert ist. Verändern Sie das Produkt nicht.
WARNUNG: Es ist unbedingt sicherzustellen, dass das Kind nicht in die Nähe des Sitzes• gelangt, während dieser auf- und zugeklappt wird. Das Auftreten von Schnitt-, Druck-
und Quetschstellen ist bei diesen Tätigkeiten unumgänglich.
WARNUNG: Lesen Sie diese Anweisungen vor Gebrauch aufmerksam durch und be-• wahren Sie sie zum späteren Nachschlagen auf. Werden die Anweisungen nicht befolgt,
kann das die Sicherheit Ihrer Kinder gefährden.
WARNUNG: Dieses Board eignet sich nicht zum Treppen Rauf- oder Runtersteigen. Wir• empfehlen, das Kind in diesem Fall vom Board zu nehmen.
WARNUNG: Bei Neigungen, holprigem und unebenem Gelände darf das Kind nicht• stehen.
WARNUNG: Vergewissern Sie sich vor jedem Gebrauch des WAVE Boards, dass es• richtig mit dem Buggy verbunden ist.
WARNUNG: Während des Zusammenbaus sind kleine Bauteile außerhalb der Reichwei-• te von Kindern aufzubewahren. Die Plastiktüten und -verpackungen müssen unverzüg-
lich entsorgt werden, um das Risiko einer Erstickungsgefahr zu umgehen.
WARNUNG: Lassen Sie das Kind niemals unbeaufsichtigt.• WARNUNG: Das WAVE Board eignet sich nicht zum Gebrauch auf Schnee oder wei-• chen Untergründen.
Verwenden Sie auf keinen Fall Zubehör, das nicht von NURSE S.A zugelassen ist.• Dieses Produkt muss korrekt, d. h. laut den Vorgaben im Benutzerhandbuch, installiert• und benutzt werden.
Bei Schäden am Mechanismus dürfen nur Originalersatzteile verwendet werden.• Das WAVE Board eignet sich nicht zum Gebrauch auf Schnee oder weichen Untergrün-• den.

6
F
AVERTISSEMENT : N’essayez pas de la fixer sur une poussette différente de celles qui sont• mentionnées dans ces instructions.
AVERTISSEMENT : Elle est conçue pour des enfants jusqu’à 12 mois et pesant jusqu’à 20 kg.• AVERTISSEMENT : N’utilisez pas le Wave avant que votre enfant sache marcher tout seul• et sans aide. L’enfant doit se tenir debout sur la partie centrale de la planche et se tenir bien
agrippé des deux mains au guidon de la poussette.
AVERTISSEMENT : Cette planche à roulettes ne convient pas pour patiner ou courir.• AVERTISSEMENT : On ne peut pas monter deux enfants en même temps.• AVERTISSEMENT : Si on ne peut pas fixer le produit en toute sécurité sur la poussette, ne• pas utiliser la planche.
AVERTISSEMENT : Il peut être dangereux de laisser l’enfant sans surveillance.• AVERTISSEMENT : Vérifiez que tous les mécanismes de blocage sont bien activés avant de• l’utiliser. Ne pas réaliser des transformations sur le produit.
AVERTISSEMENT : Il est indispensable de vérifier que l’enfant se tient bien éloigné de la• poussette lors de son pliage et de son dépliage. L’apparition d’endroits susceptibles de pou-
voir couper, pincer ou coincer est inévitable lors de ces opérations.
AVERTISSEMENT : Lisez ces instructions attentivement avant d’utiliser ce produit et gardez-• les pour les consulter ultérieurement. La sécurité de vos enfants peut être remise en cause si
vous ne suivez pas ces instructions.
AVERTISSEMENT : Cette planche à roulettes n’a pas été conçue pour monter ou descendre• des escaliers. Si on doit descendre ou monter des escaliers, on recommande de faire de-
scendre l’enfant de la planche.
AVERTISSEMENT : En cas de pentes, de terrains accidentés ou de dénivellations, l’enfant ne• doit pas être debout.
AVERTISSEMENT : Avant chaque utilisation du Wave, vérifiez que la planche et la poussette• sont correctement assemblées.
AVERTISSEMENT : Pendant le montage, on doit maintenir les petites pièces hors de portée• des enfants. Les sacs en plastique et les emballages doivent être jetés immédiatement pour
éviter tout risque d’asphyxie.
AVERTISSEMENT : Ne laissez jamais l’enfant sans surveillance.• AVERTISSEMENT : WAVE ne convient pas pour une utilisation sur la neige ou sur des surfaces molles.• N’utilisez jamais d’accessoires non approuvés par NURSE.SA.• Ce produit doit être installé et utilisé correctement tel que cela est expliqué dans le manuel• de l’utilisateur.
Quand le mécanisme subit un dommage quelconque, on ne doit utiliser que des pièces de• rechange originales.
WAVE ne convient pas pour une utilisation sur la neige ou sur des surfaces molles.•

7
P
ADVERTÊNCIA: Não tente montá-lo em nenhum outro carrinho diferente dos menciona-• dos nestas instruções.
ADVERTÊNCIA: desenhado para crianças até 12 meses e até 20 kg de peso.• ADVERTÊNCIA: Não use o WAVE até que a criança possa andar de forma independente e• sem ajuda. A criança deve ir em pé na parte central da plataforma e segurar-se bem com
ambas as mãos ao guiador do carrinho.
ADVERTÊNCIA: Este produto não foi desenhado para correr ou patinar.• ADVERTÊNCIA: Não podem ser transportadas duas crianças ao mesmo tempo.• ADVERTÊNCIA: Quando não for possível fixar com segurança o produto ao carrinho, não• usar a plataforma.
ADVERTÊNCIA: Pode ser perigoso deixar a criança sem vigilância.• ADVERTÊNCIA: Assegure-se de que todos os mecanismos de bloqueio estão activados• antes de usar. Não realizar transformações no produto.
ADVERTÊNCIA: É imprescindível assegurar que a criança se mantém afastada da cadeira• durante as acções de dobragem e desdobragem. O aparecimento de pontos de corte,
compressão e aprisionamento são inevitáveis durante estas operações.
ADVERTÊNCIA: Leia as instruções atentamente antes de usar este produto e guarde-• as para futuras consultas. A segurança dos seus filhos pode ser afectada se não forem
cumpridas estas instruções.
ADVERTÊNCIA: Esta plataforma não foi desenhada para subir ou descer degraus. Reco-• mendamos descer a criança da plataforma, no caso de ter que subir/descer degraus.
ADVERTÊNCIA: Em caso de inclinações, terrenos desiguais ou desníveis, a criança deve• estar em pé.
ADVERTÊNCIA: Antes de começar cada utilização do WAVE, assegure-se que a plata-• forma e o carrinho estão correctamente unidos.
ADVERTÊNCIA: Durante a montagem, devem manter-se as peças pequenas fora do al-• cance das crianças. As bolsas de plástico e as embalagens devem ser eliminadas de im-
ediato para evitar o risco de asfixia.
ADVERTÊNCIA: Não deixar a criança sozinha.• ADVERTÊNCIA: O WAVE não é apropriado para utilizar na neve ou em superfícies ma-• cias.
Não use nunca acessórios que não sejam aprovados pela NURSE.S.A.• Este produto deve ser instalado e utilizado correctamente tal como especificado no man-• ual do utilizador.
No caso de qualquer possível dano no mecanismo, apenas deverão ser utilizadas peças• de substituição originais.
O WAVE não é apropriado para utilizar na neve ou em superfícies macias.•

8
I
ATTENZIONE: Non cercare di assemblare la piattaforma su nessun passeggino diverso• da quelli indicati in queste istruzioni.
ATTENZIONE: La piattaforma è pensata per bambini fino ai 12 mesi e ai 20 kg di peso.• ATTENZIONE: Non utilizzare la piattaforma WAVE fino a che il bambino non è in grado• di camminare in modo indipendente e senza aiuto. Il bambino deve stare in piedi nella
parte centrale della piattaforma e tenersi stretto con entrambe le mani al manubrio del
passeggino.
ATTENZIONE: Questa piattaforma non è pensata per correre o pattinare.• ATTENZIONE: Non far salire due bambini contemporaneamente.• ATTENZIONE: Se non è possibile fissare il prodotto al passeggino in modo sicuro, non• utilizzare la piattaforma.
ATTENZIONE: Può essere pericoloso lasciare il bambino privo di vigilanza.• ATTENZIONE: Assicurarsi che tutti i meccanismi di blocco siano attivati prima dell’uso.• Non modificare il prodotto.
ATTENZIONE: È indispensabile assicurarsi che il bambino sia distante dal passeggino• durante le manovre di apertura e chiusura. La comparsa di punti che possono provocare
tagli, schiacciamenti o incastri è inevitabile durante queste operazioni.
ATTENZIONE: Leggere attentamente le istruzioni prima di usare questo prodotto e con-• servarle per consultazioni future. La sicurezza del bambino può essere compromessa se
non si osservano le presenti istruzioni.
ATTENZIONE: Questa piattaforma non è realizzata per salire o scendere scale. Si rac-• comanda di far scendere il bambino dalla piattaforma se è necessario salire o scendere
le scale.
ATTENZIONE: Nel caso di pendenze, terreni irregolari o dislivelli, il bambino non deve• stare in piedi sulla piattaforma.
ATTENZIONE: Prima di ogni uso della WAVE, assicurarsi che la piattaforma e il passeg-• gino siano uniti correttamente.
ATTENZIONE: Durante il montaggio è necessario tenere i pezzi piccoli fuori dalla portata• dei bambini. Le borse di plastica e gli imballaggi si devono smaltire immediatamente per
evitare il rischio di asfissia.
ATTENZIONE: Non lasciare mail il bambino privo di vigilanza.• ATTENZIONE: La piattaforma WAVE non è adatta all’uso sulla neve o su superfici morbide.• Non usare mai accessori non approvati da NURSE.S.A.• Questo prodotto va installato e utilizzato correttamente, come si specifica nel manuale• di istruzioni.
In caso di possibili danni al meccanismo si devono utilizzare solo i ricambi originali.• WAVE non è adatta all’uso sulla neve o su superfici morbide.•

9
ENGLISH
1 Platform
2 Wheels
3 Arms
4 Joints
5 Storage strap
6 Bolts
ESPAÑOL
1 Plataforma
2 Ruedas
3 Brazos
4 Juntas
5 Cinta para almacenaje
6 Pernos
PORTUGUÊS
1 Plataforma
2 Rodas
3 Braços
4 Juntas
5 Cinta para armazenagem
6 Pernos
1
2
3
4
56
FRANÇAIS
1 Planche
2 Roues
3 Bras
4 Attaches
5 Sangle de stockage
6 Rondelles
ITALIANODEUTSCH
1 Piattaforma
2 Ruote
3 Attacchi
4 Giunti
5 Cinghia per la conservazione
6 Perni
1 Board
2 Räder
3 Arme
4 Verbindungsstücke
5 Band zum Verstauen
6 Bolzen

10
1 2
4
3
A B
CLICK

11
6 7
5
A B

12
E
1
2
3
4
5
INSTALACIÓN DE LAS 3 RUEDAS EN LA PLATAFORMA
A En el reverso de la plataforma, colocar los pernos en los tres espacios para el rodamiento
de las ruedas.
B Insertar los ejes de las ruedas hasta que haga clic. (Imagen 1)
• Para evitar que se salgan las ruedas, una vez se han instalado, resultarán difíciles de des-
encajar.
Atención: Instalar los “pernos” para evitar que las ruedas rocen con la plataforma.
Para mantener la solidez de las partes ajustables, se construye con firmeza.
Especialmente, durante el invierno o en entornos fríos, hay casos en los que el endurecimien-
to de la resina no permite que se introduzca. Cuando sea difícil la instalación de las ruedas,
se puede utilizar un secador para que las partes ajustables (los rodamientos de las ruedas)
estén a una temperatura templada y se facilite su introducción.
• Cuando se ponga a temperatura templada, realizar la operación con cuidado para evitar
quemaduras.
• No debe exponerse directamente al fuego. Hay riesgo de quemaduras o de incendio.
• En caso de imprevisto, ponerse en contacto con Babynurse
COLOCACIÓN DE LOS 2 BRAZOS EN LA PLATAFORMA
A Para que el gancho del brazo mire hacia el exterior, el agujero de la rosca del brazo se debe
hacer pasar y encajar en el perno del eje del brazo (en los dos espacios). (Imagen 2)
B Instalar el perno (pequeño) en el perno del eje del brazo y ajustar ligeramente la tuerca de
mariposa (grande), de manera que el brazo pueda girar una vez colocado. (Imagen 2)
Atención: Según el tipo de cochecito, al instalar el gancho del brazo mirando hacia el
exterior, hay casos en los que puede chocar con el cochecito y no se pueda instalar cor-
rectamente.
En estos casos, hay que cambiar el brazo derecho por el izquierdo de manera que los brazos
queden instalados mirando hacia el interior.
INSTALACIÓN DE LAS 2 JUNTAS EN EL COCHECITO
A Aflojar la tuerca de mariposa de la junta y tirar hacia fuera la cinta de la junta. (Imagen
3/1)
B Cuando la cinta de la junta manual está enrollada alrededor del soporte de la rueda trasera
del cochecito, insertar la junta y colocar la tuerca de mariposa. (Imagen 3/2)
INSTALACIÓN DE LA PLATAFORMA EN LAS JUNTAS
A Aflojar todas las tuercas de mariposa de los brazos de manera que se pueda cambiar el
ángulo con total libertad.
B Encajar los ganchos de los brazos de ambos lados en la ranura de la junta instalada. (Imagen
4)
Cuando la palanca de la junta se tira hacia la dirección de la flecha, se abre la ranura.
REGULACIÓN DE LA LONGITUD DE LOS BRAZOS Y DE LA ALTURA DE LAS JUNTAS
A A la vez que se pulsa el botón regulador, cuando haga clic, seleccionar la posición del agu-
jero y regular la longitud del brazo. (Figura 5/1)
Atención: Regular la longitud del brazo de manera que cuando el niño esté de pie en la plata-
forma pueda agarrarse con las dos manos al manillar del cochecito.
Aviso: Procurar que haya la misma longitud en ambos brazos. Comprobar que el botón esté
jado. Si el botón no está jado, la plataforma pierde estabilidad y puede ser muy peli-
groso.
Atención: Comprobar que los brazos no chocan con las ruedas.

13
INSTRUCCIONES
GEBRAUCHSANWEISUNG
INSTRUÇÕES
INSTRUCTIONS
INSTRUCTIONS
ISTRUZIONI
•
•
•
7
6
MANTENIMIENTO:
Mantenga limpias y secas las partes metálicas para prevenir que se oxiden. Lubrique las partes
móviles regular mente con spray de silicona. No utlice aceite ni grasa. Para limpiar las partes de
plástico utilice un detergente sua ve y agua templada solamente. Por su seguridad y para un man-
tenimiento adecuado es aconsejable que lleve su producto a uno de nuestros talleres oficiales para
una revisión periódica.
B Cuando la plataforma está en posición horizontal, regular la altura de las juntas para que las
3 ruedas tengan el mismo punto de adherencia al suelo. (Imagen 5/2)
Aviso: Procurar que la altura de ambas juntas sea la misma. Si la altura de las juntas es difer-
ente, se pierde estabilidad y puede ser muy peligroso.
Atención: Cuando la altura a la que se han regulado las juntas es reducida, hay casos en los
que la plataforma no puede ponerse en posición horizontal y es necesario ajustar el ángulo
de la junta. (Ver la regulación del ángulo de la articulación del brazo en la imagen 6 en la
siguiente página).
REGULACIÓN DEL ÁNGULO DE LA ARTICULACIÓN DEL BRAZO.
Para que las 3 ruedas tengan un punto de adherencia al suelo cuando la plataforma está en
posición horizontal, hay que seguir las siguientes instrucciones para regular el ángulo de la
articulación del brazo.
A Aojar la tuerca de mariposa de la articulación y regular el ángulo de la articulación del
brazo para que la plataforma quede en posición horizontal. (Imagen 6)
B Una vez se haya regulado el ángulo de la articulación, jar la tuerca de mariposa de la
articulación.
• Atención: las dos articulaciones deben estar reguladas con un ángulo del mismo grado.
POR ÚLTIMO, AJUSTE DE TODOS LOS TORNILLOS Y FIJACIÓN.
A Una vez se haya regulado la longitud del brazo, la altura de la junta y el ángulo de la articu-
lación del brazo, fijar todas las tuercas de mariposa de las juntas.
B Por último, fijar con firmeza la tuerca de mariposa de la rosca del brazo del reverso de la
plataforma.
• Atención: Los dos brazos deben estar regulados con un ángulo del mismo grado y la parte
central del cochecito y la de la plataforma deben situarse en la misma posición. (Imagen 7)
• Tamaño (plataforma): 44 cm (ancho) x
16,5 cm (alto) x 22 cm (profundidad)
• Peso: 2,3 Kg. aprox.
• Materiales: (cuerpo) polipropileno,
(ruedas) goma, nylon, (piezas de
conexión) acero, nylon
• País productor: China
• Garantía de responsabilidad de
reparación del producto
• Según la forma o el tipo de soporte del
cochecito es posible que no se pueda
instalar.
• Ancho del soporte de la rueda trasera
de 32,5 a 43 cm
• Medir en la parte central del soporte.
• Diámetro del soporte de la rueda trasera
de 17 a 27 mm
• Ancho de la instalación de junta
no inferior a 5 cm

14
E
AVISO: Cuando se utiliza la plataforma inclinada hacia adelante se pierde estabilidad en el recorrido
y puede ser muy peligroso. Es importante que la plataforma quede fijada tal y como se muestra en la
imagen de la derecha, es decir, en posición completamente horizontal, o bien ligeramente inclinada
hacia atrás.
1.Enganchar el gancho de la cinta en el agujero de la parte central
frontal de la plataforma.
2.Pasar la cinta por el manillar del cochecito, tal y como se muestra
en la fotografía de la izquierda.
3.Para bajar la plataforma, extraer el gancho sin tirar de la cinta.
• Regulación de la longitud de la cinta
• Regular la longitud adecuada de la cinta dependiendo del lugar
en el que se enganche.
• Pasar la cinta por detrás por el espacio inferior y, a continuación,
pasarla por el espacio superior.
• Mostrar la parte central dentada.
• Abrochar con la parte inferior del cierre con un simple clic.
• Regular la parte sobrante de la cinta y tensarla para que no se
afloje.
Cuando no se utiliza la plataforma, se puede enganchar al cochecito y quedar colgando.
• Según la posición y el ángulo en el que se haya instalado la plataforma es posible que no se
pueda colgar. En estos casos, se deberá desmontar la plataforma y guardarla.
• Atención: cuando se pliegue el cochecito, desmontar el patinete desde las juntas. Sin embargo,
hay ocasiones en las que, cuando se pliega, las juntas no se pueden desmontar.
• Atención: comprobar que la plataforma está perfectamente colgada.
• Atención: cuando no hay ningún niño en el cochecito y se cuelga la plataforma, hay casos en los
que se puede desequilibrar el cochecito y volcarse. Mantenga la prudencia.

15
GB INSTRUCCIONES
GEBRAUCHSANWEISUNG
INSTRUÇÕES
INSTRUCTIONS
INSTRUCTIONS
ISTRUZIONI
•
•
•
1
2
3
4
5
FITTING THE 3 WHEELS ONTO THE PLATFORM
A Fit the bolts into the three spaces for the wheel bearing on the back of the platform.
B Insert the wheel axles until they click into place. (Diagram 1)
• Once the wheel shave been tted they are difcult to detach to prevent them from coming loose.
Warning: Fit the “bolts” to prevent the wheels from rubbing against the platform.
The adjustable parts have been solidly built to keep their shape.
In winter particularly, or in cold environments, the resin may harden making it difficult to in-
sert the wheels. If it is difficult to fit the wheels, use a hair dryer on the adjustable parts (the
wheel bearings) to warm them making it easier to insert the wheels.
• When the parts are warm, t the wheels carefully to avoid burns.
• Do not expose the parts to a naked ame. There is a risk of burns or re.
• If in doubt, get in touch with Babynurse
FITTING THE 2 ARMS ONTO THE PLATFORM
A For the arm hook to face outwards, the hole of the arm thread should pass through and fit
into the bolt of the axle of the arm (in the two spaces). (Diagram 2)
B Fit the bolt (small) into the arm axle bolt and gently tighten the wing nut (large), so that the
arm can turn once it is fitted. (Diagram 2)
Warning: Depending on the type of pushchair, when the arm hook has been fitted facing
outwards, it may knock against the pushchair preventing it from being installed correctly.
If this happens, swap the right arm for the left arm so that the arms are fitted facing in-
wards.
FITTING THE 2 JOINTS ONTO THE PUSHCHAIR
A Loosen the wing nut of the joint and pull the joint strap outwards. (Diagram 3/1)
B When the manual joint strap is rolled up around the support of the rear wheel of the push-
chair, insert the joint and fit the wing nut. (Diagram 3/2)
FITTING THE PLATFORM ONTO THE JOINTS
A Loosen all the wing nuts on the arms so that the angle can be changed easily.
B Fit the arm hooks on both sides into the slots of the joints fitted on the pushchair. (Diagram 4)
When the joint lever is pulled in the direction of the arrow, the slot opens.
ADJUSTING THE LENGTH OF THE ARMS AND THE HEIGHT OF THE JOINTS
A. While pressing the adjustment button, when it clicks, select the hole position and adjust
the length of the arm. (Diagram 5/1)
Warning: Adjust the length of the arm so that when the child is standing on the platform he
can hold onto the pushchair handles with both hands.
Note: Make sure that both arms are the same length. Check that the button is securely fas-
tened. If the button is not fastened, the platform loses stability and it can be very dangerous.
Warning: Check that the arms do not knock against the wheels.

16
GB
7
6
MAINTENANCE:
Keep the metal parts clean and dry to prevent them from rusting. Lubricate the mobile parts re-
gularly with silicone spray. Do not use oil or grease. Just use warm water and a mild detergent for
cleaning the plastic parts. For your safety and recommended maintenance it is advisable to take
the product to one of our official workshops to be inspected from time to time.
B When the platform is horizontal, adjust the height of the joints so that the 3 wheels are even
on the ground. (Diagram 5/2)
Note: Make sure that both joints are at the same height. If the joints are at different heights,
the platform loses stability and it can be very dangerous.
Warning: When the joints have been adjusted to a lower height, it is possible that the plat-
form can not be placed in the horizontal position and it is necessary to adjust the angle of the
joint. (See adjusting the angle of the arm joint in diagram 6 on the next page).
ADJUSTING THE ANGLE OF THE ARM JOINT.
The following instructions should be followed to adjust the angle of the arm joint so that the
3 wheels are even on the ground when the platform is in the horizontal position.
A Loosen the wing nut of the joint and adjust the angle of the arm joint so that the platform
is in the horizontal position. (Diagram 6)
B Once the angle of the joint has been adjusted, tighten the wing nut on the joint again.
• Warning: the two joints should be adjusted to the same angle.
LASTLY, TIGHTENING ALL THE SCREWS AND FASTENINGS.
A Once the length of the arm, the height of the joint and the angle of the arm joint have all
be adjusted, tighten all the wing nuts on the joints.
B Lastly, tightly fasten the wing nut of the arm thread on the back of the platform.
• Warning: The two arms should be adjusted to the same angle and the central part of the
pushchair and of the platform should be in the same position. (Diagram 7)
• Size (platform): 44 cm (width) x 16.5 cm
(height) x 22 cm (depth)
• Weight: 2.3 Kg. approx.
• Materials: (body) polypropylene,
(wheels) rubber, nylon, (connector
parts) steel, nylon
• Made in China
• Guarantee for product repairs
• Depending on the shape or type of push
chair support it may not be possible to in
stall the product.
• Width of the rear wheel support from 32.5
to 43 cm
• Measure the central part of the support.
• Diameter of the rear wheel support from
17 to 27 mm
• Width of the joint installation no less than
5 cm.

17
INSTRUCCIONES
GEBRAUCHSANWEISUNG
INSTRUÇÕES
INSTRUCTIONS
INSTRUCTIONS
ISTRUZIONI
•
•
•
WARNING: When the platform is used tilted forwards it loses stability and it can be very dangerous.
It is important that the platform is fitted as shown in the diagram on the right, in other words, either
completely horizontal or tilting slightly backwards.
1. Clip the strap hook into the hole in the front central part of the
platform.
2. Pass the strap around the pushchair handlebar, as shown in the
photograph on the left.
3. To lower the platform, take the hook out without pulling the strap.
• Adjusting the length of the strap.
• Adjust the strap to the appropriate length so it can be clipped on
correctly.
• Pass the strap behind through the lower space and then pass it
through the upper space.
• Leave the central serrated part clear.
• Fasten to the lower part of the lock with a simple click.
• Adjust the excess part of the strap and tighten it so it does not
come loose.
When the platform is not in use it can be hooked onto the pushchair and hung from it.
• Depending on the position and angle at which the platform has been installed it may not be possible
to hang it from the pushchair. In these cases, the platform should be detached and stored away.
•Note:whenfoldingthepushchair,detachtheboardfromthejoints.However,sometimeswhenthepushchair
is folded it is not possible to detach the joints.
•Note:checkthattheplatformishungupproperly.
•Note:whenthereisnotachildinthepushchairandtheplatformisfoldedandhungupitcansometimesunba-
lance the pushchair and tip it over. Take care when folding the platform.

18
D
1
2
3
4
5
ANBRINGUNG DER 3 RÄDER AM BOARD
A) Führen Sie die Bolzen in die drei Öffnungen für die Radlager auf der Rückseite des Boards
ein.
B) Drücken Sie die Radachsen rein, bis ein Klickgeräusch ertönt (Bild 1).
• Um zu verhindern, dass die Räder nach dem Einbau wieder rausrutschen, ist das Herauslö-
sen schwierig.
Achtung: Bauen Sie die Bolzen ein, um zu verhindern, dass die Räder am Board reiben.
Die beweglichen Teile sind so aufgebaut, dass ein robustes Endprodukt entsteht.
Insbesondere im Winter oder bei Kälte kann es aufgrund des harten Harzes unmöglich wer-
den, sie einzuführen. Ist der Einbau der Räder schwierig, kann ein Haartrockner verwendet
werden, um die beweglichen Teile (Radlager) auf Zimmertemperatur zu erwärmen und das
Einführen zu erleichtern.
• Achten Sie nach dem Erwärmen der Teile darauf, sich nicht zu verbrennen.
• Setzen Sie die Teile keinem direkten Feuer aus. Es besteht Verbrennungs- oder Brandge-
fahr.
• Sollte sich etwas Unerwartetes ereignen, kontaktieren Sie bitte Babynurse.
ANBAU DER 2 ARME AN DAS BOARD
A) Damit der Haken des Arms nach außen zeigt, muss die Gewindeöffnung des Arms durch
den Bolzen der Armachse (in die beiden Freiräume) eingeführt werden und dort einrasten
(Bild 2).
B) Bauen Sie den (kleinen) Bolzen in den Bolzen der Armachse ein und ziehen Sie die Flügel-
mutter (groß) leicht an, damit sich der Arm drehen kann, sobald er befestigt ist (Bild 2).
Achtung: Es gibt Buggys, bei denen der Armhaken, wenn er nach außen zeigt, mit dem Bug-
gy zusammenstößt und folglich nicht richtig angebaut werden kann.
In diesem Fall müssen die beiden Arme vertauscht werden, so dass beide Arme nach innen
zeigen.
MONTAGE DER 2 VERBINDUNGSSTÜCKE AN DAS BOARD
A) Lockern Sie die Flügelmutter der Verbindung und ziehen Sie das Verbindungsband nach
außen (Bild 3/1).
B) Wenn das Verbindungsband um die Aufnahme des Buggy-Hinterrads gewickelt ist, dann
führen Sie die Verbindung ein und bringen Sie die Flügelmutter an (Bild 3/2).
BEFESTIGUNG DES BOARDS AN DEN VERBINDUNGSSTÜCKEN
A) Lockern Sie alle Flügelmuttern der Arme, so dass der Winkel nach Belieben geändert
werden kann.
B) Hängen Sie die Haken der Arme auf beiden Seiten in den Schlitzen der angebauten Ver-
bindung ein (Bild 4).
Zieht man den Hebel der Verbindung in Richtung des Pfeils, öffnet sich der Schlitz.
EINSTELLUNG DER ARMLÄNGE UND DER VERBINDUNGSSTÜCKHÖHE
A) Drücken Sie den Einstellknopf und wählen Sie, sobald das Klickgeräusch zu hören ist, die
Position des Lochs und stellen Sie die Armlänge ein (Abbildung 5/1).
Achtung: Stellen Sie die Armlänge so ein, dass das Kind während es auf dem Board steht, mit
beiden Händen den Schieber des Buggys greifen kann.
Hinweis: Achten Sie darauf, dass beide Arme die gleiche Länge haben. Überprüfen Sie, ob
der Knopf eingerastet ist. Ist der Knopf nicht eingerastet, verliert das Board an Stabilität und
das kann sehr gefährlich sein.
Achtung: Achten Sie darauf, dass die Arme nicht an die Räder stoßen.

19
INSTRUCCIONES
GEBRAUCHSANWEISUNG
INSTRUÇÕES
INSTRUCTIONS
INSTRUCTIONS
ISTRUZIONI
•
•
•
7
6
INSTANDHALTUNG:
Halten Sie die Metallteile trocken, um Rost vorzubeugen. Schmieren Sie die beweglichen Teile

regelmäßig mit Silikonspray. Verwenden Sie weder Fett noch Öl. Verwenden Sie zum Reinigen
der Kunststoffteile nur mildes Reinigungsmittel und lauwarmes Wasser. Zu Ihrer Sicherheit und
zwecks angemessener Instandhaltung ist es ratsam, Ihr Produkt regelmäßig in unsere offiziellen
Werkstätten zu bringen, wo es überprüft wird.
B) Stellen Sie die Höhe der Verbindungsstücke ein, wenn sich das Board in waagrechter Stel-
lung befindet, damit die 3 Räder die gleiche Auflagefläche am Boden haben. (Bild 5/2)
Hinweis: Achten Sie darauf, dass die Höhe der Verbindungsstücke gleich ist. Bei unterschied-
lich hohen Verbindungsstücken verliert das Board an Stabilität und das kann sehr gefährlich
sein.
Achtung: Bei niedrig eingestellten Verbindungsstücken kann es dazu kommen, dass das
Board nicht in die Waagrechte gebracht werden kann. In diesem Fall muss der Winkel der
Verbindung angepasst werden. (Siehe Einstellung des Winkels des Armgelenks in Bild 6 auf
der nächsten Seite.)
EINSTELLUNG DES WINKELS DES ARMGELENKS
Damit die 3 Räder eine Auflagefläche am Boden haben, wenn sich das Board in waagrechter
Position befindet, muss der Winkel des Armgelenks folgendermaßen eingestellt werden.
A) Lösen Sie die Flügelmutter des Gelenks und stellen Sie den Winkel des Armgelenks so ein,
dass sich das Board in waagrechter Position befindet (Bild 6).
B) Ziehen Sie die Flügelmutter an, sobald der Winkel des Gelenks eingestellt ist.
• Achtung: Die beiden Gelenke müssen den gleichen Winkel haben.
ABSCHLIESSENDE ANPASSUNG ALLER SCHRAUBEN UND FIXIERUNG
A) Nachdem die Armlänge, die Verbindungshöhe und der Winkel des Armgelenks eingestellt
wurden, sind alle Flügelmuttern der Verbindungsstücke festzuziehen.
B) Ziehen Sie abschließend die Flügelmutter des Bolzens am Arm auf der Rückseite des
Boards gut fest.
• Achtung: Für die beiden Arme muss der gleiche Winkel eingestellt werden und der mittlere
Teil des Buggys und des Boards müssen auf gleicher Höhe sein (Bild 7).
• Größe (Board): 44 cm (breit) x 16,5 cm
(hoch) x 22 cm (tief)
• Gewicht: ca. 2,3 kg aprox.
• Materialien: (Körper) Polypropylen,
(Räder) Gummi, Nylon, (Verbindungstei-
le) Stahl, Nylon
• Hergestellt in: China
• Produktreparaturgarantie
• Je nach Form oder Trägertyp des Bug-
gys ist die Montage u. U. nicht möglich.
• Breite der Hinterradaufnahme von 32,5 bis
43 cm
• Im mittleren Teil der Aufnahme messen.
• Durchmesser der Hinterradaufnahme von
17 bis 27 mm
• Der Verbindungsteil muss mindestens 5
cm breit sein.

20
D
WARNUNG: Verwendet man das Board vorn über geneigt, verliert es mit der Zeit an Stabilität und
das kann sehr gefährlich sein. Es ist wichtig, das Board so zu befestigen, wie es auf dem Bild rechts zu
sehen ist, d. h. vollkommen waagrecht oder leicht nach hinten geneigt.
1. Hängen Sie den Haken des Bands in das Loch im mittleren Teil
des Boards ein.
2. Ziehen Sie das Band, wie im Foto links dargestellt, durch den
Schieber des Buggys.
3. Zum Herunterlassen des Boards den Haken lösen ohne am Band
zu ziehen.
• Einstellen der Bandlänge
• Stellen Sie die Länge, abhängig von der Stelle an der Sie den
Haken einhängen, passend ein.
• Ziehen Sie das Band von hinten durch den unteren Teil und an-
schließend durch den oberen.
• Den mittleren Teil mit Zähnen zeigen.
• Mit dem unteren Teil des Verschlusses verbinden, mit einem ein-
fachen Klick.
• Den übrigen Teil des Bands einstellen und spannen, damit es
nicht locker wird.
Wird das Board nicht benutzt, kann es am Buggy eingehängt werden.
• Je nach Position und Winkel, mit dem das Board eingestellt wurde, kann es sein, dass ein Einhän-
gen nicht möglich ist. In diesem Fall muss das Board abmontiert und aufbewahrt werden.
• Achtung: Beim Zusammenfalten des Buggys müssen die Roller an der Verbindung demontiert
werden. Es gibt jedoch Fälle, in denen sich die Verbindungsstücke beim Falten nicht entfernen
lassen.
• Achtung: Vergewissern Sie sich, dass das Board richtig eingehängt ist.
• Achtung: Ist kein Kind im Buggy, muss das Board eingehängt werden, denn in manchen Fällen
kann der Buggy aus dem Gleichgewicht geraten und sich überschlagen. Seien Sie stets vorsich-
tig.
Table of contents
Languages:
Other Be Cool Stroller manuals

Be Cool
Be Cool LIGHT User manual

Be Cool
Be Cool STREET User manual

Be Cool
Be Cool Bubble User manual

Be Cool
Be Cool CLUB User manual

Be Cool
Be Cool Pleat User manual

Be Cool
Be Cool ultimate User manual

Be Cool
Be Cool ZAS User manual

Be Cool
Be Cool Pleat Convert User manual

Be Cool
Be Cool bi-baby User manual

Be Cool
Be Cool stratos User manual

Be Cool
Be Cool ATTIC User manual

Be Cool
Be Cool outback User manual

Be Cool
Be Cool Bandit User manual

Be Cool
Be Cool SLIDE User manual

Be Cool
Be Cool quantum User manual

Be Cool
Be Cool trolley User manual

Be Cool
Be Cool LIGHT User manual

Be Cool
Be Cool slide flex User manual

Be Cool
Be Cool stratos cot User manual

Be Cool
Be Cool LIFT User manual