manuals.online logo
Brands
  1. Home
  2. •
  3. Brands
  4. •
  5. BEA
  6. •
  7. Accessories
  8. •
  9. BEA Spotfinder Infrared Zone Locator User manual

BEA Spotfinder Infrared Zone Locator User manual

This manual suits for next models

1

Other BEA Accessories manuals

BEA CONDOR User manual

BEA

BEA CONDOR User manual

BEA CGS-MF User manual

BEA

BEA CGS-MF User manual

BEA IS40 User manual

BEA

BEA IS40 User manual

BEA ACTIV8 THREE PULSE User manual

BEA

BEA ACTIV8 THREE PULSE User manual

BEA LZR SIGMA User manual

BEA

BEA LZR SIGMA User manual

BEA MW6 User manual

BEA

BEA MW6 User manual

BEA C8 User manual

BEA

BEA C8 User manual

BEA LZR-MICROSCAN1UT User manual

BEA

BEA LZR-MICROSCAN1UT User manual

BEA IXIO-DP3 User manual

BEA

BEA IXIO-DP3 User manual

BEA CONDOR ID User manual

BEA

BEA CONDOR ID User manual

BEA Eagle Operator's manual

BEA

BEA Eagle Operator's manual

BEA COLIBRI ONE User manual

BEA

BEA COLIBRI ONE User manual

BEA IS40 User manual

BEA

BEA IS40 User manual

BEA COLIBRI ONE DRO User manual

BEA

BEA COLIBRI ONE DRO User manual

BEA WIZARD II User manual

BEA

BEA WIZARD II User manual

BEA CRYSTAL User manual

BEA

BEA CRYSTAL User manual

BEA SPARROW User manual

BEA

BEA SPARROW User manual

BEA LZR-FLATSCAN REV-LZ User manual

BEA

BEA LZR-FLATSCAN REV-LZ User manual

BEA FOCUS User manual

BEA

BEA FOCUS User manual

BEA BODYGUARD III GT 300 User manual

BEA

BEA BODYGUARD III GT 300 User manual

BEA MAGIC SWITCH MS21H User manual

BEA

BEA MAGIC SWITCH MS21H User manual

BEA MAGIC SWITCH MS09 User manual

BEA

BEA MAGIC SWITCH MS09 User manual

BEA VIO-ST User manual

BEA

BEA VIO-ST User manual

BEA EAGLE User manual

BEA

BEA EAGLE User manual

Popular Accessories manuals by other brands

Quincy lab 140AE-1 operating manual

Quincy lab

Quincy lab 140AE-1 operating manual

HomePro ZIR000 user manual

HomePro

HomePro ZIR000 user manual

DOL 20SCR Technical user guide

DOL

DOL 20SCR Technical user guide

RAB Smart Task installation manual

RAB

RAB Smart Task installation manual

Kemppi KMS 300 quick guide

Kemppi

Kemppi KMS 300 quick guide

Stearns 57,500 Series Installation and service instructions

Stearns

Stearns 57,500 Series Installation and service instructions

iGuzzini TWILIGHT COPENAGHEN manual

iGuzzini

iGuzzini TWILIGHT COPENAGHEN manual

Adelaide Annexe & Canvas Avan Deluxe installation guide

Adelaide Annexe & Canvas

Adelaide Annexe & Canvas Avan Deluxe installation guide

OHAUS 5000 instruction manual

OHAUS

OHAUS 5000 instruction manual

HOME8 WLS1300 quick start guide

HOME8

HOME8 WLS1300 quick start guide

MAXBOTIX MaxSonar quick start guide

MAXBOTIX

MAXBOTIX MaxSonar quick start guide

ioSmart iSmart56 Installation and user guide

ioSmart

ioSmart iSmart56 Installation and user guide

Focusrite Scarlett 18i8 user guide

Focusrite

Focusrite Scarlett 18i8 user guide

Velleman ED38105 user manual

Velleman

Velleman ED38105 user manual

JumpSport SkyBounce user manual

JumpSport

JumpSport SkyBounce user manual

Prima-Temp PRIYA Instructions for use

Prima-Temp

Prima-Temp PRIYA Instructions for use

Tefcold BC85I-BC85I W user manual

Tefcold

Tefcold BC85I-BC85I W user manual

Vaisala WMS302 user guide

Vaisala

Vaisala WMS302 user guide

manuals.online logo
manuals.online logoBrands
  • About & Mission
  • Contact us
  • Privacy Policy
  • Terms and Conditions

Copyright 2025 Manuals.Online. All Rights Reserved.

LED COLOR: POSITION
‘ORANGE’LED FOR POSITION
‘RED’LED FOR POSITION
‘GREEN’LED FOR POSITION
SPOTFINDER
USER’S GUIDE
INFRARED ZONE LOCATOR
1 Description & Specifications
75.0176.04 20080331 Page 1 of 2
 BEA’s Infrared (IR) Spotfinder is a
hand-held tool used to locate an
active infrared source.
 This easily locates an IR area
which can be used to assist in the
palcement of the sensing zone as
well as approximate the distance
from a sensor.
 The Spotfinder has two settings,
(1) LED only (light, no sound) or
(2) LED and Buzzer.
 This accessory will shut-off after
45 seconds of no IR activity. To
reactivate, switch OFF then back
ON by selecting either LED or
BUZZER.
POSITION LED COLOR BUZZER LEVEL IR LIGHT LEVEL
1 GREEN NONE NONE
2 ORANGE SOFT - WEAK LOW
3 RED LOUD - STRONG HIGH
N/A FLASHING ORANGE LOW BATTERIES
2 Settings & Placement
DESCRIPTION SPECIFICATION
POWER SUPPLY AAAAlkaline Batteries (2) Included
DIMENSIONS 3” X 2 1/4” X 1” (76mm x 57mm x 25mm)
MATERIAL ABS Plastic
For sliding door overhead presence detection, place the Spotfinder flat on the floor so that the IR-SPOT is at the appropriate
distance from the door face. Adjust the IR Curtain on the sensor until the LED turns Orange and/or the Buzzer begins to beep
(as in Position 2 below).
NOTE: The Spotfinder only serves to identify an area of infrared light and not necessarily imply the area of the sensors detection.
BEA, Inc. always recommends a walk test to ensure compliance to all applicable standards for sensing patterns.
See ANSI
A156.10 for
Required
Distance
Page 2 of 2 75.0176.04 20080331
6 Company Contact
Do not leave problems unresolved. If a satisfactory solution cannot be achieved after troubleshooting
a problem, please call BEA, Inc. If you must wait for the following workday to call BEA, leave the door
inoperable until satisfactory repairs can be made. Never sacrifice the safe operation of the automatic door or
gate for an incomplete solution. The following numbers can be called 24 hours a day, 7 days a week.
For more information, visit www.beasensors.com
US and Canada:
Canada:
Northeast:
1-866-249-7937
1-866-836-1863
1-866-836-1863
Southeast:
Midwest:
West:
1-800-407-4545
1-888-308-8843
1-888-419-2564
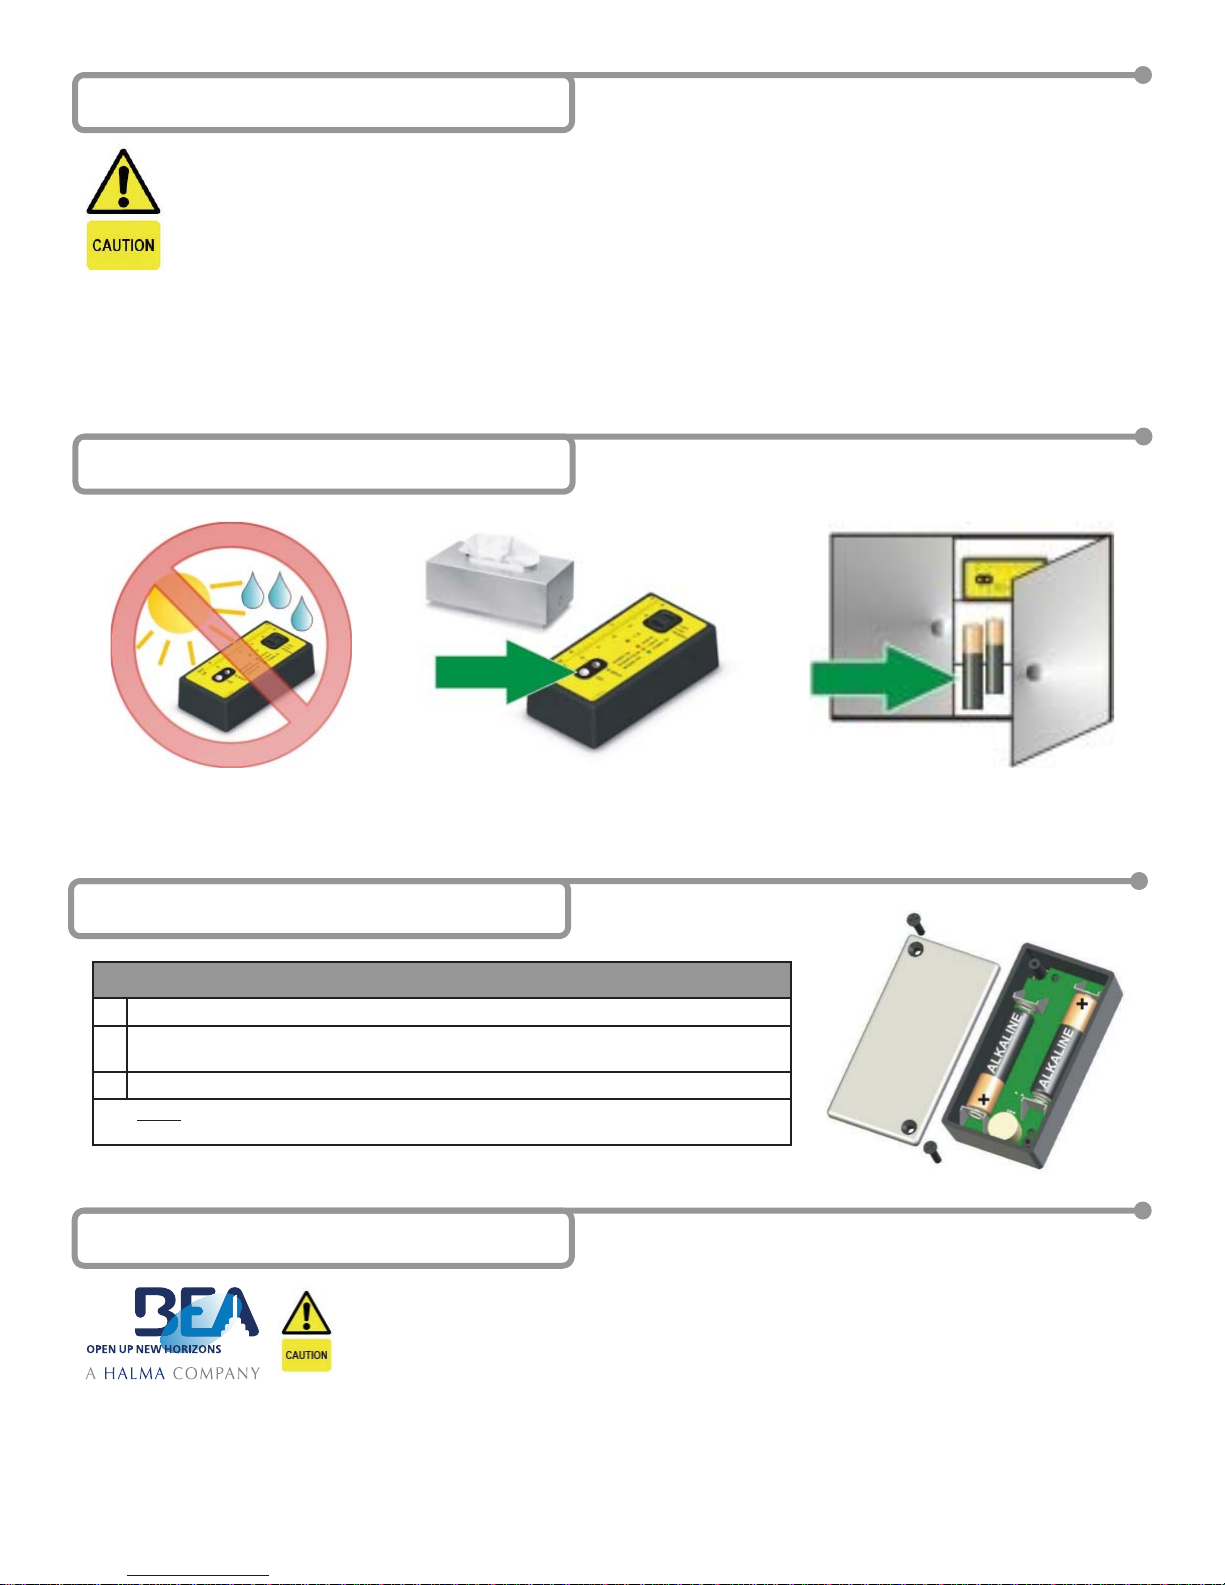
5 Battery Replacement
1.5 - VOLTAAA BATTERIES (LR03)
1. Remove two screws from back of Spotfinder.
2. Separate housing and install a two fresh 1.5-Volt (AAAType LR03) batteries making sure to
observe proper polarity.
3. Reassemble housing and replace screws.
NOTE: Don’t throw used batteries away with the general trash. Discard per your local
municipal laws and regulations.
4 Tips
Avoid long exposure to bright
sunlight and/or moisture. Keep the IR-SPOT and LED lenses clean. Before long storage, remove batteries
to prevent battery acid damage.
3 Precautions
Shut off all power going to work area before attempting any wiring procedures.
Maintain a clean & safe environment when working in public areas.
Constantly be aware of pedestrian traffic around the area.
Always stop pedestrian traffic through the doorway when performing tests that may result in unexpected reactions by the door.
Always check placement of components before powering up so that moving parts will not catch any wires or cause damage to
equipment.
Ensure compliance with all applicable safety standards (i.e. ANSI A156.10 / 19) upon completion of installation.
DO NOT attempt any internal repair of the components.All repairs and/or component replacements must be performed by BEA,
Inc. Unauthorized disassembly or repair:
1. May jeopardize personal safety and may expose one to the risk of electrical shock.
2. May adversely affect the safe and reliable performance of the product resulting in a voided warranty.