3. CERTIFICATION
The BA364NG has ATEX and IECEx Ex nA gas and
Ex tc dust certification. The main sections of this
instruction manual describes ATEX gas certification.
ATEX dust certification is described in Appendix 1 and
IECEx gas and dust certification in Appendix 2. The
BA364NG also has ETL and cETL certification for
applications in the USA and Canada. See
Appendix 3.
3.1 ATEX Ex nA certification
Notified Body Intertek Testing and Certification Ltd
have issued the BA364NG with a Type Examination
Certificate number ITS16ATEX48409X. This has
been used to confirm compliance with the European
ATEX Directive for Group II, Category 3G equipment.
The instrument carries the Community Mark and,
subject to local codes of practice, may be installed in
any of the European Economic Area (EEA) member
countries and in the EEA EFTA states, Iceland,
Liechtenstein and Norway. ATEX certificates are also
acceptable in Switzerland and Turkey. The European
Commission's Blue Guide lists the member states,
overseas countries and territories that have adopted
harmonisation legislation.
This section of the instruction manual describes ATEX
installations in explosive gas atmospheres conforming
with EN 60079-14 Electrical installations design,
selection and erection. When designing systems for
installation outside the UK the local Code of Practice
should be consulted.
3.2 Zones, gas groups and T rating
The Counter has been certified as Group II Category
3G Ex ic nA IIC T5 Gc Ta = -40ºC to +60°C
apparatus. This is non-sparking apparatus complying
with EN 60079-15 Equipment protection by type of
protection 'n' that minimises the risk of arcs or sparks
capable of creating an ignition hazard occurring
during conditions of normal operation.
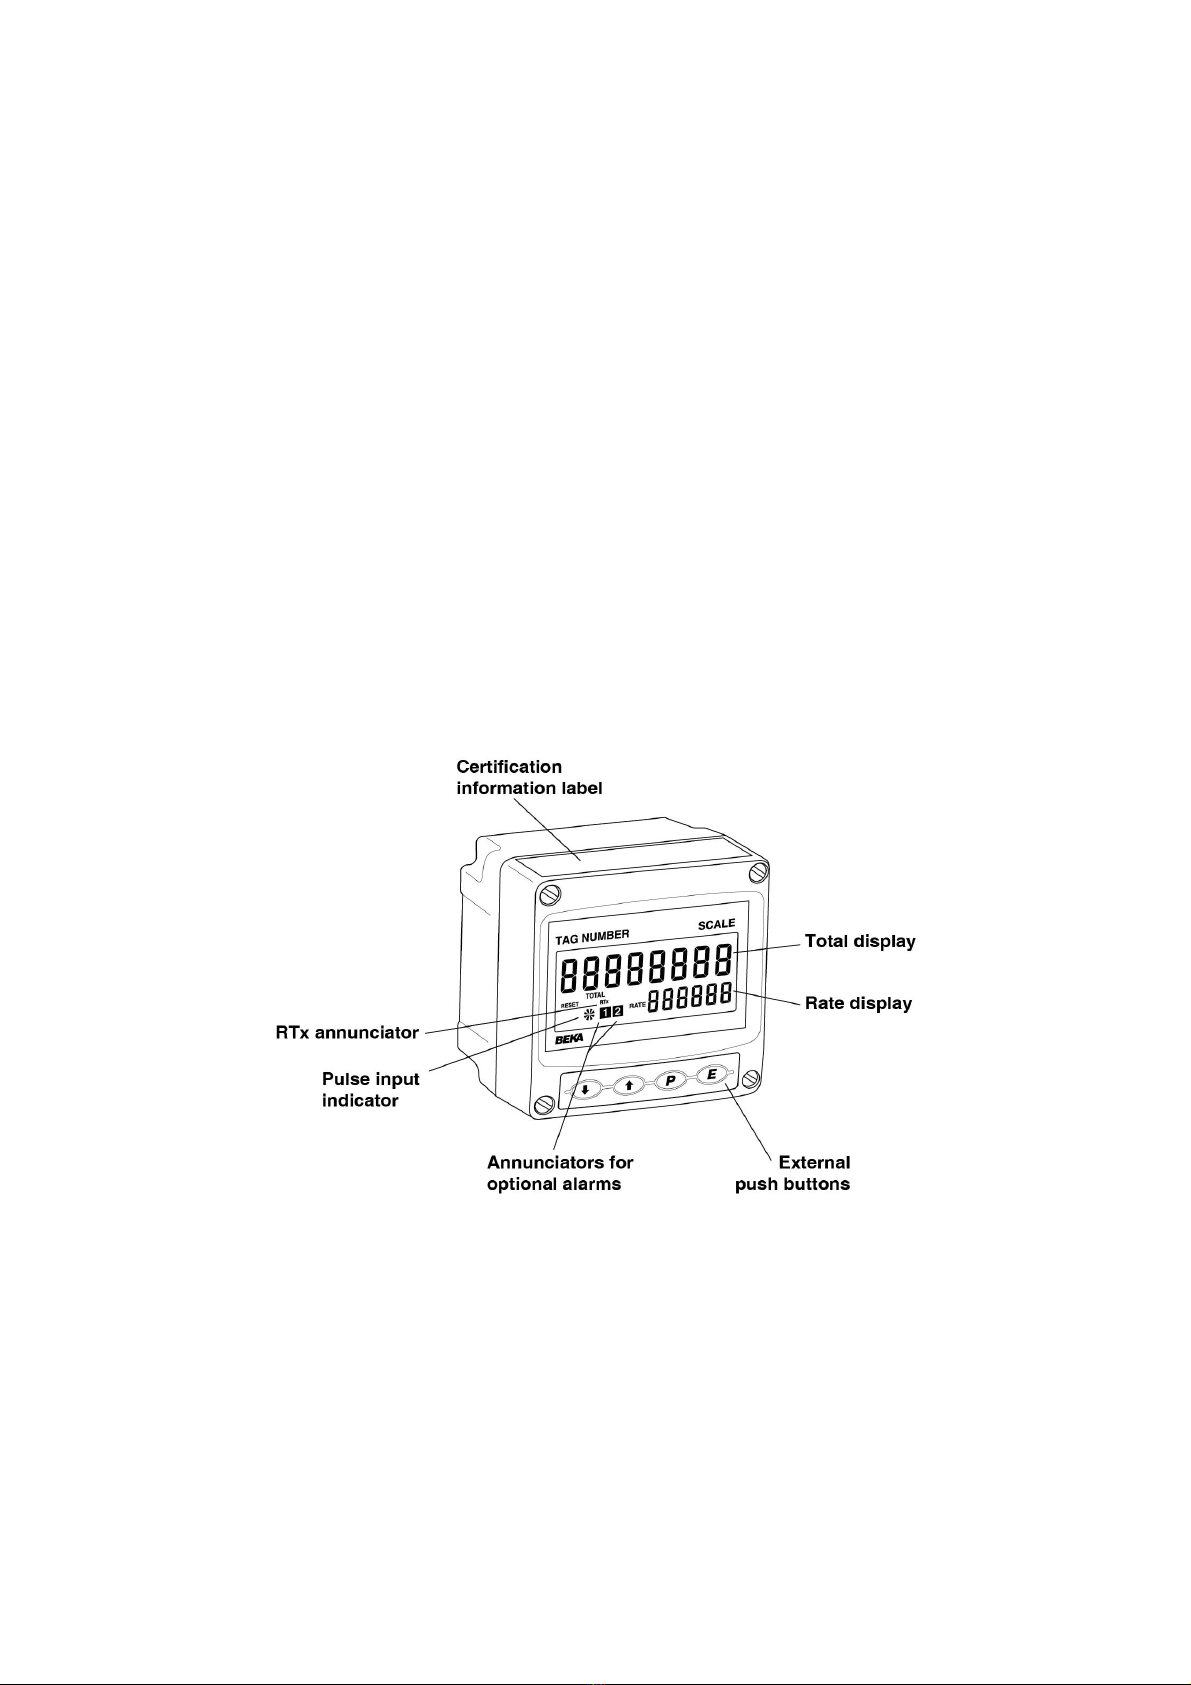
The Counter's front panel push button contacts are
non incendive and have been certified intrinsically
safe Ex ic as shown on the Type Examination
Certificate. This allows the Counter to be adjusted
and configured live when installed in Zone 2.
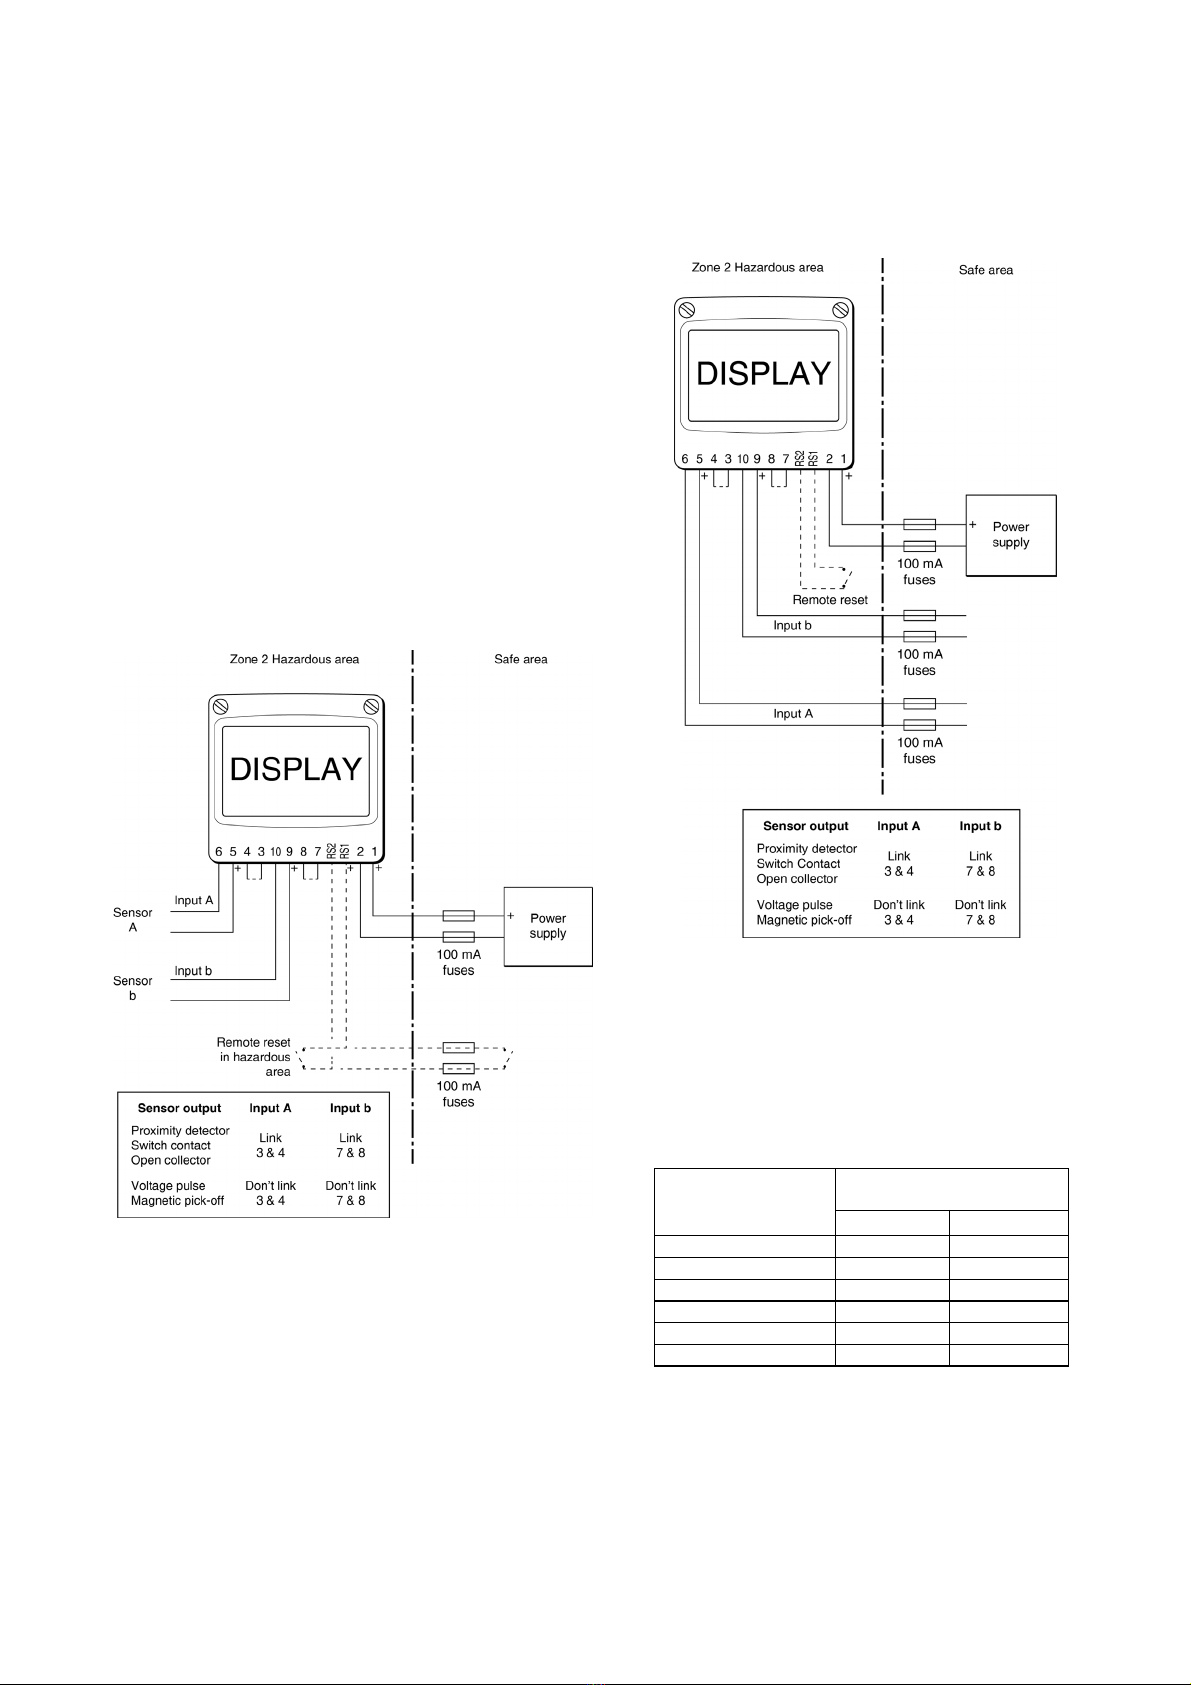
When connected to a suitable system the BA364NG
Counter may be installed in:
Zone 2 explosive gas air mixture not
likely to occur, and if it does
will only exist for a short time.
Be used with gases in groups:
Group A propane
Group B ethylene
Group C hydrogen
In gases that may safely be used with equipment
having a temperature classification of:
T1 450oC
T2 300oC
T3 200oC
T4 135oC
T5 100oC
At ambient temperatures between -40 and +60oC.
This allows use with all commonly used industrial
gases except carbon disulphide CS2.
3.3 Safety parameters
The certificate specifies input safety parameters in
normal operation i.e. without faults for all the
instrument terminals. Where only a voltage or
only a current is specified, the unspecified
parameter will be defined by components within
the BA364NG.
3.4 Special conditions for safe use
The Ex nA certificate has an ‘X’ suffix indicating
that the certificate defines special conditions for
safe use. These state that the BA364NG Counter
should be:
a. Supplied from a limited energy circuit with
output parameters in normal operation equal
to, or less than the instrument’s input
parameters. The certificate states that It is
not necessary to power the instrument from
an intrinsically safe interface, such as a
certified shunt diode safety barrier or a
galvanic isolator to comply with this
requirement.
b. Fitted with cable entry glands or conduit
fittings which maintain the impact and
ingress protection of the enclosure. Certified
Ex e or Ex n components satisfy these
requirements.
The BA364NG is supplied fitted with one
certified M20 stopping plug and one
temporary hole plug which should be
replaced with the required gland or conduit
fitting.
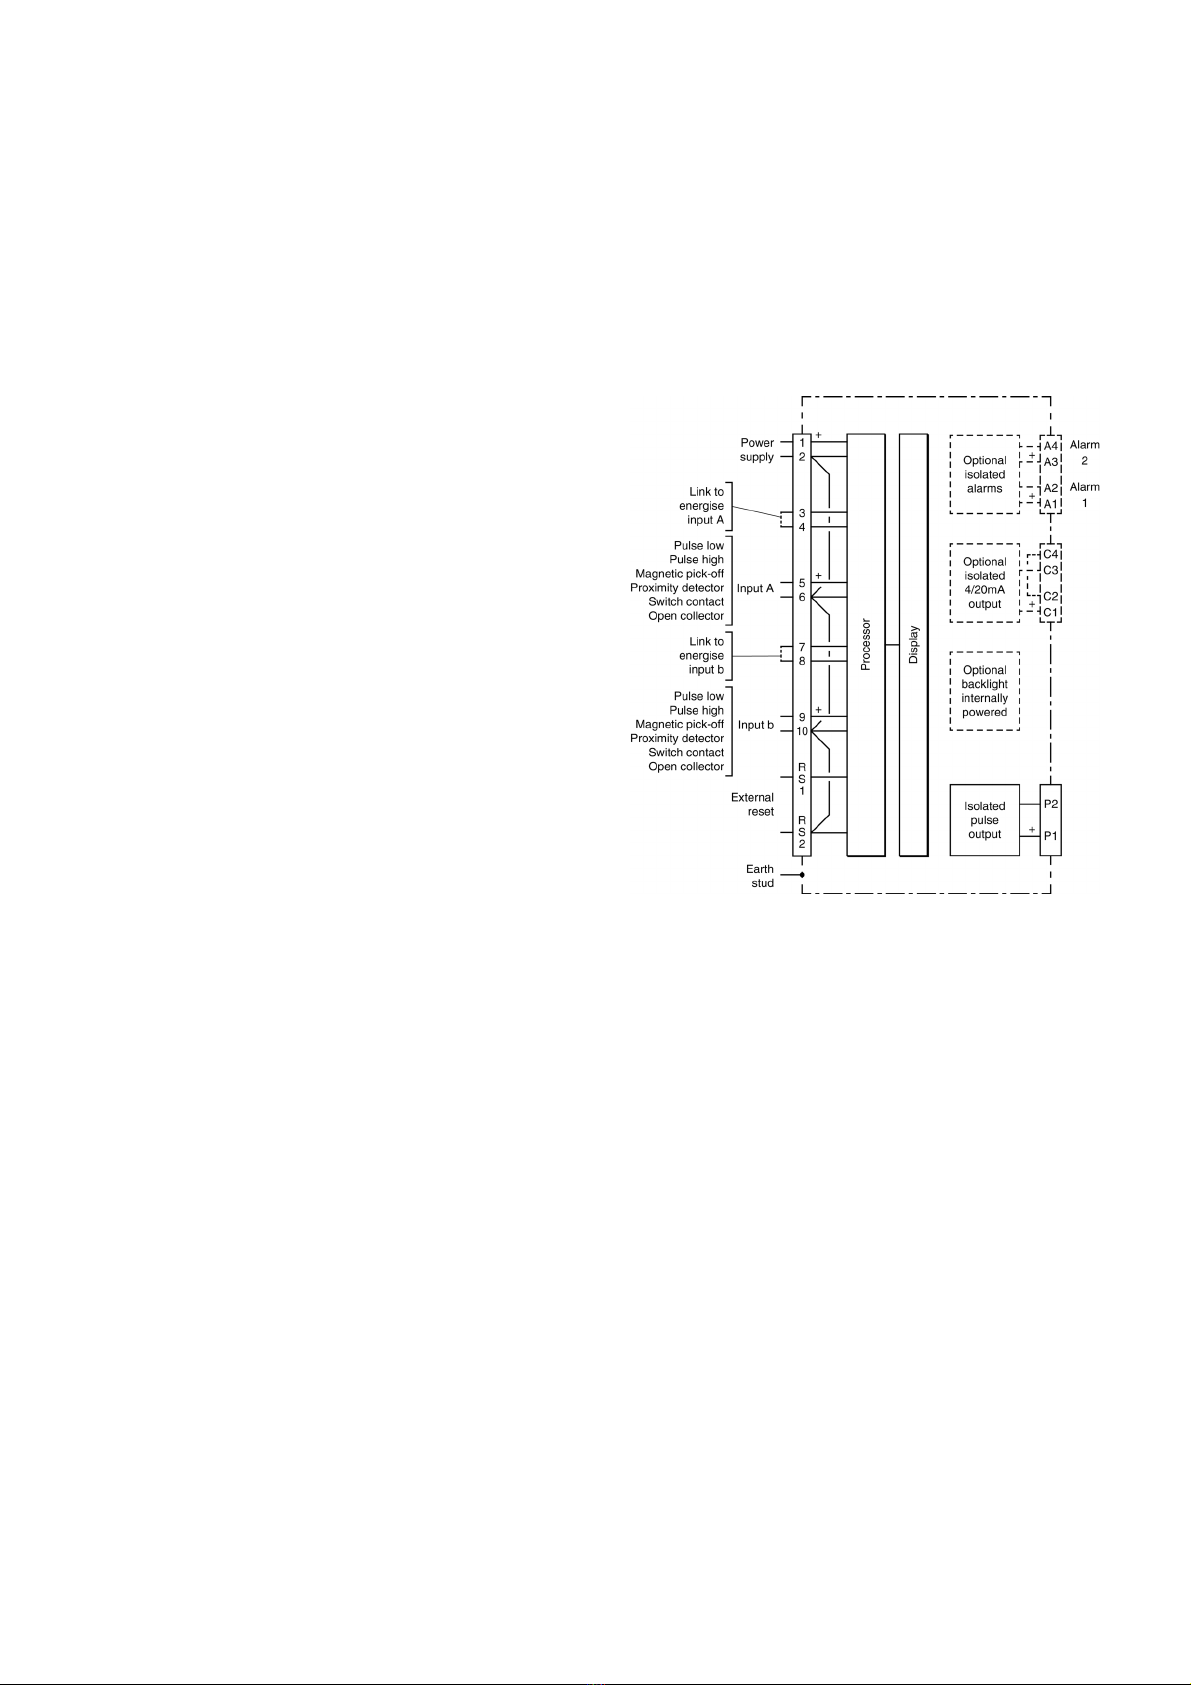
3.5 Power supply
The input safety parameters for the power supply
terminals 1 and 2 are:
Ui = 30V dc
Ii = 100mA
This allows the BA364NG to be powered from any
dc supply which in normal operation has an output
of less 30V and 100mA. See section 4.1 for
power supply recommendations.
7