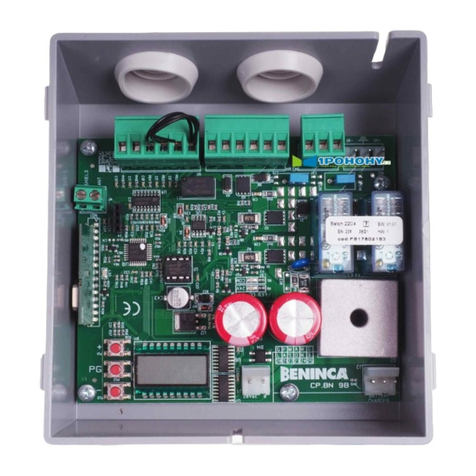
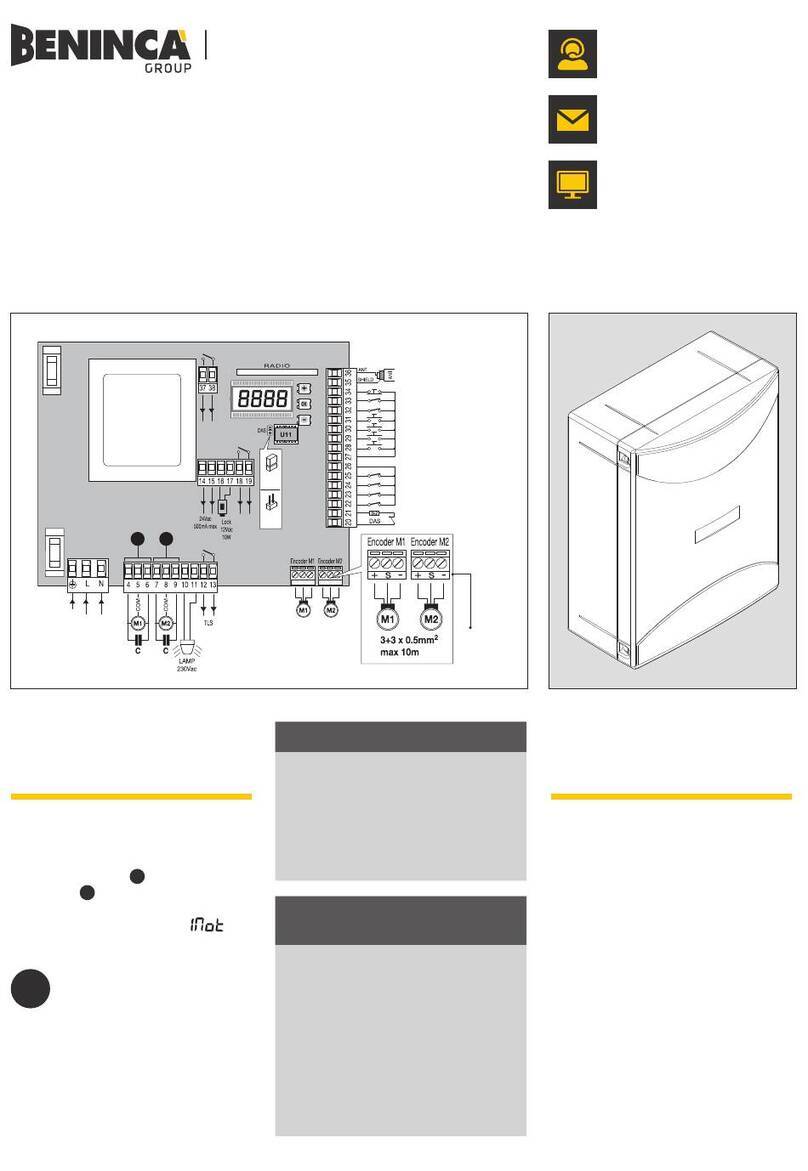
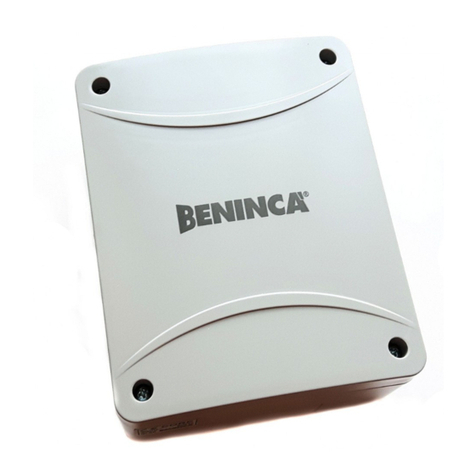
Beninca CP.BN User manual

L8542876
04/2016 rev 3
CP.BN
UNIONE NAZIONALE COSTRUTTORI
AUTOMATISMI PER CANCELLI, PORTE
SERRANDE ED AFFINI

2
LAMP
24Vdc
M1 M2
RADIO
F4
LED2
T 1,6A
ANT
3
91011121314
171819202122
BN.CB
232425
262728
12
4
PHOT
PHOT C
STOP
P. P.
PED
COM
24Vdc/0,5Amax
-M1+M1
-M1+M1
N
L
F2:1AT (230V)
F2:2AT (115V)
+-
1

3
F1
F10A
-
+
12V
BN.24V
CP.BN
BN.24V
12V
MINV:ON
MINV:OFF
M1
M2
M1
M2
F1
F10A
-
+
12V
BN.24V
CP.BN
BN.24V
12V
3
2
LN
Service
Light
230V
Relè 24Vdc
SCA 24Vdc
3W max
2ch:ON
910111213141516
24Vdc/0,5Amax
2ch:Off
serl:Off
910111213141516 910111213141516
2ch:Off
serl:on
4

4
DATI TECNICI
Alimentazione centrale di comando 24Vdc
Alimentazione di rete 230 Vac 50/60 Hz oppure 115Vac 50/60Hz a seconda della versione
Uscita Motore 1/2 motore 24Vdc
Potenza massima motore 120/120 W
Uscita alimentazione accessori 24Vdc 500mA max.
Grado di protezione IP44
Temp. funzionamento -20°C / +50°C
Ricevitore radio 433,92 MHz incorporato e confgurabile (rolling-code, fisso+rolling-code o
ARC - Advanced Rolling Code)
N° codici memorizzabili 64
ITA AVVERTENZE
E’ vietato l’utilizzo del prodotto per scopi o con modalità non previste nel presente manuale. Usi non corretti possono
essere causa di danni al prodotto e mettere in pericolo persone e cose.
Si declina ogni responsabilità dall’inosservanza della buona tecnica nella costruzione dei cancelli, nonché dalle deforma-
zioni che potrebbero verificarsi durante l’uso.
Conservare questo manuale per futuri utilizzi.
Questo manuale è destinato esclusivamente a personale qualificato per l’installazione e la manutenzione di aperture
automatiche.
L’installazione deve essere effettuaua da personale qualificato (installatore professionale, secondo EN12635), nell’osser-
vanza della Buona Tecnica e delle norme vigenti.
Verificare che la struttura del cancello sia adatta ad essere automatizzata.
L’installatore deve fornire tutte le informazioni relative al funzionamento automatico, manuale e di emergenza dell’auto-
mazione, e consegnare all’utilizzatore dell’impianto le istruzioni d’uso.
I materiali dell’imballaggio non devono essere lasciati alla portata dei bambini in quanto fonte di potenziale pericolo. Non
disperdere nell’ambiente i materiali di imballo, ma separare le varie tipologie (es. cartone, polistirolo) e smaltirle secondo
le normative locali.
Non permettere ai bambini di giocare con i dispositivi di comando del prodotto. Tenere i telecomandi lontano dai bambini.
Questo prodotto non è destinato a essere utilizzato da persone (bambini inclusi) con capacità fisiche, sensoriali o mentali
ridotte, o con mancanza di conoscenze adeguate, a meno che non siano sotto supervisione o abbiano ricevuto istruzioni
d’uso da persone responsabili della loro sicurezza.
Applicare tutti i dispositivi di sicurezza (fotocellule, coste sensibili, ecc.) necessari a proteggere l’area da pericoli di impat-
to, schiacciamento, convogliamento, cesoiamento. Tenere in considerazione le normative e le direttive in vigore, i criteri
della Buona Tecnica, l’utilizzo, l’ambiente di installazione, la logica di funzionamento del sistema e le forze sviluppate
dall’automazione.
L’installazione deve essere fatta utilizzando dispositivi di sicurezza e di comandi conformi alla EN12978 e EN12453.
Prevedere sulla rete di alimentazione un interruttore/sezionatore onnipolare con distanza d’apertura dei contatti uguale
o superiore a 3 mm.
Verificare che a monte dell’impianto elettrico vi sia un interruttore differenziale e una protezione di sovracorrente adeguati.
Alcune tipologie di installazione richiedono il collegamento dell’anta ad un impianto di messa a terra rispondente alle
vigenti norme di sicurezza.
Durante gli interventi di installazione, manutenzione e riparazione, togliere l’alimentazione prima di accedere alle parti
elettriche.
Scollegare anche eventuali batterie tampone se presenti.
L’installazione elettrica e la logica di funzionamento devono essere in accordo con le normative vigenti.
I conduttori alimentati con tensioni diverse, devono essere fisicamente separati, oppure devono essere adeguatamente
isolati con isolamento supplementare di almeno 1 mm.
I conduttori devono essere vincolati da un fissaggio supplementare in prossimità dei morsetti.
Ricontrollare tutti i collegamenti fatti prima di dare tensione.
Gli ingressi N.C. non utilizzati devono essere ponticellati.
SMALTIMENTO
Come indicato dal simbolo a lato, è vietato gettare questo prodotto nei rifiuti domestici in quanto alcune parti che lo
compongono potrebbero risultare nocive per l’ambiente e la salute umana, se smaltite scorrettamente. L’apparecchiatura,
pertanto, dovrà essere consegnata in adeguati centri di raccolta differenziata, oppure riconsegnata al rivenditore al mo-
mento dell’acquisto di una nuova apparecchiatura equivalente. Lo smaltimento abusivo del prodotto da parte dell’utente
comporta l’applicazione delle sanzioni amministrative previste dalla normativa vigente.
Le descrizioni e le illustrazioni presenti in questo manuale non sono impegnative. Lasciando inalterate le caratteristiche essenziali
del prodotto il fabbricante si riserva il diritto di apportare qualsiasi modifica di carattere tecnico, costruttivo o commerciale senza
impegnarsi ad aggiornare la presente pubblicazione.

5
CENTRALE DI COMANDO CP.BN
COLLEGAMENTI ELETTRICI
Nella seguente tabella sono descritti i collegamenti elettrici rappresentati in Fig. 1:
N° Morsetti Funzione Descrizione
1-2 24Vac/dc Ingresso alimentazione 24Vac/24Vdc.
3-4 Antenna Collegamento antenna scheda radioricevente ad innesto (3-schermo/4-segnale).
9-10 SCA/SRL/2° Ch
Radio
Contatto pulito N.O. Controllato dalle logiche “2° Ch Radio” e “SRL”.
Con logica “2° Ch Radio” On: uscita attiva come 2° canale radio.
Con logica “2° Ch Radio” Off:
- Con logica “SRL” On: Contatto comando luce di cortesia
- Con logica “SRL” Off: Contatto spia cancello aperto “SCA”
11-12 24 Vdc Uscita alimentazione accessori 24Vdc/0,5A max (12+/11-).
13-14 Lampeggiante Collegamento lampeggiante 24Vdc 15W max.
17 PED/CLOSE Con logica “OPEN/CLOSE” Off: Ingresso pulsante pedonale (contatto N.O.), comanda
l’apertura del motore 1.
Con logica “OPEN/CLOSE” On: Ingresso pulsante close (contatto N.O.), comanda la chiu-
sura di entrambi i motori.
18 Passo-Passo/OPEN Con Logica “OPEN/CLOSE” Off: Ingresso pulsante passo-passo (contatto N.O.).
Con logica “OPEN/CLOSE” On: Ingresso pulsante OPEN (contatto N.O.), comanda l’apertu-
ra di entrambi i motori.
19 PHOT C Ingresso fotocellula attiva solo in chiusura (contatto N.C.)
20 PHOT Ingresso fotocellula attiva apertura e chiusura (contatto N.C.)
21 STOP Ingresso pulsante STOP (contatto N.C.)
22 COM Comune per tutti gli ingressi di comando.
23-25 Motore 2 Connettore estraibile per il collegamento del motore 2
24 Terra Motore 2 Collegamento di messa a terra del motore 2
26-28 Motore 1 Connettore rapido precablato motore 1.
27 Terra Motore 1 Collegamento di messa a terra del motore 1
BN.CB Batteria tampone Connettore rapido per il collegamento della scheda carica batterie BN.CB
VERIFICA COLLEGAMENTI
1) Togliere alimentazione.
2) Sbloccare manualmente le ante, portarle a circa metà della corsa e ribloccarle.
3) Ripristinare l’alimentazione.
4) Dare un comando di passo-passo mediante pulsante collegato all’ingresso PP, radiocomando o pulsante <->.
5) Le ante devono muoversi in apertura.
Nel caso ciò non avvenisse, è sufficiente invertire tra loro i fili di marcia del motore, ruotando di 180° il connettore del motore1 e
invertendendo i fili 26<>28 per il motore M2.
6) Mediante la logica MINV, selezionare il motore che deve iniziare la manovra per primo in apertura, vedi Fig.4.
7) Eseguire una procedura di autoset (vedi menu SET).
PROGRAMMAZIONE
La programmazione delle varie funzionalità della centrale viene effettuata utilizzando il display LCD presente a bordo della centrale
ed impostando i valori desiderati nei menu di programmazione descritti di seguito.
Il menu parametri consente di impostare un valore numerico ad una funzione, in modo analogo ad un trimmer di regolazione.
Il menu logiche consente di attivare o disattivare una funzione, in modo analogo al settaggio di un dip-switch.
Altre funzioni speciali seguono i menu parametri e logiche e possono variare a seconda del tipo di centrale o revisione software.
UTILIZZO DEI PULSANTI <PG>/<+>/<->
Premere il tasto <PG> per accedere alle impostazioni che si possono così modificare premendo i tasti + e -.
• Premendo il tasto <+> si scorre all’interno del menù funzioni dal basso verso l’alto.
• Premendo il tasto <-> si scorre all’interno del menù funzioni dall’alto verso il basso.
• Premendo il tasto <PG> si può accedere alle eventuali impostazioni da modificare.
• Con i tasti <+> e <-> si possono modificare i valori impostati.
• Ripremendo il tasto <PG> il valore viene programmato, il display mostra il segnale “PRG”.
Vedi paragrafo “Esempio Programmazione”.

6
NOTE:
La pressione simultanea di <+> e <-> effettuata all’interno di un menu funzione consente di tornare al menu superiore senza appor-
tare modifiche.
La pressione simultanea di <+> e <-> effettuata a display spento visualizza la versione software della scheda.
Mantenere la pressione sul tasto <+> o sul tasto <-> per accelerare l’incremento/decremento dei valori.
Dopo un’attesa di 30s la centrale esce dalla modalità programmazione e spegne il display.
PARAMETRI, LOGICHE E FUNZIONI SPECIALI
Nelle tabelle di seguito vengono descritte le singole funzioni disponibili nella centrale.
PARAMETRI (PAR)
MENU FUNZIONE MIN-MAX-(Default) MEMO
TCA
Tempo di chiusura automatica. Attivo solo con logica “TCA”=ON.
Al termine del tempo impostato la centrale comanda una manovra di
chiusura.
1-240-(40s)
tsm1
Quota di rallentamento del motore 1. I valori indicano la percentuale di ral-
lentamento dell’anta (25%-50%-75%-100%) rispetto all’apertura/chiusura
totale.
25-100-(50)
tsm2
Quota di rallentamento del motore 2. I valori indicano la percentuale di ral-
lentamento dell’anta (25%-50%-75%-100%) rispetto all’apertura/chiusura
totale.
25-100-(50)
TPED
Tempo di lavoro anta pedonale.
I valori impostabili sono:
25: apertura al 25%
50: apertura al 50%
100: apertura al 100%
25-100-(100)
PMo1 Regola la coppia applicata al motore 1 durante la fase di apertura. * 1-99-(20%)
PMC1 Regola la coppia applicata al motore 1 durante la fase di chiusura.* 1-99-(20%)
PMo2 Regola la coppia applicata al motore 2 durante la fase di apertura.* 1-99-(20%)
PMc2 Regola la coppia applicata al motore 2 durante la fase di chiusura.* 1-99-(20%)
TDMo Tempo ritardo apertura Mot.2
Regola il tempo di ritardo in apertura del motore 2 rispetto al motore 1 0-15-(2s)
TDMC Tempo ritardo chiusura Mot.1
Regola il tempo di ritardo in chiusura del motore 1 rispetto al motore 2 0-40-(3s)
SLD1
Regola la velocità del motore 1 durante le fasi di rallentamento. Valore
espresso in percentuale rispetto alla velocità di normale funzionamento.
40-99 (50)
SLD2
Regola la velocità del motore 2 durante le fasi di rallentamento. Valore
espresso in percentuale rispetto alla velocità di normale funzionamento.
40-99 (50)
Pso1 Regola la coppia applicata al motore 1 durante la fase di rallentamento in
apertura* 1-99-(20%)
Psc1 Regola la coppia applicata al motore 1 durante la fase di rallentamento in
chiusura* 1-99-(20%)
Pso2 Regola la coppia applicata al motore 2 durante la fase di rallentamento in
apertura* 1-99-(20%)
Psc2 Regola la coppia applicata al motore 2 durante la fase di rallentamento in
chiusura* 1-99-(20%)
TLS
Regola la durata di attivazione della luce di servizio quando la logica
“Luce Servizio” è impostata su ON e la logica “2°Ch Radio” è impostata
su OFF
2s-180s-(60s)
* ATTENZIONE: UN’ERRATA IMPOSTAZIONE DI QUESTI PARAMETRI PUÒ RISULTARE PERICOLOSA.
RISPETTARE LE NORMATIVE VIGENTI!
Per vefrificare la coppia applicata nelle varie fasi della manovra, procedere come segue:
A display spento e con le ante in movimento, premere e mantenere premuto il pulsante <+>
Il display visualizza due cifre separate da un punto (es. 52.55), le prime due cifre indicano la coppia applicata al motore1, le se-
conde due la coppia applicata la motore 2.

7
LOGICHE (LOG)
MENU FUNZIONE ON-OFF-(Default) MEMO
TCA
Abilita o disabilita la chiusura automatica
On: chiusura automatica abilitata
Off: chiusura automatica disabilitata
(ON)
IbL
Abilita o disabilita la funzione condominiale.
On: funzione condominiale abilitata. L’impulso P.P. o del trasmettitore non ha
effetto durante la fase di apertura.
Off: funzione condominiale disabilitata.
(OFF)
SCL
Abilita o disabilita la chiusura rapida
On: chiusura rapida abilitata. Con cancello aperto o in fase di apertura
l’intervento della fotocellula provoca la chiusura automatica dopo 3 s. Attiva
solo con TCA:ON
Off: chiusura rapida disabilitata.
(OFF)
PP
Seleziona la modalità di funzionamento del ”Pulsante P.P.” e del
trasmettitore.
On: Funzionamento: APRE > CHIUDE > APRE >
Off: Funzionamento: APRE > STOP > CHIUDE > STOP >
(OFF)
PRE
Abilita o disabilita il pre-lampeggio.
On: Pre-lampeggio abilitato. Il lampeggiante si attiva 3s prima della partenza
del motore.
Off: Pre-lampeggio disabilitato.
(OFF)
SERL
Abilita o disabilita la funzione “Luce di servizio” sui morsetti (9-10)
On: uscita attiva come “Luce di servizio”. L’uscita si attiva all’inizio di ogni ma-
novra e rimane attiva per il tempo impostato dal parametro TLS.
Off: uscita attiva come “Spia cancello aperto”.
Funzione non attiva se la logica “2°Ch radio” è impostata a ON.
(OFF)
2ch
Abilita o disabilita la funzione “2°Ch radio” sui morsetti (9-10).
On: uscita “2°Ch radio” abilitata.
Off: uscita “2°Ch radio” disabilitata. L’uscita ai morsetti è attiva come “Luce di
servizio” se SERL=On oppure come SCA se SERL=Off.
Se questa funzione è impostata su On, viene ignorata qualsiasi impostazione
della logica SERL.
(OFF)
CLOC
Seleziona la modalità dell’ingresso APRE
On: Ingresso APRE con funzionalità OROLOGIO.
Da utilizzare per collegamento a temporizzatore per apertura/chiusura a
tempo. (Contatto CHIUSO- cancello aperto, Contatto aperto, funzionamento
normale).
Off: Ingresso APRE con funzionalità APRE.
Funzione attiva solo se la logica OPCL=ON
(OFF)
OPCL
Seleziona la modalità degli ingressi Passo-Passo e Pedonale.
On: ingresso al morsetto 18 attivo come OPEN, ingresso al morsetto 17 attivo
come CLOSE.
Off: ingresso al morsetto 18 attivo come Passo-passo, ingresso al morsetto 17
attivo come Pedonale.
(OFF)
INVC
Abilita o disabilita l’inversione totale quando interviene il sensore amperome-
trico.
On: inversione totale abilitata
Off: inversione totale disabilitata. La centrale comanda un’inversione di 2s e
successivamente blocca le ante.
(OFF)
MINV
Ordine di partenza dei motori:
On: il motore 2 parte per primo in apertura.
Off: il motore 1 parte per primo in apertura.
(OFF)
CVAR
Abilita o disabilita i trasmettitori a codice programmabile.
On: Ricevitore radio abilitato esclusivamente ai trasmettitori a codice variabile
(rolling-code).
Off: Ricevitore abilitato a trasmettitori codice variabile (rolling-code) e program-
mabile (autoapprendimento e dip/switch) .
(ON)
REM
Abilita o disabilita l’inserimento remoto dei radiotrasmettitori (vedi paragrafo
APPRENDIMENTO REMOTO).
On: Inserimento remoto abilitato
Off: Inserimento remoto disabilitato.
(ON)

8
RADIO (RADi)
MENU FUNZIONE
PP
Selezionando questa funzione la ricevente si pone in attesa (Push) di un codice trasmettitore da assegnare
alla funzione passo-passo.
Premere il tasto del trasmettitore che si intende assegnare a questa funzione.
Se il codice è valido, viene memorizzato e viene visualizzato il messaggio OK
Se il codice non è valido, viene visualizzato il messaggio Err.
2Ch
Selezionando questa funzione la ricevente si pone in attesa (Push) di un codice trasmettitore da assegnare al
secondo canale radio.
Premere il tasto del trasmettitore che si intende assegnare a questa funzione.
Se il codice è valido, viene memorizzato e viene visualizzato il messaggio OK
Se il codice non è valido, viene visualizzato il messaggio Err.
Se la logica 2CH è impostata su OFF il tasto assegnato alla funzione 2CH esegue il comando pedonale.
CLR
Selezionando questa funzione la ricevente si pone in attesa (Push) di un codice trasmettitore da cancellare
dalla memoria.
Se il codice è valido, viene cancellato e viene visualizzato il messaggio OK
Se il codice non è valido o non è presente in memoria, viene visualizzato il messaggio Err
RTR Cancella completamente la memoria della ricevente. Viene richiesta conferma dell’operazione.
CENTRALE DI COMANDO COMPATIBILE ARC
IMPORTANTE, LEGGERE CON ATTENZIONE:
Il ricevitore radio presente in questo prodotto è compatibile con i nuovi trasmettitori ARC (Advanced Rolling Code) i quali, grazie alla
codifica a 128 bit, garantiscono una superiore sicurezza anticopiatura.
La memorizzazione dei nuovi trasmettitori ARC è del tutto analoga a quella dei normali trasmettitori Rolling Code con codifica HCS,
ma occorre tenere presente che:
1) Trasmettitori ARC e Rolling Code HCS non possono essere memorizzati in una singola ricevente.
2) Il primo trasmettitore memorizzato stabilisce la tipologia di trasmettitori da utilizzare in seguito. Se il primo trasmettitore memo-
rizzato è ARC, non sarà possibile memorizzare trasmettitori Rolling Code HCS, e viceversa.
3) I trasmettitori a codice fisso possono essere utilizzati solo in abbinamento ai trasmettitori Rolling Code HCS, portando la logica
CVAR in OFF. Non sono quindi utilizzabili in abbinamento ai trasmettitori ARC. Se il primo trasmettitore Rolling Code memorizzato
è un ARC la logica CVAR è inifluente.
4) Se si desidera cambiare tipologia di trasmettitori è necessario procedere con un reset della ricevente.
APPRENDIMENTO REMOTO TRASMETTITORI
Se si dispone di un trasmettitore già memorizzato nella ricevente è possibile effettuare l’apprendimento radio remoto (senza neces-
sità di accedere alla centrale).
IMPORTANTE: La procedura deve essere eseguita con ante in apertura durante la pausa TCA.
Procedere come segue:
1 Premere il tasto nascosto del trasmettitore già memorizzato.
2 Premere, entro 5s, il tasto del trasmettitore già memorizzato corrispondente al canale da associare al nuovo trasmettitore. Il lam-
peggiante si accende.
3 Premere entro 10s il tasto nascosto del nuovo trasmettitore.
4 Premere, entro 5s, il tasto del nuovo trasmettitore da associare al canale scelto al punto 2. Il lampeggiante si spegne.
5 La ricevente memorizza il nuovo trasmettitore ed esce immediatamente dalla programmazione.
MENU FUNZIONE
NMAN
Visualizza il numero di cicli completi (apre+chiude) effettuate dall’automazione.
La prima pressione del pulsante <PG>, visualizza le prime 4 cifre, la seconda pressione le ultime 4.
Es. <PG> 0012 >>> <PG> 3456: effettuati 123.456 cicli.
RES
RESET della centrale. ATTENZIONE!: Riporta la centrale ai valori di default.
La prima pressione del pulsante <PG> provoca il lampeggio della scritta RES, una ulteriore pressione del pul-
sante <PG> effettua il reset della centrale.
Nota: Non vengono cancellati i trasmettitori dalla ricevente, ne la posizione e la corsa dell’anta.
SET
Autotaratura della centrale.
ATTENZIONE!: durante questa operazione il movimento delle ante DEVE essere libero da impedimenti.
La prima pressione del pulsante <PG> provoca il lampeggio della scritta SET ad intervalli di 1s, una ulteriore
pressione del pulsante <PG> effettua la sequenza di autoset della centrale.
Se la sequenza di autotaratura ha avuto esito positivo sul display compare la scritta “OK”, altrimenti vieni vi-
sualizzata la scritta “Err” (si rende necessario ripetere l’autoset).
Se durante l’autotaratura viene attivato un ingresso qualsiasi (PP,PED,PHOT,STOP), la procedura si blocca
immediatamente e sul display compare la scritta “Err”.
Nota: L’autotaratura imposta i valori di coppia dei motori. Al termine dell’operazione verificare la correttezza dei
valori impostati ed eventualmente modificarli manualmente utilizzando l’apposito menu.
9
FUNZIONAMENTO MENU AUTOSET
La procedura di autoset permette la corretta regolazione delle coppie di apertura/chiusura, a velocità normale e in rallentamento,
delle ante.
1) Prima di procedere con l’autoset verificare che:
- il movimento delle ante avvenga senza impedimenti;
- non vi siano cose e/o persone nel raggio di azione dell’automazione;
- tutti i collegamenti siano corretti e che non sia presente alcuna segnalazione da parte dei dispositivi di sicurezza (PHOT,
PHOT C, STOP);
- Portare le ante a metà corsa circa.
2) Entrare nel menu “SET” e premere il pulsante “PRG”. Il display visualizza la scritta “SET” ad intervalli di 1s.
3) Premendo una seconda volta il tasto “PRG” la scritta “SET” viene visualizzata ad intervalli di 0,5s ed inizia la fase di autoregola-
zione che consiste:
- Breve apertura di entrambi i motori (5s circa)
- Chiusura rallentata di entrambe le ante fino all’arresto meccanico in chiusura.
- Apertura rallentata di entrambe le ante fino all’arresto meccanico in apertura.
- Chiusura veloce di entrambe le ante fino all’arresto meccanico in chiusura.
- Apertura veloce di entrambe le ante fino all’arresto meccanico in apertura.
- Chiusura rallentata di entrambe le ante fino all’arresto meccanico in chiusura.
Tutte queste fasi devono avvenire in modo automatico senza alcun intervento dell’operatore. L’intervento di un ingresso qualsiasi
(PHOT,PHOT C, STOP,PP,PED…) annulla immediatamente la procedura di autoset bloccando le ante e visualizzando su display il
messaggio “Err”.
Se dovesse rendersi necessario il blocco della procedura è sufficiente attivare uno qualsiasi degli ingressi, oppure premere contem-
poraneamente i tasti + e – a bordo scheda.
Se la procedura di autoset si conclude correttamente, sul display viene visualizzato il messaggio “ok”. Premere il tasto “PRG” per
uscire dal menu di autoset.
Ogni procedura di autoset ultimata correttamente sovrascrive quella effettuata in precedenza.
NOTA: Ad ogni modifica dei parametri di coppia, velocità, rallentamento o modifica dell’ordine di partenza motori ( logica
MINV), è necessario effettuare una nuova procedura di autoset.
BATTERIA DI EMERGENZA
E’ disponibile un accessorio opzionale per l’alimentazione della centrale in caso di assenza di alimentazione di rete.
La scheda BN.CB deve essere innestata nell’apposito connettore rapido come indicato in Fig.3.
Durante il normale funzionamento di rete il LED verde è acceso e la scheda provvede al mantenimento della carica delle batterie.
Nel caso di assenza di rete la scheda fornisce alimentazione attraverso le batterie, il LED rosso si accende.
Un fusibile F10A protegge la centrale durante il funzionamento con batteria di emergenza.
In assenza di rete e con batterie scariche entrambi i LED sono spenti.
COLLEGAMENTO COSTA DI SICUREZZA
171819202122
PHOT C
PHOT
STOP
P. P.
PED
DAS
Se necessario, è possibile collegare il contatto normalmente chiuso (N.C.) di una costa
di sicurezza meccanica in serie al morsetto 22 come indicato in figura a fianco (DAS).
Per i bordi di sicurezza in gomma conduttiva 8k2 è necessario utilizzare l’accessorio
SC.E.
In caso di intervento della costa la centrale comanda una inversione del movimento
dell’anta di circa 2s o per tutta la corsa (vedi Logica INVC) sia in fase apertura che in
chiusura, dopo l’inversione viene comandato l’arresto.
DIAGNOSTICA
PHOT STOP
PHOT-C DAS
P.P.
PED
OPEN
CLOSE
Nel caso di anomalie di funzionamento è possibile visualizzare, premendo il tasto + o -,
lo stato di tutti gli ingressi (finecorsa, comando e sicurezza). Ad ogni ingresso è associa-
to un segmento del display che in caso di attivazione si accende, secondo il seguente
schema.
Gli ingressi N.C. sono rappresentati dai segmenti verticali. Gli ingressi N.O. sono rap-
presentati dai segmenti orizzontali.

10
MESSAGGI DI ERRORE
La centrale verifica il corretto funzionamento dei dispositivi di sicurezza. In caso di malfunzionamento possono essere visualizzati
dal display i seguenti messaggi:
ERR Errore in fase di autoset oppure memorizzazione telecomandi.
Thrm Intervento protezione termica.
ESEMPIO PROGRAMMAZIONE
Supponiamo sia necessario:
- impostare un tempo di chiusura automatica (TCA) di 100s
- attivare il prelampeggio
eseguire passo a passo le operazioni descritte di seguito:
Passo Premere Display Note
1PAR Primo menu
2TCA Prima funzione del primo menu
3040 Valore attualmente impostato per la funzione selezionata
4100 Settare con i tasti <+> e <-> il valore desiderato
5PRG Il valore viene programmato
TCA Effettuata la programmazione, il display si riporta alla funzione appena settata
6PAR Premere simultaneamente <+> e <-> per spostarsi al menu superiore
7Log Secondo menu
8TCA Prima funzione del secondo menu
9Pre Premere più volte <-> fino a selezionare la logica PRE
10 OFF Valore attualmente impostato per la funzione selezionata
11 ON Settare con i tasti <+> e <-> il valore desiderato
12 PRG Il valore viene programmato
Pre Effettuata la programmazione, il display si riporta alla funzione appena settata
13 PAR Premere simultaneamente <+> e <-> per tornare al menu superiore e uscire dalla programma-
zione o attendere 30s.

11
ENG WARNING
The product shall not be used for purposes or in ways other than those for which the product is intended for and as
described in this manual. Incorrect uses can damage the product and cause injuries and damages.
The company shall not be deemed responsible for the non-compliance with a good manufacture technique of gates as
well as for any deformation, which might occur during use.
Keep this manual for further use.
This manual has been especially written to be use by qualified fitters.
Installation must be carried out by qualified personnel (professional installer, according to EN 12635), in compliance with
Good Practice and current code.
Make sure that the structure of the gate is suitable for automation.
The installer must supply all information on the automatic, manual and emergency operation of the automatic system
and supply the end user with instructions for use.
Packaging must be kept out of reach of children, as it can be hazardous. For disposal, packaging must be divided the
various types of waste (e.g. carton board, polystyrene) in compliance with regulations in force.
Do not allow children to play with the fixed control devices of the product. Keep the remote controls out of reach of children.
This product is not to be used by persons (including children) with reduced physical, sensory or mental capacity, or who
are unfamiliar with such equipment, unless under the supervision of or following training by persons responsible for their
safety.
Apply all safety devices (photocells, safety edges, etc.) required to keep the area free of impact, crushing, dragging and
shearing hazard. Bear in mind the standards and directives in force, Good Practice criteria, intended use, the installation
environment, the operating logic of the system and forces generated by the automated system.
Installation must be carried out using safety devices and controls that meet standards EN 12978 and EN 12453.
An omnipolar switch/section switch with remote contact opening equal to, or higher than 3mm must be provided on the
power supply mains.
Make sure that before wiring an adequate differential switch and an overcurrent protection is provided.
Pursuant to safety regulations in force, some types of installation require that the gate connection be earthed.
During installation, maintenance and repair, cut off power supply before accessing to live parts.
Also disconnect buffer batteries, if any are connected.
The electrical installation and the operating logic must comply with the regulations in force.
The leads fed with different voltages must be physically separate, or they must be suitably insulated with additional
insulation of at least 1 mm.
The leads must be secured with an additional fixture near the terminals.
During installation, maintenance and repair, interrupt the power supply before opening the lid to access the electrical parts
Check all the connections again before switching on the power.
The unused N.C. inputs must be bridged.
WASTE DISPOSAL
As indicated by the symbol shown, it is forbidden to dispose this product as normal urban waste as some parts might be
harmful for environment and human health, if they are disposed of incorrectly. Therefore, the device should be disposed
in special collection platforms or given back to the reseller if a new and similar device is purchased. An incorrect disposal
of the device will result in fines applied to the user, as provided for by regulations in force.
Descriptions and figures in this manual are not binding. While leaving the essential characteristics of the product unchanged, the
manufacturer reserves the right to modify the same under the technical, design or commercial point of view without necessarily
update this manual.
TECHNICAL DATA
Contol unit supply 24 Vdc
Power supply 230 Vac 50/60 Hz or 115Vac 50/60Hz according to the version
Output supply 1/2 motor 24Vdc
Power maximum motor 120/120 W
Output supply accessories 24Vdc 500mA max.
Protection level IP44
Operating temp. -20°C / +50°C
Radio receiver
built in 433,92 MHz confgurabile (rolling-code, programmable + rolling-code or
ARC - Advanced Rolling Code)
Rolling code transmitters supported 64

12
CP.BEN CONTROL UNIT
WIRE DIAGRAM
Wire connections shown in Fig. 1 are described hereunder:
Terminal
no. Function Description
1-2 24Vac/dc Input, power supply, 24Vac/24Vdc.
3-4 Antenna Connection to insertable radio-receiver card antenna (3-screen/4-signal).
9-10 SCA/SRL/2° Ch
Radio
Volt-free contact, Normally Open, controlled by logics “2° Ch Radio” (2nd Radio channel)
and “SRL”.
With “2nd Radio channel” logics On: active output as 2nd Radio channel.
With “2nd Radio channel” logics Off:
- With “SRL” logics On: Contact for courtesy light control
- With “SRL” logics Off: Contact for “SCA” open gate light
11-12 24 Vdc Output, accessories power supply, 24Vc/0.5A max (12+/11-).
13-14 Flashing light Connection of warning flashing light, 24Vdc 15W max.
17 PED/CLOSE With “OPEN/CLOSE” logics Off: Input, pedestrian push-button (Normally Open contact). It
controls motor 1 opening.
With “OPEN/CLOSE” logics On: Input, close push-button (Normally Open contact). It
controls both motors.
18 Step-by-Step/OPEN With “OPEN/CLOSE” logics Off: Input, step-by-step push-button (Normally Open contact).
With “OPEN/CLOSE” logics On: Input, OPEN push-button (Normally Open contact). It
controls the opening of both motors.
19 PHOT C Input, photocell is activated only during closure (Normally Closed contact Normally Closed
contact)
20 PHOT Input, photocell is activated during opening and closing (Normally Closed contact)
21 STOP Input, STOP push-button (Normally Closed contact)
22 COM Common for all control inputs.
23-25 Motor 1 Pre-wired rapid connector, motor 1
24 Motor 1, Ground Ground of motor 1
26-28 Motor 2 Extractable connector for connection of motor 2: 24Vdc 120W max
27 Motor 2, Ground Ground of motor 2
BN.CB Buffer battery Rapid connector for connection of battery charger card BN.CB
TO CHECK CONNECTIONS
1) Cut off power supply.
2) Manually release the gate leaves, move them to around half their stroke and block them again.
3) Restore power supply.
4) Send a sep-by-step control by using the push-button connected to the Input, Step-by-Step (PP), radio control or push-button <->.
5) The gate leaves should open.
In the negative, the operation wires of the motor should be inverted by turning motor 1 connector by 180° and inverting wires
26<>28 for motor M2.
6) Select the motor which should start the operation first in the opening phase by using the MINV logics, see Fig.4.
7) Carry out an autoset procedure (see SET menu).
PROGRAMMING
The programming of the various functions of the control unit is carried out using the LCD display on the control unit and setting the
desired values in the programming menus described below.
The parameters menu allows you to assign a numerical value to a function, in the same way as a regulating trimmer.
The logic menu allows you to activate or deactivate a function, in the same way as setting a dip-switch.
Other special functions follow the parameters and logic menus and may vary depending on the type of control unit or the software
release.
USE OF PROGRAMMING KEYS
Press <PG> key to gain access to the Main Menu (PAR>>LOG>>RADIO>>...). These keys can be selected by pressing + and
– keys.
Select the Main menu with <PG> key to enter the desired Function Menu .
• If <+> is pressed, the Function Menu can be scrolled from top to bottom.
• If <-> is pressed, the Function Menu can be scrolled from bottom to top.

13
• If <PG> key is pressed, presetting to be modified can be entered.
• The preset values can be modified by using <+> and <-> keys.
• The value is programmed if <PG> key is pressed again. The word “PRG” appears on the display.
See paragraph “Programming Example”.
NOTES:
Simultaneously pressing <+> and <-> from inside a function menu allows you to return to the previous menu without making any
changes.
Hold down the <+> key or the <-> key to accelerate the increase/decrease of the values.
After waiting 30s the control unit quits programming mode and switches off the display.
Pressing <-> with the display turned off means an impulse of P.P.
PARAMETERS, LOGIC AND SPECIAL FUNCTIONS
The tables below describe the individual functions available in the control unit.
PARAMETERS (PAR)
MENU FUNCTION MIN-MAX-(Default) MEMO
TCA Automatic closing time. Active only with logic “TCA”=ON.
At the end of the set time the control unit orders a closing manoeuvre. 1-240-(40s)
tsm1
Braking value of motor 1. The values indicate the brake percentage of
the gate leaf (25%-50%-75%-100%) compared to the total opening/
closing.
25-100-(50)
tsm2
Braking value of motor 2. The values indicate the braking percentage
of the gate leaf (25%-50%-75%-100%) compared to the total opening/
closing.
25-100-(50)
TPED
Operating time of pedestrian gate leaf
Values which can be preset are:
25: 25% opening
50: 50% opening
100: 100% opening
25-100-(100)
PMo1 The torque applied to motor 1 during the opening phase is adjusted.* 1-99-(20%)
PMC1 The torque applied to motor 1 during the closing phase is adjusted.* 1-99-(20%)
PMo2 The torque applied to motor 2 during the opening phase is adjusted.* 1-99-(20%)
PMc2 The torque applied to motor 2 during the closing phase is adjusted.* 1-99-(20%)
TDMo Mot.2 opening delay time.
Regulates the delay time of motor 2 on opening with respect to motor 1
0-15-(2s)
TDMC Mot.1 closing delay time
Regulates the delay time of motor 1 on closing with respect to motor 2 0-40-(3s)
SLD1 It regulates the motor 1 speed during braking. The value is expressed in
percentage with respect to normal operating speed. 40-99 (50)
SLD2 It regulates the motor 2 speed during braking. The value is expressed in
percentage with respect to normal operating speed. 40-99 (50)
Pso1 The torque applied to motor 1 during braking in the opening phase is ad-
justed * 1-99-(20%)
Psc1 The torque applied to motor 1 during braking in the closing phase is ad-
justed * 1-99-(20%)
Pso2 The torque applied to motor 2 during braking in the opening phase is ad-
justed * 1-99-(20%)
Psc2 The torque applied to motor 2 during braking in the closing phase is ad-
justed * 1-99-(20%)
TLS
It adjusts the operating time of the service light when the “Service Light”
logics is preset to ON and the “2nd radio channel” logics is preset to
OFF
2s-180s-(60s)
* WARNING: An incorrect setting of these parameters may result in an hazard. Comply with regulations in force!
To check the torque applied to the various phases of the operation, proceed as follows:
With switched-off display and moving gate leaves, press and keep the <+> key pressed
Two figures separated by a dot are displayed (e.g. 52.55), the first two figures indicate the torque applied to motor 1, while the
last two the torque applied to motor 2.

14
LOGICS (LOG)
MENU FUNCTION ON-OFF-(Default) MEMO
TCA
Enables or disables automatic closing
On: automatic closing enabled
Off: automatic closing disabled
(ON)
IbL
Enables or disables condominium function.
On: condominium function enabled. The step-by-step impulse or transmitter
impulse has no effect during the opening phase.
Off: condominium function disabled.
(OFF)
SCL
Enables or disables rapid closing
On: rapid closing enabled. With the gate open or in the opening phase the
intervention of the photocell causes automatic closing after 3 s. Active only
with TCA:ON.
Off: rapid closing disabled.
(OFF)
PP
Selects the operating mode of the ”Step by step button” and of the
transmitter.
On: Operation: OPEN > CLOSE > OPEN >
Off: Operation: OPEN > STOP > CLOSE > STOP >
(OFF)
PRE
Enables or disables pre-blinking.
On: Pre-blinking enabled. Blinking is activated 3s before the motor starts.
Off: Pre-blinking disabled.
(OFF)
SERL
The “service light” function is enabled or disabled on terminals (9-10)
On: output, enabled as “Service light”. This output is activated at the beginning
of each operation and remains activated for the time preset by parameter TLS.
Off: output, enabled as “Open gate light”.
This function is not enabled if the “2°Ch radio” logics is preset to ON.
OFF
2ch
The second radio channel is enabled or disabled on terminals (9-10).
On: “2nd radio channel” output is enabled.
Off: “2nd radio channel” output is disabled. The output to terminals is activated
as “Service light” if SERL=On, or as SCA if SERL=Off.
If this function is preset to On, any presetting of the SERL logics will be ig-
nored.
(OFF)
CLOC
The OPEN Input mode is preset.
On: OPEN Input, with CLOCK function.
To be used as connection to timer for timed opening/closing. (Closed contact:
gate open. Open contact: normal operation).
Off: OPEN input, with OPEN function.
This function is activated only if the OPCL logics=ON
(OFF)
OPCL
The Step-by-Step and Pedestrian input modes is selected.
On: Input to terminal 18 activated as OPEN. Input to terminal 17 is activated
as Closed.
Off: Input to terminal 18 activated as Step-by-Step. Input to terminal 17 acti-
vated as Pedestrian.
(OFF)
INVC
The total reverse movement is enabled or disabled when the amperometric
sensor is triggered.
On: total reversion is enabled
Off: total reversion is disabled. The control unit controls a 2sec reversion and
then locks the gate leaves.
(OFF)
MINV
Start control signal to motors:
On: motor 2 starts first in the opening phase.
Off: motor 1 starts first in the opening phase.
(OFF)
CVAR
The code programmable transmitters is enabled or disabled.
On: Radio receiver enabled only for rolling-code transmitters.
Off: Receiver enabled for rolling-code and programmable code transmitters
(self-learning and Dip Switch).
(ON)
REM
The remote storage of the radio transmitter codes is enabled or disabled (see
par. REMOTE LEARNING).
On: Enabled remote storage
Off: Disabled remote storage.
(ON)

15
RADIO (RADi)
MENU FUNCTION
PP
By selecting this function, the receiver awaits (Push) for a transmitter code to be assigned to the step-by-step func-
tion.
Press the transmitter key to be assigned to this function.
If the code is valid, it is stored in memory and OK appears.
If the code is not valid, the wording Err is displayed.
2Ch
By selecting this function, the receiver awaits (Push) for a transmitter code to be assigned to the second radio chan-
nel.
Press the transmitter key to be assigned to this function.
If the code is valid, it is stored in memory and OK appears.
If the code is not valid, the wording Err is displayed.
If the 2CH logics is preset to OFF, the key assigned to 2CH function carries out the pedestrian control signal.
CLR
By selecting this function, the receiver awaits (Push) for a transmitter code to be erased from memory.
If the code is valid, it is erase and OK appears.
If the code is not valid or is not in memory, the wording Err is displayed.
RTR Completely erase the receiver memory. Confirmation of operation is required.
ARC COMPATIBLE CONTROL UNIT
IMPORTANT, PLEASE READ CAREFULLY:
The radio receiver in this product is compatible with the new ARC (Advanced Rolling Code) transmitters which, thanks to 128-bit
encryption ensure superior copy-security.
Storing new ARC transmitters is quite similar to that of normal rolling code transmitters with HCS coding, but be aware that:
1) ARC transmitters and Rolling Code HCS can not be stored in a single receiver.
2) The first transmitter memorized determines the type of transmitters to be used later. If the first transmitter memorized is ARC, you
can not store Rolling code HCS transmitters, and vice versa.
3) Fixed code transmitters may only be used in conjunction with Rolling code HCS transmitters, bringing the logic CVAR OFF. They
are, therefore, not usable in combination with the ARC transmitters. If the first rolling code transmitter stored is an ARC CVAR the
logic is inoperative.
4) If you want to change the type of transmitters it is necessary to proceed with a receiver reset.
REMOTE COPY OF TRANSMITTER CODES
If a transmitter code is already stored in the receiver, the radio remote copy can be carried out (without accessing to the control unit).
IMPORTANT: This procedure should be performed with gate leaves open, during the TCA dwell time.
Proceed as follows:
1 Press the hidden key of the already memorised transmitter.
2 Within 5 seconds, press the key of the already memorised transmitter which corresponds to the channel to be matched with the
new transmitter code. The flashing light switches on.
3 Within 10 sec, press the hidden key of the new transmitter.
4 Within 5 sec, press the key of the new transmitter to be matched to the channel selected at point 2. The flashing light switches off.
5 The receiver memorises the new transmitter and exits immediately the programming mode.
MENU FUNCTION
NMAN
The number of cycles (open+close) completed by the system is displayed.
When the push-button <PG> is pressed once, the first 4 digits are displayed, if the push-button is pressed
once more, the last 4 digits are displayed.
E.g. <PG> 0012 >>> <PG> 3456: 123.456 cycles were performed.
RES
RESET of the control unit. WARNING: This resets the control unit to the default values.
When the <PG> push-button is pressed once, the RES wording begins to flash, if the push-button <PG> is
pressed once more, the control unit is reset.
Note: neither the transmitter codes nor the position and stroked of the gate leaf will be erased from the re-
ceiver.
SET
Autoset of the control unit.
WARNING: during this operation, the gate leaves movement MUST be free from obstacles.
First pressure of the <PG> push-button causes the SET wording to flash at 1 sec intervals. If the <PG> push-
button is pressed again, the autoset frequency of the control unit is carried out.
If the autoset sequence has a positive result, the wording “OK” appears on the display; conversely, the “Err”
wording is displayed ( the autoset should be repeated).
If, during the autoset sequence, any input is activated (PP,PED,PHOT,STOP), the procedure stops immediately
and the wording “Err” is displayed.
Note: The autoset presets the torque values of the motors. At the end of operation, check the correctness of
the preset values and possibly modify them by hand through the appropriate Menu.

16
OPERATION OF THE AUTOSET MENU
The autoset procedure allows for the correct adjustment of the opening/closing torques, at normal speed and during braking, of the
gate leaves.
1) Before proceeding with the autoset, check that:
- the movement of the gate leaves is carried out without obstacles present;
- there are no objects/persons standing within the moving area of the automatic system;
- all connections are correct and there is no signal sent by safety devices (PHOT, PHOT C, STOP);
- Move the gate leaves at about half-stroke.
2) Enter the “SET” Menu and press the “PRG” push-button . The wording “SET” is displayed at 1 sec intervals.
3) By pressing the “PRG” key once more, the “SET” wording is displayed at 0.5 sec intervals and the self-setting phase starts. This
phase consists in the following:
- Short opening operation of both motors (about 5sec)
- Braked closure of both gate leaves until they stop against the mechanic stop in the closing phase.
- Braked opening of both gate leaves until they stop against the mechanical stop in the opening phase.
- Fast closure of both gate leaves until they stop against the mechanic stop in the closing phase.
- Fast opening of both gate leaves until they stop against the mechanical stop in the opening phase.
- Braked closure of both gate leaves until they stop against the mechanic stop in the closing phase.
All these phases should be carried out automatically without any intervention of the operator. The activation of any input (PHOT,PHOT
C, STOP,PP,PED…) immediately annuls the autoset procedure, the gate leaves stop and an “err” message is displayed.
If the procedure is to be stopped, it is sufficient to activate either input or simultaneously press keys + and – on the card.
If the autoset procedure is successfully concluded, the message “ok” will be displayed. Press “PRG” key and exit the autoset
menu.
Every autoset procedure, which is successfully concluded, overwrites the procedure previously made.
NOTE: for any modification to the parameters of torque, speed, braking or the start-up order of motors (MINV logics), a new
autoset procedure should be carried out.
EMERGENCY BATTERY
An optional accessory is available to power the control unit in the event of power failure.
The BN.CB card must be inserted in the special rapid connector, as indicated in Fig.3.
During normal operation, the green LED is switched on and the card keeps the batteries charged.
In the event of power failure, the card powers the system through the batteries and the red LED switches on.
A F10A fuse protects the control unit during operation with the emergency battery.
If the mains power supply is cut off and batteries are down, both LED’s are off.
CONNECTION TO THE SAFETY EDGE
171819202122
PHOT C
PHOT
STOP
P. P.
PED
DAS
If required, a Normally Closed (N.C.) contact of a mechanical safety edge can be con-
nected in series to terminal 22, as indicated in the side figure (DAS). For safety edges
in 8k2 conductive rubber, the accessory SC.E can be used.
If the safety edge triggers, the control unit causes the gate to invert its movement for
approx. 2 sec, or for its entire stroke (see INVC Logics) in both opening and closing
phases. After reversion, the gate stops.
DIAGNOSTICS
PHOT STOP
PHOT-C DAS
P.P.
PED
OPEN
CLOSE
In the event of malfunctions, by pressing key + or - the status of all inputs (limit switches,
control and safety) can be displayed. One segment of the display is linked to each input.
In the event of failure it switches on according to the following scheme.
N.C. inputs are represented by the vertical segments. N.O. inputs are represented by the
horizontal segments.

17
ERROR MESSAGES
The control unit checks the correct operation of the safety devices. In case of malfunctions, the following messages can be
displayed:
ERR Error in autoset phase, or storage of remote controls.
Thrm Triggering of thermic protection.
EXAMPLE OF PROGRAMMING
Let us suppose it is necessary to:
- set an automatic closing time (TCA) of 100s
- activate pre-blinking
Perform the operations described below step by step:
Step Press Display Notes
1PAR First menu
2TCA First function of the first menu
3040 Value currently set for the function selected
4100 Set the desired value with the <+> and <-> keys
5PRG The value is programmed
TCA When programming has been made, the display goes to the function just set
6PAR Press <+> and <-> simultaneously to go to the higher menu
7Log Second menu
8TCA First function of the second menu
9Pre Press <-> several times to select PRE logic
10 OFF Value currently set for the function selected
11 ON Set the desired value with the <+> and <-> keys
12 PRG The value is programmed
Pre When programming has been made, the display goes to the function just set
13 PAR Press <+> and <-> simultaneously to go to the higher menu and quit programming or wait
30s.

18
TECHNICAL DATA
Speisung der Steuereinheit 24 Vdc
Stromversorgung 230 Vac 50/60 Hz oder 115Vac 50/60Hz je nach Ausführung
Motorausgang 1/2 motor 24Vdc
Maximale Motorenleistung 120/120 W
Ausgang Speisung Zubehör 24Vdc 500mA max.
Schutzklasse IP44
Betriebstemperatur -20°C / +50°C
Funkempfänger
433,92 MHz eingebaut und konfigurierbar (Rolling-Code, fest+Rolling-Code oder
ARC - Advanced Rolling Code)
Programmierbare Codes 64
DEU HINWEISE
Das Produkt darf nicht für andere Zwecke oder auf andere Weise verwendet werden, als in der vorliegenden Anleitung
beschrieben.
Ein ungeeigneter Gebrauch kann das Produkt beschädigen und eine Gefahr für Personen und Sachen darstellen.
Wir übernehmen keinerlei Haftung für Schäden, die sich aus einer unsachgerechten Montage der Tore und aus daraus
folgenden Verformungen ergeben können.
Bewahren Sie dieses Handbuch für Nachschlagzwecke auf.
Dieses Handbuch ist ausschließlich qualifiziertem Personal für die Installation und Wartung von automatischen Öffnungsvor-
richtungen bestimmt.
Die Installation muss vonFachpersonal(professioneller Installateur gemäß EN12635) unter Beachtung der Regeln der
guten Technik sowie der geltenden Normen vorgenommen werden.
Prüfen, dass die Struktur des Tors so ist, dass es automatisiert werden kann.
Der Installateur hat dem Benutzer alle Informationen über den automatischen, manuellen Betrieb sowie den Not-Betrieb
der Automatik zusammen mit der Bedienungsanleitung zu liefern.
Das Verpackungsmaterial fern von Kindern halten, da es eine potentielle Gefahr darstellt. Das Verpackungsmaterial nicht
ins Freie werfen, sondern je nach Sorte (z.B. Pappe, Polystyrol) und laut den örtlich geltenden Vorschriften entsorgen.
Erlauben Sie es Kindern nicht, mit den Steuervorrichtungen dieses Produkts zu spielen. Halten Sie die Fernbedienungen
von Kindern fern.
Dieses Produkt eignet sich nicht für den Gebrauch durch Personen (einschließlich Kindern) mit eingeschränkten körper-
lichen, sensorischen oder geistigen Fähigkeiten oder ohne die nötigen Kenntnisse, es sei denn, sie werden von für ihre
Sicherheit verantwortlichen Personen beaufsichtigt oder angeleitet.
Wenden Sie alle Sicherheitsvorrichtungen (Fotozellen, Sensoren usw.) an, die zum Schutz desGefahrenbereiches gegen
Aufprall, Quetschung, Erfassung und Abtrennung von Gliedmaßen erforderlich sind. Berücksichtigen Sie die geltenden
Normen und Richtlinien, die Regeln der guten Technik, die Einsatzweise, die Installationsumgebung, die Betriebsweise
sowie die vom System entwickelten Kräfte.
Die Installation muss unter Verwedung von Sicherheits- und Steuerungsvorrichtungen vorgenommen werden, die der
Norm EN 12978 und EN 12453 entsprechen.
Das Stromnetz muss mit einem allpoligen Schalter bzw. Trennschalter ausgestattet sein, dessen Kontakte einen
Öffnungsabstand gleich oder größer als 3 aufweisen.
Kontrollieren, ob der elektrischen Anlage ein geeigneter Differentialschalter und ein Überspannungsschutzschalter vor-
geschaltet sind.
Einige Installationstypologien verlangen den Anschluss des Flügels an eine Erdungsanlage laut den geltenden Si-
cherheitsnormen. Während der Installation, der Wartung und der Reparatur, die Anlage stromlos machen bevor an den
elektrischen Teilen gearbeitet wird.
Klemmen Sie falls vorhanden auch die eventuellen Pufferbatterien ab.
Die elektrische Installation und die Betriebslogik müssen den geltenden Vorschriften entsprechen.
Die Leiter die mit unterschiedlichen Spannungen gespeist werden, müssen physisch getrennt oder sachgerecht mit einer
zusätzlichen Isolierung von mindestens 1 mm isoliert werden.
Die Leiter müssen in der Nähe der Klemmen zusätzlich befestigt werden.
Während der Installation, der Wartung und der Reparatur, die Anlage stromlos machen bevor an den elektrischen Teilen
gearbeitet wird.
Alle Anschlüsse nochmals prüfen, bevor die Zentrale mit Strom versorgt wird.
Die nicht verwendeten N.C. Eingänge müssen überbrückt werden.
ENTSORGUNG
Das seitlich abgebildete Symbol weißt darauf hin, dass das Produkt nicht als Hausmüll entsorgt werden darf, da einige
Bestandteile für die Umwelt und die menschliche Gesundheit gefährlich sind. Das Gerät muss daher zu einer zugelasse-
nen Entsorgungsstelle gebracht oder einem Händler beim Kauf eines neuen Geräts zurückerstattet werden. Eine nicht
ordnungsgemäße Entsorgung ist laut Gesetz strafbar.
Die in diesem Handbuch enthaltenen Beschreibungen und Abbildungen sind nicht verbindlich. Ausgenommen der Haupteigen-
schaften des Produkts, behält sich der Hersteller das Recht vor eventuelle technische, konstruktive oder kommerzielle Änderungen
vorzunehmen ohne dass er vorliegende Veröffentlichung auf den letzten Stand bringen muss.

19
STEUERZENTRALE CP.BEN
ELEKTRISCHE ANSCHLÜSSE
In der nachstehenden Tabelle sind die elektrischen und in Abb. 1 dargestellten Anschlüsse beschrieben:
Klemmen Funktion Beschreibung
1-2 24Vac/dc Eingang Speisung 24Vac/24Vdc
3-4 Antenne Anschluss Antenne der Karte des steckbaren Funkempfängers (13-Signal/14-Schirm).
9-10 SCA/SRL/2° Ch
Radio
Reiner Kontakt N.O. Gesteuert über die Logik „2°Ch Radio“ und „SRL“
Mit Logik “2° Ch Radio” On: Ausgang als zweiter Funkkanal aktiviert..
Mit Logik “2° Ch Radio” Off:
- Mit Logik “SRL” On: Kontakt Steuerung Höflichkeitsleuchte.
- Mit Logik “SRL” Off: Kontakt SCA Meldeleute Tor offen.
11-12 24 Vdc Ausgang Speisung Zubehör 24Vdc/0,5A max (12+/11-).
13-14 Blinkleuchte Anschluss Blinkleuchte 24Vdc 15W max.
17 PED/CLOSE Mit Logik “OPEN/CLOSE” Off: Eingang Taste Fußgänger (Kontakt N.O.), steuert das Öffnen
des Motors 1
Mit Logik “OPEN/CLOSE” On: Eingang Taste Close (Kontakt N.O.), steuert das Schließen
der beiden Motoren.
18 Schritt-Schritt/
OPEN
Mit Logik “OPEN/CLOSE” Off: Eingang Taste Schritt-Schritt (Kontakt N.O.)
Mit Logik “OPEN/CLOSE” On: Eingang Taste OPEN (Kontakt N.O.), steuert das Öffnen der
beiden Motoren.
19 PHOT C Eingang Fotozelle aktiv nur beim Schließen (Kontakt N.C.)
20 PHOT Eingang Fotozelle aktiv beim Öffnen und Schließen (Kontakt N.C.)
21 STOP Eingang Taste STOP (Kontakt N.C.)
22 COM Gemein für alle Steuerungseingänge.
23-25 Motor 1 Vorverkabelter Schnellverbinder Motor 1.
24 Erde Motor 1 Anschluss Erdung Motor 1
26-28 Motor 2 Abziehbarer Verbinder zum Anschluss des Motors 2: 24Vdc 120W max.
27 Erde Motor 2 Anschluss Erdung Motor 2
BN.CB Pufferbatterie Schnellverbinder zur Verbindung der Karte des Batterie-Ladegeräts BN.CB
ANSCHLÜSSE ÜBERPRÜFEN
1) Stromversorgung abtrennen.
2) Von Hand die Flügel entsichern, auf halben Hub bringen und wieder blockieren.
3) Stromversorgung wieder herstellen.
4) Eine Schritt-Schritt-Steuerung über die Taste die mit dem Eingang P.P verbunden ist, oder über die Fernbedienung oder über
die Taste <-> geben.
5) Die Torflügel müssen sich öffnen.
Falls dies nicht der Fall sein sollte, genügt es die Betriebsleiter des Motors zu vertauschen indem der Verbinder des Motors 1 um
180° gedreht und die Leiter 26<>28 für den Motor M2 vertauscht werden.
6) Über die Logik MINV, den Motor wählen der die Öffnung als erster steuern soll, siehe Abb. 4.
7) Eine Autoset-Prozedur (siehe Menü SET) vornehmen.
PROGRAMMIERUNG
Die Programmierung der verschiedenen Funktionen der Zentrale erfolgt über das LCD Display an Bord der Zentrale indem die ge-
wünschten Werte im Programmierungsmenü, wie nachstehend beschrieben eingerichtet werden.
Das Menü Parameter ermöglicht es einer Funktion einen numerischen Wert zuzuordnen, wie es bei einem Trimmer der Fall ist. Das
Menü der Logik ermöglicht es eine Funktion zu aktivieren oder deaktivieren, ähnlich wie bei der Einstellung eines Dip-Schalters.
In den Menüs Parameter und Logik können zudem noch andere Sonderfunktionen eingestellt werden, die je nach Modell oder
Software-Version unterschiedlich sind.
GEBRAUCH DER PROGRAMMIERUNGSTASTEN
Die Taste <PG> drücken, um das Hauptmenü (PAR>>LOG>>RADIO>>...) abzurufen, dessen Optionen über die Tasten + und – ge-
wählt werden können.
Das Hauptmenü über die Taste <PG> wählen, um das Menü der gewünschten Funktionen abrufen zu können.
• Die Taste <+> drücken, um das Menü der Funktionen von oben nach unten abzurollen
• Die Taste <-> drücken, um das Menü der Funktionen von unten nach oben abzurollen.
• Durch Drücken der Taste <PG> kann man eventuelle Einstellungen ändern.
• Mit den Tasten <+> und <-> kann man eingerichtete Werte ändern.
• Drückt man nochmals die Taste <PG>, wird der Wert programmiert und am Display wird die Schrift „PRG“ angezeigt.

20
Siehe Paragraph „Programmierungsbeispiel“.
BEMERKUNGEN:
Durch gleichzeitiges Drücken der Tasten <+> und <-> im Inneren des Menüs ‚Funktion’, kann man das vorhergehende Menü abru-
fen ohne Änderungen vorzunehmen.
Die Taste <+> oder <-> gedrückt halten, um die Zu-/Abnahme des Wertes zu beschleunigen.
Nach einer Wartezeit von 30 Sekunden, schaltet die Zentrale den Programmierungsmodus und das Display aus.
Das Drücken der Taste <-> bei ausgeschaltetem Display entspricht einem Impuls P.P.
PARAMETER, LOGIKEN UND SONDERFUNKTIONEN
In den folgenden Tabellen werden die einzelnen Funktionen der Steuerzentrale beschrieben.
PARAMETER (PAR)
MENÜ FUNKTION MIN-MAX-(Default) MEMO
TCA
Automatikverschlusszeit. Aktiv nur mit Logik “TCA”=ON.
Nach Ablauf der eingegebenen Zeit steuert die Steuerzentrale ein Ver-
schlussmanöver.
1-240-(40s)
tsm1
Geschwindigkeitsabnahme Motor 1. Die Werte geben die Geschwin-
digkeitsabnahme des Torflügels in Prozent (25%-50%-75%-100%) im
Verhältnis zur gesamten Öffnungs-/Schließweite an.
25-100-(50)
tsm2
Geschwindigkeitsabnahme Motor 2. Die Werte geben die Geschwin-
digkeitsabnahme des Torflügels in Prozent (25%-50%-75%-100%) im
Verhältnis zur gesamten Öffnungs-/Schließweite an.
25-100-(50)
TPED
Betriebszeit Fußgängertorflügel
Diese kann folgendermaßen eingestellt werden:
25: Öffnet um 25%
50: Öffnet um 50%
100: Öffnet um 100%
25-100-(100)
PMo1 Regelt das für den Motor 1 angelegte Drehmoment beim Öffnen. * 1-99-(20%)
PMC1 Regelt das für den Motor 1 angelegte Drehmoment beim Schließen.* 1-99-(20%)
PMo2 Regelt das für den Motor 2 angelegte Drehmoment beim Öffnen. 1-99-(20%)
PMc2 Regelt das für den Motor 2 angelegte Drehmoment beim Schließen.* 1-99-(20%)
TDMo Verzögerungszeit Öffnen Mot.2 Regelt die Verzögerungszeit beim Öffnen
des Motors 2 im Vergleich zum Motor 1 0-15-(2s)
TDMC Verzögerungszeit Schließen Mot.1 Regelt die Verzögerungszeit beim
Schließen des Motors 1 im Vergleich zum Motor 2 0-40-(3s)
SLD1
Regelt die Geschwindigkeit des Motors 1 während der Phase der Ge-
schwindigkeitsabnahme. Der Wert wird in Prozent im Verhältnis zur nor-
malen Betriebsgeschwindigkeit ausgedrückt.
40-99 (50)
SLD2
Regelt die Geschwindigkeit des Motors 2 während der Phase der Ge-
schwindigkeitsabnahme. Der Wert wird in Prozent im Verhältnis zur nor-
malen Betriebsgeschwindigkeit ausgedrückt.
40-99 (50)
Pso1 Regelt das für den Motor 1 angelegte Drehmoment während der Ge-
schwindigkeitsabnahme beim Öffnen.* 1-99-(20%)
Psc1 Regelt das für den Motor 1 angelegte Drehmoment während der Ge-
schwindigkeitsabnahme beim Schließen.* 1-99-(20%)
Pso2 Regelt das für den Motor 2 angelegte Drehmoment während der Ge-
schwindigkeitsabnahme beim Öffnen.* 1-99-(20%)
Psc2 Regelt das für den Motor 2 angelegte Drehmoment während der Ge-
schwindigkeitsabnahme beim Schließen.* 1-99-(20%)
TLS
Regelt die Zeit während welcher das Dienstlicht aktiviert bleiben soll,
wenn die Logik „Dienstlicht“ auf ON und die Logik “2°Ch Radio” auf OFF
geschaltet sind.
2s-180s-(60s)
* ACHTUNG: Eine falsche Einstellung dieser Parameter kann gefährlich sein.
Die geltenden Vorschriften beachten!
Um das Drehmoment zu prüfen, das während den verschiedenen Phasen der Steuerung angewendet wird, folgendermaßen vor-
gehen: Bei ausgeschaltetem Display und bei laufenden Torflügeln, die Taste <+> drücken und gedrückt halten.
Das Display zeigt zwei, durch einen Punkt getrennte Zahlen (z.B. 52.55) an; die ersten beiden geben das für den Motor 1 verwen-
dete Drehmoment und die letzten beiden das des Motors 2 an.
Other manuals for CP.BN
2
Table of contents
Languages:
Other Beninca Control Panel manuals

Beninca
Beninca CP.BISON OTI User manual

Beninca
Beninca DA.B1 User manual

Beninca
Beninca HEADY User manual

Beninca
Beninca HEADY User manual

Beninca
Beninca MATRIX User manual

Beninca
Beninca CORE User manual

Beninca
Beninca CP.BN User manual

Beninca
Beninca BRAINY User manual

Beninca
Beninca DA.90S User manual

Beninca
Beninca CP.MS5 User manual