manuals.online logo
Brands
  1. Home
  2. •
  3. Brands
  4. •
  5. Bentel Security
  6. •
  7. Security Sensor
  8. •
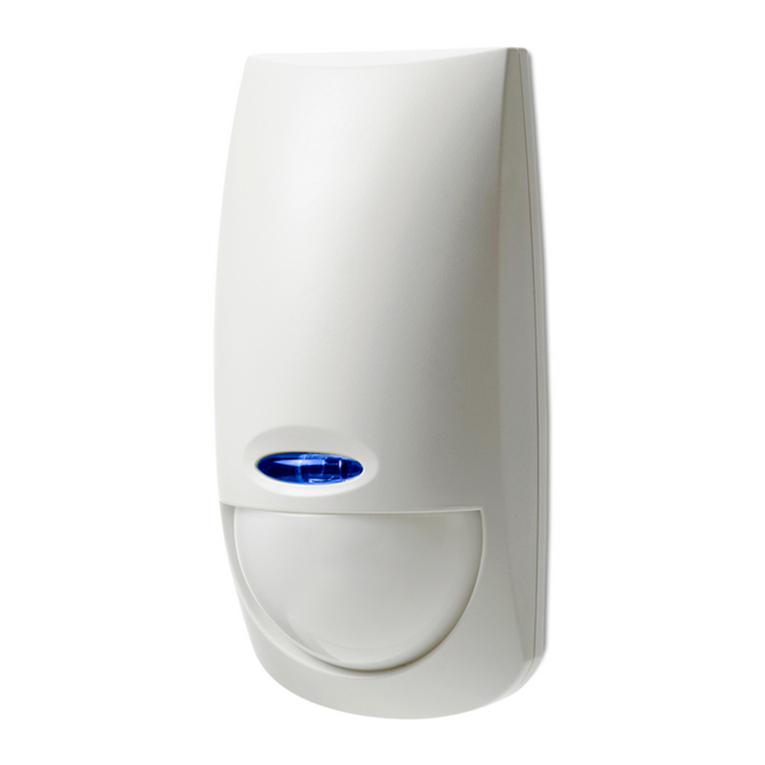
  9. Bentel Security DT800 User manual

Bentel Security DT800 User manual

®
MADE
IN
ITALY
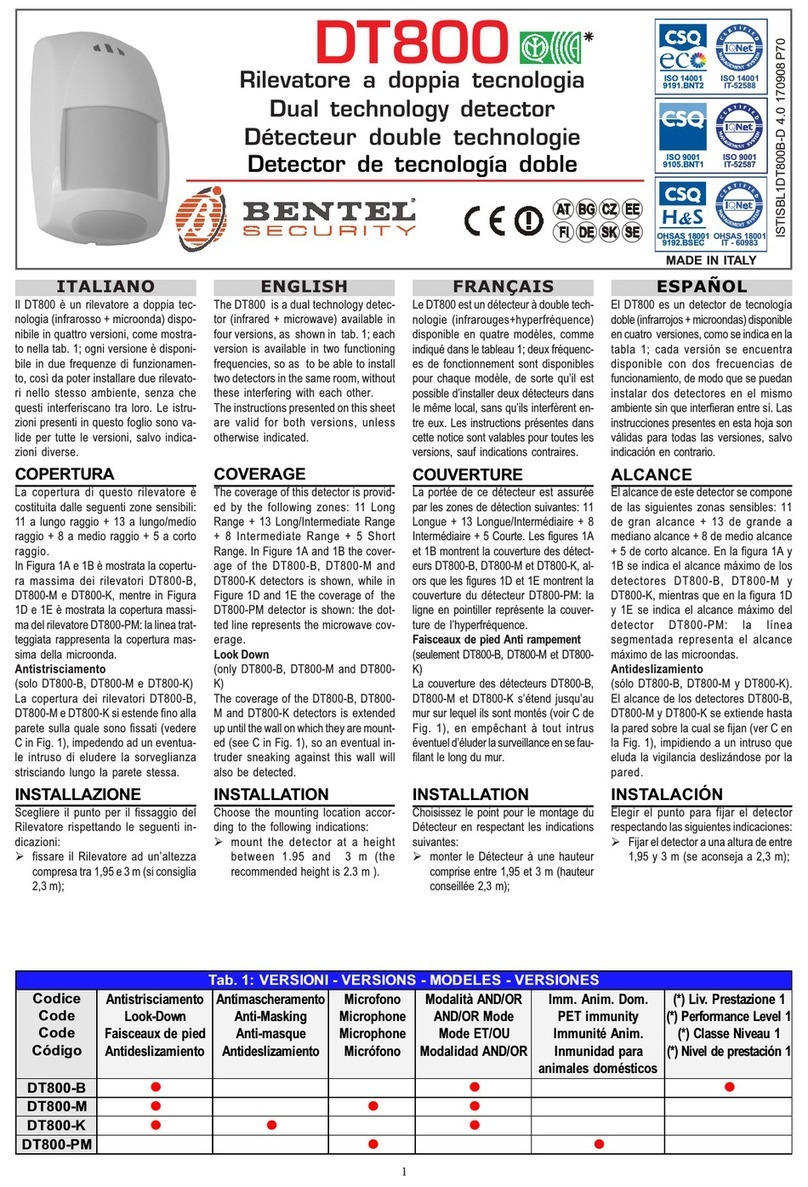
DT800
Rilevatore a doppia tecnologia
Dual technology detector
Il DT800 è un rilevatore a doppia tecnologia (infrarosso +
microonda) disponibile in quattro versioni, come mostrato
nella tab. 1; ogni versione è disponibile in due frequenze di
funzionamento, così da poter installare due rilevatori nello
stesso ambiente, senza che questi interferiscano tra loro.
Le istruzioni presenti in questo foglio sono valide per tutte
le versioni, salvo indicazioni diverse.
COPERTURA
In Figura 1A e 1B è mostrata la copertura dei rilevatori
DT800-B, DT800-M e DT800-K, mentre in Figura 1D e 1E
è mostrata la copertura del rilevatore DT800-PM: la linea
tratteggiata rappresenta la copertura della microonda.
Antistrisciamento (solo DT800-B, DT800-M e DT800-K)
La copertura dei rilevatori DT800-B, DT800-M e DT800-K
si estende fino alla parete sulla quale sono fissati (vedere
C in Fig. 1), impedendo ad un eventuale intruso di eludere
la sorveglianza strisciando lungo la parete stessa.
INSTALLAZIONE
Scegliere il punto per il fissaggio del Rilevatore rispettan-
do le seguenti indicazioni:
¾fissare il Rilevatore ad un’altezza compresa tra 1,95 e
3 m (si consiglia 2,3 m);
¾NON puntare il Rilevatore su superfici riflettenti, come
specchi o finestre, poiché possono distorcere l’area di
copertura o riflettere i raggi solari direttamente sul
Rilevatore;
¾NON fissare il Rilevatore in punti sottoposti a forti
correnti d’aria, come vicino alle uscite dell’aria
condizionata;
¾NON fissare il Rilevatore vicino a fonti di umidità, di
vapore o idrocarburi;
¾NON limitare la copertura del Rilevatore con ostacoli
di grandi dimensioni come piante o armadietti.
Tab. 1: VERSIONI - VERSIONS
Codice
Code Antistrisciamento
Look-Down Antimascheramento
Anti-Masking Microfono
Microphone Modalità AND/OR
AND/OR Mode Imm. Anim. Dom.
PET immunity
DT800-B zz
DT800-M zzz
DT800-K zz z
DT800-PM zz
The DT800 is a dual technology detector (infrared +
microwave) available in four versions, as shown in tab.
1; each version is available in two functioning frequen-
cies, so as to be able to install two detectors in the same
room, without these interfering with each other.
The instructions presented on this sheet are valid for
both versions, unless otherwise indicated.
COVERAGE
In Figure 1A and 1B the coverage of the DT800-B, DT800-
M and DT800-K detectors is shown, while in Figure 1D
and 1E the coverage of the DT800-PM detector is shown:
the dotted line represents the microwave coverage.
Look Down (only DT800-B, DT800-M and DT800-K)
The coverage of the DT800-B, DT800-M and DT800-K
detectors is extended up until the wall on which they are
mounted (see C in Fig. 1), so an eventual intruder sneak-
ing against this wall will also be detected.
INSTALLATION
Choose the mounting location according to the following
indications:
¾mount the detector at a height between 1.95 and 3 m
(the recommended height is 2.3 m ).
¾DO NOT position the detector towards reflecting
surfaces such as mirrors or windows, as these can
distort the coverage area or reflect the sun's rays
directly onto the detector;
¾DO NOT mount the detector in places exposed to
sources of air flow such as close to air conditioning
vents;
¾DO NOT mount the detector near sources of humidity,
steam or hydrocarbons;
¾DO NOT restrict the coverage of the detector with
large obstacles such as plants or closets.
ISTISBL1DT800B-D 0.0 130406 P70
Fig. 1 - Copertura DT800-B, BT800-M e DT800-K: A)
vista in pianta; B) vista laterale; C) antistrisciamento.
Copertura DT800-PM: D) vista in pianta; E) vista laterale.
Immunità agli animali domestici (solo DT800-PM)
Affinché il rilevatore DT800-PM sia immune agli animali
domestici, il cui peso complessivo NON superi i 20 Kg,
oltre alle indicazioni generali, rispettare le seguenti indi-
cazioni:
¾NON puntare il Rilevatore su un vanoscala a cui ha
accesso un animale domestico;
¾NON fissare il Rilevatore a meno di 3 m da mobili o oggetti
alti più di 0,9 m, sui quali può salire un animale domestico;
¾NON angolare il Rilevatore verso il basso.
Fissaggio in piano, ad angolo o a bandiera
1. Aprire il Rilevatore: svitare la vite 26, se presente;
infilare un piccolo giravite piatto nell’apertura 21 e
premere delicatamente verso i LED.
2. Rimuovere la Scheda Elettronica: premere verso il
basso il gancio 20.
3. Aprire il foro 17a o 17b o 17c per il fissaggio i piano;
aprire i fori 16a e 16c oppure i fori 16b e 16d per il
fissaggio ad angolo; aprire i fori 16a e 16b oppure i fori
16c e 16d per il fissaggio a bandiera.
4. Aprire il foro 19a o 19b o 19c per il passaggio del cavo
per i collegamenti.
5. Passare il cavo per i collegamenti attraverso il foro
predisposto, quindi fissare il Fondo al muro tramite le
viti in dotazione.
6. Riagganciare la Scheda Elettronica al Fondo: inserire
il lato superiore della Scheda sotto i ganci 18, quindi
premere sul lato inferiore della Scheda verso il Fondo.
7. Eseguire i collegamenti sulla morsettiera 4.
8. Impostare il modo di funzionamenro del Rilevatore,
come descritto nei relativi paragrafi.
9. Chiudere il Rilevatore: agganciare il lato superiore del
Coperchio al Fondo quindi spingere sul lato inferiore
del Coperchio fino a udire uno scatto; se previsto,
bloccare il Coperchio tramite la vite 26 (non fornita).
Fig. 1 - DT800-B, BT800-M and DT800-K coverage: A)
top view; B) side view; C) sneak cover. DT800-PM co-
verage: D) top view; E) side view.
Pet immunity (only DT800-PM)
In order for the DT800-PM detector to be immune to pets
that DO NOT exceed 20 kg, together with the general
instructions, follow these indications:
¾DO NOT position the detector towards a stairwell to
which pets have access;
¾DO NOT mount the detector less then 3 m from furniture
or objects higher than 0.9 m, onto which pets can
climb;
¾DO NOT angle the detector downwards.
Wall mount, corner mount or side mount
1. Open the detector: remove screw 26 if present; insert
a small flat blade screwdriver into opening 21 and
push delicately towards the LED.
2. Remove the electronic board: push hook 20
downwards.
3. Open hole 17a or 17b or 17c for the wall mount; open
holes 16a and 16c or holes 16b and 16d for the corner
mount, open holes 16a and 16b or holes 16c and 16d
for the side mount.
4. Open hole 19a or 19b for the passage of the connecting
cable.
5. Pass the connecting cable through the appropriate
hole, then attach the back plate to the wall with the
screws supplied.
6. Reattach the electronic board to the back plate; insert the
top part of the board underneath hooks 18, then press on
the lower part of the board towards the back plate.
7. Carry out the connections on terminal board 4.
8. Set the operating mode of the detector as described in
the relative paragraphs.
9. Close the detector: hook the top part of the cover to the
backplate then push onto the bottom part of the cover
until you hear a click; the cover can be secured with
screw 26 (not supplied).
90°90°
A
B
D
E
C
10.Eseguire la Prova di Copertura, come descritto nel
relativo paragrafo.
Fissaggio su canalizzazioni a vista
Tramite la Base 23 fornita di serie, èpossibile fissare il
Rilevatore su canaline da 15 mm, come descritto di
seguito.
1. Procedere come per l’installazione in piano, ad angolo
o a bandiera, fino al punto 5.
2. Aprire il settori 22a o 22b.
3. Passare il cavo per i collegamenti attraverso il foro
19a o 19b o 19c della Base, quindi appoggiare la Base
al muro, sopra la canalina.
4. Passare il cavo per i collegamenti attraverso il foro
19a o 19b o 19c del Fondo, quindi fissare il Fondo più
la Base al muro, tramite le viti in dotazione.
5. Procedere come per l’installazione in piano, ad angolo
o a bandiera, dal punto 8.
Fissaggio tramite lo Snodo
Tramite lo snodo opzionale BR-01 èpossibile fissare il
Rilevatore a parete o a soffitto, ruotarlo in senso orizzon-
tale di ±45°e inclinarlo fino a 5°verso il basso.
1. Procedere come per l’installazione in piano, ad angolo
o a bandiera, fino al punto 2.
2. Aprire i fori 17a e 19b sul Fondo del Rilevatore.
3. Per il fissaggio a parete, aprire il foro 37a o 37b, il foro
38b edilforo36a,seèprevistoilDeviatoreAntisabotaggio.
Per il fissaggio a soffitto, aprire il foro 37c o 37d, il foro 38a
ed il foro 36b, se èprevisto il Deviatore Antisabotaggio.
4. Passare il cavo per i collegamenti attraverso il foro
38, quindi fissare il Fondo tramite il foro 37 e, se è
previsto il Deviatore Antisabotaggio, fissare il Tassello
Antisabotaggio tramite il foro 36.
5. Se previsto, posizionare il Deviatore Antisabotaggio (non
fornito) nel Coperchio, come mostrato in Figura 2F
La levetta del Deviatore deve essere orientata come
mostrato in Figura 2F altrimenti il dispositivo non
funziona correttamente.
6. Se previsto, collegare il Deviatore Antisabotaggio in
serie alla linea antisabotaggio.
Tab. 2: DESCRIZIONE DEI MORSETTI Tab. 2: DESCRIPTION OF THE TERMINALS
Contatto Antimascheramento (solo DT800-K):
chiuso a riposo; aperto in caso di mascheramento.
Microfono (solo DT800-M e DT800-PM):
M= Microfono; G= Massa
M
G
Anti-masking Contact (only DT800-K):
closed on standby; open in case ofmasking.
Microphone (only DT800M and DT800-PM):
M= Microphone; G= Negative
Rilevazione Stato Centrale:se DIP switch n. 4 = ON
(default), allora centrale inserita quandoIN èappeso;
se DIP switch n. 4 = off, allora centrale inserita quando
IN èa massa
IN
Control Panel Status detection: if DIP switch no. 4 = ON
(default), then control panel is armed whenIN is floating;
If DIP switch no. 4 = off, then control panel is armed
when IN is negative
Alimentazione Rilevatore: 12 Vcc ±3 V +/–Detector Power Supply: 12 Vcc ±3 V
Contatto Antisabotaggio: chiuso a riposo;
aperto in caso di sabotaggio AS Tamper Contact: closed on standby;
open in case of tamper
Contatto di Allarme:
a riposo, Cchiuso su NC ed NA appeso;
in caso di allarme, Cchiuso su NA ed NC appeso
NC
C
NA
Alarm contact:
On standby, Cclosed on NC and NA floating;
in case of alarm, Cclosed on NA and NC floating
10.Carry out the walk test as described in the relative
paragraph.
Surface wiring mount
With the base 23, series provided, it is possible to mount
the detector on 15 mm wire channels, as described in
the following.
1. Proceed as for the wall, corner or side mount, until
n. 5.
2. Open areas 22a or 22b.
3. Pass the connecting cable through opening 19a or 19b
or 19c of the base, then position the base to the wall,
above the channel.
4. Pass the connecting cable through opening 19a or 19b
or 19c of the back plate, then attach the back plate and
the base to the wall, with the supplied screws.
5. Proceed as for the wall, corner or side mount, from
n. 8.
Swivel Mount
With the BR-01 optional swivel, it is possible to wall
mount or ceiling mount the detector, rotate it ±45°hori-
zontally, and tilt it up to 5°downwards.
1. Proceed as for the wall, corner or side mount until
n. 2
2. Open holes 17a and 19b on the back plate of the
detector.
3. For the wall mount, open hole 37a or 37b, holes 38b
and 36a, if the tamper switch is being fitted. For the
ceiling mount, open hole 37c or 37d, holes 38a and
36b, if the tamper switch is being fitted.
4. Pass the connecting cable through hole 38, then attach
the back plate through hole 37 and, if the tamper switch
is being fitted, attach the tamper bracket through
hole 36.
5. If it is being fitted, position the tamper switch (not
supplied), into the cover, as shown in Fig. 2F.
The switch lever must be directed as described in Fig.
2F otherwise the device will not function correctly.
6. If it is being fitted, connect the tamper switch in series
to the tamper line.
7. Infilare il Perno 33 nell’apertura 31, passare il cavo per
collegamenti attraverso l’apertura 30, quindi fissare il
Coperchio al Fondo tramite la vite 29.
8. Accoppiare il Supporto 28 al Fondo del Rilevatore,
quindi passare il cavo per i collegamenti, prima
attraverso l’apertura 27, poi attraverso il foro 19b.
9. Fissare il Fondo piùil Supporto al perno 33, tramite la
vite in dotazione, senza serrare.
10.Orientare il Fondo nella direzione desiderata, quindi
serrare la vite.
11.Procedere come per l’installazione in piano, ad angolo
o a bandiera, dal punto 8.
Tab. 3: DESCRIZIONE DELLE PARTI Tab. 3: DESCRIPTION OF PARTS
LED VERDE: allarme infrarosso 1GREENLED:infrared alarm
LED ROSSO: allarme generale e memoria 2REDLED:general alarm and memory
LED GIALLO: allarme microonda 3 YELLOW LED: microwave alarm
Morsettiera per i collegamenti 4Connection terminal board
DIP switch di programmazione 5Programming DIP-switch
Ponticello L: disabilitazione LED 6Ljumper: LED disabling
Ponticello uW: disabilitazione microonda 7uWjumper: microwave disabling
Sensore infrarosso 8Infrared sensor
Sensibilitàinfrarosso: aumenta in senso orario 9Infrared sensitivity: increases clockwise
Microswitch antisabotaggio 10 Tamper microswitch
Sensibilitàmicroonda: aumenta in senso orario 11 Microwave sensitivity: increases clockwise
Sensore microonda 12 Microwave sensor
Microfono (solo DT800-M e DT800-PM) 13 Microphone (only DT800-M and DT800-PM)
Sensibilitàmicrofono (solo DT800-M e DT800-PM):
aumenta in senso orario 14 Microphone sensitivity (only DT800-M and DT800-PM):
increases clockwise
Fondo del Rilevatore 15 Detector back plate
Fori per il fissaggio ad angolo 16 Corner-mount holes
Fori per il fissaggio inpiano: il foro 17c èsul retro del Fondo 17 Wall-mount holes: hole 17c is onthe back ofthe back plate
Ganci per il fissaggio della Scheda Elettronica 18 Hooks for attaching the electronic board
Fori per il passaggio dei cavi: il foro19b èsul retro del
Fondo 19 Holes for the cable passage: hole 19b is on the back
of the back plate
Gancio per il fissaggio della Scheda Elettronica 20 Hook for attaching the electronic board
Gancio per il fissaggio del Coperchio 21 Hook for attaching the cover
Settori da aprire per la canalina 22 Areas to open for the wire channel
Base per il fissaggio su canalizzazione a vista 23 Base for surface wiring mount
Coperchio 24 Cover
Scheda Elettronica 25 Electronic board
Vite per il bloccaggio del Coperchio (NON fornita) 26 Screw for cover blockage (not supplied)
Passagio dei cavi sul Supporto dello Snodo 27 Cable passage on the swivel support
Supporto dello Snodo 28 Swivel support
Vite per il fissaggio del Coperchio al Fondo dello Snodo 29 Screws for attaching the cover to the swivel back plate
Passaggio cavi sul Coperchio dello Snodo 30 Cable passage on the swivel cover
Apertura per l'inserimento del Perno 31 Opening for the insertion ofthe pivot
Coperchio dello Snodo 32 Swivel cover
Perno dello Snodo 33 Swivel pivot
Fondo dello Snodo 34 Swivel back plate
Microswitch antisabotaggio dello Snodo (non fornito) 35 Swivel tamper microswitch (not supplied)
Fori per il fissaggio del Tassello Antistrappo 36 Holes for the seize-switch bracket
Fori per il fissaggio dello Snodo 37 Holes for the swivel mount
Passaggio dei cavi sul Fondo dello Snodo 38 Cable passage on the swivel back plate
7. Insert pivot 33 into opening 31, pass the connecting
cable through opening 30, then attach the cover to the
back plate with screw 29.
8. Couple support 28 to the back plate of the detector,
then pass the connecting cable first through opening
27, then through hole 19b.
9. Attach the back plate and the support to pivot 33 with
the screws given, without tightening.
10.Direct the back plate forwards the desired direction,
then tighten the screw.
11.Proceed as for the wall, corner or side mount, from
n. 8.
Fig. 2 - Identificazione delle parti. Fig. 2 - Identification of the parts.
23
0B<=2
+
B043
PIR
=08=6
+
+
MIC
4
11
5
10
123
13
14
7
6
12
2
8
15
24
20
26
28
32
33
34
15
19b
1818
20
16d
17b 17b
17a
17c
17a
17c
16c
16a
16b
A B C
D
E
19b
23
29
25
9
F
35
33
32
19c19a 22a 19c19a
22b
21
27
30
31
38b
37a
37d
37b
36a 37c 36b
38a
G
COLLEGAMENTI
Usare cavo schermato per il collegamento del Rilevato-
re: collegare lo schermo alla massa della centrale, la-
sciandolo scollegato dalla parte del Rilevatore. Se la
distanza tra il Rilevatore e la centrale ènotevole, assicu-
rarsi che non vi sia caduta di tensione (la tensione di
alimentazione deve essere compresa tra 9 e 15 V).
Il Rilevatore impiega circa 60 secondi per stabilizzar-
si, dal momento in cui viene alimentato. Questo peri-
odo è segnalato dal LED rosso acceso.
Antimascheramento (solo DT800-K)
Il DT800-K èin grado di segnalare, tramite i morsetti Me
G, se uno dei suoi sensori viene mascherato:
¾a riposo, i morsetti Me Gsono collegati;
¾se uno dei due sensori viene mascherato, il morsetti
Me Gsi scollegano.
Per un corretto funzionamento dell’antimascheramen-
to, la sensibilità dei sensori infrarosso e microonda
del rilevatore DT800-K deve essere simile.
Microfono (solo DT800-M e DT800-PM)
I rilevatori DT800-M e DT800-PM sono dotati di un micro-
fono che, collegato con centrali predisposte, permette di
ascoltare via telefono, i suoni prodotti nell’ambiente nel
quale sono installati.
¾I morsetti Me Gdel Rilevatore sono, rispettivamente,
il microfono e la massa.
¾Tramite il trimmer 14 èpossibile regolare la sensibilità
del microfono: ruotando il trimmer in senso orario la
sensibilitàaumenta.
MODO AND
Il Rilevatore va in allarme quando i suoi sensori generano,
contemporaneamente, il numero di impulsi programmati,
in un tempo massimo di 30 s (colonna AND della Tab. 4).
Per impostare il Modo AND dei rilevatori DT800-B, DT800-M
e DT800-K, commutatare il DIP switch n. 1 su ON (default).
Il Rilevatore DT800-PM può funzionare solo in Modo AND.
MODO AND/OR
(solo DT800-B, DT800-M e DT800-K)
Oltre a funzionare come in Modo AND, se uno dei due sensori
viene mascherato, il Rilevatore va in allarme quando il sen-
sore funzionante genera il numero di impulsi programmato, in
un tempo massimo di 30 s (colonna OR della Tab. 4).
Per impostare il Modo AND/OR commutare il DIP switch
n. 1 su OFF.
Tab. 4: ALARM PULSES
DIP switch no. DT800-B, DT800-M e DT800-K DT800-PM
1* 2AND OR AND
ON ON 1 (def.) 3 (def.) 1 (def.)
ON off 252
off ON / / 2
off off / / 4
*) The DIP switch no. 1 of the detectors DT800-B, DT800-M
and DTR800-K determines the Operating Mode (Table 5)
Tab. 4: IMPULSI PER ALLARME
DIP switch n. DT800-B, DT800-M e DT800-K DT800-PM
1* 2AND OR AND
ON ON 1 (def.) 3 (def.) 1 (def.)
ON off 252
off ON / / 2
off off / / 4
*) Il DIP switch n. 1 dei rilevatori DT800-B, DT800-M e
DT800-K, determina il Modo di Funzionamento(Tab. 5)
CONNECTIONS
Use shielded cable for the connection of the detector:
connect the shield to the control panel negative terminal,
and leave the other end (detector end) disconnected. If
there is considerable distance between the detector and
the control panel, check for voltage drop (required volt-
age range: 9 V to 15 V).
The detector will stabilize approximately 60 seconds
after power up. The stabilization phase will be indicat-
ed by glowing on the red LED.
Anti-masking (only DT800-K)
The DT800 can signal when one of its sensors is masked
through terminal Mand G:
¾on standby, terminals Mand Gare connected;
¾if one of the two sensors is masked, terminals Mand
Gdisconnect.
For a proper functioning of the anti-masking, the sen-
sitivity of the infrared and microwave sensors of the
DT800-K detector must be the same.
Microphone (only DT800-M and DT800-PM)
The DT800-M and the DT800-PM detectors are supplied
with a microphone that, connected to a suitable control
panel, allows for the listening of sounds produced in the area
in which they are installed through the use of a phone.
¾Terminals Mand Gof the detector are respectively the
microphone and the negative terminal.
¾It is possible to adjust the sensitivity of the microphone
through the trimmer 14: sensitivity increases by turning
the trimmer clockwise.
AND MODE
The detector will go into alarm when its sensors gener-
ate, at the same time, the programmed number of pulses
within 30 s (AND column - Table 4). To set the AND
Mode of the DT800-B, DT800-M and DT800-K detectors,
turn DIP switch no. 1 ON (default).
The DT800-PM detector can only operate on AND mode.
AND/OR MODE
(only DT800-B, DT800-M and DT800-K)
Apart from operating as in AND Mode, if one of the two
sensors is masked, the detector will go into alarm when
the working sensor generates a number of programmed
pulses, within 30 s (OR column - Table 4).
To set the AND/OR Mode turn DIP switch no. 1 OFF.
ABILITAZIONE MEMORIA
Questa funzione èutile quando si devono collegare più
rilevatori alla stessa linea di una centrale, per sapere in
quale punto preciso èavvenuta l’intrusione: se, a centra-
le disinserita, il LED rosso di un rilevatore resta acceso,
vuol dire che quel rilevatore èandato in allarme. La
memoria viene cancellata e il LED rosso si spegne quan-
do la centrale viene inserita. Per abilitare la memoria:
¾commutare il DIP switch n. 4 su ON;
¾collegare il morsetto IN del Rilevatore ad una uscita
che segnala lo stato della centrale;
¾commutare il DIP switch n. 3 su ON se l’uscita è
appesa quando la centrale èdisinserita, oppure
commutare il DIP switch n. 3 su OFF se l’uscita èa
massa quando la centrale èdisinserita.
Se il DIP switch n. 4 viene commutato su OFF, la
memoria è sempre disabilitata, indipendentemente
dallo stato del morsetto IN.
DISABILITAZIONE LED
I LED di segnalazione possono essere disabilitati a centrale
disinserita, per non recare disturbo, come descritto di seguito:
¾lasciare il ponticello Lintatto;
¾collegare il morsetto IN del Rilevatore ad una uscita
che segnala lo stato della centrale;
Tab. 5: PROGRAMMAZIONE (DIP-switch e ponticelli) Tab. 5: PROGRAMMING (DIP-switch and jumpers)
MODO (solo DT800-B, DT800-M e DT800-K)MODE (only DT800-B, DT800-M and DT800-K)
ON (def.) AND 1ON (def.) AND
off AND/OR off AND/OR
CONTAIMPULSI (solo DT800-B, DT800-M e DT800-K) PULSE COUNTER (only DT800-B, DT800-M and DT800-K)
ON (def.) allarme con 1 impulso in AND o 3 impulsi in OR 2ON (def.) Alarm with 1 pulse in AND or 3 pulses in OR
off allarme con 2 impulsi in AND o 5 impulsi in OR off Alarm with 2 pulses in AND or 5 pulses in OR
RILEVAZIONE STATO CENTRALE CONTROL PANEL STATUS DETECTION
ON (def.) se IN appeso, centrale inserita 3ON (def.) If IN is floating, the panel is armed
off se IN a massa, centrale inserita off If IN is negative, the panel is armed
MEMORIA MEMORY
ON (def.) se DIP 3
ON (def.) ABILITATA se IN appeso (def.)
disabilitata se IN a massa 4
ON (def.) if DIP 3
ON (def.) ENABLED if IN floating (def.)
disabled is IN negative
se DIP 3
off ABILITATA se IN a massa
disabilitata se IN appeso if DIP 3
off ENABLED is IN is negative
disabled if IN is floating
off disabilitata off disabled
LED LEDs
INTATTO
(def.) se DIP 3
ON (def.) ABILITATI se IN appeso (def.)
disabilitatI se IN a massa L
INTACT
(def.) if DIP 3
ON (def.) ENABLED if IN floating (def.)
disabled is IN negative
se DIP 3
off ABILITATI se IN a massa
disabilitati se IN appeso if DIP 3
off ENABLED is IN is negative
disabled if IN is floating
tagliato ABLITATI Cut ENABLED
MICROONDA (solo DT800-B, DT800-M e DT800-PM) MICROWAVE (only DT800-B, DT800-M and DT800-PM)
INTATTO
(def.) se DIP 3
ON (def.) ABILITATA se IN appeso (def.)
disabilitata se IN a massa uW
INTACT
(def.) if DIP 3
ON (def.) ENABLED if IN floating (def.)
disabled is IN negative
se DIP 3
off ABILITATA se IN a massa
disabilitata se IN appeso if DIP 3
off ENABLED is IN is negative
disabled if IN is floating
tagliato abilitata Cut ENABLED
ENABLING MEMORY
This feature is used when several detectors are con-
nected to the same control panel zone. If the detector
signals an alarm to the control panel, the red LED will
glow when the system disarms, thus indicating the ex-
act place of violation.
The memory will clear and the red LED will go OFF
when the control panel rearms. To enable the memory:
¾turn DIP switch no. 4 ON;
¾connect the IN terminal of the detector to an output that
signals the control panel status;
¾turn DIP switch no. 3 ON if the output is floating when
the control panel is disarmed, or
turn DIP switch no. 3 OFF if the output is negative
when the control panel is disarmed.
If DIP switch no. 4 is turned OFF, the memory is
always disabled independently from the state of the
IN terminal.
DISABLING THE LEDs
The LEDs can be disabled, with the panel disarmed, so as
not to cause disturbances, by following these instructions:
¾leave jumper Lintact;
¾connect terminal IN of the detector to an output that
signals the status of the control panel;
¾commutare il DIP switch n. 3 su ON se l’uscita è
appesa quando la centrale èdisinserita, oppure
commutare il DIP switch n. 3 su OFF se l’uscita èa
massa quando la centrale èdisinserita.
Se il ponticello Lviene tagliato, i LED sono abilitati,
indipendentemente dallo stato del morsetto IN.
DISABILITAZIONE
MICROONDA
(solo DT800-B, DT800-M e DT800-PM)
La microonda puòessere disabilitata a centrale disinse-
rita, per ridurre l’inquinamento elettromagnetico, come
descritto di seguito:
¾lasciare il ponticello uW intatto;
¾collegare il morsetto IN del Rilevatore ad una uscita
che segnala lo stato della centrale;
¾commutare il DIP switch n. 3 su ON se l’uscita è
appesa quando la centrale èdisinserita, oppure
commutare il DIP switch n. 3 su OFF se l’uscita èa
massa quando la centrale èdisinserita.
Se il ponticello uW viene tagliato, la microonda è sem-
pre abilitata, indipendente dallo stato del morsetto IN.
PROVA DI COPERTURA
Eseguire una prova di cammino nell’ambiente in cui èinstal-
lato il Rilevatore, ed aumentare gradualmente la sensibilità
(trimmer 9e 11) affinchéi LED verde e giallo segnalino che i
vostri movimenti sono stati rilevati da entrambi i sensori.
Tab. 6: CARATTERISTICHE TECNICHE Tab. 6: TECHNICAL FEATURES
Frequenza microonde:
DT800-B/D, DT800-M/D, DT800-K/D, DT800-PM/D
DT800-B/E, DT800-M/E, DT800-K/E, DT800-PM/E 10,525 GHz
10,515 GHz
Microwave frequency:
DT800-B/D, DT800-M/D, DT800-K/D, DT800-PM/D
DT800-B/E, DT800-M/E, DT800-K/E, DT800-PM/E
Portata 12 m Range
Immunitàagli animali domestici (solo DT800-PM) 20 Kg Pet Immunity (only DT800-PM)
Alimentazione 12 Vcc ±3 V Power supply
Assorbimento 15 mA
(25 mA max.) Current draw
Uscita allarme N.C. Alarm contact
Impulso allarme 0,5 s Alarm pulse
Uscita sabotaggio N.C. Tamper switch
Sensibilitàmicrofono (solo DT800-M e DT800-PM) -24 dB
(300 ÷4000 Hz) Microwave sensitivity (only DT800-M and DT800-PM
Temperatura di funzionamento 5 ÷40 °C Temperature range
Grado di protezione IP40 Protection classification
Dimensioni (L*H*P) 67*122*49 mm Dimensions (L*H*P)
Peso Weight
¾turn DIP switch no. 3 ON if the output is floating when
the panel is disarmed, or
turn DIP switch no. 3 OFF if the output is negative when
the control panel is disarmed.
If jumper Lis cut, the LEDs are enabled, independ-
ently from the state of jumper IN.
DISABLING
THE MICROWAVE
(Only DT800-B, DT800-M and DT800-PM)
It is possible to disable the microwave with the control
panel disarmed, in order to reduce electromagnetic pollu-
tion, by following these instructions:
¾leave jumper uW intact;
¾connect terminal IN of the detector to an output that
signals the control panel status;
¾turn DIP switch no. 3 ON if the output is floating when
the panel is disarmed, or
turn DIP switch no. 3 OFF if the output is negative
when the panel is disarmed.
If jumper uW is cut, the microwave is always ena-
bled, independently from the state of jumper IN.
WALK TEST
Create motion in the protected area, gradually increase
the sensitivity level (use trimmers 9and 11) until the
green and yellow LEDs signal motion detection.
Le specifiche del prodotto possono subire variazioni
senza preavviso.
Con la presente BENTEL SECURITY dichiara che que-
sto prodotto è conforme ai requisiti essenziali ed altre
disposizioni rilevanti relative alla Direttiva 1999/5/CE.
La Dichiarazione di Conformità R & TTE completa
può essere trovata su www.bentelsecurity.com/dc.html.
BENTEL SECURITY reserves the right to change the tech-
nical specifications of this product without prior notice.
Hereby, BENTEL SECURITY, declares that this device
is in compliance with the essential requirements and
other relevant provisions of Directive 1999/5/EC.
The complete R & TTE Declaration of Conformity
can be found at www.bentelsecurity.com/dc.html.

Other manuals for DT800

1

This manual suits for next models

4

Other Bentel Security Security Sensor manuals

Bentel Security BL151 User manual

Bentel Security

Bentel Security BL151 User manual

Bentel Security FC450IB User manual

Bentel Security

Bentel Security FC450IB User manual

Bentel Security AMC10 User manual

Bentel Security

Bentel Security AMC10 User manual

Bentel Security FC400H User manual

Bentel Security

Bentel Security FC400H User manual

Bentel Security DT800 User manual

Bentel Security

Bentel Security DT800 User manual

Bentel Security Visus99 User manual

Bentel Security

Bentel Security Visus99 User manual

Bentel Security RAY60 User manual

Bentel Security

Bentel Security RAY60 User manual

Bentel Security IR 360 User manual

Bentel Security

Bentel Security IR 360 User manual

Bentel Security FC450IB User manual

Bentel Security

Bentel Security FC450IB User manual

Bentel Security BW-MCN User manual

Bentel Security

Bentel Security BW-MCN User manual

Bentel Security ZT100H User manual

Bentel Security

Bentel Security ZT100H User manual

Bentel Security BMD503 User manual

Bentel Security

Bentel Security BMD503 User manual

Bentel Security RAY60-S User manual

Bentel Security

Bentel Security RAY60-S User manual

Popular Security Sensor manuals by other brands

ACP ABSORB 350 Product installation manual

ACP

ACP ABSORB 350 Product installation manual

CAME 001SIR215WL manual

CAME

CAME 001SIR215WL manual

STEINEL HF 3360-R PF UP WS Information

STEINEL

STEINEL HF 3360-R PF UP WS Information

teko Astra-43A user guide

teko

teko Astra-43A user guide

Pyronix HomeControl+ Installation & reference manual

Pyronix

Pyronix HomeControl+ Installation & reference manual

Inficon WHISPER operating manual

Inficon

Inficon WHISPER operating manual

Bosch ISN-SM-90 installation manual

Bosch

Bosch ISN-SM-90 installation manual

Siemens FDOOT241-A9-Ex Technical manual

Siemens

Siemens FDOOT241-A9-Ex Technical manual

Nittan Evolution EV-UV instruction manual

Nittan

Nittan Evolution EV-UV instruction manual

BEA DK-12 Specification sheet

BEA

BEA DK-12 Specification sheet

Larson Electronics EXP-EMG-EXT series instruction manual

Larson Electronics

Larson Electronics EXP-EMG-EXT series instruction manual

Lince BABY BA Technical manual

Lince

Lince BABY BA Technical manual

Lince BABY UNIVERSALE Installation, operation and maintenance manual

Lince

Lince BABY UNIVERSALE Installation, operation and maintenance manual

Fracarro IR900 installation manual

Fracarro

Fracarro IR900 installation manual

Alula RE609 quick start guide

Alula

Alula RE609 quick start guide

Hailo Y Lanyard Wind Instructions for use

Hailo

Hailo Y Lanyard Wind Instructions for use

Stanley LD200 manual

Stanley

Stanley LD200 manual

PCB Piezotronics W105C02/018C10 Installation and operating manual

PCB Piezotronics

PCB Piezotronics W105C02/018C10 Installation and operating manual

manuals.online logo
manuals.online logoBrands
  • About & Mission
  • Contact us
  • Privacy Policy
  • Terms and Conditions

Copyright 2025 Manuals.Online. All Rights Reserved.