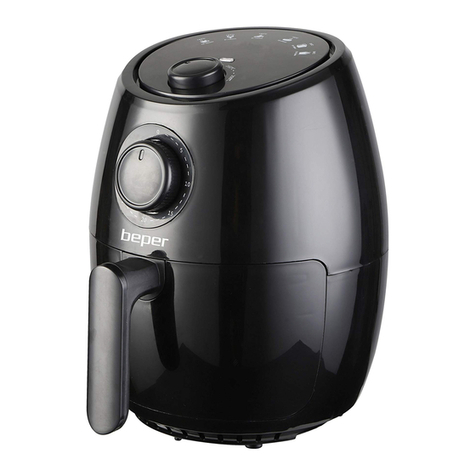
Beper BC.350 Quick guide

• FRIGGITRICE AD ARIA CALDA - MANUALE DI ISTRUZIONI
• AIR FRYER - USE INSTRUCTIONS
• FRITEUSE À AIR CHAUD - MANUEL D’INSTRUCTIONS
• HEISSLUFT FRITTEUSE - BETRIEBSANLEITUNG
• FREIDORA DE AIRE CALIENTE - MANUAL DE INSTRUCCIONES
• ΦΡΙΤΕΖΑ ΑΕΡΟΣ - ΕΓΧΕΙΡΊΔΙΟ ΟΔΗΓΙΏΝ
• FRITEUZĂ - MANUAL DE INSTRUCȚIUNI
Cod.: BC.350

Friggitrice ad aria calda Manuale di istruzioni
pag. 4
pag. 10
pag. 15
pag. 21
pag. 27
pag. 33
pag. 38
For further information and/or for instructions for use in other languages, please visit: beper.com
ITALIANO
ENGLISH
FRANÇAIS
DEUTSCH
ESPAÑOL
ΕΛΛΗΝΙΚΗ
ROMÂNĂ
Fig.1

Fig.2 Fig.3
Fig.4
Fig.5

Friggitrice ad aria calda Manuale di istruzioni
AVVERTENZE GENERALI
LEGGERE QUESTE ISTRUZIONI PRIMA DI USARE L’APPAREC-
CHIO.
Prima e durante l’uso dell’apparecchio è necessario seguire alcune
precauzioni elementari.
Dopo aver tolto l’imballaggio assicurarsi dell’integrità dell’apparec-
chio. In caso di dubbio non utilizzare l’apparecchio e rivolgersi a per-
sonale professionalmente qualicato. Gli elementi dell’imbal laggio
(sacchetti di plastica, polistirolo, ecc.) non devono essere lasciati alla
portata dei bambini, in quanto potenziali fonti di pericolo.
Assicurarsi sempre che la tensione di rete elettrica sia uguale a quel-
la indicata nell’etichetta dati tecnici e che l’impianto sia compatibile
con la potenza dell’apparecchio.
Non tirare mai il cavo per scollegarlo dalla presa di corrente elettrica.
Assicurarsi che il cavo non sia in contatto con superci calde o ta-
glienti.
Non utilizzare l’apparecchio con il cavo danneggiato.
Se il cavo di alimentazione è danneggiato, esso deve essere sostitu-
ito dal Costruttore o dal suo Servizio Assistenza Tecnica o comunque
da una persona con qualica similare, in modo da pre venire ogni
rischio.
Collegare l’apparecchio esclusivamente ad una presa di corrente
elettrica alternata.
In generale è sconsigliabile l’uso di adattatori, prese multiple e/o pro-
lunghe. Qualora il loro uso si rendesse indispensabile è necessario
utilizzare solamente adattatori e prolunghe conformi alle vigenti nor-
me di sicurezza.
Questo apparecchio dovrà essere destinato solo all’uso per il quale
è stato espressamente concepito. Ogni altro uso è da considerarsi
improprio e quindi pericoloso, nonché far decadere la garanzia. Il
costruttore non può essere considerato responsabile per eventuali
danni derivati da usi impropri, erronei ed irragionevoli.
Per evitare surriscaldamenti pericolosi si raccomanda di svolgere in
tutta la sua lunghezza il cavo di alimentazione.
Prima di effettuare qualsiasi operazione di cambio degli accessori o
di pulizia disinserire l’apparecchio dalla rete di alimentazione elettri-
ca.
Non lasciare esposto l’apparecchio ad agenti atmosferici (pioggia,
sole, etc.).

5
IT
Friggitrice ad aria calda Manuale di istruzioni
Non tenere l’apparecchio vicino a fonti di calore (es. termosifone).
Questo apparecchio non deve essere utilizzato da persone (compre-
si i bambini) con capacità siche, sensoriali o mentali ridotte; da per-
sone che manchino di esperienza e conoscenza dell’apparecchio, a
meno che siano attentamente sorvegliate o ben istruite relativamente
all’utilizzo dell’apparecchio stesso da parte di una persona responsa-
bile della loro sicurezza.
Assicurarsi che i bambini non giochino con l’apparecchio.
Allorché si decida di smaltire come riuto questo apparecchio, si rac-
comanda di renderlo inoperante.
SI RACCOMANDA INOLTRE DI RENDERE INNOCUE
QUELLE PARTI DELL’APPARECCHIO SUSCETTIBILI
DI COSTITUIRE UN PERICOLO. QUESTO APPAREC-
CHIO NON DEVE ESSERE UTILIZZATO DAI BAMBINI.
TENERE L’APPARECCHIO ED IL SUO CAVO FUORI
DALLA PORTATA DEI BAMBINI.
DESCRIZIONE PRODOTTO Fig.1
1. Corpo principale
2. Manopola di regolazione della temperatura
3. Manopola timer
4. Luce di funzionamento
5. Cestello
6. Pulsante di rilascio del cestello
7. Impugnatura del cestello
8. Teglia
9. Griglia di aerazione
10. Cavo di alimentazione
PRECAUZIONI:
Non immergere mai l’apparecchio in acqua
Evitare che acqua e/o ogni altro liquido penetri all’interno dell’apparecchio
Non coprire la griglia di aerazione mentre l’apparecchio è in funzione
Gli ingredienti dovranno essere inseriti esclusivamente nel apposito cestello
Non aggiungere olio nel cestello e/o nella teglia
Non toccare l’apparecchio mentre è in funzione. Pericolo di ustione
Lasciare almeno 10 cm di spazio libero attorno all’apparecchio mentre è in funzione.
Durante il funzionamento dalla griglia di aerazione uscirà vapore bollente, si prega di non avvicinarsi in alcun
modo.
Quando si estrae il cestello porre attenzione alla fuoriuscita di vapore e aria bollente.
Se l’apparecchio dovesse emettere fumo, scollegarlo immediatamente e attendere che l’apparecchio si raffreddi.
TIMER:
Questo apparecchio è dotato di un sistema a tempo, quando il timer si sarà azzerato, l’apparecchio emetterà un
suono e si spegnerà automaticamente. Si può anche spegnere l’apparecchio manualmente, girando la manopo-
la del timer in senso antiorario no alla posizione 0.

6
Friggitrice ad aria calda Manuale di istruzioni
Primo utilizzo
Togliere l’apparecchio dall’imballo e vericare che tutti i componenti siano presenti ed integri.
Lavare seguendo le indicazioni riportare alla sezione” PULIZIA E MANUTENZIONE”.
UTILIZZO:
Posizionare l’apparecchio su una supercie stabile, piana, uniforme e resistente al calore.
Collegare la spina a una presa, vericando la compatibilità dell’impianto con i dati tecnici dell’apparecchio.
Estrarre con cautela la teglia dalla friggitrice premendo l’apposito pulsante(Fig.2)
Mettere gli ingredienti nel cestello
Vericare il tempo di preparazione e la temperatura necessaria per i diversi ingredienti prima di iniziare (vedi
tabella). Si possono cuocere contemporaneamente diversi alimenti, l’importante è che abbiano lo stesso tempo
di cottura.
Riporre la teglia (Fig.3) facendo attenzione di allineare correttamente le guide poste all’interno del corpo della
friggitrice.
Non usare mai la teglia senza il cestello.
Non toccare la teglia durante e dopo l’uso, poiché molto calda. Maneggiarla solamente utilizzando l’apposita
maniglia.
Per accendere l’apparecchio, ruotare la manopola del timer no al tempo di preparazione desiderato (Fig.4)
Impostare la manopola di controllo della temperatura alla temperatura desiderata. (vedere la tabella) (Fig.5).
Si può preriscaldare l’apparecchio senza ingredienti, girando la manopola TIMER, su un tempo di 3 minuti, e
attendere che la luce di riscaldamento si spenga. Quindi riempire il cestello e impostare il timer e la temperatura
desiderati.
Il timer inizia a contare il tempo di preparazione impostato e il processo di frittura ad aria calda inizia. Durante
questo processo, la spia riscaldante si accende e si spegne. Ciò indica che l’elemento riscaldante sta mante-
nendo la temperatura impostata.
L’olio in eccesso degli ingredienti verrà raccolto sul fondo della teglia.
Alcuni ingredienti richiedono di essere mescolati a metà del tempo di preparazione (vedere la tabella). Per me-
scolare gli ingredienti, estrarre la teglia dall’apparecchio utilizzando l’apposita maniglia, mescolare, quindi, far
scorrere nuovamente la teglia nella friggitrice.
Quando la campanella del timer suona, estrarre la vaschetta dall’apparecchio e posizionarla su di un piatto.
Controllare che gli ingredienti siano pronti, se non lo sono riporre il cestello nella teglia e impostare il timer an-
cora per pochi minuti.
Svuotare il cestello in una ciotola o su un piatto, fare attenzione a non capovolgere il cestello con la teglia ancora
attaccata, in quanto l’olio in eccesso raccolto sul fondo della teglia andrà ad intaccare gli alimenti.
IMPOSTAZIONI:
La tabella di seguito riportata vi aiuterà a selezionare le impostazioni di base per alcuni ingredienti. Naturalmente
si tratta solo di indicazioni, poiché gli ingredienti differiscono in origine, dimensione, forma e marca.
Gli ingredienti più piccoli di solito richiedono tempi di preparazione leggermente più brevi rispetto agli ingredienti
più grandi.
Una quantità più elevata di ingredienti richiede solo un tempo di preparazione leggermente più lungo, una quan-
tità ridotta di ingredienti richiede solo un tempo di preparazione leggermente più breve.
Mescolare gli ingredienti più piccoli a metà del tempo di preparazione ottimizza il risultato nale e può aiutare a
rendere la cottura uniforme.
Non utilizzare ingredienti estremamente grassi
L’apparecchio si può usare anche semplicemente per riscaldare gli ingredienti, impostando la temperatura a 150
° C per un massimo di 10 minuti.

7
IT
Friggitrice ad aria calda Manuale di istruzioni
Capacità
Min-max
(g)
Tempo
(min.)
Temperatura
°C
Mescolare Altre informazioni
Patate fritte sottili
(surgelate)
300-400 18-20 200 Mescolare
Patate fritte spesse
(surgelate)
300-400 20-25 200 Mescolare
Patate gratinate 500 20-25 200 Mescolare
Bistecca 100-500 10-15 180
Costoletta di maiale 100-500 10-15 180
Hamburger 100-500 10-15 180
Salsiccia 100-500 13-15 200
Coscia di pollo 100-500 25-30 180
Petto di pollo 100-500 15-20 180
Involtini primavera 100-400 8-10 200 Mescolare Preriscaldare prima
dell’uso
Pepite di pollo
(surgelate)
100-500 6-10 200 Mescolare Preriscaldare prima
dell’uso
Bastonci di pesce
(surgelati)
100-400 6-10 200 Preriscaldare prima
dell’uso
Snacks al for-
maggio impanati
(surgelati)
100-400 8-10 180 Preriscaldare prima
dell’uso
Verdure ripiene 100-400 10 160
Tortine 300 20-25 160 Utilizzare con una
teglia / stampo da
forno
Quiche 400 20-22 180 Utilizzare con una
teglia / stampo da
forno
Mufn 300 15-18 200 Utilizzare con una
teglia / stampo da
forno
Dolcetti 400 20 160 Utilizzare con una
teglia / stampo da
forno
Nota: Aggiungere 3 minuti al tempo indicato in tabella se l’apparecchio è freddo.

8
Friggitrice ad aria calda Manuale di istruzioni
Pulizia e Manutenzione:
Pulire l’apparecchio dopo ogni uso.
Rimuovere la spina dalla presa di corrente e lasciare raffreddare l’apparecchio. Per far raffreddare più rapida-
mente l’apparecchio rimuovere il cestello e la teglia.
Per pulire la teglia e il cestello non utilizzare utensili da cucina o materiali di pulizia abrasivi , in quanto potreb-
bero danneggiarli.
Pulire l’esterno dell’apparecchio con un panno morbido leggermente umido.
Pulire il cestello, e la teglia con acqua calda, un po’ di sapone liquido e una spugna non abrasiva.
È possibile utilizzare liquido sgrassante per rimuovere eventuali residuo di sporco.
La teglia e il cestello sono lavabili in lavastoviglie.
Pulire l’interno dell’apparecchio con un panno morbido leggermente umido.
Pulire l’elemento riscaldante con un pennello di pulizia per rimuovere eventuali residui di cibo.
Prima di riporre l’apparecchio assicurarsi che tutte le parti siano pulite e asciutte.
Dati Tecnici:
Alimentazione:220-240V~50/60Hz
Potenza: 1300Watts
Capacità del cestello: 2.5Litri
Temperatura regolabile : 80°C -200°C
Timer: 0-30 min
In un ottica di miglioramento continuo Beper si riserva la facoltà di apportare modiche e migliorie al
prodotto in oggetto senza previo preavviso.
Il simbolo del cestino barrato riportato sull’apparecchio indica che il prodotto, alla ne della propria vita
utile, dovendo essere trattato separatamente dai riuti domestici, deve essere conferito in un centro di
raccolta differenziata per apparecchiature elettriche ed elettroniche oppure riconsegnato al rivenditore
al momento dell’acquisto di una nuova apparecchiatura equivalente.
L’adeguata raccolta differenziata per l’avvio successivo dell’apparecchio al riciclaggio, al trattamento e allo smal-
timento ambientalmente compatibile contribuisce ad evitare possibili effetti negativi sull’ambiente e sulla salute e
favorisce il recupero dei materiali di cui è composto.
L’utente è responsabile del conferimento dell’apparecchio a ne vita alle appropriate strutture di raccolta. Per
informazioni più dettagliate inerenti i sistemi di raccolta disponibili, rivolgersi al servizio locale di smaltimento
riuti, o al negozio dove è stato effettuato l’acquisto.
Chiunque abbandona o cestina questo apparecchio e non lo riporta in un centro di raccolta differenziata per riuti
elettrici-elettronici è punito con la sanzione amministrativa pecuniaria prevista dalla normativa vigente in materia
di smaltimento abusivo di riuti

9
IT
Friggitrice ad aria calda Manuale di istruzioni
CERTIFICATO DI GARANZIA
La garanzia di applicazione è valida 24 mesi dalla data di acquisto per difetti di materiale o di fabbricazione.
La garanzia è valida unicamente presentando il certicato di garanzia e il documento di acquisto (scon-
trino scale) che certichi la data di acquisto e il nome del modello dell’apparecchio acquistato.
Se l’apparecchio dovesse richiedere assistenza tecnica rivolgersi al venditore o presso la nostra sede. Questo
per conservare inalterata l’efcienza del vostro apparecchio e per NON invalidare la garanzia. Eventuali ma-
nomissioni dell’apparecchio da parte di personale non autorizzato invalideranno automaticamente la garanzia.
Condizioni di garanzia
Se ci sono guasti a causa di difetti di materiale e/o fabbricazione durante il periodo di garanzia, garantiamo la
riparazione del prodotto gratuitamente.
Non sono coperte dalla garanzia tutte le parti che dovessero risultare difettose a causa di:
a. Danni da trasporto o da cadute accidentali,
b. Errata installazione o inadeguatezza impianto elettrico,
c. Riparazioni o modiche operate da personale non autorizzato,
d. Mancata o non corretta manutenzione e pulizia,
e. Prodotto e/o parti di prodotto soggette a usura e/o consumabili (es.: lampade, batterie, lame)
f. Mancata osservanza delle istruzioni per il funzionamento dell’apparecchio, negligenza
o trascuratezza nell’uso.
L’elenco di cui sopra è a titolo meramente esemplicativo e non esaustivo, in quanto la presente garanzia è
comunque esclusa per tutte quelle circostanze che non possono farsi risalire a difetti di fabbricazione dell’ap-
parecchio.
La garanzia è inoltre esclusa in tutti i casi di uso improprio dell’apparecchio ed in caso di uso professionale.
Beper Srl declina ogni responsabilità per eventuali danni che possano direttamente o indirettamente derivare a
persone, cose ed animali domestici in conseguenza della mancata osservanza di tutte le prescrizioni indicate
nell’apposito “Libretto Istruzioni ed avvertenze” in tema di installazione, uso e manutenzione dell’apparecchio.
Assistenza tecnica
Per l’assistenza tecnica e/o riparazioni fuori dal periodo di garanzia ci si può rivolgere direttamente all’indirizzo
sottostante.
BEPER SRL
Via Salieri, 30
37050 - Vallese di Oppeano - Verona
Tel. 045/7134674 – Fax 045/6984019
e-mail: assistenza@beper.com

10
Air Fryer Use Instructions
GENERAL SAFETY ADVICE
READ THE OPERATING INSTRUCTIONS CAREFULLY BEFORE
FIRST USE OF THE APPLIANCE.
Read the following instructions carefully, since they give you useful
safety information about installation, use and maintenance and help
you avoid mishaps and possible accidents.
Remove the packing and make sure that the appliance is intact, with
special attention to the supply cable. The elements of the packing
(plastic bags, polystyrene, etc) do not have to be accessible to the
children, in order to preserve them from danger sources.
It is recommended not to throw these packing material in the dome-
stic waste, but to deliver them to the appropriate station of collection
or destruction refusals, asking eventually information to the manager
of the Sanitation Department of your own municipality.
Before connecting the appliance make sure that the mains voltage
corresponds to the data specied on the label.
If the plug does not suit the socket, let it be replaced with another
suitable plug by qualied personnel only, which shall also ensure that
the section of the socket cables is suitable for your appliance power
absorption.
Never pull the supply cord to unplug the appliance.
Make sure that the supply cord never comes into contact with hot or
cutting surfaces
Do not use this appliance if the supply cord is damaged. In case of
damage, it must be replaced by the manufacturer, its service agent or
similarly qualied persons in order to avoid a hazard.
Only connect this appliance on alternating current
Generally, the use adaptors multiple plugs and/or extensions is not
recommended; should they be necessary, please use only simple or
multiple adaptors and extensions in compliance with the safety rules
in force, making sure that the capacity absorption limit marked on the
simple adaptors and the extensions and the maximum power limit
marked on the multiple adaptor are not exceeded.
This appliance is to be destined to its special purpose only.
Any other use is to be considered as improper and thus dangerous.
The manufacturer cannot be responsible for any damages deriving
from improper, wrong or incautious use.
To avoid any heating risk, it is recommended to unroll completely the
supply cord and to unplug the appliance, when not used.

11
EN
Air Fryer Use Instructions
DESCRIPTION Fig.1
1. Housing
2. Temperature control knob
3. Timer knob
4. Power-on light
5. Basket
6. Basket release button
7. Basket handle
8. pan
9. Air outlet openings
10 .Power cord
WARNING:
Never immerse the housing, which contains electrical components and the heating elements, in water or rinsing
under the tap
Avoid any liquid enter the appliance
Do not cover the air inlet and the air outlet when the appliance is working.
Keep all ingredients in the basket or prevent any contact from heating elements.
Never ll the pan and or the basket with oil
Don’t touch the appliance while it is operating. Danger of scalding.
Do not place the appliance against a wall or against other appliances. Leave at least 10cm free space on the
back and sides and 10cm free space above the appliance while in use.
During hot air frying, hot steam is released through the air outlet openings, Keep your hands and face at a safe
distance from the steam and from the air outlet openings.
Also be careful of hot steam and air when you remove the pan from the appliance.
Immediately unplug the appliance if you see dark smoke coming out of the appliance. Wait for the smoke emis-
sion to stop before let the appliance cool down before use again.
Before cleaning, always unplug the appliance.
To protect against electric shock, do not immerse cord, plug or any
parts of the appliance into water or other uids.
Do not hold the appliance with wet hands or feet.
Do not hold the appliance with naked feet.
Do not expose the appliance to atmospheric agents such as rain,
wind, snow, hail.
Do not use the appliance near explosives, highly ammable mate-
rials, gases, burning ames, heaters.
Do not allow children, disabled people or every people without expe-
rience or technical ability to use the appliance if they are not properly
watched over. Close supervision is necessary when any appliance
used by or near children.
Make sure that children do not play with this appliance.
If you decide not to use the appliance any longer, make it unservice-
able by simply cutting the supply cable after disconnecting the plug
from the socket.
ALSO MAKE ANY DANGEROUS PARTS UNSERVICE-
ABLE, ESPECIALLY FOR CHILDREN WHO COULD
PLAY WITH THE APPLIANCE.

12
Air Fryer Use Instructions
TIMER:
This appliance is equipped with a timer, when the timer has counted down to 0, the appliance produces a bell
sound and switches off automatically. To switch off the appliance manually, turn the timer knob anticlockwise to 0.
Caution
- Ensure the appliance in placed on a horizontal, even and stable surface.
- Check if the voltage indicated on the appliance ts the local mains voltage.
FIRST USE:
Remove all packaging materials and check that all parts will be inside and not damaged.
Wash all parts by following the instruction shown on section” CLEANING”
USAGE:
Place the appliance on a stable, horizontal, even and hot resistant surface.
Check if the voltage indicated on the appliance ts the local mains voltage and plug in.
Carefully pull the pan out of the Hot-air fryer while pushing the special button (Fig.2).
Put the ingredients in the basket.
Determine the required preparation time for the ingredient (see the setting table). You can prepare different
ingredients at the same time, important thing is that they must have the same cooking time.
Slide the pan back into the Hot-air fryer (Fig.3). Noting to carefully align with the guides in the body of the fryer.
Never use the pan without the basket in it.
Do not touch the pan during and immediately after use, as it gets very hot. Only hold the pan by the handle.
To switch on the appliance, turn the timer knob to the required preparation time (Fig.4)
Turn the temperature control knob to the required temperature. (see the setting table) (Fig.5).
You can also let the appliance preheat without any ingredients inside. In that case, turn the timer knob to 3
minutes and wait until the heating-up light goes out. Then ll the basket and turn the timer knob to the required
preparation time.
The timer starts counting down the set preparation time. During the hot air frying process, the heating-up light
comes on and goes out from time to time. This indicates that the heating element is switched on and off to main-
tain the set temperature.
Excess oil from the ingredients is collected on the bottom of the pan.
Some ingredients require shaking halfway through the preparation time (see the setting table).To shake the
ingredients, pull the pan out of the appliance by the handle and shake it. Then slide the pan back into the fryer.
When you hear the timer bell, the set preparation time has elapsed. Pull the pan out of the appliance and place it
on a the trial framework. Check if the ingredients are ready. If the ingredients are not ready yet, simply slide the
pan back into the appliance and set the timer to a few extra minutes.
Empty the basket into a bowl or onto a plate, do not turn the basket upside down with the pan still attached to it,
as any excess oil that has collected on the bottom of the pan will leak onto the ingredients.
Settings
This table below will help you to select the basic settings for the ingredients. Keep in mind that these settings
are indications. As ingredients differ in origin, size, shape as well as brand, we cannot guarantee the best setting
for your ingredients.
Smaller ingredients usually require a slightly shorter preparation time than larger ingredients.
A larger amount of ingredients only requires a slightly longer preparation time, a smaller amount of ingredients
only requires a slightly shorter preparation time.
Shaking smaller ingredients halfway through the preparation time optimizes the end result and can help prevent
unevenly fried ingredients.
Do not prepare extremely greasy ingredients in the Hot-air fryer.
You can also use the Hot-air fryer to reheat ingredients. To reheat ingredients, set the temperature to 150°C for
up to 10 minutes.

13
EN
Air Fryer Use Instructions
Min-max
Amount
(g)
Time
(min.)
Temperature
°C
Shake Extra information
Thin frozen fries 300-400 18-20 200 shake
Thick frozen fries 300-400 20-25 200 shake
Potato gratin 500 20-25 200 shake
Steak 100-500 10-15 180
Pork chops 100-500 10-15 180
Hamburger 100-500 10-15 180
Sausage roll 100-500 13-15 200
Drumsticks 100-500 25-30 180
Chicken breast 100-500 15-20 180
Spring rolls 100-400 8-10 200 shake Use oven-ready
Frozen chicken
nuggets
100-500 6-10 200 shake Use oven-ready
Frozen sh ngers 100-400 6-10 200 Use oven-ready
Frozen bread
crumbed
100-400 8-10 180 Use oven-ready
cheese snacks 100-400 10 160
Stuffed vegetables 100-400 10 160 Use baking tin
Cake 300 20-25 160 Use baking tin/oven
dish
Quiche 400 20-22 180 Use baking tin
Mufns 300 15-18 200 Use baking tin/oven
dish
Sweet snacks 400 20 160
Note: Add 3 minutes to the preparation time when you start frying while the Hot-air fryer is still cold.
Cleaning:
Clean the appliance after every use.
Remove the mains plug from the wall socket and let the appliance cool down, remove the pan to let the Hot-air
fryer cool down more quickly.
Do not use metal kitchen utensils or abrasive cleaning materials to clean the pan and the basket, to prevent
damages.
Wipe the outside of the appliance with a moist cloth.
Clean the pan and the basket with hot water, some washing-up liquid and a non-abrasive sponge.
You can use degreasing liquid to remove any remaining dirt.
The pan and basket are dishwasher-proof.
Clean the inside of the appliance with hot water and non-abrasive sponge.
Clean the heating element with a cleaning brush to remove any food residues.
Before replace the appliance make sure all parts are clean and dry.

14
Air Fryer Use Instructions
GUARANTEE CERTIFICATE
This appliance has been checked in the factory. From the date of original purchase a 24 month guarantee ap-
plies to material and production defects. The purchase receipt and the guarantee certicate must be submitted
together in case of claim to guarantee.
The guarantee is valid only with a guaranty certicate and proof of purchase (scal receipt) indicating
the date of purchase and the model of the appliance
For any technical assistance, please contact directly the seller or our head ofce in order to preserve the applian-
ce’s efciency and NOT TO void the guarantee. Any intervention on this appliance by non-authorized persons
will automatically void the guarantee.
GUARANTEE CONDITIONS
If the appliance shows defects as a result of faulty material and/or production during the period of guarantee, we
guarantee repair free of charge on condition that:
- The appliance has been used properly and for the purpose for which it has been intended.
- The appliance has not been tampered with, otherwise it is not maintainable.
- The purchase receipt shall be presented.
- The appliance showing a fair wear and tear shall not be covered by this guarantee.
Therefore, any part that could be accidentally broken or having visible signs of use in consumable products
(such as lamps, batteries, heating elements…) the aesthetic parts are excluded from the guarantee, and any
defect whatsoever resulting from non-respect of the rules for use, negligence in usage and/or maintenance of
the appliance, carelessness, wrong or improper installation, damage during transport and any other damage not
attributable the supplier.
For every defect that could not be repaired within the guarantee period, the appliance will be replaced free of
charge.
In any case, if the part to be replaced for defect, breakage or malfunction is an accessory and/or a detachable
part of the product, Beper reserves the right to replace only the very part in question and not the entire product
TECHNICAL ASSISTANCE
Even after the guarantee period we will always pay attention to repairs for defected appliances.
For technical assistance and/or repairs after the guarantee period you can directly contact the below address:
CONTACT YOUR DISTRIBUTOR IN YOUR COUNTRY OR ATER SALES DEPARTMENT BEPER. E-MAIL as-
sistenza@beper.com WHICH WILL FORWARD YOUR ENQUIRIES TO YOUR DISTRIBUTOR.
The European directive 2011/65/EU on Waste Electrical and Electronic Equipment (WEEE), requires
that old household electrical appliances must not be disposed of in the normal unsorted municipal
waste stream. Old appliances must be collected separately in order to optimize the recovery and
recycling of the materials they contain, and reduce the impact on human health and the environment.
The crossed out “wheeled bin” symbol on the product reminds you of your obligation, that when you
dispose of the appliance, it must be separately collected.
TECHNICAL DATA:
Power: 1300W
Power supply: 220-240V ~ 50-60Hz
Capacity of basket:2.5Litre
Adjustable temperature:80°C—200°C
Timer (0-30 min)
For any improvement reasons, Beper reserves the right to modify or improve the product without any
notice.

ES
15
ESESFR
Friteuse à air chaud Manuel d’instructions
PRECAUTIONS GENERALES
LIRE ATTENTIVEMENT LES INSTRUCTIONS SUIVANTES AVANT
LA PREMIERE UTILISATION DE L’APPAREIL.
Avant et durant l’utilisation de cet appareil il est nécessaire de suivre
précautions élémentaires suivantes.
Après avoir enlever l’emballage, s’assurer de l’intégrité de l’appareil.
En cas de doute ne pas utiliser l’appareil et s’adresser à un pro-
fessionnel qualié. Les éléments d’emballage (sachets plastique,
polystyrène, etc.) ne doivent pas être laissés à la portée des enfants,
car potentiellement dangereux.
Il est recommandé de ne pas jeter les éléments d’emballage dans les
déchets ménagers, mais de les déposer dans les centres de traite-
ment des déchets appropriés, en demandant éventuellement conseil
au gérant du centre de sa commune de résidence.
Toujours s’assurer que la tension électrique soit la même que cel-
le indiquée sur l’étiquette des données techniques et que le réseau
électrique soit compatible avec la puissance de l’appareil.
En cas d’incompatibilité entre la prise électrique murale et celle de
l’appareil faire changer la prise de l’appareil par un professionnel
qualié. Ce dernier devra s’assurer que la section des câbles de la
prise soit adaptée à la puissance absorbée par l’appareil.
Ne jamais tirer sur le câble d’alimentation pour débrancher la prise
électrique.
S’assurer que le câble n’entre pas en contact avec des supercies
chaudes ou coupantes.
Ne pas utiliser l’appareil si le câble d’alimentation est abîmé.
Si le câble d’alimentation est endommagé, pour éviter tout risque, il
devra être substitué par le constructeur, par son service d’assistance
technique ou toute autre personne de même qualication.
Brancher l’appareil exclusivement sur une prise de courant alterné.
Il est en général déconseiller d’utiliser des adaptateurs, prises mul-
tiples et/ou rallonges. En cas de nécessité, utiliser seulement des
adaptateurs ou rallonges conformes aux normes de sécurité en vi-
gueur.
Cet appareil ne devra être utilisé que pour l’usage pour lequel il a été
conçu.
Tout autre usage sera considéré comme inapproprié et donc dange-
reux, et engendrera l’annulation de la garantie.

16
Friteuse à air chaud Manuel d’instructions
Le constructeur ne peut être tenu pour responsable en cas de dom-
mages causés par une utilisation incorrecte, inappropriée et dérai-
sonnable.
Pour éviter tout risque d’échauffement il est recommandé de dérouler
entièrement le câble d’alimentation et de débrancher l’appareil de la
prise de courant en cas d’inutilisation.
Avant d’effectuer toute opération de nettoyage ou entretien, débran-
cher l’appareil de la prise de courant électrique.
Ne jamais immerger l’appareil dans l’eau ou d’autres liquides.
Ne pas toucher l’appareil avec les mains et pieds mouillés ou humi-
des.
Ne pas utiliser l’appareil si vous êtes pieds nus.
Ne pas laisser l’appareil exposé aux agents atmosphériques comme
la pluie, le soleil …
Ne pas laisser l’appareil près d’une source de chaleur (ex. Radiateur)
Ne pas laisser les enfants, les personnes avec des capacités physi-
ques, sensorielles ou mentales réduites, ou manquant d’expérience
ou de connaissance technique, utiliser cet appareil sans surveillance
S’assurer que les enfants ne jouent pas avec cet appareil.
DÈS LORS QUE L’APPAREIL DOIT ÊTRE DÉTRUIT, IL
EST RECOMMANDÉ DE COUPER LE CÂBLE D’ALI-
MENTATION, ET DE RETIRER TOUTES LES PARTIES
SUSCEPTIBLES DE PRÉSENTER UN QUELCONQUE
DANGER, EN PARTICULIER POUR LES ENFANTS
QUI POURRAIENT UTILISER CET APPAREIL COMME
UN JEU.
DESCRIPTION PRODUIT Fig.1
1. Corps principal
2. Bouton de régularisation de la température
3. Bouton de la minuterie
4. Lumière de fonctionnement
5. Panier
6. Pulsant de délivrance du panier
7. Poignée du panier
8. Plaque
9. Grille d’aération
10. Câble d’alimentation

ES
17
ESESFR
Friteuse à air chaud Manuel d’instructions
PRÉCAUTIONS :
Ne jamais plonger l’appareil dans l’eau
Éviter que l’eau et/ou chaque autre liquide pénètre à l’intérieur de l’appareil
Ne pas couvrir la grille d’aération alors que l’appareil est en fonction
Les ingrédients doivent être insérés exclusivement dans le panier approprié
Ne pas ajouter de l’huile dans le panier et/ou sur la plaque
Ne pas toucher l’appareil alors qu’il est en fonction. Danger de brûlure
Laisser au moins 10 cm d’espace libre autour de l’appareil alors qu’il est en fonction
Pendant le fonctionnement de la grille d’aération il sortira de la vapeur bouillante, nous vous prions de ne pas
vous approcher en aucun cas
Quand vous extrayez le panier faire attention à la sortie de la vapeur et de l’air bouillante
Si de l’appareil il devrait sortir de la fumée, le débrancher immédiatement et attendre que l’appareil se refroidis-
se.
MINUTERIE :
Cet appareil est équipé d’un système à temps, quand la minuterie sera mise à zéro, l’appareil émettra un son et
il s’éteindra automatiquement. Vous pouvez aussi éteindre l’appareil manuellement, en tournant le bouton de la
minuterie dans le sens contraire des aiguilles d’une montre jusqu’à la position 0.
Première utilisation
Enlever l’appareil de l’emballage et vérier que tous les composants soient présents et intégraux.
Laver en suivant les indications reportées à la section « NETTOYAGE ET ENTRETIEN ».
UTILISATION :
Positionner l’appareil sur une supercie stable, plate, uniforme et résistante à la chaleur.
Brancher la che à une prise, en vériant la compatibilité de l’installation avec les données techniques de l’ap-
pareil.
Extraire avec attention la plaque de la friteuse en appuyant sur le pulsant approprié (Image 2).
Mettre les ingrédients dans le panier.
Vérier le temps de préparation et la température nécessaire pour les différents ingrédients avant de commencer
(voir tableau). Vous pouvez cuire en même temps différents aliments, l’important est qu’ils aient le même temps
de cuisson.
Replacer la plaque (Image 3) en faisant attention d’aligner correctement les guides placés à l’intérieur du corps
de la friteuse.
Ne jamais utiliser la plaque sans le panier.
Ne pas toucher la plaque pendant et après l’usage, puisqu’elle est trop chaude. La manipuler seulement en
utilisant le manche approprié.
Pour allumer l’appareil, tourner le bouton de la minuterie jusqu’au temps de préparation désirée (Image 4).
Imposer le bouton de contrôle de la température à la température désirée. (voir le tableau) (Image 5).
Vous pouvez préchauffer l’appareil sans les ingrédients, en tournant le bouton TIMER, sur un temps de 3 minu-
tes, et attendre que la lumière de réchauffement s’éteigne. Donc remplir le panier et imposer la minuterie et la
température désirées.
La minuterie commence à compter le temps de préparation imposé et le procès de friture à air chaud commence.
Pendant ce processus, l’indicateur réchauffant s’allume et s’éteint. Cela indique que l’élément réchauffant est en
train de maintenir la température imposée.
L’huile en excès des ingrédients sera recueillie sur le fond de la plaque.
Certains ingrédients demandent d’être mélangés à la moitié du temps de préparation (voir le tableau). Pour
mélanger les ingrédients, extraire la plaque de l’appareil en utilisant la poignée appropriée, mélanger, donc, faire
glisser de nouveau la plaque dans la friteuse.
Quand la sonnerie de la minuterie sonne, extraire la cuvette de l’appareil et la positionner sur un plat. Contrôler
que les ingrédients soient prêts, s’ils ne le sont pas placer le panier sur la plaque et imposer encore la minuterie
pour quelques minutes.
Vider le panier dans un saladier ou sur un plat, faire attention à ne pas renverser le panier avec la plaque encore
attachée, car l’huile en excès recueilli sur le fond de la plaque ira toucher les aliments.

18
Friteuse à air chaud Manuel d’instructions
FORMULATIONS :
Le tableau ci-dessous mentionné vous aidera à sélectionner les formulations de base pour quelques ingrédients.
Naturellement il s’agit seulement d’indications, puisque les ingrédients diffèrent en origine, dimension, forme et
marque.
Les ingrédients plus petits d’habitude demandent des temps de préparation légèrement plus brefs par rapport
aux ingrédients plus gros.
Une quantité plus élevée d’ingrédients demande seulement un temps de préparation légèrement plus long, une
quantité réduite d’ingrédients demande seulement un temps de préparation légèrement plus bref.
Mélanger les ingrédients plus petits à la moitié du temps de préparation optimise le résultat nal et peut aider à
rendre la cuisson uniforme.
Ne pas utiliser des ingrédients extrêmement gras.
L’appareil peut être aussi utilisé simplement pour réchauffer les ingrédients, en imposant la température à 150 °
C pour un maximum de 10 minutes.
Capacité
Min - max
(g)
Temps
(min.)
Température
°C
Mélanger Autres informations
Frites très minces
(surgelées)
300-400 18-20 200 Mélanger
Frites épaisses
(surgelées)
300-400 20-25 200 Mélanger
Pommes de terre
gratinées
500 20-25 200 Mélanger
Bifteck 100-500 10-15 180
Côtelette de porc 100-500 10-15 180
Hamburger 100-500 10-15 180
Saucisse 100-500 13-15 200
Cuisse de poulet 100-500 25-30 180
Poitrine de poulet 100-500 15-20 180
Paupiettes du
printemps
100-400 8-10 200 Mélanger Préchauffer avant l’utilisa-
tion
Bâtonnets de pou-
let (surgelés)
100-500 6-10 200 Mélanger Préchauffer avant l’utilisa-
tion
Bâtonnets de pois-
son (surgelés)
100-400 6-10 200 Préchauffer avant l’utilisa-
tion
Snacks au fromage
panés (surgelés)
100-400 8-10 180 Préchauffer avant l’utilisa-
tion
Légumes farcis 100-400 10 160
Gâteaux 300 20-25 160 Utiliser avec une plaque /
moule pour le four
Quiche 400 20-22 180 Utiliser avec une plaque /
moule pour le four
Mufn 300 15-18 200 Utiliser avec une plaque /
moule pour le four
Petits gâteaux 400 20 160 Utiliser avec une plaque /
moule pour le four

ES
19
ESESFR
Friteuse à air chaud Manuel d’instructions
Note : Ajouter 3 minutes au temps indiqué dans le tableau si l’appareil est froid.
NETTOYAGE ET ENTRETIEN :
Nettoyer l’appareil après chaque usage.
Débrancher la che de la prise de courant et laisser refroidir l’appareil. Pour faire refroidir plus rapidement l’ap-
pareil enlever le panier et la plaque.
Pour nettoyer la plaque et le panier ne pas utiliser des ustensiles de cuisine ou des matériaux de nettoyages
abrasifs, car ils pourraient les endommager.
Nettoyer l’externe de l’appareil avec un chiffon souple légèrement humide.
Nettoyer le panier, et la plaque avec de l’eau chaude, un peu de savon liquide et une éponge non abrasive.
Il est possible d’utiliser un liquide dégraissant pour enlever des éventuels résidus de saleté.
La plaque et le panier sont lavables dans le lave-vaisselle.
Nettoyer l’appareil complètement avec un chiffon souple légèrement humide.
Nettoyer l’élément réchauffant avec un pinceau de nettoyage pour enlever des éventuels résidus d’aliment.
Avant de ranger l’appareil s’assurer que toutes les parties soient propres et sèches.
Données Techniques :
Alimentation : 220 - 240V ~ 50/60Hz
Puissance : 1300 Watts
Capacité du panier : 2.5 Litres
Température réglable : 80°C -200°C
Minuterie : 0-30 min
Dans un soucis d’amélioration permanent Beper se réserve le droit d’apporter des modications et
améliorations au produit sans aucun préavis.

20
Friteuse à air chaud Manuel d’instructions
Le produit en n de vie doit être détruit selon les normes en vigueur relatives à l’élimination des
déchets et ne peut être traité comme simple déchet ménagé.
Le produit doit être détruit dans un centre d’élimination des déchets adapté ou être restitué au reven-
deur dans le cas d’une substitution avec un autre produit équivalent neuf.
Le fabricant prendra à sa charge les frais occasionnés pour la destruction du produit selon les termes
de la loi en vigeur.
Le produit est composé de pièces non biodégradables et substances qui peuvent polluer l’environnement si
détruites de façon inapropriée . Par ailleurs, certaines parties de ces matières peuvent être recyclées évitant ain-
si toute pollution pour l’environnement. Il est de votre et notre devoir de préserver la santé de l’environnement.
Le symbole indique que le produit répond aux normes requises par les nouvelles
directives introduites en faveur de l’environnement (2011/65/EU) et que le produit doit être détruit de façon ap-
propriée au terme du cycle de vie.
Si besoin, informez-vous auprès des autorités locales compétentes en matière d’élimination des déchets de
votre commune.
Toute personne qui ne tiendra pas compte de ces règles d’élimination des déchets indiquées dans ce para-
graphe en répondra selon la loi en vigueur.
CERTIFICAT DE GARANTIE
La garantie d’application est valable pour 24 mois à partir de la date d’achat pour des défauts de matériel ou de
fabrication.
La garantie est valable uniquement en présentant le certicat de garantie et le document d’achat (ticket
de caisse) qui certie la date d’achat et le nom du modèle de l’appareil acheté
Si l’appareil devrait demander l‘assistance technique s’adresser au vendeur ou auprès de notre siège. Ceci pour
conserver inaltérée l ‘efcacité de votre appareil et pour NON invalider la garantie. Des éventuelles manipula-
tions de l’appareil de la part du personnel non autorisé invalident automatiquement a garantie.
CONDITIONS DE GARANTIE
S’il y a des pannes à cause des défauts de matériel et/ou de fabrication pendant la période de garantie, nous
garantissons la réparation du produit gratuitement.
Elles ne sont pas couvertes de la garantie toutes les parties qui devraient résulter défectueuses à cause de :
a. Dommages de transport ou de chutes accidentelles,
b. Installation erronée ou inadaptation de l’installation électrique,
c. Réparations ou modications effectuées par un personnel non autorisé,
d. Manque ou incorrect entretien et nettoyage,
e. Produit et/ou parties du produit relevant de l’usure et/ou consommables (ex : lampes piles, lames)
f. Manque d’observation des instructions pour le fonctionnement de l’appareil, négligence dans l’utilisation
La liste indiquée ci-dessus est à titre purement exemplaire et non exhaustif, car la présente garantie est donc
exclue pour toutes les circonstances qui ne peuvent pas dériver des défauts de fabrication de l’appareil.
En outre la garantie est exclue dans tous les cas d’usage impropre de l’appareil et en cas d’usage professionnel.
Beper S.R.L. décline chaque responsabilité pour des éventuels dommages qui peuvent directement ou indi-
rectement dériver à des personnes, des choses et des animaux domestiques, en conséquence au non-respect
de toutes les prescriptions indiquées dans le « livret des instructions et des précautions » approprié, en thème
d’installation, d’utilisation et d’entretien de l’appareil.
ASSISTANCE TECHNIQUE
Pour l’assistance technique et/ou des réparations en dehors de la période de garantie, vous pouvez vous adres-
ser directement à l’adresse indiquée ci-dessous:
LE SERVICE APRÈS-VENTE EST EFFECTUÉ PAR VOTRE REVENDEUR OU PAR
L’IMPORTATEUR/DISTRIBUTEUR DES PRODUITS BEPER.
ÉCRIVEZ UN E-MAIL AU assistenza@beper.com POUR CONNAITRE LE CENTRE SERVICE AGRÉE BEPER
LE PLUS PROCHE DE CHEZ VOUS.
Table of contents
Languages:
Other Beper Fryer manuals

Beper
Beper BC.353 Quick guide

Beper
Beper BC.352 Quick guide

Beper
Beper BC.360 Operating and maintenance manual

Beper
Beper P101FRI090 User manual

Beper
Beper P101FRI001 Quick guide

Beper
Beper 90.496A User manual

Beper
Beper 90.650 User manual

Beper
Beper 90.655 Quick guide

Beper
Beper BC.353 Quick guide

Beper
Beper P101FRI051 User manual