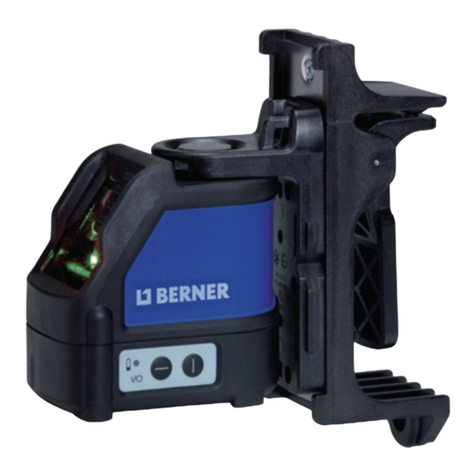
Berner BCLL TOP User manual

EN CROSSLINE LASER TR ÇAPRAZ ÇİZGİLAZERİ
DA SIGTE-LASERAPPARAT EL ΑΛΦΑΔΙ ΛΕΪΖΕΡ ΣΤΑΥΡΟΥ
DE KREUZLINIENLASER LV KRUSTLĪNIJU LĀZERS
FR LASER À RÉTICULE HU KERESZTVONALAS LÉZERKÉSZÜLÉK
NO KRYSSLASER HR LASER S KRIŽNIM LINIJAMA
FI RISTIKKOLASER SK PRIEČNY LASER
SV LINJELASER RO LASER LINIAR
ES LÁSER RETICULAR PL KRZYŻOWY LASER LINIOWY
IT LASER A FASCI INCROCIATI LT KRYŽMINIS LAZERINIS NIVELYRAS
NL DRADENKRUISLASER CZ KŘÍŽOVÝ LASER
PT LASER DE LINHA CRUZADA
BCLL TOP: 183846
BCLL-G TOP: 351718
Instruction Manual/Safety instructions
Brugsanvisning/Sikkerhedsinstruktioner
Bedienungsanleitung/Sicherheitshinweise
Notice d’Utilisation/lndications de sécurité
Bruksanvisning/Sikkerhetsforskrifter
Käyttöohje/Turvallisuusohjeet
Bruksanvisning/Säkerhetsinstruktioner
Instrucciones de manejo/Instrucciones de segurid
Manuale d’lstruzioni/lndicazioni per la sicurezza
Gebruiksaanwijzing/Veiligheidsinstructies
Manual de instruçôes/lnstruçôes de segurança
Kullanım Kılavuzu/Güvenlik talimatları
Εγχειρίδιο Οδηγιών/Οδηγίες ασφαλείας
Lietošanas rokasgrāmata / drošības norādījumi
Kezelési útmutató/Biztonságtechnikai útmutatások
Korisnički priručnik/sigurnosne upute
Návod na použitie/bezpečnostné pokyny
Manual de operare/Instrucţiuni de securitate
Instrukcja obsługi/instrukcje dotyczące bezpieczeństwa
Naudotojo vadovas / saugos instrukcijos
Návod k použití/Bezpečnostní pokyny

English 8
Dansk 30
Deutsch 53
Français 78
Norsk 102
Suomi 124
Svenska 146
Español 169
Italiano 193
Nederlands 217
Português 241
Türkçe 265
Ελληνιka 287
Latviešu 313
Magyar 335
Hrvatski 358
Slovensky 380
Română 403
Polski 426
Lietuvių 450
Česky 473

1
b
d
c
e
h
f
a, i
(+)
(+)
a
(–)
(–)
a
i
g

2
< 4°
f
k
j
l

3
h
B
1
A
3
Û Û
4
5
23

4
CD
D
C
E
9 m (30')
3 3
76
1, 2
8
4, 5
2
G
F
1
2

5
5
4
G
H
3
10 m (33')
5 m
(18')

6
10m (33')
5 m
(18')
10m (33')
5 m
(18')

7
z
x
t
qs
r
o
m
p
u
v
y
wa1
n

8
ENGLISH
CROSSLINE LASER BCLL/BCLL-G TOP
Congratulations!
You have chosen a Berner tool. Years of experience, thorough
product development and innovation make Berner one of the most
reliable partners for professional power tool users.
Technical Data
BCLL TOP BCLL-G TOP
Voltage 6.0 V 6.0 V
Type 1 1
Battery size 4 × LR6 (AA) 4 × LR6 (AA)
Laser power < 1.5 mW < 1.5 mW
Laser class 2 2
Wavelength 620-630 nm 510-530 nm
Protection class IP54 IP54
Self-leveling range +/– 4 ° +/– 4 °
Operating temperature –10 to +45 °C –10 to +45 °C
Receptacle thread 1/4“ × 20 TPI 1/4“ × 20 TPI
Weight 0.9 kg 0.9 kg
Definitions: Safety Guidelines
The defi nitions below describe the level of severity for each signal
word. Please read the manual and pay attention to these symbols.
DANGER: Indicates an imminently hazardous
situation which, if not avoided, will result in death or
serious injury.
WARNING: Indicates a potentially hazardous
situation which, if not avoided, could result in death
or serious injury.

9
ENGLISH
CAUTION: Indicates a potentially hazardous situation
which, if not avoided, may result in minor or
moderate injury.
NOTICE: Indicates a practice not related to
personal injury which, if not avoided, may result in
property damage.
Denotes risk of electric shock.
Denotes risk of fire.
Safety Instructions for Lasers
WARNING! Read and understand all instructions.
Failure to follow all instructions listed below may
result in electric shock, fire and/or serious personal
injury.
SAVE THESE INSTRUCTIONS
• Do not operate the laser in explosive atmospheres, such as in
the presence of flammable liquids, gases or dust. Power tools
create sparks which may ignite the dust or fumes.
• Use the laser only with the specifically designated batteries.
Use of any other batteries may create a risk of fire.
• Store idle laser out of reach of children and other untrained
persons. Lasers are dangerous in the hands of untrained users.
•
Use only accessories that are recommended by the manufacturer
for your model. Accessories that may be suitable for one laser,
may create a risk of injury when used on another laser.
• Tool service MUST be performed only by qualified repair
personnel. Repairs, service or maintenance performed by
unqualified personnel may result in injury. For the location of
your nearest authorised Berner repair agent, refer to the list of
authorised Berner repair agents on back of this manual or visit
www.berner.eu on the Internet.

10
ENGLISH
• Do not use optical tools such as a telescope or transit to view the
laser beam. Serious eye injury could result.
• Do not place the laser in a position which may cause anyone to
intentionally or unintentionally stare into the laser beam. Serious
eye injury could result.
• Do not position the laser near a reflective surface which may
reflect the laser beam toward anyone’s eyes. Serious eye injury
could result.
• Turn the laser offwhen it is not in use. Leaving the laser on
increases the risk of staring into the laser beam.
• Do not remove or deface warning labels. If labels are removed
user or others may inadvertently expose themselves to radiation.
• Position the laser securely on a level surface. Damage to the
laser or serious injury could result if the laser falls.
WARNING: Use of controls or adjustments or
performance of procedures other than those specified
herein may result in hazardous radiation exposure.
WARNING: Use of controls or adjustments or
performance of procedures other than those
specified herein may result in hazardous radiation
exposure.
WARNING: DO NOT DISASSEMBLE THE LASER.
There are no user serviceable parts inside.
Disassembling the laser will void all warranties on
the product. Do not modify the product in any way.
Modifying the tool may result in hazardous laser
radiation exposure.
WARNING: Fire hazard! Avoid short-circuiting the
contacts of a removed battery.
Additional Safety Instructions for Lasers
• This laser complies with class 2 according to EN 60825-1:2007.
Do not replace a laser diode with a different type. If damaged,

11
ENGLISH
have the laser repaired by an authorised repair agent.
• Do not use the laser for any purpose other than projecting laser
lines.
An exposure of the eye to the beam of a class 2 laser is considered
safe for a maximum of 0.25 seconds. Eyelid refl exes will normally
provide adequate protection. At distances over 1 m, the laser
complies with class 1 and thus is considered completely safe.
• Never look into the laser beam directly and intentionally.
• Do not use optical tools to view the laser beam.
• Do not set up the tool at a position where the laser beam can
cross any person at head height.
• Do not let children come in contact with the laser.
Residual Risks
The following risks are inherent to the use of this device:
– injuries caused by staring into laser beam.
Markings on Tool
The following pictographs are shown on the tool:

12
ENGLISH
Art.-Nr. 351718
6 V TYPE 1 200mA
BCLL-G TOP
1.5mW @ 510-530nm
IEC 60825-1 : 2014
Read the instruction manual before use.
Laser warning.
Do not stare into the laser beam.
DATE CODE POSITION
The date code, which also includes the year of manufacture, is
printed on the inside of the battery compartment.
Example:
2017 XX XX
Year of Manufacture
Important Safety Instructions for Batteries
WARNING: Batteries can explode, or leak, and can
cause injury or fire. To reduce this risk:
• Carefully follow all instructions and warnings on the
battery label and package.

13
ENGLISH
• Always insert batteries correctly with regard to polarity
(+ and –), marked on the battery and the equipment.
• Do not short battery terminals.
• Do not charge batteries.
• Do not mix old and new batteries. Replace all of them
at the same time with new batteries of the same brand
and type.
• Remove dead batteries immediately and dispose of
per local codes.
• Do not dispose of batteries in fire.
• Keep batteries out of reach of children.
• Remove batteries if the device will not be used for
several months.
Package Contents
The package contains:
1 Crossline laser
1 Wall mount
4 LR6 (AA-size) batteries
1 Kitbox
1 Instruction manual
1 Strip of security labels
• Take the time to thoroughly read and understand this manual
prior to operation.
ASSEMBLY AND ADJUSTMENT
WARNING! Do not place the laser in a position which
may cause anyone to intentionally or unintentionally
stare into the laser beam. Serious eye injury may
result from staring at the beam.

14
ENGLISH
Unpacking
FITTING THE WARNING LABEL
The safety warnings on the label shown on the laser must be
formulated in the language of the user.
For that purpose, a separate sheet of self-adhesive labels has been
supplied with the tool.
WARNING: Check that the safety warnings on the
label have been formulated in your language.
The warnings should read as follows:
LASER RADIATION
DO NOT STARE INTO BEAM
CLASS 2 LASER PRODUCT
• If the warnings are in a foreign language, proceed as follows:
– Remove the required label from the sheet.
– Carefully place the label over the existing label.
– Press the label in place.
Batteries (fig. 1)
BATTERY TYPE
This laser operates on four LR6 (AA-size) batteries.
TO INSTALL BATTERIES
1. Lift up the battery compartment cover (a) as shown in fi gure 1.
2. Insert four fresh LR6 (AA-size) batteries in the compartment,
placing the batteries according to (+) and (–) on the inside of the
battery door.
WARNING: When replacing batteries, always replace
the complete set. Do not mix old batteries with new
ones.
Preferably use alkaline batteries.

15
ENGLISH
Operating Tips
• Use only new, high-quality, name brand batteries for best
results.
• Ensure batteries are in good working condition. If the low
battery red indicator light is fl ashing, the batteries need
replacement.
• To extend battery life, turn laser off when not working with or
marking the beam.
• To ensure the accuracy of your work, check often to make
sure your laser is calibrated. See Field Calibration Check.
• Before attempting to use the laser, make sure it is positioned
securely, on a smooth, fl at surface.
• Always mark the centre of the beam created by the laser.
• Extreme temperature changes may cause movement of
internal parts that can aff ect accuracy. Check your accuracy
often while working. See Field Calibration Check.
• If the laser has been dropped, check to make sure your laser
is still calibrated. See Field Calibration Check.
LOW BATTERY INDICATION (FIG. 1)
The BCLL TOP/BCLL-G TOP laser is equipped with a red indicator
light (b), as shown in fi gure 1. The red indicator light is located to
the left of the on/off buttons (c, d, e).
A fl ashing red indicator light indicates that the batteries are low
and need to be replaced. The laser may continue to operate for
a short time while the batteries continue to drain, but the beam(s)
will quickly dim. After fresh batteries are installed and the laser is
turned on again, the laser beam(s) will return to full brightness and
the red indicator light will stay off . (A fl ashing laser beam is not
caused by low batteries; see Out of Tilt Range Indicator.)
Description (fig. 1)
WARNING: Never modify the power tool or any part
of it.
Damage or personal injury could result.

16
ENGLISH
a. Battery compartment cover
b. Red indicator light
c. ON/OFF button, horizontal laser line
d. ON/OFF button, vertical laser line
e. ON/OFF button, side vertical laser line
f. Magnetic pivot bracket
g. Keyhole slot
h. Fine adjustment knob
i. 1/4” × 20 female thread
INTENDED USE
The crossline laser BCLL TOP/BCLL-G TOP has been designed
to project laser lines to aid in professional applications. The tool
can be used for horizontal (level), vertical (plumb) and square
alignment. The applications range from layout of walls and windows
to installation of framing track.
DO NOT use under wet conditions or in presence of fl ammable
liquids or gases.
The crossline laser is a professional tool. DO NOT let children
come into contact with the tool. Supervision is required when
inexperienced operators use this tool.
OPERATION
To Turn the Laser On and Off (fig. 1)
With the laser off , place it on a fl at surface. This model has
three ON/OFF buttons, one for a horizontal laser line (c), one for
a vertical laser line (d) and one for a side vertical laser line (e).
Each laser line is powered on by pressing its ON/OFF button.
The laser lines can be powered one at a time or at the same time.
Pressing the ON/OFF buttons again turns the laser lines off .
Using the Laser
The beams are level or plumb as long as the calibration has been

17
ENGLISH
checked (see Field Calibration Check) and the laser beam is not
fl ashing (see Out of Tilt Range Indicator).
OUT OF TILT RANGE INDICATOR (FIG. 2)
The BCLL TOP/BCLL-G TOP laser is designed to self-level. If the
laser has been tilted so much that it cannot level itself (average
> 4° tilt), it will fl ash the laser beam. The fl ashing beam indicates
the tilt range has been exceeded and IS NOT LEVEL (OR
PLUMB) AND SHOULD NOT BE USED FOR DETERMINING OR
MARKING LEVEL (OR PLUMB). Try repositioning the laser on
a more level surface.
SLOPING THE LASER
If the BCLL TOP BCLL TOP/BCLL-G TOP laser is tilted beyond 15°
out of level, its laser beams will stay on longer between fl ashes to
make it easier to do angled work.
USING THE PIVOT BRACKET (FIG. 1)
The BCLL TOP/BCLL-G TOP laser has a magnetic pivot bracket (f)
permanently attached to the unit. This bracket allows the unit to
be mounted to any upright surface made of steel or iron. Common
examples of suitable surfaces include steel framing studs, steel
door frames and structural steel beams. The bracket also has
a keyhole slot (g) allowing the unit to be hung from a nail or screw
on any kind of surface.
WARNING: Position the laser and/or wall mount on
a stable surface. Serious personal injury or damage
to the laser may result if the laser falls.
USING THE LASER WITH THE WALL MOUNT (FIG. 3)
The laser wall mount (j) off ers more mounting options for the BCLL
TOP laser. The wall mount has a clamp (k) at one end which can
be fi xed to a wall angle for acoustic ceiling installation. At each end
of the wall mount is a screw hole (l), allowing the wall mount to be
attached to any surface with a nail or screw.
Once the wall mount is secured, its steel plate provides a surface to
which the magnetic pivot bracket (f) can be attached. The position

18
ENGLISH
of the laser can then be fi ne-tuned by sliding the pivot bracket up or
down on the wall mount.
ALIGNING THE VERTICAL BEAM – FINE ADJUST (FIG. 4)
The fi ne adjustment knob (h) on the top of the BCLL TOP/BCLL-G
TOP is for lining up the vertical beams. Place the BCLL TOP/BCLL-G
TOP on a fl at surface and turn the knob to the right to move the
beam to the right or to the left to move the beam to the left.
Rotating the fi ne adjustment knob adjusts the entire internal
mechanism, maintaining the 90° angle between the two vertical
beams.
LEVELING THE LASER
As long as the BCLL TOP/BCLL-G TOP laser is properly calibrated,
the laser is self-leveling. Each laser is calibrated at the factory to
fi nd level as long as it is positioned on a fl at surface within average
± 4° of level. No manual adjustments are required.
MAINTENANCE
• To maintain the accuracy of your work, check the laser often
to make sure it is properly calibrated. See Field Calibration
Check.
• Calibration checks and other maintenance repairs may be
performed by Berner service centres.
• When not in use, store the laser in the kit box provided.
Do not store your laser at temperatures below –20 °C (–5 °F)
or above 60 °C (140 °F).
• Do not store your laser in the kit box if the laser is wet.
The laser should be dried fi rst with a soft dry cloth.
NOTE: Disassembling the laser level will void all warranties on the
product.
Other manuals for BCLL TOP
1
This manual suits for next models
3
Table of contents
Languages:
Other Berner Measuring Instrument manuals

Berner
Berner 169091 User manual

Berner
Berner 43344 User manual

Berner
Berner 43345 User manual

Berner
Berner Testboy 20 User manual

Berner
Berner Hot-Star BHS1 Guide

Berner
Berner 213981 User manual

Berner
Berner BLM 80 User manual

Berner
Berner Premium 215222 User manual

Berner
Berner DM8 User manual

Berner
Berner 177903 User manual