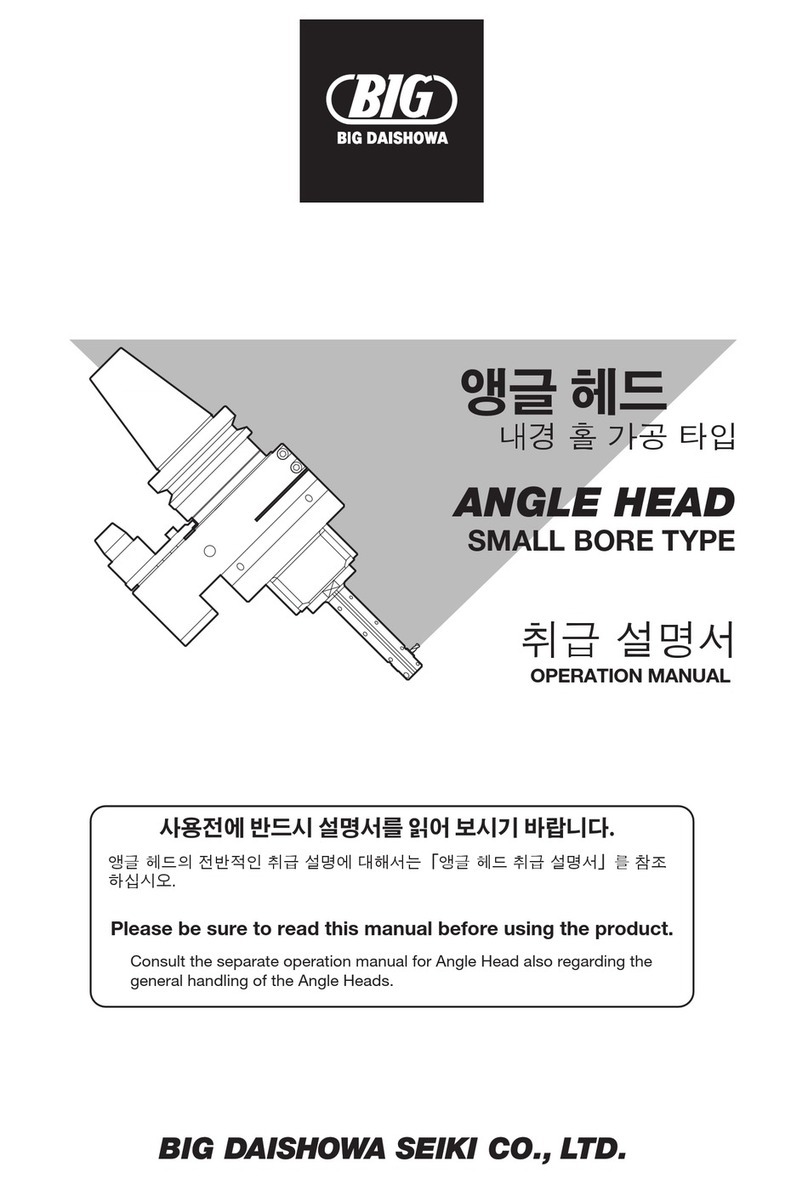
BIG Point Master Pro PMPC Series User manual

TEL048(252)1323
TEL022(382)0222
TEL0276(30)5511
TEL046(204)0055
TEL0263(40)1818
東部支店
仙台営業所
北関東営業所
南関東営業所
長野営業所
■
■
■
■
■
■
■
■
■
■
TEL052(871)8601
TEL054(654)7001
TEL076(292)1002
TEL06(6747)7558
TEL086(245)2981
中 部 支 店
静岡営業所
北陸営業所
西 部 支 店
岡山営業所
TEL082(420)6333
TEL092(451)1833
TEL072(982)8277
■
■
■
広島営業所
九州営業所
海外営業本部
■FA機器部 TEL072(982)8071
この度は、 ポイントマスタープロをお買い求めいただき誠にありがとうございます。
ポイントマスタープロPMPCシリーズは、通電しない加工物(樹脂・セラミック等)や通電し
ない機械(セラミックベアリング仕様)にもご使用いただけます。ご使用前にあたっては必ず
本書をお読みいただき、ご使用される方がいつでも見ることができる場所に必ず保管してく
ださいますようお願いいたします。
主な仕様 MAIN SPECIFICATIONS
スタイラス(付属品)
Stylus(Standard
±1μm(2σ)
±12mm
5mm
XY: 0.4N Z:1.5N
取扱説明書 OPERATION MANUAL
ポイントマスタープロポイントマスタープロ
●ストレ−トシャンクタイプ《STRAIGHT SHANK TYPE》
●PMPC-20/PMPC-32 ●BBT30-PMPC-115
●BBTシャンクタイプ《BBT SHANK TYPE》
ST28−4R
Model
PMPC-20
PMPC-32
バッテリー
Battery
バッテリー寿命
Battery life
LR1×2(単5)
20
32
50 100
60 90
φD h7
型 式
連続90時間
90 hours(continuous use)
Model Weight
型 式
交換用スタイラス STYLUS FOR THE EXCHANGE
本製品はスタイラス部分が分離できるように、M3のネジ込み式になっています。
スタイラスが傷付いた時や、ワ-クの形状によりスタイラスの交換ができます。
特別交換品として下記のスタイラスを用意しております。下記以外のスタイラスは使用でき
ません。
The screw-in(M3) stylus is replaceable. Please change a stylus according to its wear
and tear, and also when a different type of stylus is required. The following styli are
available as options. A stylus except for the following can't be used.
図1 Fig.1
図1 Fig.1 図2 Fig.2
図2 Fig.2
Measuring range
電池のセット方法 TO INSERT BATTERY
バッテリーの極性は、必ずご確認ください。極性を逆に挿入された場合は、動
作しないばかりかセンサー内部電気回路を破損させご使用できなくなる事があ
ります。
ご使用前に必ずスタイラスを手でタッチし、LEDの点灯・ブザ-が鳴ること
事を確認してください。LEDが点灯しない・LEDの点灯が弱い・ブザ-が
鳴らない場合は、バッテリ-を新品に交換してください。
シャンク底面・本体側面のバッテリ-キャップ(BBTタイプはプルボルト)を取り外し付属の
バッテリ-を + 側を先に入れバッテリーキャップを締め込んでください。
LR1×2 (IEC) or N(ANSI)batteries
+−
+
−
CR2×1 battery
●BBT40-PMPC-120
LR1×2 (IEC) or N(ANSI)batteries
+−
ご注意 CAUTION
・
電池の表面や電池が接触する電極面に汚れが付着すると、電池の容量が残ってい
てもLEDが点灯しない場合やブザ-が鳴らない場合があります。その場合は、
柔らかいウエス等で汚れを取り除いてください。
・
・
Thank you very much for purchasing the POINT MASTER PRO. POINT MASTER
PRO PMPC Series are used also for nonconductive wokpiece (resin, ceramics, etc.) and
on nonconductive machines (ceramic bearing type).
Please read these instructions before use and keep them where the operator may
refer to them whenever necessary.
Remove the battery cap at the end of the shank or at the side of the body (the pullstud
in case of BBT shank type) and insert the accessory batteries with the positive end first.
Then tighten the above battery cap or pullstud.
Make sure the correct direction of the electrode of the batteries. Inserting them
wrong way around not only disables the operation but also may damage
internal electric circuit of the sensor and become out of order.
�
・
・
・
φ20、φ32
BBT30、BBT40
繰り返し精度
Repeatability(Probe)
XYストロ−ク
XY stroke
Zストロ−ク
Z stroke
バッテリ-アラ-ム機能
Bttery Alarm
2.7V以下でワ-ク測定時に点滅
LED flickers at 2.7V or less when
stylus touches workpiece.
測定圧
Measuring Pressure
シャンク
Shank
L
Φd
L1
L
Φd
測定範囲
BBT40-PMPC-120
BBT30-PMPC-115
Model
バッテリー
Battery
バッテリー寿命
Battery life
CR2×1
LR1×2(単5)
BBT30
115
1
2
BBT40
120
BBT NO.
L
型 式
Fig.
(mm)
63
93
L1
(mm)
L
(mm)
L1
(mm)
連続80時間
80 hours(continuous use)
連続90時間
90 hours(continuous use)
Please contact our agent for REPLACEMENT BATTERIES.
(NOTE)
図
L
Fig.
(mm)
L1
(mm)
図質量(g)
φd
12
8
1
2
3
4
4
28
28
2
2.0
2.0
2.5
2.9
2.6
−
スタイラス先端
超硬(Carbide)
ルビ−(Ruby)
Material
28
センサ−ヘッド
SENSOR HEAD
スタイラス
STYLUS
Z
オ-バ-トラベル量
φ4
オ-バ-トラベル量
XY
バッテリ−キャップ
BATTERY CAP
LED 3ヶ所
LED THREE PLACE
ブザ-
BUZZER
シャンク(別記)
SHANK バッテリ−
BATTERY 4-芯出しボルト
4-CENTERING
φ35
M3 ネジ部
M3 SCREW
LL1
28
φ35
φD
L
L1
28
φ35
BBTNO.
L
L1
28
φ35
BBTNO.
-PMPC シリ-ズ-
ST28 -1P
ST28 -2P
ST28 -3P
ST28 -4P
ST28 -4R
Before using, ensure that the LEDs and beep function correctly by touching the
stylus with a finger. Replace the batteries in the case the LEDs do not illuminate
brightly or beep sound is not generated.
If the battery or electrode surfaces are contaminated, LEDs may not illuminate or
beep sound may not be generated even if the batteries are not exhausted. Then,
clean the surface with soft cloth or similar.
プルボルトのネジ部端面およびクランプ部が黒染め
されている場合はサンドペ-パ-等で磨いて通電性
を良くしてください。
In case the pull stud is chemically oxidized, please remove the
chemically oxidized surface to increase the conductivity.
磨く箇所
remove the
chemically oxidized
ご注意 CAUTION

使用方法 HOW TO USE
●通常の使用方法 ●Usual usage
●高精度な測定が必要な場合
スタイラスをワーク測定面に微細送りで接触させていくとタッチした瞬間に、LEDが点
灯しブザ-が鳴ります。最初にLEDが点灯しブザ-が鳴った位置が、主軸中心位置より
スタイラスのボール径の半分を差し引いた位置として検出されます。
高精度な測定が必要な場合は、スタイラスのボールがワーク測定面に接触してから内部の
接点がタッチ位置を検出するまでに発生するXY方向5μm・Z方向2μm程度の遅れ(不
感量)の考慮が必要です。(XY方向の不感量は一定ではありません。)
No.1111-1FA
■ EXPORT DEPARTMENT■ EXPORT DEPARTMENT
TEL (+81)-72-982-8277TEL (+81)-72-982-8277
品 名
No.
Destination
検査印
Inspection by
ご購入日
Purchased on
年月日
この商品は弊社の厳密なる品質および精度検
査に合格した事を証明致します。
お客様の正常な使用状態で万一故障いたしま
した場合は、本保証書により満1年間は無料
で修理または部品交換させていただきます。
We hereby certify this Product has passed a rigorous
quality and accuracy examination. We guarantee to
replace the parts concerned should the certified
product fail during normal usage within the guarantee
period.
ご注意
次の様な故障については保障期間中でも有料修理となります。
The guarantee will not apply in following circumstances:
(2)改造、分解による故障。
Failure due to modification, disassembling, etc.
(3)火災、天災、保管上の不備(高温、多湿な場所など)による故障。
Failure cased by fire, natural disaster or improper storage
(i.e. in hot or humid environment).
(4)本保証書のご提示がないとき。
The certificate is not presented.
(ATTENTION)
●
ポイントマスタープロ(PMPCシリ-ズ)
POINT MASTER PRO(PMPC Series)
保証書 Quality Certificate
リングゲージを機械に取付け、別売品のセンタリングツール又はテストインジケータ
で中心座標を求めます。
主軸を定位置停止させ(M19:主軸オリエント)機械主軸にポイントマスタープロを取付けます。
リングゲージの中心位置からX,Y方向を測定します。
テストインジケータで求めた中心位置とポイントマスタープロで求めた中心位置の差
を記録に残し、実際のワーク測定の時に演算します。
巾計測の場合は、リングゲージ・ブロックゲ-ジに明記された寸法とポイントマスタ
ープロで計測した
寸法との差(ボール径による差)を記録に残し、実際のワーク測定の
時に演算します
。
Attach the ring gauge to the machine. Determine the center of coordinates by means of the
optional centering tool or test indicator. Attach Point Master Pro to the machine spindle and stop
the spindle in the specified position. (M19 : spindle orientation)
Take measurements in X and Y directions from the center position of the ring gauge. Record the
difference between the center position determined by the test indicator and that obtained by
Point Master Pro, which is to be used for operation in the phase of actual work measurement.
In case of width measurement, record the difference between the dimension indicated on the
ring gauge・gaugeblocks and that measured by Point Master Pro (difference owing to ball
diameter).
● If highly accurate measurement is required :
・機械主軸にドライブキー位相を180度間違えて取付けますと大きな測定誤差が発
生します。
スタイラスに振れがある場合は、精度の良い測定ができませんので、使用上の注
意に明記された方法で芯出し調整を実施してください。
ご注意
CAUTION
A large measurement error will be caused if Point Master Pro, set to the chuck, should be
attached to the machine spindle in a by 180°deviated drive key phase.
Runout of the stylus, if any, makes accurate measurement impossible. Center it in the method
as specified in the Cautions In Use.
When highly accurate measurements are needed, it is necessary to take into account that there is
a delay (dead zone) of 5μm in XY direction and 2μm in Z direction from contacting of the stylus
ball with measuring surface of the work till detection of touch position by the internal contact.
(Dead travel in both X and Y directions is nonconstant.)
ご注意
CAUTION
危 険
DANGER
使用上の注意 CAUTIONS IN USE
ポイントマスタープロを、機械主軸に取付けます。主軸オリエント(M19)を解除
して、手で機械主軸をゆっくりと回転させます。この時にスタイラスが振れている
場合は、チャックで掴みなおして振れが一番少ない位置にセットしてください。
そ
れでも振れがある場合は、下記の方法で芯出し調整を実施してください。
●ご使用前に振れ検査
●スタイラスの芯出し調整
本体外周にある4カ所のφ6ゴムの内側にヘッド取付け兼用芯出しボルトがありま
す。出荷時に芯出し調整しているため、通常は触らないでください。万一、芯出し
調整の必要が生じた時は、スタイラスに電気マイクロメータ(測定圧0.2N以下)
を当て、主軸を手で回して振れを測定しながら4カ所のボルトを緩め締めして、振
れのゼロ調整を実施してください。スタイラスの芯出し調整は、有償にて弊社で承
りますので、ご購入された販売店を通じてご依頼ください。
●スタイラスの稼働範囲
スタイラスは、XY方向に±12mmZ方向に5mmストロークします。ストローク以
上に押し付けますと、スタイラスおよび本体が損傷して測定ができなくなりますの
で絶対にしないでください。また、指等ではじいたり衝撃を加えますとスタイラス
が曲がったり内部の接点を痛めることになり、精度がでなくなりますので、絶対に
しないでください。
●使用後の手入れ
・長期間使用しない場合は、電池を取り外してください。
・本体の汚れは、乾いた柔らかい布で拭いてください。
ガソリン、シンナー、石油類での清掃は本体を痛めます。
また、水洗いは絶対にしないでください。
・高温にならない乾燥した場所で保管してください。
・加工物に本器を早送りで近づける場合は、余裕のある位置で止め、残りはゆっく
りとハンドルで送ってください。万一、早送りのままでご使用されますと本器や
加工物および機械等を破損する恐れがあり、またその結果発生する破片等で人体
に危険を及ぼす可能性があります。
・本器をミーリングチャック等に着脱する時は落下などに
十分気を付けてください。
●Check for runout before use
●Centering adjustment of the stylus
●スタイラスの点検
スタイラスにゆるみがないか確認してください。もし、ゆるみがある場合は精度が
でませんので締め直してください。
●Stroke of the stylus
The stylus stroke amounts to ±10°in XY-direction and 5 mm in Z-direction. Never push it
beyond the stroke limit. Otherwise, the stylus and the unit body will be damaged to make
measurement impossible.
Never give shock to the stylus, for example by flicking with finger. Otherwise, the stylus will be
bent or the internal contact will be damaged to lower measurement accuracy.
●Care after use
・Remove batteries from the Point Master Pro to be stored for an extended period.
・Wipe off any dirt from the unit body with a dry soft cloth. Cleaning with gasoline, thinner
or any other medium of petroleum basis causes damage to the unit body. Never wash it
with water.
・Store Point Master Pro in a dry place free from high temperatures.
●Check of the stylus
Check the stylus for any looseness. A loose stylus lowers measurement accuracy. Retighten it
as required.
When the Point Master Pro approaches the workpiece at high feed rate, it should be
arrested at sufficiently safe distance to allow the final approach at fine feed by utilizing a
handle. Should the Point Master Pro collide with the workpiece at high feed rate then
damage may be caused and broken parts could endanger persons in the area.
・センタ-スル-用のプルボルト(穴あき)は使用できません。但し、センタ-スル
-仕様の機械の給油ノズルの関係上穴あきプルボルトしか使用できない場合は、
最寄りの営業所にご相談ください。
Pullstud with a hole through for coolant cannot be used. However, in the case coolant nozzle
of the machine designed for coolant through the spindle does not allow use of a pullstud
without the hole, please contact agent for advice.
Mount the POINT MASTER PRO into a chuck and attach the assembly to the machine spindle.
Release the spindle orient (M19) and turn the machine spindle slowly by hand.
If the stylus shows a runout, clamp the assembly again by the chuck in position where runout
is the smallest. Unless runout is eliminated, proceed with centering adjustment in the
following manner.
There is a centering bolt beneath (4) ƒÓ6mm rubber seals around the head of the Point Master
Pro. These centering bolts also function to fix the head. Do not touch these centering screws in
normal use, as centering adjustment is completed before delivery. If adjustment becomes
necessary, put an electric micrometer, which measuring pressure should be 0.2N or less, to the
stylus and repeat loosening and tightening (4) centering bolts until runout measured while the
spindle is rotated by hand is eliminated.
We offer centering adjustment at your expense. Please contact agent.
・
・Care should be taken when mounting or dismantling the Point Master Pro to or from the
chuck in order to prevent it falling.
ストレ-トシャンクタイプの場合は、精度が良いチャックに取付けてください。
( ニューベビーチャック・メガニュ-ベビ-チャック等をご推奨します。)
・精度維持のため、本器のATCによる機械主軸への装着は推奨致しません。 It is not recommended to mount the Point Master Pro into the machine spindle through
automatic tool change for maintaining accuracy.
・測定時に、バッテリ-アラ-ム機能によりLEDが点滅した場合には、(LR-1×2)
(CR2×1)バッテリ-を交換してください。 Replace both (LR-1×2、CR2×1) batteries if the battery alarm function blinks the LED at the
time of measurement.
(1)使用上の誤りによる破損や故障。
Damage or failure due to improper usage.
As soon as the stylus contacts the measuring surface of the workpiece in fine feed, the LEDs and
beep function. The position where the LEDs and beep function first is half the distance of the
diameter of the stylus ball from the spindle center.
Straight shank types should be clamped with a precision chuck. NEW BABY CHUCK or MEGA
NEW BABY CHUCK is recommended.
This manual suits for next models
4
Table of contents
Other BIG Industrial Equipment manuals
BIG
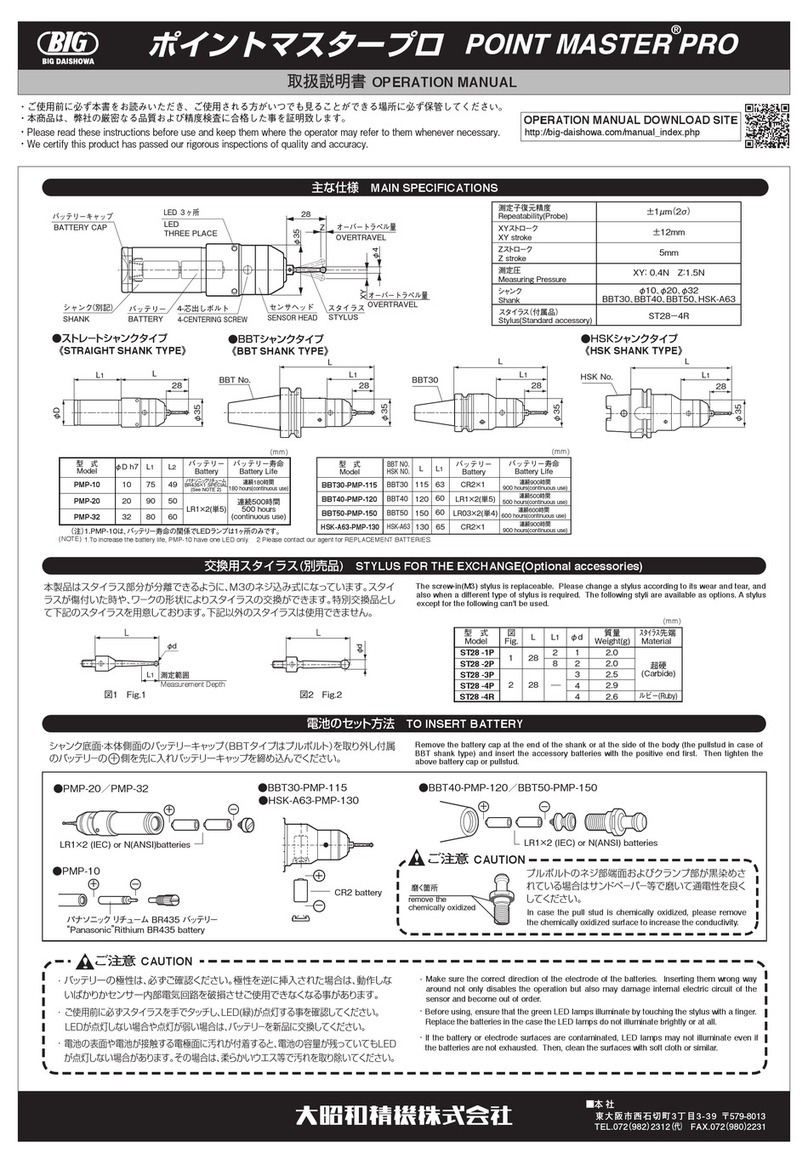
BIG Point Master Pro User manual
BIG
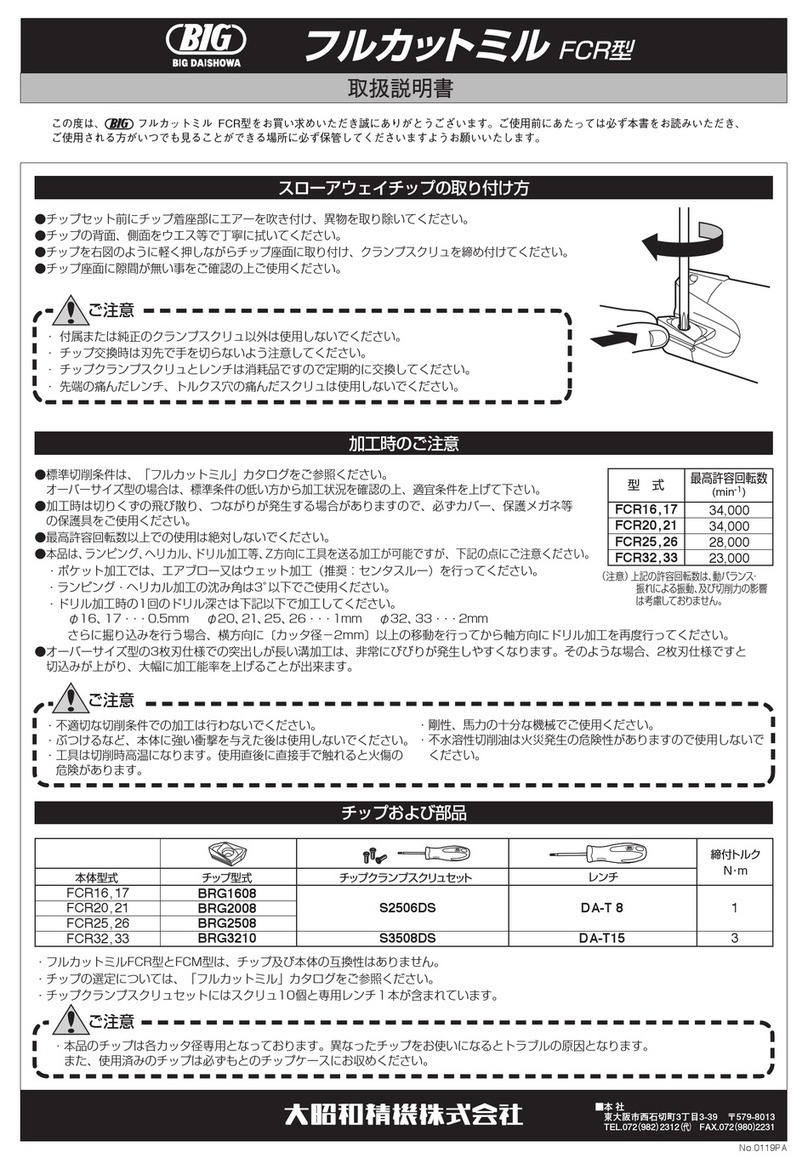
BIG FCR User manual
BIG
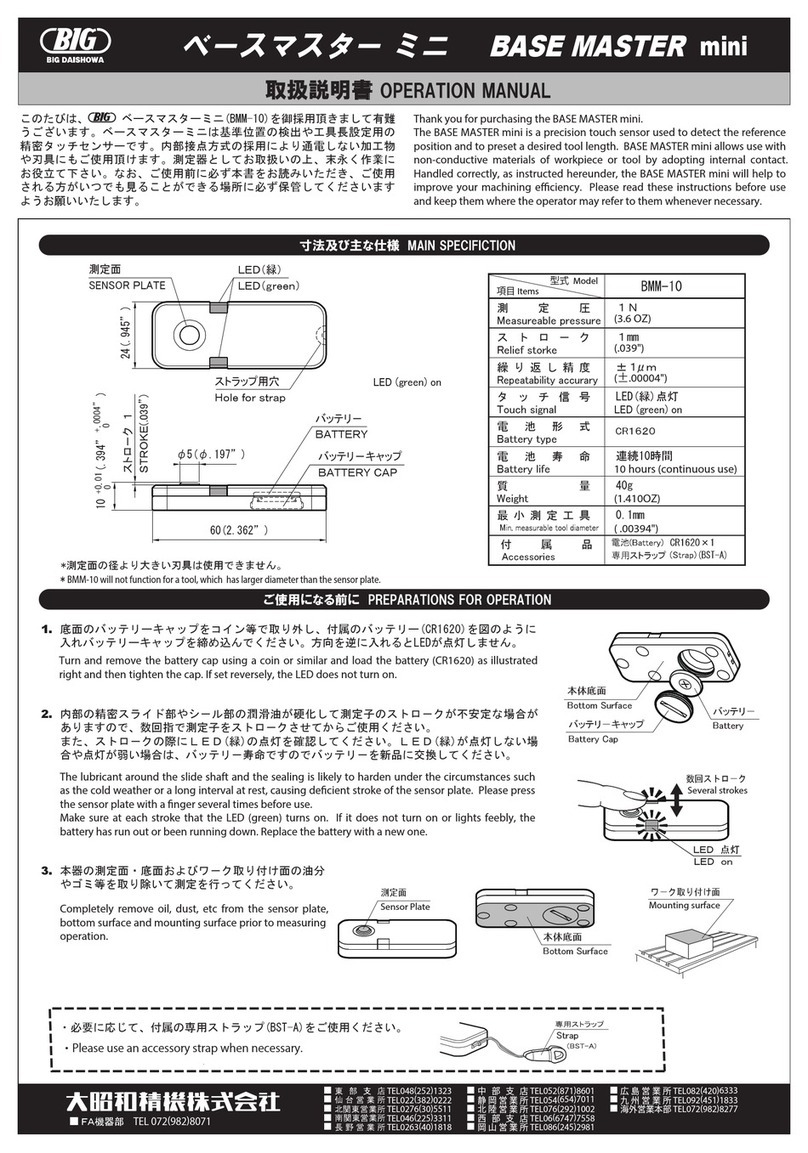
BIG Base Master Mini User manual
BIG
BIG RBX5 User manual
BIG
BIG PLP-BBT30 User manual

BIG
BIG Base Master Mini User manual
BIG
BIG BBT40 User manual
BIG
BIG HSK-A63 User manual
BIG
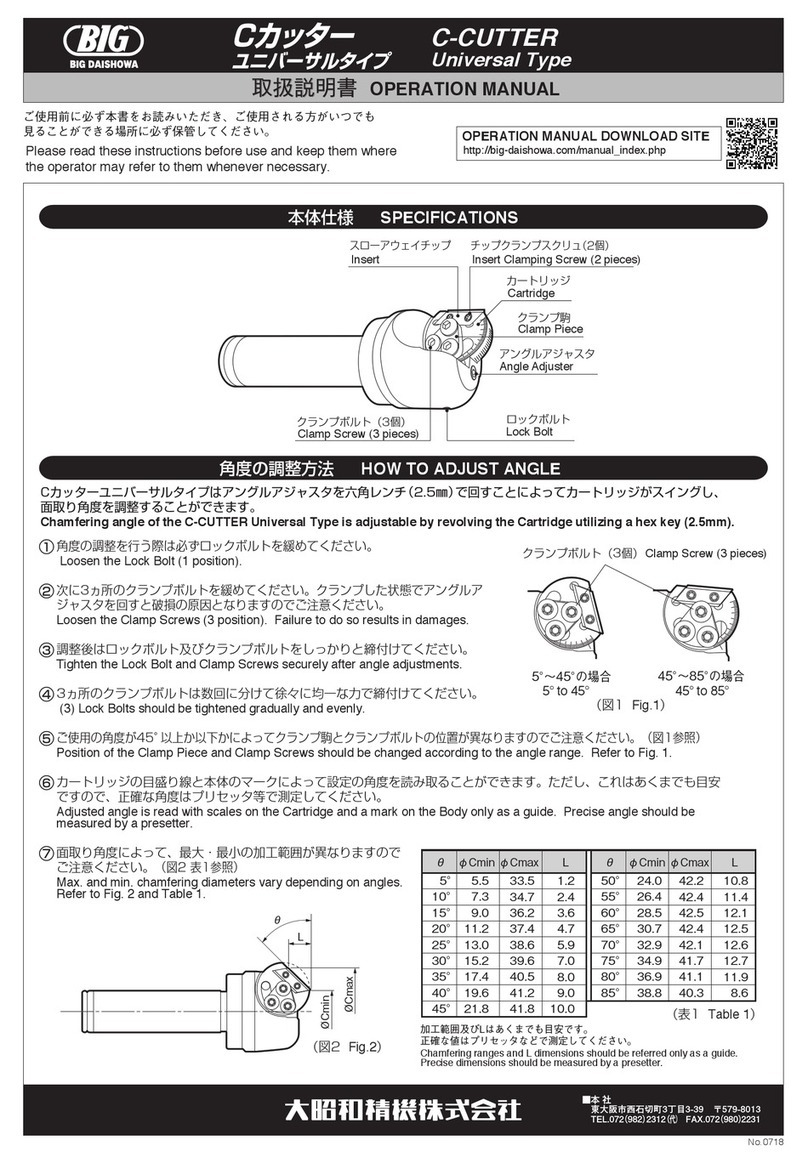
BIG C-Cutter Universal Type User manual
BIG
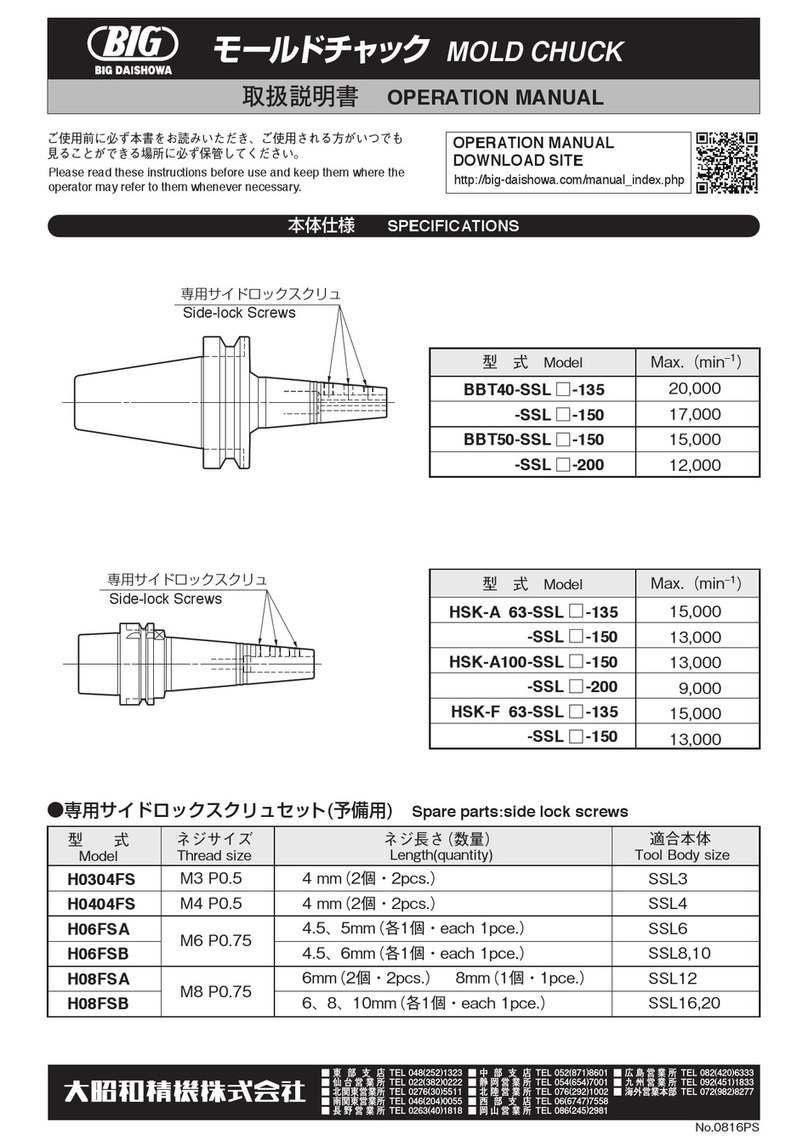
BIG BBT40-SSL -135 Series User manual
