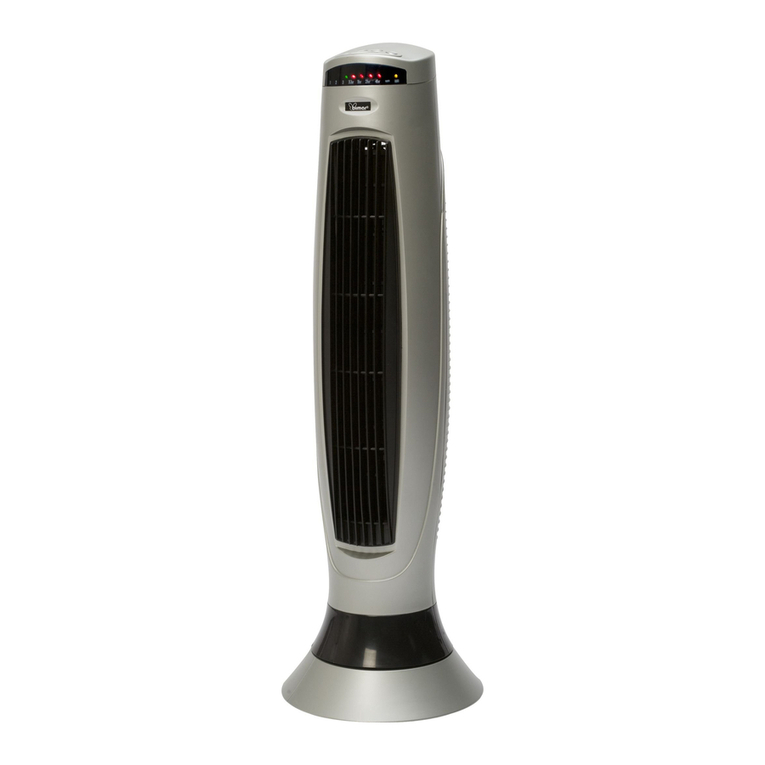
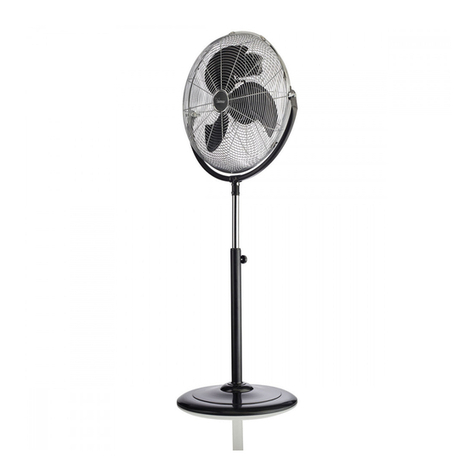
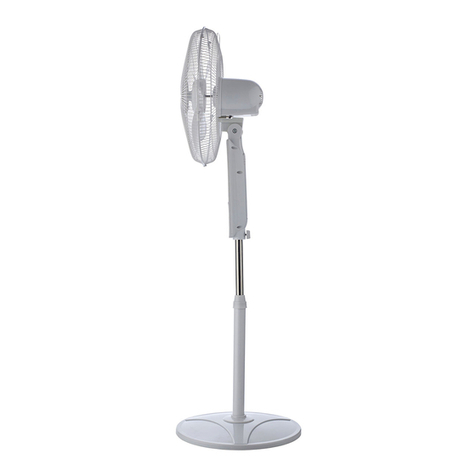
Bimar YF-ST1627-1 User manual

1
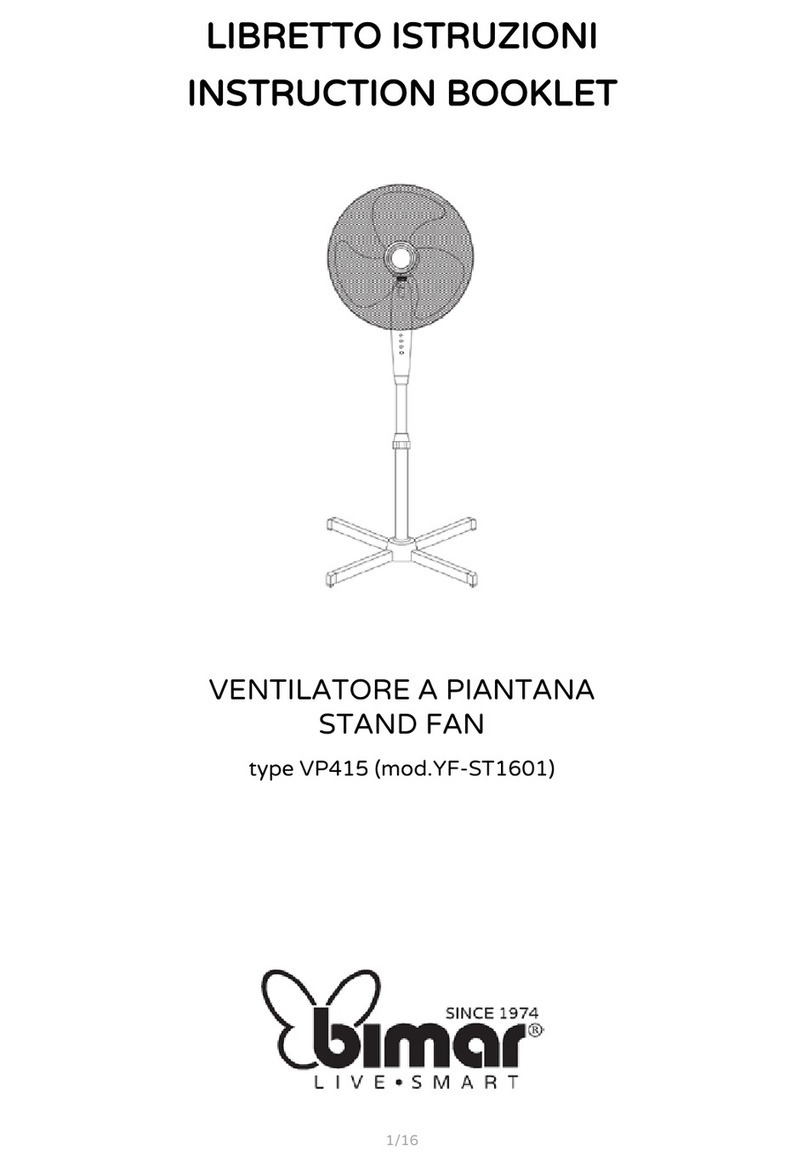
LIBRETTO ISTRUZIONI
INSTRUCTION BOOKLET
VENTILATORE A PIANTANA
STAND FAN
type VP43T (mod. YF-ST1627-1)

2
Questo simbolo vi invita a leggere attentamente queste istruzioni prima dell’uso
dell’apparecchio, ed eventualmente informare terzi, se necessario. Conservare il
libretto per ulteriori consultazioni e per l’intera durata di vita dell’apparecchio. Se
nella lettura di queste istruzioni d’uso alcune parti risultassero difficili nella
comprensione o se sorgessero dubbi, pri
ma di utilizzare il prodotto contattare
l’azienda all’indirizzo scritto in ultima pagina.
Questo simbolo indica la classe II isolamento elettrico, per cui la spina del
cordone è priva del polo per la messa a terra.
Questo simbolo evidenzia istruzioni e avvertenze per un impiego sicuro.
Avvertenze, installazione, uso, pulizia e manutenzione dell’apparecchio
potrebbero subire aggiornamenti rispetto alla presente stesura: si consiglia di
collegarsi periodicamente al sito www.bimaritaly.it, e consultare il manuale
aggiornato on-line.
T
Questo simbolo indica che il ventilatore è idoneo al clima tropicale e utilizzabile in
ambienti con temperatura sino a 40°C.
AVVERTENZE GENERALI
•Questo apparecchio è destinato solo all’impiego domestico, per la
ventilazione di ambienti interni: non utilizzatelo per altro scopo.
Ogni altro uso è da considerarsi improprio e pericoloso. Il costruttore
nonpotràessereritenutoresponsabiledieventualidanniderivantida
uso improprio, erroneo e irresponsabile e/o da riparazioni effettuate
da personale non qualificato.
Esempi diapparecchi per ambiente domestico sono apparecchi per
tipichefunzionidomestiche,usatiinambitodomestico,chepossono
essere utilizzati per tipiche funzioni domestiche anche da persone
non esperte:
-in negozi, uffici e altri luoghi di lavoro similari;
-in aziende agricole o similari;
-da clienti di alberghi, motel e altri ambienti di tipo residenziale;
-in ambienti del tipo bed and breakfast.
•Non infilare alcun utensile o le dita fra le maglie della griglia di
protezione della ventola.

3
•L’apparecchio può essere utilizzato da bambini di età non inferiore a
8 anni e da persone con ridotte capacità fisiche, sensoriali o mentali,
o prive di esperienza o della necessaria conoscenza, purché sotto
sorveglianza oppure dopo che le stesse abbiano ricevuto istruzioni
relative all’uso sicuro dell’apparecchio e alla comprensione dei
pericoli ad esso inerenti. I bambini non devono giocare con
l’apparecchio. La pulizia e la manutenzione destinata ad essere
effettuata dall’utilizzatore non deve essere effettuata da bambini
senza sorveglianza.
•L’apparecchiodeve essere mantenuto fuoridalla portata di bambini.
•Tenere la batteria del telecomando fuori dalla portata dei
bambini.
•Attenzione: quando si utilizzano apparecchi elettrici,occorre sempre
rispettare le precauzioni di sicurezza di base per evitare i rischi di
incendio, di scosse elettriche e di lesioni fisiche.
•Non usare l’apparecchio se non funziona correttamente o se
sembra danneggiato; in caso di dubbio rivolgersi a personale
professionalmente qualificato.
•Assicurarsi che il ventilatore funzioni correttamente: nel caso
contrario spegnere l’apparecchio e farlo controllare da personale
professionalmente qualificato.
•Non spostare l’apparecchio durante il funzionamento.
•Se l’apparecchio non è in funzione togliere la spina dalla presa di
corrente.
•Scollegare sempre l’apparecchio dalla presa di corrente prima di
assemblare, smontare e prima di pulire l’apparecchio.
•Non lasciare l’apparecchio esposto agli agenti atmosferici (sole,
pioggia, ecc.).

4
•Non toccare l’apparecchio con mani o piedi bagnati.
•Non tirare il cavo per spostare l’apparecchio.
•Non tirare il cavo d’alimentazione o l’apparecchio stesso per
disinserire la spina dalla presa di corrente.
•Se il cavo di alimentazione è danneggiato, esso deve sostituito dal
costruttore o dal suo servizio assistenza tecnica o comunque da una
persona con qualifica similare, in modo da prevenire ogni rischio.
•Questo apparecchio non è destinato a essere fatto funzionare per
mezzo di un temporizzatore esterno o con un sistema di comando a
distanza separato, per evitare il rischio di incendio nel caso l’apparecchio
sia coperto e/o sia posizionato in modo non corretto o ad altro
dispositivo che possa accendere l’apparecchio automaticamente,
evitando così rischi di danni a persone, animali o cose.
•In caso di guasto o cattivo funzionamento spegnere l’apparecchio e
farlo controllare da personale professionalmente qualificato; le
riparazioni effettuate da personale non qualificato possono essere
pericolose e fanno decadere la garanzia.
•Assicurarsi che il ventilatore sia scollegato dalla rete di alimentazione
prima di togliere lo schermo di protezione.
INSTALLAZIONE
•Dopo aver tolto l’imballaggio, assicurarsi dell’integrità dell’apparecchio; in caso di dubbio non
utilizzarlo e rivolgersi a personale professionalmente qualificato. Gli elementi d’imballaggio
(sacchetti di plastica, polistirolo espanso, chiodi, ecc.) non devono essere lasciati alla portata di
mano di bambini in quanto potenziali fonti di pericolo. Tutti gli elementi dell'imballaggio vanno
conferiti alla raccolta differenziata identificando la destinazione pertinente alla sua materia
prima (si veda il simbolo impresso su ogni elemento), e secondo le disposizioni del proprio
Comune. I sacchetti piccoli (es.: set viti di fissaggio, il telecomando) che per le misure ridotte
sono privi di marcatura, vanno destinati alla raccolta nelle modalità vigenti nel proprio Comune.
•Prima di collegare l’apparecchio controllare che i valori di tensione riportati sulla targa dati
corrispondano a quelli della rete elettrica. In caso di incompatibilità tra la presa e la spina
dell’apparecchio, far sostituire la presa con altra di tipo adatto da personale professionalmente
qualificato, il quale accerti che la sezione dei cavi della presa sia idonea alla potenza assorbita
dall’apparecchio. In generale è sconsigliato l’uso di adattatori e/o prolunghe; se il loro uso si
rendesse indispensabile, devono essere conformi alle vigenti norme di sicurezza e la loro portata
di corrente (ampères) non deve essere inferiore a quella massima dell’apparecchio.
•Prima di ogni utilizzo verificare che l’apparecchio sia in buono stato, che il cordone elettrico non
sia danneggiato: in caso di dubbio rivolgersi a personale professionalmente qualificato.

5
•La presa di corrente deve essere facilmente accessibile in modo da poter disinserire con facilità
la spina in caso di emergenza.
•Posizionare l’apparecchio lontano da:
-fonti di calore (ad es. fiamme libere, fornello gas, ecc. )
-contenitori di liquidi (ad esempio, lavelli ecc.) per evitare schizzi d’acqua o che vi possa cadere
(distanza minima 2 metri)
-tessuti (tende, ecc.) o materiali volatili che possano ostruire la griglia di aspirazione; verificare
che anche la parte anteriore sia sgombra da materiali volatili (polvere, ecc.).
•La superficie di appoggio deve essere stabile, non in pendenza (in quanto l’apparecchio
potrebbe ribaltarsi) e liscia.
ASSEMBLAGGIO
Attenzione:
prima di assemblare il ventilatore, assicurarsi che sia scollegato dalla presa di corrente.
L’apparecchio può essere utilizzato solo se completamente e correttamente assemblato in tutte le
sue parti, quindi completo di base con contrappeso, griglie di protezione, elica.
Procedere come descritto e utilizzare le figure per riferimento.
Piantana
A. Innestare la colonna (15) nella relativa sede della base con contrappeso (16), allineare i quattro
fori della piastra con quelli della base con contrappeso; inserire n.4 viti, posizionare le rondelle
con i relativi dati e serrare in modo adeguato (al termine dell’operato verificare che la colonna e
la base siano saldamente accoppiati).
B. Allungare l’asta regolabile (14) fino all’altezza desiderata e bloccarla avvitando in modo serrato
la ghiera fissaggio asta.
Ventilatore
A. Svitare le ghiere: fissaggio elica (3) e griglia posteriore (5).
B. Inserire la griglia posteriore (6) sul carter motore e verificare che la maniglia (7) risulti nella parte
superiore, posizionandola in modo che i perni si inseriscano nei fori corrispondenti, e bloccarla
con l’apposita ghiera.
C. Inserire l’elica (4) sull’albero motore (9), in modo che l’asola si accoppi alla chiavetta. Bloccare
con l’apposita ghiera (3) avvitandola (in senso antiorario) in modo serrato.
D. Accoppiare la griglia anteriore (2) a quella posteriore (6) bloccandole con i ganci di tenuta. Ai
fini della sicurezza è obbligatorio assicurare il fissaggio utilizzando l’apposita vite c/dado da
impegnare nei fori presenti sul bordo delle griglie (i fori per la vite devono risultare nella parte
inferiore), (1). Al termine dell’operato, verificare che le griglie di protezione siano saldamente
accoppiate e fissate al motore.
E. Fissare il corpo del ventilatore alla piantana innestando il foro inferiore sull’asta regolabile della
piantana, e bloccarlo serrando la vite fissaggio piantana (13).

6
1) Vite con dado
2) Griglia anteriore/schermo di
protezione
3) Ghiera fissaggio Elica
4) Elica
5)
Ghiera fissaggio griglia
posteriore
6) Griglia posteriore
7) Maniglia
8) Pannello comandi
9) Albero motore
10) Tasto oscillazione
11) Corpo motore
12)
Viti con dado fissaggio
piantana/base
13) Vite fissaggio piantana
14) Asta regolabile
15) Colonna
16) Base con contrappeso
17) Anello di copertura
Pannello comandi
Telecomando

7
USO
Attenzione
: il ventilatore può essere utilizzato solo se correttamente assemblato in buono stato.
Le funzioni del ventilatore si azionano sia con la tastiera del pannello comandi, e con il
telecomando che deve essere puntato frontalmente (distanza max di circa 4m) verso il pannello
comandi.
Non permettere ai bambini di inserire e sostituire la batteria.
Inserire n.1 batteria tipo “CR2025. 3V” nel telecomando (non inclusa nella
confezione): spostare la linguetta verso destra (→PUSH), eventualmente
utilizzare un piccolo cacciavite e contemporaneamente sfilare il porta-
batteria verso l’esterno (↓OPEN); introdurre la batteria (rispettando la
polarità) e richiudere il porta-batteria. Per lunghi periodi di inattività del
telecomando togliere la batteria.
Il ventilatore ha i seguenti elementi di regolazione e comando che si azionano sia dal pannello
comandi e col telecomando:
-
ON/Stand-By.
Si attiva col tasto
“” (1) che aziona il ventilatore e, premuto nuovamente, lo
mette in Stand-By.
-
SPEED.
Si attiva col tasto
” (3) che seleziona le ventilazioni “Low”= velocità minima “Med”=
velocità media “High”= velocità massima. Sul pannello si illumina il LED corrispondente ad
ognuna.
-
Timer
. Si attiva col tasto “TIMER ” (4) che seleziona il tempo di funzionamento, al cui
termine l’apparecchio si arresta automaticamente. Ad ogni pressione, il tasto incrementa di ½
ora il tempo: 0,5 ora- 1 ora – 1,5 ore- 2 ore- …sino a 7,5 ore. Sul pannello si illuminano i LED
relativi al periodo selezionato. Per disattivare il timer, impostare il tempo massimo, quindi
premerlo nuovamente per escludere la funzione (i LED si spegneranno).
-
Modalità.
Con la modalità “Normal” ad ogni settaggio (Low, Med, High) la ventilazione è
costante: questa modalità si attiva all’accensione dell’apparecchio. Le modalità “Natural” e
“Sleep” si selezionano col tasto “ ” (2), e sul pannello si illumina il LED corrispondente. Con
modalità “Natural” la ventilazione alterna le velocità secondo cicli di 40, o 20, o 10 secondi circa
(vedi grafici) e si attivano selezionando High, o Med, o Low rispettivamente.

8
Con modalità “Sleep” i cicli Natural di 40sec e di 20sec. passano al successivo inferiore in
automatico dopo 30 minuti, cioè: il ciclo di 40sec dopo 30 minuti passa al ciclo di 20sec, che
dopo 30 minuti passa al ciclo di 10sec. che prosegue fino allo scadere del tempo.
-
Oscurazione.
Si attiva col tasto “”(5) che spegne o accende i LED del pannello comandi.
-
Oscillazione orizzontale Destra-Sinistra.
Si aziona premendo il tasto (10) situato sul corpo
motore, e si disattiva sollevandolo.

9
-
Inclinazione verticale Alto-Basso.
Si regola impugnando il corpo motore e dirigendolo nella
direzione desiderata: i “click” identificano le diverse inclinazioni assunte dall’unità ventilante.
Per azionare il ventilatore, inserire la spina nella presa di corrente, si sentirà un “bip” che indica che
l’apparecchio è in stand-by; per attivare il ventilatore premere il tasto “” il ventilatore si avvierà
alla velocità minima (sul display si accende icona “Low”) e selezionare le funzioni desiderate
Per disattivare l’apparecchio, premere il tasto “ ”. Per spegnere l’apparecchio togliere la spina
dalla presa di corrente.
Per lunghi periodi di inattività, togliere la spina dalla presa di corrente.
PULIZIA E MANUTENZIONE
Attenzione
: prima di eseguire le normali operazioni di pulizia, togliere la spina dalla presa di
corrente.
•Per la pulizia utilizzare un panno morbido, leggermente inumidito; non utilizzare prodotti
abrasivi o corrosivi.
•Non immergere nessuna parte del ventilatore in acqua o altro liquido: nel caso dovesse succedere
non immergere la mano nel liquido ma per prima cosa togliere la spina dalla presa di corrente.
Asciugare con cura l’apparecchio e verificare che tutte le parti elettriche siano asciutte: in caso di
dubbio rivolgersi a personale professionalmente qualificato.
•E’ indispensabile mantenere i fori di aerazione del motore liberi da polvere e lanugine: verificare
periodicamente e pulire con un panno.
•Per periodi lunghi di inutilizzo, è consigliabile riporre il ventilatore al riparo da polvere e umidità.
•Se si decide di non utilizzare più l’apparecchio, si raccomanda di renderlo inoperante tagliando il
cavo di alimentazione (prima assicurarsi d’aver tolto la spina dalla presa di corrente), e di rendere
innocue quelle parti che sono pericolose qualora utilizzate per gioco dai bambini (ad esempio
l’elica).
BATTERIA
- Rimuovere la batteria dal telecomando prima dello smaltimento. Non gettare la batteria nei
rifiuti domestici. Lo smaltimento della batteria deve avvenire negli appositi contenitori o negli specifici
centri di raccolta. L’adeguata raccolta differenziata contribuisce ad evitare possibili effetti negativi
sull’ambiente e sulla salute. Per rimuovere la batteria, seguire le indicazioni delle istruzioni d’uso.
Avvertenze per il corretto smaltimento del prodotto ai sensi della Direttiva Europea direttiva 2011/65/UE
.
Alla fine della sua vita utile il prodotto non deve esser smaltito insieme ai rifiuti urbani.
Può essere consegnato presso gli appositi centri di raccolta differenziata predisposti dalle amministrazioni
comunali, oppure presso i rivenditori che forniscono questo servizio.
Smaltire separatamente un elettrodomestico consente di evitare possibili conseguenze negative per
l’ambiente e per la salute derivanti da un suo smaltimento inadeguato e permette di recuperare i materiali
di cui è composto al fine di ottenere un importante risparmio di energia e di risorse. Per rimarcare l’obbligo
di smaltire separatamente gli elettrodomestici, sul prodotto è riportato il marchio del contenitore di
spazzatura mobile barrato. Lo smaltimento abusivo del prodotto da parte dell’utente comporta
l’applicazione delle sanzioni amministrative previste dalla normativa vigente.

10
Please read these instructions carefully before using the appliance, and
instruct other persons using it, too, if necessary. Keep the manual handy for
future use.
If when reading these instructions manual certain parts should be difficult
to understand, or if there is any confusion, contact the company indicated
on the last page before using the product.
This symbol indicates that the appliance is a class II appliance. This means
the plug on the power cord is not earthed.
This symbol highlights instructions and precautions for safe use. Warnings
and appliance installation, use, cleaning and maintenance procedures may
be updated slightly from those described in this manual; for further details,
please consult the updated on-line manual at www.bimaritaly.it.
T
This symbol show that tower fan is suitable for tropical climate for room
temperature about 40°C.
GENERAL NOTICES
•Thisdevice isintended forhome useonly,toventilate rooms:donot use
itforany otherpurpose.Any otheruse istobe consideredinappropriate
and therefore dangerous. The manufacturer cannot be held
responsible for any damage caused by inappropriate, improper or
irresponsible use and/or for repairs made to the product by
unauthorised personnel.
•Examples of devices for domestic use are appliances typically used in
the home, which can be used for typical domestic tasks even by non-
experts:
-in shops, offices and other such places of work;
-in agricultural businesses or similar;
-by clients in hotels, motels and other residential type
environments
-bed and breakfast type environments
•Do not insert any tool, or your fingers, into the grille protecting the
blades.

11
•This appliance can be used by children aged 8 years and above and
persons with reduced physical, sensory or mental capabilities or lack of
experience and knowledge if they are supervised or if they have been
given instructionsconcerning the useoftheapplianceinasafewayand
iftheyunderstandthe hazardsinvolved.Childrenmustnotplaywiththe
appliance. Cleaning and user maintenance must not be performed by
children without supervision.
•The appliance must be kept out of children’s reach.
•Keep the battery of the remote control out of reach ofchildren.
•Warning: when using electrical appliances, the basic safety precautions
must always be observed to avoid risks of fire, electric shocks and
physical injury.
•Do not use the appliance if it is not operating correctly or seems
damaged; if in doubt, contact professionally qualified personnel.
•Make sure that the fan is working correctly: if not, turn the appliance off
and have it checked by professionally qualified personnel.
•Do not move the appliance when it is running.
•If the appliance is not in use, unplug it from the plug point.
•Always unplug the appliance before you assemble, disassemble or
clean the appliance.
•Do not leave the appliance exposed to the weather (sun, rain, etc.).
•Do not touch the appliance with wet hands or feet.
•Do not pull on the cord to move the appliance.
•Do not pull on the cord or the appliance itself to disconnect the plug
from the plug point.
•If the power cord isdamaged, it must be replaced by themanufacturer,
its service agent or similarly qualified persons in order to avoid risks.
•This appliance must not be operated by means of an external timer or
a separate remote control system, to avoid the risk of fire if the device is

12
covered and / or is positioned incorrectly. It must also not be used
together with another device that can automatically turn on the unit,
thus avoiding the risk of damage to people, animals or property.
•Iftheappliancebreaksorthereisamalfunction,switchofftheappliance
and have it checked by qualified personnel; repairs carried out by
unauthorised personnel may be dangerous and nullify the guarantee.
•Ensure that the fan is switched off from the supply mains before
removing the guard.
INSTALLATION
•After removing the packing materials, check the integrity of the appliance; if you are unsure, do
not use it and ask for qualified professional help. The packing materials (plastic bags, polystyrene
foam, nails, etc.) must be kept out the reach of children because they are potential sources of
danger.
All packaging elements must be disposed of according to their raw material (see the symbol
stamped on each one) and according to the provisions of their municipality. The bag containing
the screws or other parts, which is unmarked due to its small size, therefore you have to follow
the procedures for the disposal of their municipality.
•Before connecting the appliance, check that the voltage values shown on the data plate
correspond to those of the electricity supply network. In the event of incompatibility between
the electric outlet and the plug of the appliance, have the outlet replaced with another more
suitable type by professionally qualified personnel, who will make sure that the section of the
wires of the outlet is appropriate for the absorbed power of the heater. In general, the use of
adapters or extension cords is not recommended; if their use is indispensable, they must conform
to existing safety standards and their current capacity (amperes) must not be less that the
maximum of the appliance.
•The power socket must be easy to reach so the plug can be removed quickly in case of
emergency.
•To not place the appliance near sinks or other container of liquids (minimum distance of 2 meters)
to avoid the risk of it falling in.
•Do not place the appliance near an open flame, cooking or other heating appliance.
•Keep the fan far away from fabrics (curtains, etc.) or unstable materials that could obstruct the
air intake grille; make sure that the front is free of unstable materials (dust, etc.).
•Make sure that the electric cord is not touching rough, hot or moving surfaces and not twisted or
wrapped around the appliance.
•Stand the appliance on a horizontal, flat surface or table; do not stand on a inclined plane (the
appliance could upset).
ASSEMBLY
Attention: before assembling the fan, make sure it is unplugged from the socket.
The appliance can only be used once correctly assembled in all its parts, complete with
counterweight base, protective grills, propeller.
Proceed as shown and use the images for reference.

13
Stand
A. Insert the pole (15) in place on the base and counterweight (16), align the 4 holes of the column
with those of the base and counterweight; insert n.4 screws with washer and nuts, tighten
properly (at the end of the operation, check that column and base with counterweight are firmly
coupled).
B. Lengthen the adjustable pole (14) until the height desired and lock it by tightening the pole
attachment ring nut.
Fan
A. Unscrew the ring nuts: fan fixing (3) and rear grid (5).
B. Insert the rear grill (6) into the motor body, make sure the handle is at the top and lock it using
the ring nut (5).
C. Insert the propeller (4) onto the drive shaft (9) and lock it with the ring nut (3) (turn counter
clockwise and tighten).
D. To fasten the front grill, it is best to place the main unit on a smooth even floor. Couple the front
grill (2) to the rear (6) and hold in place with plastic ring, (a fixing screw is good at the bottom)
and secure fastening by tightening screw (1). At the end of the operation, check that the
protective grills are firmly coupled and attached to the motor.
E. Attach the fan body to the stand by inserting the lower hole on the adjustable pole of the stand and
lock it by tightening the stand attachment screw (13).
1) Guard nut and screw
2) Front grill / protective screen
3) Blade retaining nut
4) Fan blade
5) Rear guard fixing nut
6) Rear grill
7) Carrying handle
8) Control panel
9) Motor spindle
10) Floor fixing screw
11) Motor housing
12) Screws
13) Pole retaining screw
14) Adjustable pole
15) Pole clamp
16) Round base and counterweight
17) Base cup

14
Control Panel
Remote control
USE
Warning
: The fan can only be used if properly assembled in good condition.
The functions of this appliance can be started using they keyboard of the control panel or the
remote control which has to be pointed in the correct direction (at a max distance of 4m).
Do not allow children to replace battery.
Insert n.1 battery type: “CR2025. 3V” of the remote control (not included
in the package), move the plastic tab to the right (→PUSH) and
simultaneously remove the battery slot (↓OPEN). Insert the battery
(following the right polarity: +/-) and close the battery slot.
For long periods remove the battery.
The fan has the following setting and control elements which are operated through remote control
or control panel:
-
Stand-by-ON button
“": to turn the fan on or turn it off in standby mode
-
Ventilation:
the three speeds are selected by pressing the “SPEED ” button (3): the symbol
corresponding to the selected speed will light up: (Low= min; Med= med; High= max).
-
Timer:
This function allows you to set the time of operation, after which the unit will stop
automatically. To set the operating time, press the “TIMER ” (4) button repeatedly: each
press of the button changes the time set, and the selected time appears on the display (0,5 hour
- 1 hour – 1,5 hours-2 hours, etc…): the maximum operating time is 7.5 hours. To disable the
timer, set the maximum time, then press the button again and the corresponding indicator lights
will turn off.
-
Mode
: the fan can work both at a constant speed “SPEED ” (minimum, medium and max),
as well as at two different speeds that are intermittent:
“
Sleep
” and “
Natural”. To activate

15
"Natural" mode, press the “ ” (2) button until appears on the display light “Nature”: speeds
are random and cyclic. With "Natural" mode, ventilation alternates speeds according to cycles
of approximately 40, or 20, or 10 seconds (see graphs) and are activated by selecting High, or
Med, or Low respectively.
With "Sleep" mode the Natural cycles of 40sec and 20sec. they pass to the next lower one
automatically after 30 minutes, i.e.: the 40sec cycle after 30 minutes passes to the 20sec cycle,
which after 30 minutes passes to the 10sec cycle. which continues until time runs out.

16
-LEDs switch off button “ ”:turn it on and or turn it off to press again.
-
Swing (right-left):
press the (10) button, turn it on and or turn it off to press again.
-
Vertical tilt (high-low):
This is selected by tilting the motor body to the desired direction (high-
horizontal-low).
To operate the fan, plug it into a socket: indicating the standby status; press the “ " button to
activate the fan (the fan starts at the lowest speed. On the display of the control panel, an "L" icon
will light up) and select the desired functions.
To deactivate the unit, press the " " button. To turn off the appliance, unplug it from the socket.
To fully switch off the appliance, remove the plug from the power socket.
CLEANING AND MAINTENANCE
Attention
: before normal cleaning, remove the plug from the socket.
•Clean the body with soft, slightly damp, cloth; do not use abrasive or corrosive products.
•Do not immerse any part of the fan in water or other liquid: if this should happen, do not put your
hand in the liquid, but first remove the plug from the socket. Carefully dry the appliance and make
sure that all the electrical parts are dry: in the case of doubt, ask for professionally qualified help.
•It is essential that the motor's air holes be kept from dust and lint.
•Periodically check the electric cord for damage; its replacement requires a special tool: contact
an authorized service center, also for any repairs.
•If the fan will not be used for long periods, it must be protected from dust and humidity; we
recommend storing it in its original packaging.
•Should you decide not to use the appliance any more, we recommend making it inoperative by
cutting the power cord (after making sure you have disconnected the plug from the socket) and
make dangerous parts harmless if children are allowed to play with them (such as the blade).
BATTERY
- Remove the battery from the remote control before its disposal. Do not dispose the
battery with domestic waste. The battery must be disposed of in the appropriate containers or in
the specific collecting centre. Suitable segregated collection helps prevent damage to the
environment and to human health.
To remove battery, refer to Instructions for use.
IMPORTANT INFORMATION FOR CORRECT DISPOSAL OF THE PRODUCT IN ACCORDANCE
WITH EC DIRECTIVE 2011/65/EC.
At the end of its working life, the product must not be disposed of as urban waste. It must be
taken to a special local authority differentiated waste collection centre or to a dealer providing
this service. Disposing of a household appliance separately avoids possible negative
consequences for the environment and health deriving from inappropriate disposal and enables
the constituent materials to be recovered to obtain significant savings in energy and resources. As
a reminder of the need to dispose of household appliances separately, the product is marked with
a crossed-out wheeled dustbin.

17
Prescrizioni relative alle informazioni/Information requirements
Descrizione/Description
Simbolo/Symbol
Valore/Value
Unità/Unit
Portata massima d’aria/Maximum fan
flow rate
F
49,25
m³/min
Potenza assorbita del ventilatore/Fan
power input
P
35,00
W
Valori di esercizio/Service value
SV
1,41
(m³/min)/W
Consumo elettrico in modo
“attesa”/Standby power consumption
PSB
-
W
Livello di potenza sonora del
ventilatore/Fan sound power level
LWA
53,03
dB(A)
Velocità massima dell’aria/Maximum air
velocity
c
2,08
m/sec
Norme di misura per il valore di
esercizio/Measurement standard for
service value
Regolamento/Commission Regulation: (UE)
n.206/2012
Dati tecnici/Technical data
220-240V~ 50/60Hz 40W

18
GARANZIA:
Si consiglia di registrare l’apparecchio online sul sito https://www.bimaritaly.it/it/garanzia oppure
scanionare il Qr code a fianco per la registrazione garanzia prodotto (compilare i dati richiesti per
attivare la garanzia sul prodotto che hai acquistato)
Condizioni generali di garanzia
La garanzia decorre dall’acquisto dell’apparecchio la cui data è comprovata da un documento di consegna fiscalmente obbligatorio
(ricevuta o scontrino fiscale o documento di trasporto), ha una durata di 24 mesi e cessa dopo il periodo prescritto
.
Si garantiscono
tutte le sostituzioni o le riparazioni che si rendessero necessarie a causa di difetti di materiale o di costruzione. Non sono coperte
da garanzia tutte le parti che dovessero risultare difettose per la mancata osservanza delle istruzioni di installazione, o di uso, o di
manutenzione, per danni causati dal trasporto, per negligenza o incuria nell’uso, per impiego non idoneo, ovvero circostanze che
comunque non possono farsi risalire a difetti di fabbricazione dell’apparecchio. Sono inoltre escluse la sostituzione o la riparazione
di tutte le parti soggette a normale consumo (resistenze) oppure a scadenza, ed inoltre le parti asportabili, le lampade, le parti in
vetro, in ceramica, le tubazioni esterne, le batterie e gli accessori mono-impiego (usa e getta).Le sostituzioni o le riparazioni,
contemplate nell’impegno di garanzia, vengono effettuate gratuitamente per merce resa franco officine della Ditta costruttrice, o
presso uno dei nostri Centri Assistenza Tecnica; sono quindi a carico dell’Utente le sole spese di trasporto.La garanzia non è
riconosciuta in caso di riparazioni effettuate da personale non appartenente ai Centri Assistenza Tecnica autorizzati, o nel caso
vengano impiegati ricambi non originali.La garanzia è disciplinata e interpretata in base alle leggi applicabili vigenti nel Paese in cui
il prodotto viene acquistato. Per i dettagli, consultare il Servizio clienti del proprio paese o il sito internet di Bimar
(www.bimaritaly.it).La Ditta costruttrice declina ogni responsabilità per eventuali danni a persone, animali domestici o cose, diretti o
indiretti, conseguenti alla mancata osservanza di tutte le prescrizioni indicate nel libretto istruzioni
dell’apparecchio concernenti specialmente le avvertenze, l’installazione, l’uso e la manutenzione
dell’apparecchio.
GUARANTEE:
it is advised to register the appliance on the website https://www.bimaritaly.it/it/garanzia
or to scan the QR code on the side to properly register the warranty (fill out the form to acivate the
warranty on the product you purchased).
General guarantee terms
Guarantee coverage starts from the moment of purchase of the appliance as indicated by a fiscally mandatory delivery document
(bill or tax receipt or shipping document). Guarantee coverage lasts 24 months and terminates after the prescribed term.Guarantee
coverage covers all replacements or repairs that become necessary due to defects in material or manufacture.Guarantee coverage
does not cover all those parts which become defective due to failure to comply with installation, operating or maintenance
instructions, shipping damage, operating neglect or negligence, improper use or any circumstances which are not due to
manufacturing defects of the appliance. Guarantee coverage is also excluded for replacement or repair of all parts subject to fair
wear and tear or to expiry, as well as removable parts, light bulbs, glass components, ceramic parts, external tubes, batteries and
disposable (throw-away) accessories. Replacements or repairs that come under guarantee coverage are performed free of charge
for goods delivered free the Manufacturer’s factory or to one of our Technical Service Centres. The Customer must only pay for
shipping costs.Guarantee coverage is not granted if repairs are performed by personnel not belonging to authorized Technical
Service Centres or when non-genuine spare parts are used.This warranty is governed by and construed in accordance with applicable
laws in force in the country where the product is purchased. For details, contact the Customer Support in your country or
the Bimar website. (www.bimaritaly.it).The Manufacturer declines all responsibility for any direct or indirect harm to persons, pets or
property consequent to failure to comply with all the provisions specified in the appliance instruction booklet and especially those
regarding appliance maintenance, operation, installation or warnings.

19
This manual suits for next models
1
Table of contents
Languages:
Other Bimar Fan manuals
Popular Fan manuals by other brands

minkaAire
minkaAire Mesa F566 instruction manual

VIRTUAL ON
VIRTUAL ON VO-Z4 user manual

QUNNENG OPTOELECTRONIC TECHNOLOGY
QUNNENG OPTOELECTRONIC TECHNOLOGY QCF-DB52061 installation guide

Craftmade
Craftmade VS60OB5 installation guide

Beurer
Beurer LV 50 Fresh Breeze Instructions for use

Maico
Maico ALD 10 Mounting instructions