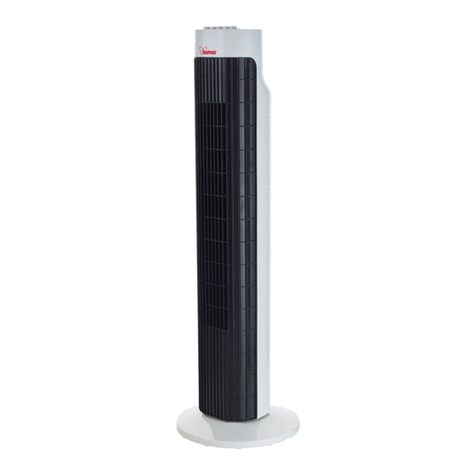
Bimar T42902 User manual

1/28
LIBRETTO ISTRUZIONI
NOTICE D'INSTRUCTIONS
INSTRUCTION BOOKLET
BEDIENUNGSANLEITUNG
FOLLETO DE INSTRUCCIONES
VENTILATORE A COLONNA
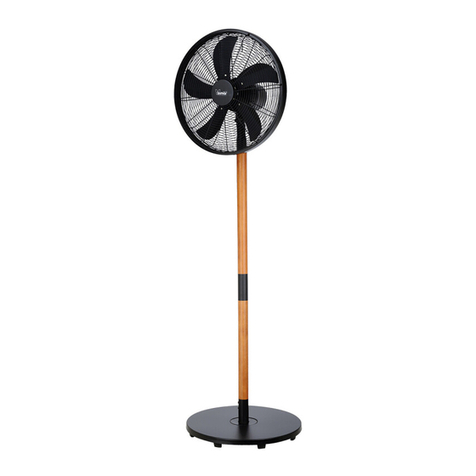
TOWER FAN
STANDVENTILATOR
VENTILATEUR SUR PIED
VENTILADOR DE COLUMNA
type VC117 (mod. T42902)
Questosimboloviinvitaaleggereattentamentequesteistruzioniprimadell’uso
dell’apparecchio,edeventualmenteinformareterzi,senecessario.Conservareil

2/28
librettoperulterioriconsultazionieperl’interaduratadivitadell’apparecchio.Se
nellaletturadiquesteistruzionid’usoalcunepartirisultasserodifficilinella
comprensioneosesorgesserodubbi,primadiutilizzareilprodottocontattare
l’aziendaall’indirizzoscrittoinultimapagina.
QuestosimboloindicalaclasseIIisolamentoelettrico,percuilaspinadelcordone
èprivadelpoloperlamessaaterra.
AVVERTENZEGENERALI
•Questoapparecchioèdestinatosoloall’impiegodomestico,perlaventilazionediambienti
interni:nonutilizzateloperaltroscopo.Ognialtrousoèdaconsiderarsiimproprioepericoloso.
Il costruttore non potrà essere ritenuto responsabile di eventuali danni derivanti da uso
improprio,erroneoeirresponsabilee/odariparazionieffettuatedapersonalenonqualificato.
Esempi di apparecchi per ambiente domestico sono apparecchi per tipiche funzioni
domestiche, usati in ambito domestico, che possono essere utilizzati per tipiche funzioni
domesticheanchedapersonenonesperte:
-innegozi,ufficiealtriluoghidilavorosimilari;
-inaziendeagricoleosimilari;
-daclientidialberghi,motelealtriambientiditiporesidenziale;
-inambientideltipobedandbreakfast.
•Noninfilarealcunutensileoleditafralemagliedellagrigliadiprotezionedellaventola.
•Nonutilizzarel’apparecchiocontemperaturaambientesuperiorea40°C.
•L’apparecchiopuòessereutilizzatodabambinidietànoninferiorea8anniedapersonecon
ridottecapacitàfisiche,sensorialiomentali,oprivediesperienzaodellanecessariaconoscenza,
purchèsottosorveglianzaoppuredopochelestesseabbianoricevutoistruzionirelativeall’uso
sicurodell’apparecchioeallacomprensionedeipericoliadessoinerenti.Ibambininondevono
giocare con l’apparecchio. La pulizia e la manutenzione destinata ad essere effettuata
dall’utilizzatorenondeveessereeffettuatadabambinisenzasorveglianza.
•Questoapparecchiopuòessereutilizzatodabambinidagli8anniinsuedapersone
con ridotte capacità fisiche, sensoriali o mentali o con mancanza di esperienza o
conoscenza se a loro è stata assicurata un’adeguata sorveglianza oppure se hanno
ricevuto istruzioni circa l’uso in sicurezza dell’apparecchio e hanno compreso i
pericolicorrelati.Ibambininondevonogiocareconl’apparecchio.Leoperazionidi
puliziaedimanutenzionenondevonoessereeffettuatedabambiniamenochenon
abbianopiùdi8anniesianosorvegliati.
•L’apparecchiodeveesseremantenutofuoridallaportatadibambini.

3/28
•Attenzione:quandosiutilizzanoapparecchielettrici,occorresemprerispettareleprecauzionidi
sicurezzadibaseperevitareirischidiincendio,discosseelettricheedilesionifisiche.
•Scollegaresemprel’apparecchiodallapresadicorrenteprimadiassemblare,smontareeprima
dipulirel’apparecchio.
•Nonusarel’apparecchiosenonfunzionacorrettamenteosesembradanneggiato;incasodi
dubbiorivolgersiapersonaleprofessionalmentequalificato.
•Assicurarsichelaventolafunzionicorrettamente:nelcasocontrariospegnerel’apparecchioe
farlocontrollaredapersonaleprofessionalmentequalificato.
•Nonspostarel’apparecchioduranteilfunzionamento.
•Scollegaresemprel’apparecchiodallapresadicorrenteprimadiassemblare,smontareeprima
dipulirel’apparecchio.
•Sel’apparecchiononèinfunzionetoglierelaspinadallapresadicorrente.
•Nonlasciarel’apparecchioespostoagliagentiatmosferici(sole,pioggia,ecc.).
•Nontoccarel’apparecchioconmaniopiedibagnati.
•Nontirareilcavoperspostarel’apparecchio.
•Nontirareilcavod’alimentazioneol’apparecchiostessoperdisinserirelaspinadallapresadi
corrente.
•Seilcavodialimentazioneèdanneggiato,essodevesostituitodalcostruttoreodalsuoservizio
assistenzatecnicaocomunquedaunapersonaconqualificasimilare,inmododaprevenire
ognirischio.
•Questoapparecchiononèdestinatoaesserefattofunzionarepermezzodiuntemporizzatore
esternooconunsistemadicomandoadistanzaseparato,perevitareilrischiodiincendionel
casol’apparecchiosiacopertoosiaposizionatoinmodononcorretto.
•In caso di guasto o cattivo funzionamento spegnere l’apparecchio e farlo controllare da
personaleprofessionalmentequalificato;leriparazionieffettuatedapersonalenonqualificato
possonoesserepericoloseefannodecaderelagaranzia.
INSTALLAZIONE
•Dopo aver tolto l’imballaggio, assicurarsi dell’integrità dell’apparecchio; in caso di dubbio non utilizzarlo
e rivolgersi a personale professionalmente qualificato. Gli elementi d’imballaggio (sacchetti di plastica,
polistirolo espanso, chiodi, ecc.) non devono essere lasciati alla portata di mano di bambini in quanto
potenziali fonti di pericolo, ma vanno smaltiti secondo le norme vigenti negli appositi contenitori per la
raccolta differenziata.
•Prima di collegare l’apparecchio controllare che i valori di tensione riportati sulla targa dati corrispondano
a quelli della rete elettrica. In caso di incompatibilità tra la presa e la spina dell’apparecchio, far sostituire
la presa con altra di tipo adatto da personale professionalmente qualificato, il quale accerti che la sezione
dei cavi della presa sia idonea alla potenza assorbita dall’apparecchio. In generale è sconsigliato l’uso di
adattatori e/o prolunghe; se il loro uso si rendesse indispensabile, devono essere conformi alle vigenti
norme di sicurezza e la loro portata di corrente (ampères) non deve essere inferiore a quella massima
dell’apparecchio.

4/28
•La presa di corrente deve essere facilmente accessibile in modo da poter disinserire con facilità la spina in
caso di emergenza.
•Prima di ogni utilizzo verificare che l’apparecchio sia in buono stato, che il cordone elettrico non sia
danneggiato: in caso di dubbio rivolgersi a personale professionalmente qualificato.
•Posizionare l’apparecchio lontano da:
-fonti di calore (ad es. fiamme libere, fornello gas, ecc. )
-contenitori di liquidi (ad esempio, lavelli ecc.) per evitare schizzi d’acqua o che vi possa cadere
(distanza minima 2 metri)
-tessuti (tende, ecc.) o materiali volatili che possano ostruire la griglia di aspirazione; verificare che
anche la parte anteriore sia sgombra da materiali volatili ( polvere, ecc.).
•La superficie di appoggio deve essere stabile, non in pendenza (in quanto l’apparecchio potrebbe
ribaltarsi) e liscia. Non posizionare il ventilatore su mensole. Non appendere l’apparecchio al muro.
•Questo apparecchio non è destinato a essere fatto funzionare per mezzo di un temporizzatore esterno o con
un sistema di comando a distanza separato, per evitare il rischio di incendio nel caso l’apparecchio sia
coperto o sia posizionato in modo non corretto.
•Non allacciare l’apparecchio a sistemi di controllo termico o programmatore o timer o ad altro dispositivo
che possa accendere l’apparecchio automaticamente, evitando così rischi di danni a persone, animali o
cose.
•In caso di guasto o cattivo funzionamento spegnere l’apparecchio e farlo controllare da personale
professionalmente qualificato; le riparazioni effettuate da personale non qualificato possono essere
pericolose e fanno decadere la garanzia.
ASSEMBLAGGIO
Attenzione: prima di assemblare il ventilatore, assicurarsi che sia scollegato dalla presa di corrente.
Attenzione: utilizzare il ventilatore solo con la base correttamente assemblata.
Per l’assemblaggio si prenda come riferimento le figure:
posizionare sul corpo per primo il guscio anteriore (D), poi
quello posteriore (C) e bloccarli con gli appositi ganci,
assicurare il bloccaggio con le 2 viti (B1, type #8x3/8”) e le 4
viti (B2, type M5x1/2”) in dotazione. Inserire attraverso la guida
(A) del guscio posteriore il cordone elettrico.
Al termine dell’operato, verificare che i due gusci siano
saldamente assemblati correttamente sul corpo motore.

5/28
Pannello comandi
Telecomando
1. Pulsante On/off
2. Pulsante velocità
3. Pulsante funzione ionizzante
4. Pulsante oscillazione
5. Pulsante timer
1. Pulsante On/off
2. Pulsante velocità
3. Pulsante funzione ionizzante
4. Pulsante oscillazione
5. Pulsante timer
USO
Prima di ogni utilizzo verificare che l’apparecchio sia in buono stato, che il cordone elettrico non sia
danneggiato: se il cavo di alimentazione è danneggiato, esso deve sostituito dal costruttore o dal suo
servizio assistenza tecnica o comunque da una persona con qualifica similare, in modo da prevenire ogni
rischio.
Il telecomando deve essere puntato in direzione del display, e prima ancora inserirvi le
batterie (aprire lo sportello posteriore e inserire 2 batterie tipo “AAA” (non incluse)
rispettando la polarità; richiudere lo sportello). Raccomandiamo di sostituire
contemporaneamente tutte le batterie. Non mischiare batterie già utilizzate e batterie
nuove. Per lunghi periodi di inattività del telecomando togliere le batterie.
Inserire la spina nella presa di corrente.
Ventilazione:
1) Per accendere il ventilatore, premere il tasto “ ” (1) del pannello comandi o del telecomando.
2) Per selezionare la velocità desiderata, premere ripetutamente il tasto “ ” (2): sul pannello comandi
o sul telecomando (minima, media o massima), sul display si illuminerà la spia corrispondente alla
velocità selezionata:
1= velocità minima 2= Velocità media 3= Velocità massima
Timer: questa funzione consente di impostare il tempo di funzionamento, al termine del quale
l’apparecchio si arresta automaticamente.
Per impostare il tempo di funzionamento, premere ripetutamente il tasto “ ” (5) del telecomando o del
pannello comandi: ad ogni pressione del tasto varia il tempo impostato, e sul display si illumina la spia
corrispondente al tempo selezionato (0,5 ora- 1 ora – 1,5 ore-2 ore, ecc….): il tempo massimo è di 7 ore.
Per disattivare il timer, impostare il tempo massimo, quindi premere nuovamente il tasto e le
corrispondenti spie si spegneranno.
Funzione ionizzante: produce un flusso di ioni negativi che neutralizzano ioni positivi presenti l’aria,
questa funzione è attiva ogni volta che si preme il pulsante (3) dalla pulsantiera o dal telecomando, sul
display si illuminerà la spia corrispondente.
Oscillazione orizzontale (destra-sinistra): si ottiene premendo l’apposito tasto “ ”del telecomando o
della pulsantiera; sul display si illuminerà la spia corrispondente. Per eliminare il movimento premere
nuovamente il tasto (4).

6/28
La griglia uscita aria è corredata di un deflettore che permette di dirigire l’aria in alto o basso.
Per spegnere il ventilatore, premere il tasto “ ” presente sul telecomando o sul pannello comandi, poi
disinserire la spina dalla presa di corrente.
Per lunghi periodi di inattività, togliere la spina dalla presa di corrente.
PULIZIA E MANUTENZIONE
Attenzione: prima di eseguire le normali operazioni di pulizia, togliere la spina dalla presa di corrente.
•Per la pulizia utilizzare un panno morbido, leggermente inumidito; non utilizzare prodotti abrasivi o
corrosivi.
•Non immergere nessuna parte del ventilatore in acqua o altro liquido: nel caso dovesse succedere non
immergere la mano nel liquido ma per prima cosa togliere la spina dalla presa di corrente. Asciugare
con cura l’apparecchio e verificare che tutte le parti elettriche siano asciutte: in caso di dubbio
rivolgersi a personale professionalmente qualificato.
•E’ indispensabile mantenere i fori di aerazione del motore liberi da polvere e lanugine.
•Per periodi lunghi di inutilizzo, è necessario stivare il ventilatore al riparo da polvere e umidità;
consigliamo di utilizzare l’imballo originale.
•Se si decide di non utilizzare più l’apparecchio, si raccomanda di renderlo inoperante tagliando il cavo
di alimentazione (prima assicurarsi d’aver tolto la spina dalla presa di corrente), e di rendere innocue
quelle parti che sono pericolose qualora utilizzate per gioco dai bambini.
Avvertenze per il corretto smaltimento del prodotto ai sensi della Direttiva
Europea direttiva 2011/65/UE.
Alla fine della sua vita utile il prodotto non deve esser smaltito insieme ai rifiuti
urbani. Può essere consegnato presso gli appositi centri di raccolta differenziata
predisposti dalle amministrazioni comunali, oppure presso i rivenditori che
forniscono questo servizio. Smaltire separatamente un elettrodomestico consente di
evitare possibili conseguenze negative per l’ambiente e per la salute derivanti da un
suo smaltimento inadeguato e permette di recuperare i materiali di cui è composto
al fine di ottenere un importante risparmio di energia e di risorse. Per rimarcare
l’obbligo di smaltire separatamente gli elettrodomestici, sul prodotto è riportato il
marchio del contenitore di spazzatura mobile barrato. Lo smaltimento abusivo del
prodotto da parte dell’utente comporta l’applicazione delle sanzioni amministrative
previste dalla normativa vigente.
Pleasereadtheseinstructionscarefullybeforeusingtheappliance,andinstructother
personsusingit,too,whennecessary.KeepbookletHandyforfurtheruse.
Ifwhenreadingthisinstructionsmanualcertainpartsshouldremaindifficultto
understand,orifthereisanyconfusion,contactthecompanyindicatedonthelast
pagebeforeusingtheproduct.
Attention:instructionsandgeneralnoticesforsafetyuse.

7/28
Thissymbolshow:theapplianceisclassIIequipment,forwhichthepowercord
plugiswithoutofthepoletotheground.
GENERALNOTICES
•Thisdeviceisintendedforhomeuseonly,toventilaterooms,andinthemannerdescribedin
this manual: do not use it for any other purpose. Any other use is to be considered
inappropriateandthereforedangerous.Themanufacturercannotbeheldresponsiblefor
eventualdamagecausedbyinappropriate,improperorirresponsibleuseand/orforrepairs
madetotheproductbyunauthorisedpersonnel.
Thisapplianceisintendedtobeusedinhouseholdandsimilarapplicationssuchas:
-staffkitcheninshops,officesandotherworkingenvironments;
-farmhouses
-byclientsinhotels,motelsandotherresidentialtypeenvironments
-bedandbreakfasttypeenvironments
•Donotinsertanytool,oryourfingers,intothegrilleprotectingtheblades.
•Donotusethedeviceatroomtemperaturesabove40°C.
•Thisappliancecanbeusedbychildrenagedfrom8yearsandaboveandpersonswith
reducedphysical,sensoryormentalcapabilitiesorlackofexperienceandknowledgeifthey
havebeengivensupervisionorinstructionconcerninguseoftheapplianceinasafewayand
iftheyunderstandthehazardsinvolved.Childrenshallnotplaywiththeappliance.Cleaning
andusermaintenanceshallnotbemadebychildrenwithoutsupervision.
•Theappliancemustbekeptoutofchildren’sreach.
•This appliance can be used by children aged 8 and older and by persons with
reduced physical, sensory or mental capabilities or lack of experience and
knowledge if they are properly supervised or if they have received instructions
regarding the safe use of the appliance and have understood the related dangers.
Childrenshouldnotplaywiththeappliance.Cleaningandmaintenanceshouldnot
be performed by childrenunless they are older than 8 years of ageand are
supervised.
•Attention: when using electric appliances, the basic safety precautions must always be
observedtoavoidrisksoffire,electricshocksandphysicalinjury.
•Donotusetheapplianceifitisnotoperatingcorrectlyorseemsdamaged;ifindoubt,contact
professionallyqualifiedpersonnel.
•Alwaysunplugtheappliancebeforeyouassemble,disassembleorcleantheappliance.
•Donotusetheapplianceifitisnotoperatingcorrectlyorseemsdamaged;ifindoubt,contact
professionallyqualifiedpersonnel.

8/28
•Makesurethattheapplianceisworkingcorrectly:ifnot,turntheapplianceoffandhaveit
checkedbyprofessionallyqualifiedpersonnel.
•Donotmovetheappliancewhenitisoperating.
•Unplugtheappliancewhennotinuse.
•Donotleavethedeviceexposedtotheweather(sun,rain,etc.).
•Donottouchtheappliancewithwethandsorfeet.
•Donotpullonthecordtomovetheappliance.
•Donotpullonthecordtodisconnecttheplugfromthesocket.
•Ifthesupplycordisdamaged,itmustbereplacedbythemanufactuer,itsserviceagentor
similarlyqualifiedpersonsinordertoavoidahazard.
•Donotusetheappliancewithatimeroraprogrammerorwithasystemthatcanswitch
ontheapplianceautomatically,toavoidriskoffire,sinceafireriskexistsiftheapplianceis
coveredorpositionedincorrectly.
•Iftheappliancebreaksdownorthereisamalfunction,switchofftheapplianceandhaveit
checkedbyqualifiedpersonnel;repairs carriedoutbyunauthorisedpersonnelmaybe
dangerousandinvalidatetheguarantee.
INSTALLATION
•After removing the packing materials, check the integrity of the heater; if you are unsure, do not use it
and ask for qualified professional help. The packing materials (plastic bags, polystyrene foam, nails,
etc.) must be kept out the reach of children because they are potential sources of danger.
•Before connecting the appliance, check that the voltage values shown on the data plate correspond to
those of the electricity supply network. In the event of incompatibility between the electric outlet and
the plug of the heater, have the outlet replaced with another more suitable type by professionally
qualified personnel, who will make sure that the section of the wires of the outlet is appropriate for the
absorbed power of the heater. In general, the use of adapters or extension cords is not recommended; if
their use is indispensable, they must conform to existing safety standards and their current capacity
(amperes) must not be less that the maximum of the appliance.
•The power socket must be easy to reach so the plug can be removed quickly in case of emergency.
•Beforeeach use, checkthattheequipmentis in goodcondition, and thatthepower cable isnotdamaged: if in
doubtconsult a qualifiedprofessional.
•Place theappliancefarfrom
-Heat sources (e.g.flames, gas stoves etc.)
-container of liquids (e.g.sinks etc) to avoid any spray or the appliance falling into it (minimum
distance of 2 meters)
-fabrics (curtains, etc.) or unstable materials that could obstruct the air intake grille; make sure
that the front is free of unstable materials (dust, etc.).
•The surface on which the appliance is placed must be stable, level (otherwise the unit may fall over)
and smooth. Do not place the fan on shelves. Do not hang the unit on the wall.
•This appliance is not intended to be operated by means of an external timer or a separate remote control
system, to avoid the risk of fire in case the device is covered or is positioned incorrectly.
•Do not connect to thermal control systems or a programmer or timer or other device that can
automatically turn on the unit, thus avoiding the risk of damage to people, animals or property.
•In the event of a breakdown or poor operation, turn the appliance off and have it checked by
professionally qualified personnel; repairs carried out by unauthorised personnel may be dangerous and
invalidate the guarantee.
ASSEMBLY
9/28
Attention: always unplug the appliance before you assemble to the fan.
Attention: the fan can only be used if complete with the support base.
For assembly refer to the diagrams: first place the front shell (D) on the body, then
the rear shell (C) and secure them with the hooks provided. Use the 2 screws (B1,
type #8x3/8”) and the 4 screws (B2, type M5x1/2”) provided. Insert the electrical
cable through the guide (A) in the rear shell.
After this has been done, check that the two shells are firmly and correctly
assembled.
Control panel
Remote control
1. On/off button
2. Speed button
3. Ionising function button
4. Swing functionbutton
5. Timerbutton
1. On/off button
2. Speed button
3. Ionising function button
4. Swing functionbutton
5. Timerbutton
USE
Before each use, verify that the unit is in good condition, the electric cord is not damaged, if the power
cord is damaged, it must be replaced by the manufacturer or a competent qualified electrician or a person
with similar qualifications, in order to avoid any risk.
The remote must be pointed at the display. Before using it, insert the batteries (open the
rear flap and insert 2 "AAA" batteries (not included) with correct polarity; close the
flap). Replacing all batteries at the same time is recommended. Do not mix used
batteries with new batteries. Should the remote control not be used for long periods of
time remove the batteries.
Plug the fan into the power outlet.
Running the fan:
1) To turn the fan on, press the “ ” (1) button on the control panel or the remote control.
2) In order to select the desired speed, press the “ ” (2) repeatedly on the control panel or the remote
control (minimum, medium or maximum), an indicator will light on the display corresponding to the
speed selected

10/28
“1”= minimum speed “2”= medium speed “3”= maximum speed
Timer: This function allows you to set the time of operation, after which the unit will stop automatically.
To set the operating time, press the “ ” (5) button on the remote or the control panel repeatedly: each
press of the button changes the time set, and the selected time will light on the display (0,5 hour - 1 hour –
1,5 hours-2 hours, etc…): the maximum operating time is 7 hours. To disable the timer, set the maximum
time, then press the button again and the corresponding indicator lights will turn off.
Ionising function: produces a flow of negative ions, which neutralise positive ions present in the air; this
function is activated every time you press button (3) on the keypad or remote control.
Horizontal swing (right-left) this is done by pressing the button “ ”on the remote control of the
keypad. To stop the movement, press button (4) once again.
The air outlet grill is equipped with a deflector which allows to direct the air up or down.
To turn the fan off press the “ ” button on the remote control or the control panel, then unplug the plug
from the mains.
If the appliance is not being used for long periods of time, remove the plug from the plug point.
CLEANING AND MAINTENANCE
Attention: before normal cleaning, remove the plug from the socket.
•Clean the body with soft, slightly damp, cloth; do not use abrasive or corrosive products.
•Do not immerse any part of the fan in water or other liquid: if this should happen, do not put your hand
in the liquid, but first remove the plug from the socket. Carefully dry the appliance and make sure that
all the electrical parts are dry: in the case of doubt, ask for professionally qualified help.
•It is essential that the motor's air holes be kept from dust and lint.
•If the fan will not be used for long periods, it must be protected from dust and humidity; we
recommend storing it in its original packaging.
•Should you decide not to use the appliance any more, we recommend making it inoperative by cutting
the power cord (after making sure you have disconnected the plug from the socket) and make
dangerous parts harmless if children are allowed to play with them.
IMPO TANT INFO MATION FO CO ECT DISPOSAL OF THE P ODUCT IN
ACCO DANCE WITH EC DI ECTIVE 2011/65/EC.
At the end of its orking life, the product must not be disposed of as urban aste.
It must be taken to a special local authority differentiated aste collection centre or
to a dealer providing this service. Disposing of a household appliance separately
avoids possible negative consequences for the environment and health deriving
from inappropriate disposal and enables the constituent materials to be recovered
to obtain significant savings in energy and resources. As a reminder of the need to
dispose of household appliances separately, the product is marked ith a crossed-
out heeled dustbin.

11/28
Nousvousprionsdelireattentivementcesinstructionsavantd’utiliserl'a
ppareiletdeles
divulgueràtouteslespersonnesquipourraientenavoirbesoin.Gardez-lezaporteede
main.Siàlalecturedecemanueld'instructioncertainespartiesétaientdifficileà
comprendreousivousaviezdesdoutes,veuillezcontacterlasociétéàl'adresse
indiquéeavantd'utiliserleproduit.
Attention:instructionsetlesavertissementspourune
utilisationsûre.
Cesymboleindiquequel’appareilestdelaclasseII,pourquilecordond'alimentation
estdépourvuedepôleàlaterre.
AVERTISSEMENTSGÉNÉRAUX
•
Cetappareilestexclusivementdestinéàl’emploidomestiquepourlaventilationdesespaces
intérieurs : ne l’utilisez pour aucune autre fin. Tout autre usage est considéré comme
inopportun et donc dangereux. Le constructeur décline toute responsabilité pour les
détériorations dues à une utilisation inappropriée, incorrecte ou non conforme au mode
d’emploiet/oupourdesréparationseffectuéespardupersonnelnonqualifié.
Cetappareilestdestinéàêtreutilisédansdesapplicationsdomestiquesetanaloguestellesque:
-
les coins cuisines réservés au personnel des magasins, bureaux et autres environnements
professionnels;
-
lesfermes;
-
l’utilisationparlesclientsdeshôtels,motelsetautresenvironnementsàcaractèrerésidentiel;
-
lesenvironnementsdetypechambresd’hôtes.
•
N’introduisezaucunoutilnivosdoigtsentrelesmaillesdelagrilledeprotectiondel’hélice.
•
N’utilisezpasl’appareilàunetempératureambiantesupérieureà40°C.
•
Ceproduit nepeutêtreutilisépardesenfantsdemoinsde8ansetdespersonnespossédant
des capacités physiques, sensorielles ou mentales réduites ou sans expérience ni
connaissances suffisantes,àmoinsqu’ellesnesetrouventsouslasurveillancedequelqu’un
ouqu’ellesaientreçu lesinstructions nécessairesrelativesàl’utilisationentoutesécurité de
l’appareiletàleurcompréhension.Lesenfantsnedoiventenaucuncasjoueravecl’appareil.
Lenettoyageetl’entretienàlachargedel’utilisateurnedoiventpasêtreeffectuéspardes
enfantssanssurveillance.
•
Cetappareilpeutêtreutilisépardesenfantsde8ansetplusetpardespersonnesavec
des capacités physiques, sensorielles ou mentales réduites ou avec un manque
d’expérienceoudeconnaissancesiunesurveillancedecespersonnesaétémiseen
place ou s’ils ont reçu des instructions au sujet de l’utilisation en toute sécurité de

12/28
l’appareilets’ilsontcomprislesrisquesliés.Lesenfantsnedoiventpasjoueravec
l’appareil.Lesopérationsdenettoyageetd’entretiennedoiventpasêtrefaitespardes
enfantsàmoinsqu’ilsaientplusde8ansetqu’ilssoientsurveillés.
•
Tenirhorsdelaportéedesenfants.
•
Attention:lorsdel’emploid’appareilsélectriques, lesconsignesdesécuritédebasedoivent
toujoursêtrerespectéesafind’évitertoutrisqued’incendie,d’électrocutionoudeblessure.
•
Débrancheztoujoursl’appareildelaprisedecourantavantd’assembler,dedémonteroude
nettoyerl’appareil.
•
N'utilisezpasl’appareils’ilnefonctionnepascorrectementous’ilsembleendommagé;en
casdedoute,adressez-vousàuntechnicienspécialisé.
•
Assurez-vousquel’hélicefonctionnecorrectement:danslecascontraire,éteignezl’appareil
etfaîtes-lecontrôlerparuntechnicienspécialisé.
•
Nedéplacezpasl’appareildurantlefonctionnement.
•
Débrancheztoujoursl’appareildelaprisedecourantavantd’assembler,dedémonteroude
nettoyerl’appareil.
•
Retireztoujourslafichedelaprisedecourantlorsquel’appareilnefonctionnepas.
•
N’exposezpasl’appareilauxagentsatmosphériques(soleil,pluie.etc.).
•
Netouchezpasl’appareilaveclesmainsetlespiedsmouillés.
•
Netirezpassurlecâblepourdéplacerl’appareil.
•
Netirezpassurlecâbled’alimentationousurl’appareilpourdébrancherlafichedelaprisede
courant.
•
Silecâbleestendommagé,ildoitêtreobligatoirementremplacépar leconstructeurouson
serviced’assistancetechnique,oubienparunepersonnequalifiée,defaçonàprévenirtout
éventuelrisque.
INSTALLATION
•Après avoir enlevé l’emballage, assurez-vous de l’intégrité de l’appareil ; en cas de doute, ne
l’utilisez pas et adressez-vous à un personnel professionnellement qualifié. Ne laissez pas les
éléments d’emballage (sachets en plastique, polystyrène expansé, clous, etc...) à la portée de main des
enfants car ils constituent des sources de danger potentielles, mais éliminez-les conformément aux
normes en vigueur dans les conteneurs spéciaux de tri sélectif.
•Avant de brancher l'appareil, vérifiez que la tension du réseau corresponde bien à celle indiquée sur
la plaque signalétique de l'appareil. En cas d'incompatibilité entre la prise et la fiche de l'appareil,
faites remplacer la prise avec une autre de type approprié par des techniciens professionnellement
qualifiés qui devront s'assurer que la section des câbles de la prise corresponde à la puissance
absorbée par l’appareil. En général, l'utilisation d'adaptateurs ou de rallonges est déconseillée ;
cependant, s'il s'avère indispensable d'en utiliser, ils doivent être conformes aux normes de sécurité en
vigueur et leur débit de courant (ampères) ne doit être inférieur au débit maximum de l'appareil.
•La prise de courant doit être facile d’accès afin de pouvoir débrancher facilement l’appareil en cas
d'urgence.
•Avant chaque utilisation, vérifiez si l’appareil est en bon état, si le cordon électrique n’est pas
endommagé : en cas de doute, il faut s’adresser au personnel professionnellement qualifié.
•Eloignez l’appareil des :

13/28
-
sources de chaleur (par ex. flammes libres, gazinières, etc.)
-
conteneurs de liquides (par ex. éviers, etc.) pour éviter les éclaboussures d'eau et que celui-ci ne
tombe à l’intérieur (distance de 2 mètres minimum)
-
tissus (rideaux, etc.) ou des matières volatiles susceptibles d’obstruer la grille d’aspiration ;
vérifiez aussi que la partie avant ne soit pas obstruée de matières volatiles (poussières, etc.).
•La surface d’appui doit être stable, horizontale (car l’appareil pourrait basculer) et lisse. Ne placez pas
l’appareil sur des étagères. N’accrochez pas l’appareil au mur.
•N’utilisez pas l’appareil avec une minuterie externe ou un système de commande à distance, afin
d’éviter tout risque d'incendie si l’appareil est couvert ou situé en position non appropriée.
•Ne branchez pas l’appareil à des systèmes de contrôle thermique , à un programmateur, une minuterie
ou tout autre dispositif susceptible de mettre l'appareil en marche automatiquement, afin d’éviter tout
risque envers les personnes, animaux et objets.
•En cas de panne ou de mauvais fonctionnement, éteignez l’appareil et faites-le contrôler par un
personnel professionnellement qualifié ; les réparations effectuées par un personnel incompétent
peuvent être dangereuses et entraîner l’annulation de la garantie.
MONTAGE
Le ventilateur ne peut être utilisé qu'avec sa base de support. Pour le montage, se référer à la figure
montage: visser tout d'abord l'habillage avant puis celui arrière, introduire à travers le guide le cordon
d'alimentation électrique; assurer le blocage avec les vis fournies.
Pour l’assemblage, on prend comme référence les figures :
placer tout d’abord sur le corps la coquille antérieure (D), puis
celle postérieure (C) et les bloquer à l’aide des crochets spéciaux
puis assurer le blocage à l’aide des 2 vis (B1, type #8x3/8”) et
des 4 vis (B2, type M5x1/2”) fournies. Insérer à travers le guide
(A) de la coquille arrière le cordon électrique. A la fin de
l’opération, vérifier que les deux coquilles soient bien
assemblées sur le corps du moteur.

14/28
Tableau de commande
Télécommande
1. Bouton On/off
2. Bouton Vitesse
3. Bouton fonction ionisante
4. Bouton oscillation
5. Bouton minuterie
1. Bouton On/off
2. Bouton Vitesse
3. Bouton fonction ionisante
4. Bouton oscillation
5. Bouton minuterie
UTILISATION
Les fonctions du ventilateur peuvent être actionnées soit à travers les boutons-poussoirs situés sur le
tableau de commande, soit à l’aide de la télécommande.
La télécommande doit être dirigée en direction de l’écran et au préalable, insérer les
piles (ouvrir la porte arrière et insérer 2 piles de type «AAA» (pas icnlues) en respectant
les pôles puis refermer la porte). Nous vous conseillons de remplacer en même temps
toutes les piles. Ne pas mélanger des piles déjà utilisées et des piles neuves. Pendant de
longues périodes d’inactivité de la télécommande, retirer les piles.
Introduire la fiche dans la prise de courant.
Ventilation :
1)
Pour allumer le ventilateur, appuyer sur la touche “ON/OFF” de la télécommande ou du tableau de
commande.
2)
Pour sélectionner la vitesse souhaitée, appuyer à plusieurs reprises sur la touche “SPEED" (2) :
sur le tableau de commande ou sur la télécommande (minimum, moyenne ou maximum), le voyant
correspondant à la vitesse sélectionnée s'allumera sur l'afficheur :
1= Vitesse minimum 2 = Vitesse moyenne 3= Vitesse maximum
Oscillation horizontale (droite-gauche): appuyer sur la touche “OSC” de la télécommande ou du tableau
à poussoirs. Pour supprimer le mouvement, appuyer à nouveau sur la touche “OSC”.
Minuterie: cette fonction permet de configurer le temps de fonctionnement au terme duquel l'appareil
s'arrête automatiquement.
•
Pour définir le temps de fonctionnement, appuyer à plusieurs reprises sur la touche “TIMER” de la
télécommande ou du tableau de commande. À chaque pression de la touche, le temps programmé varie
et le témoin lumineux correspondant au temps sélectionné s'allume sur le tableau de commande (0,5
heure - 1 heure – 1,5 heures - 2 heures, ….. ) : le temps maximum est de 7 heures. Pour désactiver la
minuterie, régler le temps macimum donc appuyer à nouveau sur la touche et les témoins lumineux
correspondants s’éteindront.

15/28
Fonction ionisante : elle produit un flux d'ions négatifs qui neutralisent les ions positifs présents dans
l’air, pour l'obtenir, cette fonction est active chaque fois qu’on appuye sur la touche (3) sur le panneau de
commandes ou sur la télécommande
Oscillation horizontale (droite-gauche) : on l’obtient en appuyant sur la touche spéciale de la
télécommande ou du panneau de commandes. Pour supprimer le mouvement appuyer à nouveau sur la
touche (4).
La grille de sortie d’air est lié à un déflecteur qui permet de diriger l’air en haut ou en bas.
Poue éteindre le ventilateur appuyer sur la touche présente sur la télécommande ou sur le panneau de
commandes puis débrancher la fiche de la prise de courant.
En cas d'inutilisation prolongée, débrancher la fiche de la prise de courant.
NETTOYAGE ET ENTRETIEN
Attention: avant d'exécuter les opérations de nettoyage ordinaires, débrancher la fiche de la prise de
courant.
•
Pour le nettoyage, utiliser un chiffon doux, légèrement humide ; éviter les produits abrasifs ou
corrosifs.
•
Ne plonger aucune partie du ventilateur dans l'eau ou dans un autre liquide ; si cela devait arriver, ne
pas plonger la main dans le liquide, mais débrancher avant toute chose la fiche de la prise de courant.
Sécher l'appareil avec soin et vérifier que toutes les parties électriques sont sèches: en cas de doute,
s'adresser à un personnel professionnel qualifié.
•
Il est indispensable de maintenir les trous d'aération du moteur dégagés de toute présence de poussière
et de particules textiles.
•
En cas de longues périodes d'inutilisation, ranger le ventilateur à l'abri de la poussière et de l'humidité ;
nous recommandons d'utiliser son emballage original.
•
Si l'on décide de ne plus utiliser l'appareil, il est recommandé de le rendre inopérant en coupant le câble
d'alimentation (s'assurer au préalable d'avoir débranché la fiche de la prise de courant) et de rendre
inoffensives les parties qui sont dangereuses si des enfants devaient s'en servir pour jouer.
AVE TISSEMENTS POU L'ÉLIMINATION CO ECTE DU P ODUIT AUX
TE MES DE LA DI ECTIVE EU OPÉENNE 2011/65/UE.
Au terme de son utilisation, le produit ne doit pas être éliminé avec les déchets
urbains. Le produit doit être remis à l'un des centres de collecte sélective prévus
par l'administration communale ou auprès des revendeurs assurant ce service.
Éliminer séparément un appareil électroménager permet d'éviter les retombées
négatives pour l'environnement et la santé dérivant d'une élimination incorrecte, et
permet de récupérer les matériaux qui le composent dans le but d'une économie
importante en termes d'énergie et de ressources.Pour rappeler l'obligation
d'éliminer séparément les appareils électroménagers, le produit porte le symbole
d'un caisson à ordures barré.

16/28
BittelesenSievorderBenutzungdesGerätessorgfältigdieseAnleitungenund
setzenSiegegebenenfallsDrittedarüberinKenntnis.Gebrauchsanleitungzum
weitrennachschlagennachscklagenaufbewahren.
SolltenwährenddesLesensdieserBedienungsanleitungFragenaufkommen
oderirgendwelcheStellenschwerverständlichsein,dannkontaktierenSievor
demGebrauchdesGerätsdenHerstellerunterderAdresse,dieaufderletzten
Seiteangegebenist.
Achtung:AnweisungenundWarnhinweisefüreinesichereAnwendung.
DiesesSymbolzeigtan,dassessichumeinGerätderKlasseIIhandelt,fürdieder
NetzsteckerfreivonderStangeaufdenBoden.
ALLGEMEINEHINWEISE
•DiesesGerätistausschließlichfürdenGebrauchimHaushaltzumBelüftenvonRäumen
bestimmt:VerwendenSieeszukeinemanderenZweck.JedeandereAnwendungwirdals
unsachgemäßunddeshalbgefährlichbetrachtet.DerHerstellerübernimmtkeineHaftungfür
eventuelle Schäden infolge von unsachgemäßer, falscher oder unverantwortlicher
Verwendungund/oderReparaturen,dienichtvonFachpersonaldurchgeführtwurden.
DasGerätsollindenHaushaltundähnlicheAnwendungenverwendetwerden,wie:
-PersonalkücheinGeschäften,BürosundanderenArbeitsumgebungen;
-Bauernhäuser
-VonKundeninHotels,MotelsundanderenWohntypUmgebungen
-ÜbernachtungmitFrühstückTypUmgebungen
•KeinesfallsWerkzeugeoderFingerdurchdasSchutzgitterdesFlügelradseinführen.

17/28
•VerwendenSiedasGerätnichtbeiUmgebungstemperaturenvonüber40°C.
•Kinder unter 8Jahren, Personen mit eingeschränkten körperlichen, sensorischen oder
geistigenFähigkeitensowiePersonenohneentsprechendeErfahrungoderKenntnissedürfen
dieses Gerät nur unter Aufsicht oder nach Erhalt aller Anweisungen für die sichere
VerwendungdesGerätessowieAuskunftüberdiedamitverbundenenGefahrenbenutzen.
Kindersolltenbeaufsichtigtwerden,umsicherzustellen,dasssienichtmitdemGerätspielen.
Vom Anwender durchzuführende Reinigungs- und Wartungsarbeiten dürfen nicht von
KindernohneAufsichtdurchgeführtwerden.
•Dieses Gerät kann von Kindern ab 8 Jahren und Personen mit eingeschränkten
körperlichen, sensorischen oder geistigen Fähigkeiten oder mangelnder Erfahrung
undWissenbenutztwerden,sofernsiedienotwendigeAufsichtoderAnweisungen
imHinblickaufdensicherenUmgangmitdemGeräterhalten,undwennsiesichder
möglichen Gefahren bewusst sind. Kinder dürfen nicht mit dem Gerät spielen. Die
Säuberung und Wartung darf nicht von Kindern durchgeführt werden,außer wenn
sieüber8Jahrealtsindunddabeibeaufsichtigtwerden.
•BewahrenSiedasGerätaußerhalbderReichweitevonKindernauf.
•Achtung: Beim Umgang mit Elektrogeräten immer die grundsätzlichen
Sicherheitsmaßnahmenbeachten.DamitvermeidenSieBrandgefahrsowiedieGefahrvon
StromschlägenundKörperverletzungen.
•Trennen Sie das Gerät immer erst von der Steckdose, bevor Sie es auseinander- oder
zusammenbauenoderreinigen.
•BenutzenSiedasGerätnicht,wennesnichteinwandfreifunktioniertoderbeschädigtzusein
scheint.ImZweifelsfallwendenSiesichaneineFachkraft.
•Vergewissern Sie sich, dass das Flügelrad korrekt funktioniert: Sollte dem nicht so sein,
schaltenSiedasGerätab,undlassenSieesdurchentsprechendqualifiziertesFachpersonal
überprüfen.
•VerrückenSiedasGerätnichtwährenddesBetriebs.
•Trennen Sie das Gerät immer erst von der Steckdose, bevor Sie es auseinander- oder
zusammenbauenoderreinigen.
•WenndasGerätnichtinBetriebist,ziehenSiedenSteckerausderSteckdose.
•SetzenSiedasGerätnichtderWitterung(direkteSonneneinstrahlung,Regenusw.)aus.
•BerührenSiedasGerätniemalsmitnassenoderfeuchtenHändenoderFüßen.
•ZiehenSienieamNetzkabel,umdasGerätzuverrücken.

18/28
•ZiehenSienichtamKabel,umdenNetzsteckerausderSteckdosezuziehen.
•EinsbeschädigtesNetzkabelmussvomHersteller,seinemKundendienstodervoneinem
entsprechend qualifizierten Fachmann ausgewechselt werden, damit jegliche Risiken
ausgeschlossenwerdenkönnen.
INSTALLATION
•Prüfen Sie nach dem Auspacken, dass das Gerät unversehrt ist; benutzen Sie das Gerät im Zweifelsfall
auf keinen Fall und wenden Sie sich an entsprechend qualifiziertes Fachpersonal. Das
Verpackungsmaterial (Kunststoffbeutel, Polystyrolschaum usw.) darf nicht in die Reichweite von
Kindern gelangen, da es eine Gefahrenquelle darstellt, und es und muss gemäß den geltenden
Bestimmungen in den entsprechenden Behältern für die getrennte Abfallentsorgung entsorgt werden.
•Bevor Sie das Gerät an die Steckdose anschließen, kontrollieren Sie, dass die auf dem Typenschild
angegebenen Werte mit denen der Stromversorgung übereinstimmen. Sollten der Stecker des Gerätes und
die vorhandene Steckdose nicht kompatibel sein, lassen Sie die Steckdose von entsprechend
qualifiziertem Fachpersonal austauschen. Dieses muss sicherstellen, dass der Querschnitt der Kabel der
Steckdose für die Leistungsaufnahme des Gerätes geeignet ist. Im Allgemeinen wird von der Verwendung
von Verlängerungen und/oder Adaptern abgeraten. Falls ihre Verwendung jedoch unumgänglich ist, so
müssen diese den geltenden Sicherheitsvorschriften entsprechen und ihre Stromstärke (Ampere) darf
nicht niedriger sein, als die maximale Stromstärke des Gerätes.
•Die Steckdose muss leicht zugänglich sein, damit der Stecker im Bedarfsfall problemlos aus der
Steckdose gezogen werden kann.
•Prüfen Sie vor jeder Verwendung, dass sich das Gerät in einem guten Zustand befindet und dass das
Stromkabel nicht beschädigt ist: Wenden Sie sich im Zweifelsfall an entsprechend qualifiziertes Personal.
•Stellen Sie das Gerät fern von Folgendem auf:
-Hitzequelle (z. B. offene Flammen, Gasofen etc.)
-Flüssigkeitsbehältern (z. B. Waschbecken), um die Berührung mit Spritzwasser oder das Fallen des
Gerätes in Wasser zu vermeiden (Mindestabstand 2 Meter)
-Stoffen (Vorhänge usw.) oder fliegenden Materialien, die das Schutzgitter auf der Saugseite verdecken
könnten; vergewissern Sie sich auch, dass der vordere Teil sauber und unverstellt ist ist (ohne Staub
usw.).
•Stellen Sie das Gerät auf einer stabilen, waagerechten und glatten Fläche auf (das Gerät könnte sonst
umkippen). Stellen Sie den Ventilator nicht auf Konsolen. Montieren Sie das Gerät nicht an der Wand.
•Benutzen Sie das Gerät nicht mit einer Zeitschaltuhr oder einem sonstigen System zur Programmierung oder
Fernbedienung, um Brandgefahr zu vermeiden, falls das Gerät abgedeckt oder nicht ordnungsgemäß
positioniert ist.
•Schließen Sie das System nicht an thermische Steuersysteme, Programmiergeräte, Timer oder andere
Geräte oder Systeme an, die das Gerät automatisch starten können, um Verletzungen und Schäden an
Personen, Tieren und Sachen zu verhindern.
•Schalten Sie das Gerät bei einem Defekt oder einer Störung sofort ab und lassen Sie es von einer
Fachkraft kontrollieren; Reparaturen durch unqualifiziertes Personal können gefährlich sein und führen
zum Verfall der Garantie.
MONTAGE
Der Ventilator darf nur mit dem Standfuß verwendet werden. Halten Sie sich bei der Montage des Fußes
an die Anleitungen der Abbildung montage: schrauben Sie als erstes die hintere und danach die vordere
Schale an; führen Sie das Elektrokabel ein und sichern Sie den Fuß und sichern Sie den Fuß mit den
beiliegenden Schrauben.

19/28
Zum Zusammenbauen auf die Abbildungen Bezug nehmen.
Zuerst die vordere Abdeckung (D) und dann die hintere
Abdeckungen (C) auf das Gehäuse setzen und sie mit den
entsprechenden Haken blockieren. Die Blockierung mit den 2
mitgelieferten Schrauben (B1, Typ #8x3/8”) und den 4
mitgelieferten Schrauben (B2, Typ M5x1/2”) absichern. Das
Stromkabel über die Führung (A) der hinteren Abdeckung
einführen.
Am Ende dieses Arbeitsgangs prüfen, ob die Abdeckungen
richtig am Motorgehäuse angebracht wurden.
Bedienfelds
Fernbedienung
1. Ein-/Aus-Taste
2. Geschwindigkeitstaste
3. Taste ionisierende Funktion
4. Schwingungstaste
5. Timer-Taste
1. Ein-/Aus-Taste
2. Geschwindigkeitstaste
3. Taste ionisierende Funktion
4. Schwingungstaste
5. imer-Taste
GEBRAUCH
Sie können die Funktionen des Ventilators sowohl mit dem Bedienfeld als auch mit der Fernbedienung
wählen.
Die Fernbedienung muss zum Display hin gerichtet werden. Vorher die Batterien
einlegen (dazu die hintere Klappe öffnen und 2 Batterien des Typs “AAA” (werden
nicht mitgeliefert) einlegen. Dabei auf die Pole achten. Die Klappe wieder schließen).
Wir empfehlen gleichzeitig immer alle Batterien auszuwechseln. Bereits benutzte
Batterien nicht mit neuen Batterien mischen. Bei längerer Nichtbenutzung die Batterien
aus der Fernbedienung nehmen.
Stecken Sie den Netzstecker in die Netzsteckdose.
Ventilation:

20/28
1) Zum Einschalten des Ventilators an der Steuertafel oder an der Fernbedienung die Taste “ ” (1)
drücken.
2) Zum Einstellen der gewünschten Geschwindigkeit mehrmals die Taste “ ” (2) drücken (min.,
mittel oder max.), auf dem Display leuchtet die der gewählten Drehzahl entsprechende
Kontrollleuchte auf
“1”= Mindestgeschwindigkeit “2”= mittlere Geschwindigkeit “3”= Höchstgeschwindigkeit.
Timer: mit dieser Funktion kann die Betriebszeit eingestellt werden. Am Ende dieser Zeit hält das Gerät
automatisch an.
Zum Einstellen der Betriebszeit mehrmals an der Steuertafel oder an der Fernbedienung die Taste “ ” (5)
drücken: Bei jedem Tastendruck ändert sich die eingestellte Zeit und am auf dem Display leuchtet die der
Timer gewählten entsprechende Kontrollleuchte auf: (0,5 Stunde- 1 Stunde – 1,5 Stunden- 2 Stunden,
usw. ….): Die Höchstzeit beträgt 7 Stunden. Zum Ausschalten des Timers, die Höchstzeit eingegeben und
dann erneut die Taste drücken. Die entsprechenden Lampen schalten sich aus.
Ionisierende Funktion: Erzeugt einen Strom von negativen Ionen, welche die in der Luft vorhandenen
positiven Ionen neutralisieren. Diese Funktion ist immer dann aktiv, wenn an der Steuertafel oder der
Fernbedienung die Taste (3) gedrückt wird.
Waagerechte Schwingung (rechts/links): Wird durch Betätigung der entsprechenden Taste “ ” an
der Steuertafel oder der Fernbedienung eingeschaltet. Zum Ausschalten der Bewegung erneut die Taste
(4) drücken.
Das Luftauslassgitter verfügt über einen Abweiser, mit dem die Luft nach unten oder nach oben gerichtet
werden kann.
Zum Ausschalten des Ventilators an der Steuertafel oder an der Fernbedienung die Taste “ ” drücken.
Dann den Stecker aus der Steckdose ziehen.
Bei längerer Nichtbenutzung den Stecker aus der Steckdose ziehen.
REINIGUNG UND PFLEGE
Achtung: ziehen Sie den Netzstecker aus der Netzsteckdose, bevor Sie das Gerät reinigen.
•Verwenden Sie zum Reinigen ein weiches, leicht feuchtes Tuch. Verwenden Sie keine scheuernden
oder aggressiven Reinigungsmittel.
•Vergewissern Sie sich von Zeit zu Zeit, dass das Sauggitter nicht von Flaum und Fasern verstopft ist.
Sollte das Filter verschmutzt sein, Gitters auf der Rückseite lösen und dasselbe abnehmen; d trocknen
und wieder korrekt einsetzen. Das Gitter wieder einbauen und mit den beiden Befestigungsschrauben
anbringen. Die Schrauben vorschriftsmäßig anziehen.
•Kein Teil des Ventilators darf in Wasser oder andere Flüssigkeiten eingetaucht werden: Sollte dies
geschehen, keinesfalls die Hand in die Flüssigkeit tauchen, sondern als Erstes den Netzstecker aus der
Netzsteckdose ziehen. Trocknen Sie das Gerät sorgfältig und vergewissern Sie sich, dass alle
elektrischen Teile trocken sind: Wenden Sie sich im Zweifelsfall an einen Fachmann.
•Die Lüftungsöffnungen des Motors müssen unbedingt frei von Staub und sonstigen Verunreinigungen
gehalten werden.
•Wenn Sie den Ventilator längere Zeit nicht verwenden wollen, müssen Sie ihn geschützt vor Staub und
Feuchtigkeit aufbewahren. Wir empfehlen Ihnen, hierzu die Originalverpackung zu verwenden.
•Wenn Sie vorhaben, das Gerät nicht mehr zu verwenden, sollten Sie es unbrauchbar machen, indem Sie
das Netzkabel abschneiden. Vergewissern Sie sich vorher, dass Sie den Netzstecker aus der
Netzsteckdose gezogen haben! Außerdem sollten Sie dafür Sorge tragen, dass die gefährlichen Teile
keine Verletzungen verursachen können, wenn Sie von Kindern zum Spielen verwendet werden.
WICHTIGE HINWEIS FÜ DIE KO EKTE ENTSO GUNG DES P ODUKTS
IN ÜBE EINSTIMMUNG MIT DE EG- ICHTLINIE 2011/65/EG.
This manual suits for next models
1
Table of contents
Languages:
Other Bimar Fan manuals