Biomeme Franklin User manual

Franklin Real-Time
PCR Thermocycler
USER MANUAL

© Biomeme, Inc. 201921000003.01-01.2018
Table of Contents
Thermocycler Overview
Technical Specications
Thermocycler Buttons & Layout
LED Status Indicators
Turning Thermocycler On/O
Charging & Checking Battery Status
Enabling/Disabling Bluetooth
Recovering & Reattaching Test Data
Transferring Data
Loading Sample into Go-Strips
Placing Go-Strips into Thermocycler
Maintenance & Cleaning
Troubleshooting
Disclaimer
03
04
05
06
07
07
08
09
10
11
12
13
14
16
31000003.01-01.2018© Biomeme, Inc. 2019
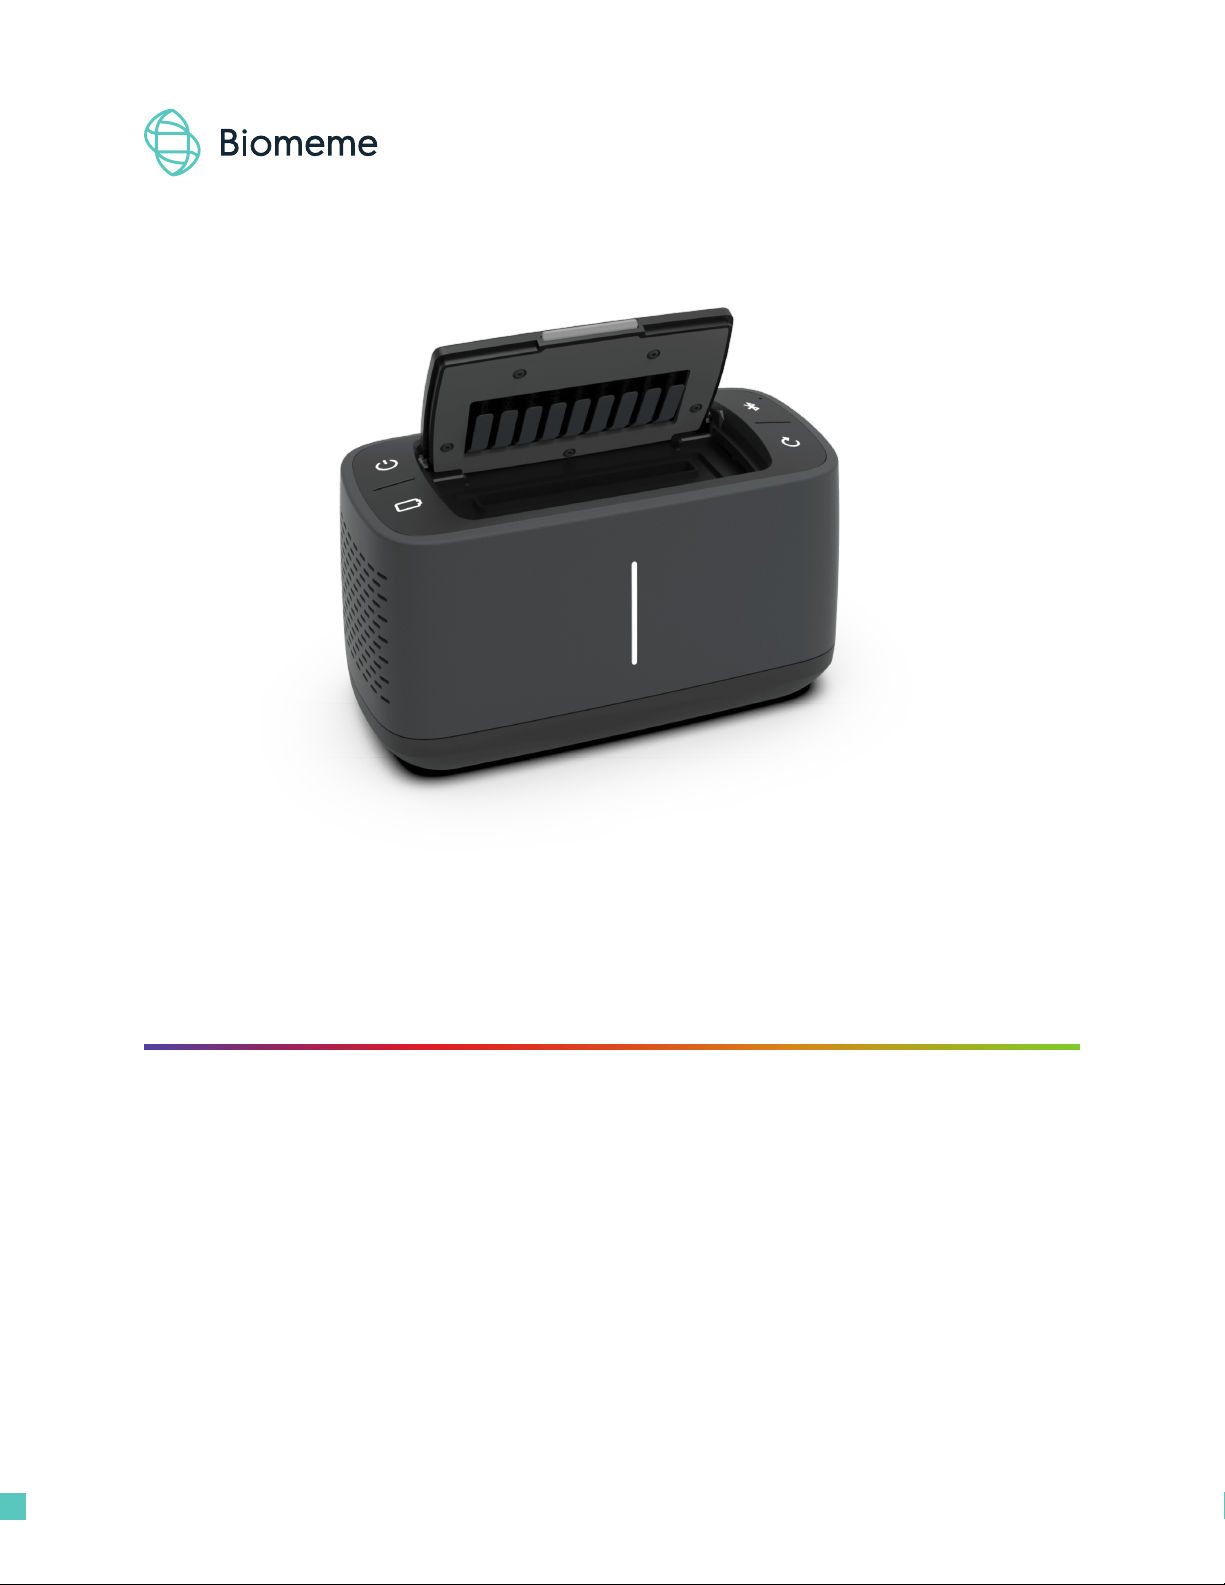
The Biomeme Franklin transforms your smartphone into a thermocycler for
real-time PCR or isothermal analysis with sample-to-result in 30-60 minutes,
depending on test protocol. This mobile thermocycler enables multiplex
real-time detection of up to 27 targets from 1 sample or test 9 samples for
up to 3 targets each. Just under 3 lbs, hand-held, and battery-operated for
maximum portability enabling a full day’s work out in the eld on a single
charge. For your convenience, we oer 3 dierent variations of the Franklin -
one9, two9 and three9.
Franklin Thermocycler

© Biomeme, Inc. 201941000003.01-01.2018
Technical Specifications
DIMENSIONSSPECIFICATIONS
System Control & Data Transfer
Sample Capacity
Reaction Volume per Well
Total Channels
Recommended Fluorophores*
Integrated Barcode Scanner
Max Samples per Run
Max PCR Targets per Run
Weight
Operating Ambient Temperature
Operating Humidity Limit
Operating Altitude Limit
Wall Power (VAC)
Internal Battery
Quantitative
Wired or Wireless (BLE)
9 Wells
20 - 50 µL
3
FAM / SYBR (Green), TexasRedX (Amber),
ATTO647N (Red)
Yes
9
27
1.36 kg / 3 lb
4 - 40°C / 39 - 104°F
0 - 99%
3,048 m / 10,000
100 - 240V
5 hrs
Yes
*Note that the Darwin one9 is limited to the FAM/SYBR (Green) channel and the Darwin two9 is limited to the
FAM/SYBR (Green) and ATTO647N (Red) channels only. You can upgrade your thermocycler(s) at any time!
© Biomeme, Inc. 201951000003.01-01.2018
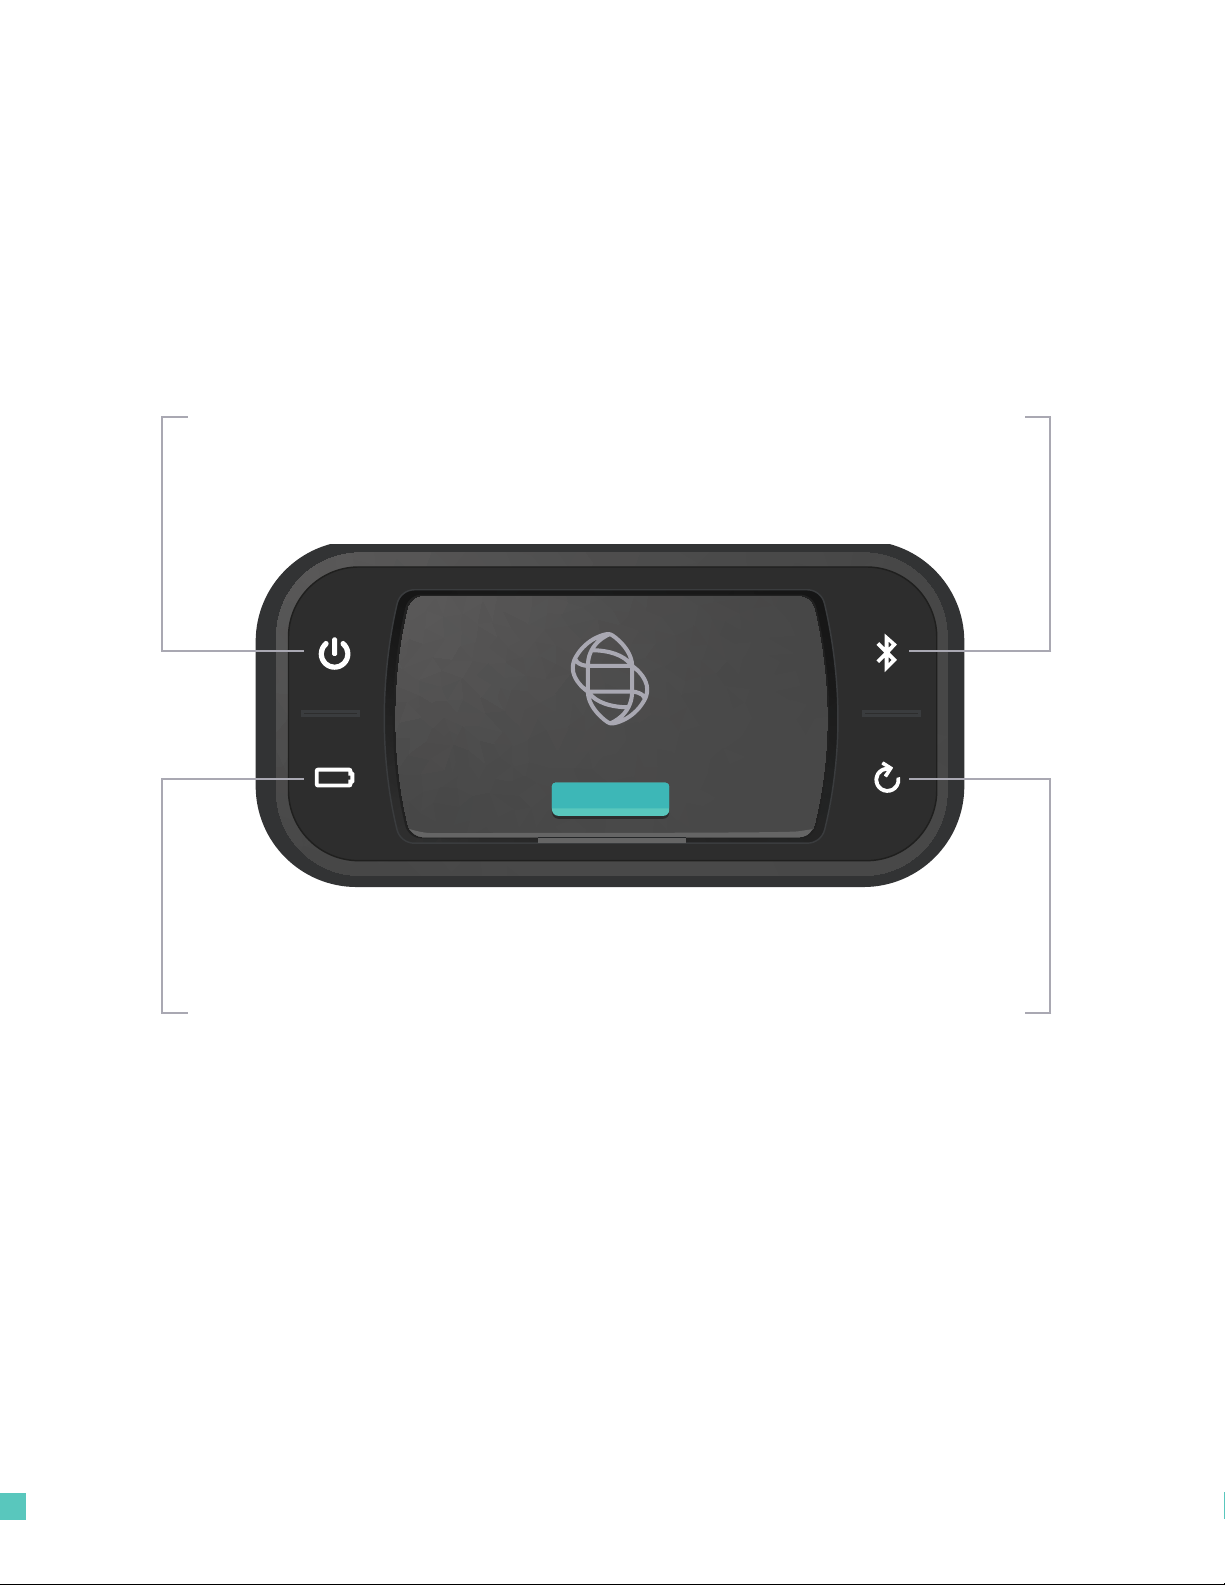
Thermocycler Button Layout
Power Button
Turn thermocycler on/o
Bluetooth Radio Button
Enable/disable Bluetooth
Recovery Button
Restore thermocycler to
same state as previously
completed or failed run
There are a total of 4 buttons located on the top of your Franklin thermocycler:
Battery Button
Check current battery
charge status

© Biomeme, Inc. 201961000003.01-01.2018
LED Status Indicators
INTERPRETATIONCOLOR
WHITE 5 solid indicates your thermocycler is on
5 blinking indicates Bluetooth (BLE) pairing
GREEN
2 solid indicates remaining battery is between 21 and 40%
3 solid indicates remaining battery is between 41 and 60%
4 solid indicates remaining battery is between 61 and 80%
5 solid indicates remaining battery is between 81 and 100%
1 blinking indicates charging
1 solid indicates run start to 9% complete
2 solid indicates run is between 10 and 31% complete
3 solid indicates run is between 32 and 53% complete
4 solid indicates run is between 54 and 75% complete
5 solid indicates run is between 76 and 99% complete
1 solid indicates remaining battery is between 0 and 20%
5 blinking indicates thermocycler lid is open or an error
5 blinking indicates your test is complete and data is ready to
be synced to your smartphone
YELLOW
RED
BLUE
Vertical LED on the front of your Franklin thermocycler
The Franklin has 5 LEDs on the front of the unit. The LEDs are used to convey
various states of the thermocycler as outlined in the table below.
NOTE If the battery is in the red, you shouldn't start your
run until you plug your thermocycler into power.

© Biomeme, Inc. 201971000003.01-01.2018
Turning Your Thermocycler On and O
To power on your thermocycler, press and hold the power button (located
on the top of the unit) for roughly half a second. The status LED on the front of
your thermocycler will illuminate white to indicate it has successfully turned
on. To turn the unit o, press and hold the power button for 1.5 seconds and
the status LED will turn o upon release of the button. The unit will also turn
itself o aer 15 minutes of inactivity.
Charging & Checking Battery Status
If your battery is running low, simply plug the AC power adapter into an outlet
and insert the power connector into the back of your thermocycler. When
the battery button is held, the LED on the front of your thermocycler
indicates the battery charge status as follows:
MICRO
USB
POWER
CONNECTOR
NOTE
To preserve your
smartphone's battery
life, disconnect your
smartphone from the
thermocycler when
it's not in use.

© Biomeme, Inc. 201981000003.01-01.2018
BATTERY PERCENTAGELED STATUS
81 - 100%
61 - 80%
41 - 60%
1 solid
4 solid
3 solid
21 - 40%2 solid
0 - 20%
5 solid
A single green LED will blink while charging. If your battery charge is
between 0 and 20%, the bottom most LED will blink green while charging.
If your battery charge is greater than 20%, the top most LED will blink green
while charging.
Enabling & Disabling Bluetooth (BLE)
Bluetooth (BLE) can be turned on or o at any time by pressing and holding
the Bluetooth button on the top of your thermocycler for roughly half a
second. By default, Bluetooth is disabled. A blue LED will light up next to the
BLE button indicating it is enabled.
Once enabled, tap “Connect via BLE” when prompted in the smartphone
app. If working with multiple Franklin thermocyclers, select the appropriate
unit and tap “Conrm”. The LED on the front of your thermocycler will ash
white indicating it’s connected.
If you prefer wired control over wireless, connect your smartphone and
Franklin unit using your preferred OTG adapter and micro USB cable.
RED
GREEN
GREEN
GREEN
GREEN
© Biomeme, Inc. 201991000003.01-01.2018
Recovering & Reattaching Test Data
Pressing the Recovery button on the top of your thermocycler will safely
restore the unit to the same state as the previously completed or failed run
such that your smartphone can collect the result data. The recovery feature is
most commonly used when:
• A user accidentally turns their unit completely o
• A user starts their test run, walks away, and doesn't realize their unit is
running on battery power before it eventually dies and needs to be charged
NOTE
This feature is not intended to restart an interrupted test, but only to recover partial
or whole test data. Once a new test is started, any previous data will be erased.
For security reasons. the same smartphone that was used to initiate the test must
be used to download the test results.
Recovery
The connection may be lost between your smartphone and your thermocycler for
a number of reasons (i.e. phone battery died, mobile app crashed, etc.).
If this happens, you can easily reattach your smartphone to the thermocycler.
To do so, relaunch the Biomeme mobile app and on the app home screen tap the
“Reattach Test” button. From there, select your test from the list of incomplete
runs. Aer selecting your test, please wait roughly 30 seconds before your run data
begins to populate.
Reattaching
© Biomeme, Inc. 201910 1000003.01-01.2018
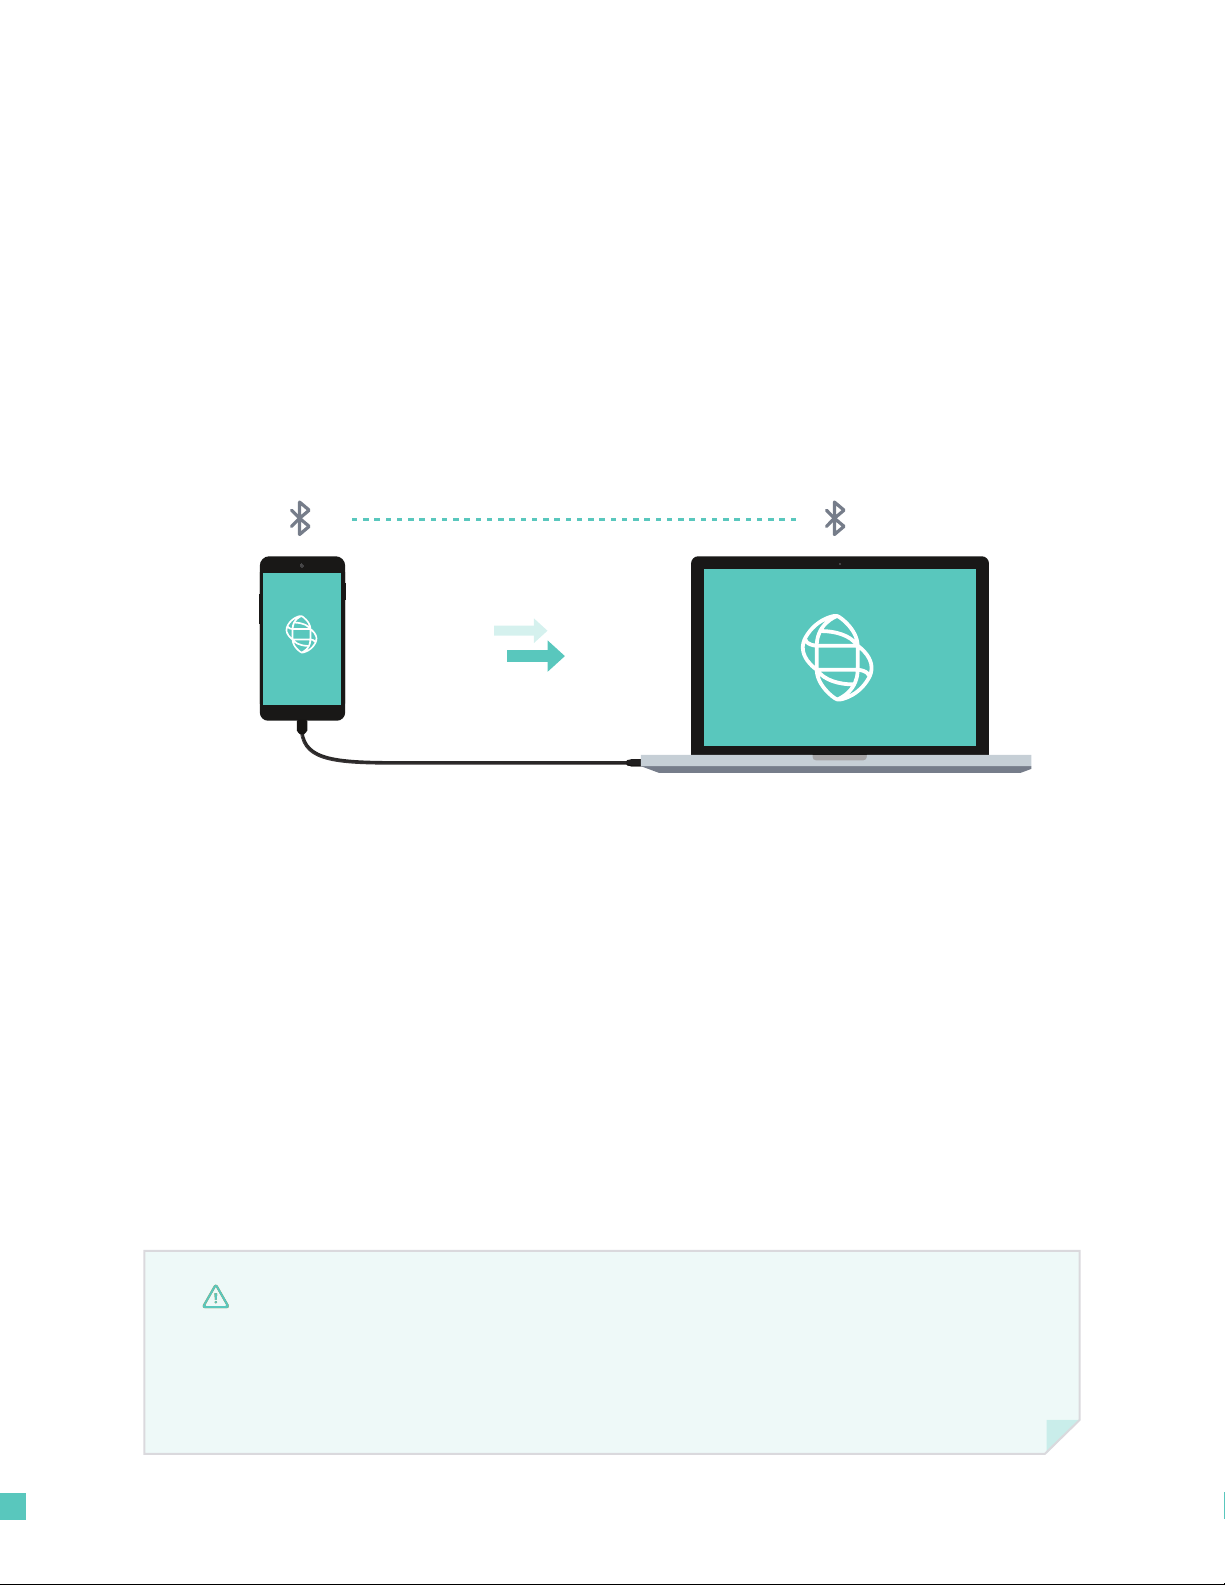
Transferring Data
WIRELESS
Wireless (Bluetooth)
On your computer, make sure your bluetooth is set to “Receive a File”.
This will prepare your computer to accept the data transfer from your smartphone.
1. In the mobile app, navigate through “View Results” and select a test
2. Once on the test result screen, tap “Send” in the top right corner
3. A menu will slide in with sharing options; select “Bluetooth”
and transition to the “Choose Bluetooth Device” screen
NOTE
Instructions could vary depending on your computer and/or smartphone Operating
System. If you require further assistance, please contact support@biomeme.com.
WIRED
Be sure to connect to the thermocycler via wire or Bluetooth so the app can
automatically transfer data o the unit once available.
Reattaching (continued)

© Biomeme, Inc. 201911 1000003.01-01.2018
NOTE
Results from your tests can be transferred from your smartphone to a computer
via a micro USB cable. Plug one end of the micro USB into the smartphone (may
require OTG adapter depending on type of smartphone) and plug the other
end of the cable into your computer. On the smartphone, make sure to select
“Use USB for Charging” and select le transfers.
Cutting and pasting OR
deleting the .xlsx les will
permanently delete them
o the smartphone. If you
want them to remain,
make sure to only copy
and paste.
Wired
On your computer, select:
1. File Explorer > This PC
2. Under Devices and Drives, click s60
3. Select Internal Storage > Android > data >
com. biomemebase > les
All of your test runs will be listed within this
folder. Copy the .xlsx les to your computer.
NOTE
Instructions could vary depending on your computer and/or smartphone Operating
System. If you require further assistance, please contact support@biomeme.com.
NOTE
If you start your test with a serial connection, you must nish your test on a serial connection.

© Biomeme, Inc. 201912 1000003.01-01.2018
Loading Sample into Go-Strips
Transfer 20 µL puried DNA into each well of the Go-Strip. Once all wells are lled,
place the void lling cap into the strip. Align the Go-Strip and void lling cap so
that the strip connections are visible through the cap cutouts.
BUBBLES
Hold the strip rmly between your
ngers and use one nger to secure the
void lling cap inside of the strip. Then,
with a whipping motion of the wrist,
ick the tubes a few times to ensure
bubbles are removed from the bottom
of each tube.
NOTE
Bubbles may remain at
the top of a tube. This is
acceptable. Bubbles at the
bottom of the tube, however,
are not acceptable.
NOTE
Contents of the test strip may shi during transport. When starting to work with any
test, make sure the cake of the lyophilized reagent rests at the bottom of each Go-Strip
test reaction well. If they are not, tap the bottom of the closed test strip gently but rmly
against a solid surface before opening the caps and adding nucleic acid.

© Biomeme, Inc. 201913 1000003.01-01.2018
Placing into Biomeme Thermocycler
Open the lid of the Biomeme thermocycler. Place your test strip, with the void
lling cap inserted, into a 3-well slot. Don’t worry if the void lling cap feels
slightly loose. When the lid of the thermocycler is closed it will further secure
the caps into place.
It’s important to make sure your Go-Strip is oriented correctly when placing
it into your thermocycler. Make sure the strip connections that are visible
through the void lling cap cutouts are facing the back of your thermocycler.
This will ensure sample 1 is always to the far le.
Navigate to the Biomeme App to begin your testing protocol. For further
instructional information about your thermocycler, contact Biomeme.

© Biomeme, Inc. 201914 1000003.01-01.2018
Maintenance & Cleaning
The Biomeme Franklin thermocycler is maintenance-free and has no
serviceable parts. In the case of thermocycler failure or damage, please
contact [email protected]om.
The Franklin thermocycler can be cleaned using 70% ethanol, 10% bleach or
a disinfecting wipe (e.g. Lysol) solution. Do not spray or pour solution directly
onto the thermocycler when cleaning. Ensure no excess liquid is used when
cleaning as it may damage the unit.
• Do not disassemble the thermocycler for cleaning
• Do not immerse in water or cleaning solutions
• Do not clean with soap or other solutions
• Avoid cleaning the heating wells (silver)
If you do need to clean your heating wells because it's impacting performance,

© Biomeme, Inc. 201915 1000003.01-01.2018
Troubleshooting
Why is my Bluetooth not connecting?
If you are having trouble connecting, ensure that you enabled Bluetooth on
both your smartphone and thermocycler.
Why is my thermocycler not showing up in the connection list?
Ensure that Bluetooth is turned on. The LED next to the button should be
illuminating blue. If your thermocycler is still not showing, try scanning
multiple times to allow for discovery.
My Bluetooth connection was lost during a test run…
If you lose Bluetooth connection, the smartphone app will notify you that the
connection has been lost. It will prompt you to reconnect to the thermocycler
if you are able to. Upon reconnecting, the test data will update on the
smartphone aer a short delay (1-2 seconds).
What happens if my test stops prematurely?
If your test fails, the smartphone will notify you of the error returned from
the thermocycler. Your last run will be saved in the Biomeme mobile app
up to the point of failure, but the data will not be processed resulting in no
CQ values, baseline, or graph of smooth data. The raw data and information
about your run is still exportable through the xlsx spreadsheet, however.
My thermocycler turned o during a test run...
If your thermocycler turns o during a test, then the thermocycler battery
may be dead and the unit should be plugged into power. Your connection to
the smartphone will also be lost. If this happens, we recommend you to stop
the run in the smartphone mobile app. See Recovering & Reattaching Test
Data for more details.

© Biomeme, Inc. 201916 1000003.01-01.2018
I have a low battery warning at test start...
You are able to start a test, but ensure that you are plugged into a charger
before the thermocycler runs out of power.
My app closed during a test run...
If the smartphone app closes during a test, you can sync to the test by
reopening the app and pressing the incomplete runs option. This will display
the previous incomplete run. See Recovering & Reattaching Test Data for
more details.
I reconnected to the wrong thermocycler...
If you accidentally reconnect to the wrong thermocycler, the app will notify
you that you are connected to the wrong thermocycler and not fetch any data
from the current run.
How do I stop a test?
While the test is running, you have the ability to press the stop run button.
Doing so will prompt the mobile app to ask you to conrm that you would
like to stop the test in progress. Upon stopping, your run will be saved to the
current point, and available in the test results section of the mobile app.
The thermocycler failed to start test...
If your run fails to start, the app will return to the home screen and have you
restart the setup of your test. Restart the thermocycler then reconnect the
smartphone. If starting still fails aer many retries, please contact
The USB failed to send the protocol...
Make sure your thermocycler is on. If on and still failing, power cycle your
thermocycler and go through the setup again.

© Biomeme, Inc. 201917 1000003.01-01.2018
How do I upgrade my one9 and/or two9 thermocycler to add additional
color channel detection?
Adding additional color detection channels to your thermocycler is easy and
does not require you to return your unit or purchase any new parts. All you'll
need is the MAC address for the thermocycler(s) requiring an upgrade which
can be found on the label on the bottom of your unit(s).
Start by navigating to the settings menu () in the Biomeme mobile app and
tap upgrade. From there, you'll be re-directed to our mobile-friendly online
store where you can purchase additional color channels such as ATTO647N
(Red) and TexasRedX (Amber). Once your order is received, a Biomeme
representative will follow up regarding your MAC address(es) and use this to
provide you with a unique 16-character unlock code (per unit) to be entered
using the Biomeme mobile app. Please note, your smartphone must be
connected to the thermocycler via Bluetooth or serial in order to complete
the upgrade.
What should I do if I receive a heater error message?
Retry running your test, but if the error persists please contact
What should I do if my test is complete, but I can't reattach my
smartphone to get my results?
Steps to try, in order:
1. Turn o Bluetooth on your smartphone. Then, turn Bluetooth back on and attempt
to reconnect to the thermocycler.
2. Close the Biomeme mobile app completely then re-open it and attempt to access
Incomplete Runs from the app home screen to recover your test results.

© Biomeme, Inc. 201918 1000003.01-01.2018
Disclaimer
For Research Use Only. Not for use in human or veterinary diagnostics. The
performance characteristics of this product have not been established.
Biomeme products may not be transferred to third parties, resold, modied for
resale or used to manufacture commercial products or to provide a service to
third parties without written approval of Biomeme, Inc.
Biomeme warrants every thermocycler to be free of defects in material and
workmanship for one year from date of shipment to buyer. All warranties are
subject to our Terms and Conditions and Privacy Policy (https://biomeme.
com/privacy-policy-and-terms-of-use/).
Biomeme, Inc.
1015 Chestnut Street, Suite 1401
Philadelphia, PA, USA 19107
Patent Protected
(https://biomeme.com/patents/)
Other manuals for Franklin
4
Table of contents
Other Biomeme Laboratory Equipment manuals


Popular Laboratory Equipment manuals by other brands


cytiva
cytiva Sefia S-2000 operating instructions

Varian
Varian ProStar 430 Driver manual

Beckman Coulter
Beckman Coulter Avanti J-26 XP Series Instructions for use

cytiva
cytiva OligoPilot 400 operating instructions

Tuttnauer
Tuttnauer Valueklave 1730 Technician manual

Oroboros Instruments
Oroboros Instruments O2k manual


