manuals.online logo
Brands
  1. Home
  2. •
  3. Brands
  4. •
  5. Bonaldo
  6. •
  7. Indoor Furnishing
  8. •
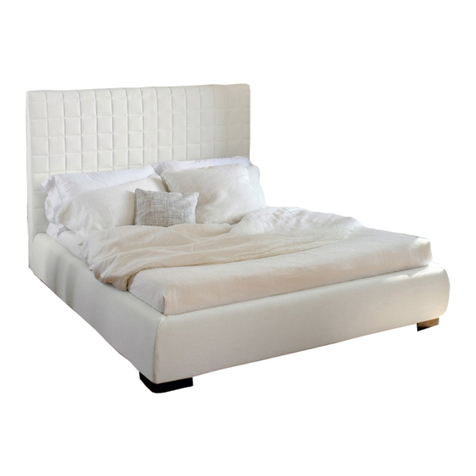
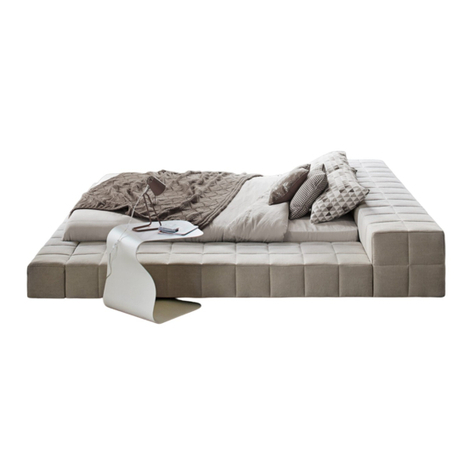
  9. Bonaldo SQUARING 160 User manual

Bonaldo SQUARING 160 User manual

– Scheda montaggio –
– Assembly Instructions- Aufbauanleitung - Notice de montage –
SQUARING (Penisola 160/180)
SQUARING (160/180 Peninsula)
SQUARING (160/180 Halbinsel)
SQUARING (Extension pied de lit et latérale 160/180)
AVite M8x10 B Vite M8x40 C Vite M8x60 D Chiave esagonale
Screw M8x10 Screw M8x40 Screw M8x60 Allen Key
Schraube M8x10 Schraube M8x40 Schraube M8x60 Sechskantschlüssel
Vis M8x10 Vis M8x40 Vis M8x60 Clé six pans
Fig.1
FIG.2
a
c
b
Testata
Headboard
Kopfteil
Tête de lit
Longone
Side rail
Seitenteil
Longeron
Pediera
Footboard
Fußteil
Pied de lit
- Avvitare con la vite “C” i piedini 2 e 3 sulla testiera, sul longherone e sulla pediera come illustrato in figura.
- Use the screw C to fit the feet 2 and 3 on the headboard, side rail and footboard as illustrated.
- Mit der Schraube “C” die Füße 2 und 3 am Kopfteil, Seitenteil und Fußteil befestigen, wie die Abbildung zeigt.
- Visser les pieds 2 et 3 avec la vis "C" sur la tête de lit, sur le longeron et sur le pied de lit, comme illustré dans le dessin.
- Dopo aver montato i piedi e disposto i longheroni (
a
– c) sul pavimento come in fig.1, fissare la piastra di
unione alla estremità dei longoni “a” e “c” (fig.2)
con 3 viti “B”.
- After fitting the feet and placing the side rails (a-c)
on the floor as shown in Fig. 1, attach the joining
p
late to the end of the side rails “a” and “c” ( Fig. 2)
with 3 screws B.
- Nach Montage der Füße und Anordnung de
r
Seitenteile (a – c) am Boden wie Abb.1 zeigt,
Verbindungsplatte an den Enden der Seitenteile “a”
und “c” (Abb.2) mit den 3 Schrauben “B“
befestigen.
- Après avoir monté les pieds et disposé les longerons
(a - c) par terre comme dans la fig.1, fixer la plaque
d'union à l'extrémité des longerons "a" et "c" (fig.2)
avec 3 vis "B".
Piastra unione
Verbindungsplatte
Joining plate
Plaque d’union
Fig. 5
d
c
Fig. 6
Fig. 7 Fig. 8
b
c
Fig. 3 Fig. 4
- Accoppiare la testiera “d” e la pediera “b” al longone “c”, con l
a
piastra angolare, avvitando per prime le 3 viti sul longone. con l
a
chiave C (fig.3-4). Prendere i piedini 1 e fissarli con una vite “B” sul
foro centrale con la chiave D in modo che risultino sotto la piastr
a
angolare (fig.5-6). Fissare una piastra traversa al centro della pedier
a
con 2 viti “A” (fig.) e l’altra al centro della testiera (fig.7-8).
- Join the headboard “d” and the footboard “b” to the side rail “c” with
the corner plate, first screwing the 3 screws on the side rail with the
key C (Figs. 3-4). Take the feet 1 and attach them with a screw B i
n
the central hole with the key D so that they are under the corner plate
(Figs. 5-6). Attach a crosspiece plate to the centre of the footboar
d
with two screws A and the other one to the centre of the headboar
d
(Figs. 7-8).
- Kopfteil “d” und Fußteil “b” mit dem Seitenteil “c” verbinden; daz
u
das Eckelement zuerst mit den 3 Schrauben am Seitenteil mittels
Schlüssel C (Abb. 3-4) befestigen. Füße 1 mit je einer Schraube “B”
im mittleren Gewindeloch mit dem Schlüssel D so befestigen, dass sie
sich unter dem Eckelement befinden (Abb.5-6). Eine der beiden
Platten in der Mitte des Fußteils mit 2 Schrauben “A” befestigen, die
andere in der Mitte des Kopfteils (Abb.7-8).
- Accoupler la tête de lit "d" et le pied de lit "b" au longeron "c", avec l
a
p
laque angulaire, en vissant d'abord les trois premières vis sur le
longeron avec la clé C (fig.3-4). Fixer ensuite les pieds 1 avec une vis
"B" sur le trou central avec la clé D de façon qu'ils se trouvent sous l
a
patte de fixation angulaire (fig. 5-6 ). Fixer une plaque transversale
au centre du pied de lit avec 2 vis "A" et l'autre au centre de la tête de
lit (fig.7-8).
p
iede
foot
Fuß
p
ie
d
Piede
Foot
Fuß
p
ied
Fig. 9
I
H
Fig. 12
Fig. 13
Fig.11
Fig. 10
H
- Prendere le staffe triangolari (fig.9) e fissarle ai 4 angoli del letto co
n
due viti “A”ciascuna nelle posizioni indicate “H” e “I” (fig.10) con la
chiave D. Dato che ogni angolo ha 5 fori filettati, fissare dunque le
piastre all’altezza desiderata.
- Take the triangular brackets (Fig. 9) and attach them to the 4 corners o
f
the bed with two screws A, each in the positions indicated by H and I
(Fig. 10) with the key D. Since each corner has 5 threaded holes, attach
the plates at the required height.
- Die dreieckigen Bügel (Abb.9) an den 4 Ecken des Bettes mit je 2
Schrauben “A” mittels Schlüssel D in den angegebenen Positionen "H"
und "I" befestigen (Abb.10). Da jede Ecke 5 Gewindelöcher aufweist,
können die Platten in der gewünschten Höhe befestigt werden.
- Prendre les pattes de fixation triangulaires (fig. 9) et les fixer aux 4 coins
du lit avec deux vis "A" chacune dans les positions indiquées "H" et "I"
(fig. 10) avec la clé D. Étant donné que chaque coin a 5 trous taraudés,
fixer les plaques à la hauteur désirée.
- Allineandolo alla stessa altezza delle piastre triangolari (fig.11), fissare anche il traverso con due viti “A” per lato con la chiave
D.(fig. 12-13).
- Line it at the same height as the triangular plates (Fig. 11) and also attach the crosspiece with two screws A per side using the key
D (Figs. 12-13).
- Querstrebe auf der gleichen Höhe der dreieckigen Plättchen (Abb. 11) ebenfalls mit zwei Schrauben ”A” pro Seite mittels
Schlüssel D befestigen (Abb.12-13).
- En l’alignant à la même hauteur que les plaques triangulaires (fig.11) fixer aussi la traverse avec 2 vis "A" de chaque côté, avec l
a
clé D (fig. 12-13).
1
2
3
4
5
6
A
B
C
D
E
Montaggio supporti traversa per le diverse regolazioni
Assembly of the crosspiece supports for the various adjustments
Montage Stützen der Querstrebe für unterschiedliche Regulierungen
Montage supports traverse pour les différents réglages
Cono da 85 (D) + regolatore da 70 con tappo regolabile (B)
85 cone (D) + 70 adjuster with adjustable cap (B)
Kegel zu 85 (D) + Regler zu 70 mit verstellbarem Verschluss (B)
Cône de 85 (D) + régulateur de 70 avec bouchon réglable (B)
Cono da 85 (D) + regolatore da 55 (A)
85 cone (D) + 55 adjuster (A)
Kegel zu 85 (D) + Regler zu 55 (A)
Cône de 85 (D) + régulateur de 55 (A)
Cono da 55 (C) + regolatore da 55 (A)
55 cone © + 55 adjuster (A)
Kegel zu 55 (C) + Regler zu 55 (A)
Cône de 55 (C) + régulateur de 55 (A)
2 feltrini su portaconi (E) da 25
2 felt pads on 25 cone supports (E)
2 Filzbeläge für Kegelstützen (E) zu 25
2 tampons en feutre sur porte-cônes (E) de 25
Portaconi
Cone support
Kegelstütze
Porte-cônes
SQUARING
Vite TSPEI M8 x 40 zinc.
M8 x 40 galvanised flat
countersunk head screw
SchraubeTSPEI M8 x 40
verz.
Vis FHC M8x40 zinguée
Vite TBEI M8 x 10 zinc.
M8 x 10 galvanised hex
socket screw
Schraube TBEI M8 x 10
verz.
Vis BHC M8x10 zinguée
Vite TBEI M8 x 60 zinc.
M8 x 60 galvanised hex
socket screw
Schraube TBEI M8 x 60
verz.
Vis BHC M8x60 zinguée
Chiave esag. 5
Allen key 5
Sechskantschlüssel 5
Clé six pans 5
KIT FERRAMENTA COMPLETO
COMPLETE KIT OF METAL PARTS
GARNITUR BEFESTIGUNGSTEILE
KOMPLETT
KIT QUINCAILLERIE COMPLET
35 13 9 1
UTILIZZO
USE
VERWENDUNG
UTILISATION
Fissaggio piastre ang.
e per traversa
Attachment of corner
plates and for
crosspiece
Befestigung
Eckelemente und
Querstrebe
Fixation plaques ang.
et traverse
Fissaggio traversa e
ang. per regolaz.
Attachment of
crosspiece and corner
element for
adjustment
Befestigung
Querstrebe und
Verstellwinkel
Fixation traverse et
plaque ang. pour
réglage
Fissaggio piedini
Feet attachment
Befestigung Füße
Fixation pieds
SQUARING 160 PENISOLA 34 12 9 1
SQUARING 180 PENISOLA 34 12 9 1
Bonaldo Spa
Via Straelle, 3 – P.O. Box n. 6 – 35010 Villanova Pd Italia
Tel. +39 049 9299011 Fax +39 049 9299000
www.bonaldo.it - [email protected]
ATTENZIONE: - Maneggiare con mani pulite.
- Non fissare del tutto le viti durante il montaggio; fissarle bene a montaggio finito.
ATTENTION: - Handle with clean hands.
- Do not tighten the screws completely during assembly; fix them properly at the end of assembling.
ACHTUNG: - Mit sauberen Händen anfassen.
- Während des Aufbaus die Schrauben nicht festziehen, sondern erst am Ende der Montage.
ATTENTION:- Manipuler avec les mains propres.
- Ne pas serrer à fond les vis lors de l'assemblage ; les serrer à fond à la fin du montage.
Grazie per aver scelto uno dei prodotti BONALDO.
Thank you for choosing a BONALDO product.
Danke dass Sie ein BONALDO Produkt gewählt haben.
Merci d’avoir choisi un produit BONALDO.

This manual suits for next models

1

Other Bonaldo Indoor Furnishing manuals
Bonaldo CURLING User manual

Bonaldo

Bonaldo CURLING User manual

Bonaldo Youniverse User manual

Bonaldo

Bonaldo Youniverse User manual

Bonaldo FRAME K SIDEBOARD User manual

Bonaldo

Bonaldo FRAME K SIDEBOARD User manual

Bonaldo Thin User manual

Bonaldo

Bonaldo Thin User manual

Bonaldo AX Console User manual

Bonaldo

Bonaldo AX Console User manual

Bonaldo Menu Extending table User manual

Bonaldo

Bonaldo Menu Extending table User manual

Bonaldo COLIBRI User manual

Bonaldo

Bonaldo COLIBRI User manual

Bonaldo BLOOM STORAGE UNIT User manual

Bonaldo

Bonaldo BLOOM STORAGE UNIT User manual

Bonaldo Papillon User manual

Bonaldo

Bonaldo Papillon User manual

Bonaldo Art Extension Dining Table User manual

Bonaldo

Bonaldo Art Extension Dining Table User manual

Bonaldo ART 220.325.6 User manual

Bonaldo

Bonaldo ART 220.325.6 User manual

Bonaldo Hulahoop User manual

Bonaldo

Bonaldo Hulahoop User manual

Bonaldo Octa Dining Table User manual

Bonaldo

Bonaldo Octa Dining Table User manual

Bonaldo DELTA User manual

Bonaldo

Bonaldo DELTA User manual

Bonaldo MELLOW User manual

Bonaldo

Bonaldo MELLOW User manual

Bonaldo BLABLA User manual

Bonaldo

Bonaldo BLABLA User manual

Bonaldo ROLL User manual

Bonaldo

Bonaldo ROLL User manual

Bonaldo BLABLA User manual

Bonaldo

Bonaldo BLABLA User manual

Bonaldo VENUS User manual

Bonaldo

Bonaldo VENUS User manual

Bonaldo ART User manual

Bonaldo

Bonaldo ART User manual

Bonaldo Art Dining Table User manual

Bonaldo

Bonaldo Art Dining Table User manual

Bonaldo DORIAN CONSOLE User manual

Bonaldo

Bonaldo DORIAN CONSOLE User manual

Bonaldo Geometric Dining Table User manual

Bonaldo

Bonaldo Geometric Dining Table User manual

Bonaldo CUFF OPEN User manual

Bonaldo

Bonaldo CUFF OPEN User manual
Popular Indoor Furnishing manuals by other brands

Furniture Solutions VEGA 18VEGBSX2.AB manual

Furniture Solutions

Furniture Solutions VEGA 18VEGBSX2.AB manual

Pilaster Designs GR8054 Assembly instructions

Pilaster Designs

Pilaster Designs GR8054 Assembly instructions

Habitat Yves 825028 manual

Habitat

Habitat Yves 825028 manual

Argos Gloucester 609/1233 Assembly instructions

Argos

Argos Gloucester 609/1233 Assembly instructions

Style selections DTC201133B manual

Style selections

Style selections DTC201133B manual

Mainstays MSS129900298079 Assembly and Care Guide

Mainstays

Mainstays MSS129900298079 Assembly and Care Guide

Costco BACK-IN-MOTION 790820 operating instructions

Costco

Costco BACK-IN-MOTION 790820 operating instructions

iCube NIGHTSTAND Assembly instructions

iCube

iCube NIGHTSTAND Assembly instructions

Costway HV10201 manual

Costway

Costway HV10201 manual

RiverRidge ASHLAND 06-080 Assembly instructions

RiverRidge

RiverRidge ASHLAND 06-080 Assembly instructions

JWA HOBBS 74717 Assembly instruction

JWA

JWA HOBBS 74717 Assembly instruction

U-Line H-8863 quick start guide

U-Line

U-Line H-8863 quick start guide

Whittier Wood Products 441Wa Assembly instructions

Whittier Wood Products

Whittier Wood Products 441Wa Assembly instructions

hernest HEFTDR-0005 Assembly instructions

hernest

hernest HEFTDR-0005 Assembly instructions

Costway EP24932US-K user manual

Costway

Costway EP24932US-K user manual

RTA Products TECHNI MOBILI RTA-K462 Assembly instructions

RTA Products

RTA Products TECHNI MOBILI RTA-K462 Assembly instructions

U-Line S-15178 quick start guide

U-Line

U-Line S-15178 quick start guide

Emmezeta MILANO TYP 33 Assembling instructions

Emmezeta

Emmezeta MILANO TYP 33 Assembling instructions

manuals.online logo
manuals.online logoBrands
  • About & Mission
  • Contact us
  • Privacy Policy
  • Terms and Conditions

Copyright 2025 Manuals.Online. All Rights Reserved.