manuals.online logo
Brands
  1. Home
  2. •
  3. Brands
  4. •
  5. Bristan
  6. •
  7. Plumbing Product
  8. •
  9. Bristan PISA PS2-BSM-C User manual

Bristan PISA PS2-BSM-C User manual

.D3)
WATER PRESSURE
These fittings are suitable for use at all supply pressures. However for optimum use
both the hot and cold supplies should be reasonably balanced.
If the fitting is installed at low pressure (tank fed), then the minimum distance from the
outlet to the underside of the cold tank should be a least 2.0 metres to ensure adequate
performance.
This mixer should be installed in compliance with the Water Regulations. Where the
supplies are unbalanced, i.e. hot water from cylinder tank / cold from the mains,
approved check valves must be fitted in the supply pipes.
For further details contact your Local Water Authority.
16
Before starting any installation project please consider:
Prior to drilling into walls, check there are no hidden electrical
wires, cables or water supply pipes with the aid of an electronic
detector. If you use power tools do not forget:
- Wear eye protection
- Unplug equipment after use
SAFETY
NOTE
Operating Pressures: Min 0.2 bar, Max 7.0 bar.
Bristan Guarantee
2 year - Pumps, Power showers
2year parts. 1 year labour (subject to registration).
Electric Showers/Instantaneous Water Heaters
2 year parts. 1 year labour (subject to registration).
5 year - Taps and Mixers
5 year parts. 5 year labour (subject to proof of purchase).
Shower Valves
5 year parts. 5 year labour (subject to proof of purchase), else 1 year
proof of purchase.
Accessories
5 year parts only. Includes bathroom accessories, shower accessories
(e.g hoses, handsets and poles), wastes, WC levers and light pulls.
This guarantee applies to products purchased within the United Kingdom or
Republic of Ireland, but does not apply to products used commercially.
The guarantee is only available to original purchasers who have proof of purchase.
The installation must allow ready access to all products for the purpose of
inspection, maintenance or replacement.
Any part found to be defective during the above guarantee period will be replaced
without charge, providing that the product has been installed in accordance with
the instructions, used as intended, and regularly serviced.
Servicing should be carried out a regular intervals of no more than 12 months and
more frequently in hard water areas (heavy lime scale) areas.
In the unlikely event that any problem are encountered with the product’s
performance on installation, you must obtain guidance/authoristation from our
Customer Service Department, and able to supply proof and date of purchase,
before any remedial action is taken.
The guarantee excludes general wear and tear and damage caused by accident,
misuse or neglect, and does not cover the following:
∙Components that are subject to general wear and tear such as filters,
seals, ‘O’ rings and washers etc.
∙Damage caused by faulty installation.
∙Damage caused by lime scale or any waterborne debris.
∙Damage caused by inappropriate cleaning products (see user
instructions).
∙Damage caused by the use of non-Bristan parts.
∙The product being used for a purpose other than intended by the
manufacturer.
In the interest of continuous product improvement Bristan reserves the right to alter
specification as necessary.
CONTENTS
Description Page Number
Water Pressure & Safety Note 1
Basin & Bath Taps 2
Basin Mixers 3
Bath Filler 4
Bath Shower Mixer 5
Guarantee 6
Aftercare Back Page
34
Basin Mixers - PS SMBAS C & PS BAS C Bath Filler - PS BF C
BATH FILLER
1. Identify all components and check for completeness, particularly before
commencing installation.
2. Install the bath filler body to the bath using the backnuts (12) and washers (11)
provided under the bath with washer (10) and plinth (09) above.
3. Connect the hot and cold water supplies and turn water supplies on.
4. Fully open the valves by turning handles, letting it run for a few minutes to check
for leaks.
SMALL BASIN & BASIN MIXER with Wastes
1. Identify all components and check for completeness, particularly before
commencing installation.
2. Install mixer to the basin. Secure the mixer to the surface of the basin
using the fixing kit (13,14,15 & 16) with the plinth (09 for PS SMBAS C only)
above the basin.
3. Screw in connecting tail pipes (12) by hand ONLY (DO NOT OVERTIGHTEN)
4. Fit clicker waste and rubber washer into the basin. Use pure silicon sealant where
necessary. Place shaped rubber washer under the basin and secure waste by
tightening the backnut. In order to fill the basin, the button in the middle of the
waste needs to be pressed down. To release water, press button again.
5. Connect the hot and cold water supplies and turn both supplies on. Lift and turn
handle both ways for a few minutes, letting the water flow, to check all joints and
connections for leaks.
CONTENTS - for both taps
1. Handle (x1)
2. Grub Screw (x1)
3. Cap (x1)
4. Shroud (x1)
5. Locking Nut (x1)
6. Cartridge (x1)
7. Body (x1)
8. Flow Straightener (x1)
9. Plinth (PS SMBAS C Only) (x1)
10. O’ ring (x1)
11. O’ ring (x2)
12. Tail pipes (x2)
13. Rubber ‘C’ shaped washer (x1)
14. Metal ‘C’ shaped washer (x1)
15. Threaded Studs (x2)
16. Fixing Nuts (x2)
17. Clicker Waste (x1)
CONTENTS
1. Cap (x2)
2. Grub Screw (x2)
3. Handle (x2)
4. Spline Adaptor (x2)
5. Valve (x2)
6. Body (x1)
7. O’ ring (x2)
8. Inlet Tails (x2)
9. Plinth (x2)
10. Washer (x2)
11. Washer (x2)
12. Backnut (x2)
13. Flow Straightener (x1)

Other Bristan Plumbing Product manuals

Bristan Jute JU PBSM C User manual

Bristan

Bristan Jute JU PBSM C User manual

Bristan NIVA NVA BSM C Wiring diagram

Bristan

Bristan NIVA NVA BSM C Wiring diagram

Bristan Pivot Series User manual

Bristan

Bristan Pivot Series User manual

Bristan Java J SFSNK EF C User manual

Bristan

Bristan Java J SFSNK EF C User manual

Bristan Quadrant Riser Rail kit User manual

Bristan

Bristan Quadrant Riser Rail kit User manual

Bristan Value VAL BSM C CD Wiring diagram

Bristan

Bristan Value VAL BSM C CD Wiring diagram

Bristan Prism User manual

Bristan

Bristan Prism User manual

Bristan CFC33 User manual

Bristan

Bristan CFC33 User manual

Bristan VR1000 User manual

Bristan

Bristan VR1000 User manual

Bristan Descent Series User manual

Bristan

Bristan Descent Series User manual

Bristan N2 SHC3STP C Wiring diagram

Bristan

Bristan N2 SHC3STP C Wiring diagram

Bristan K 1/2 C Wiring diagram

Bristan

Bristan K 1/2 C Wiring diagram

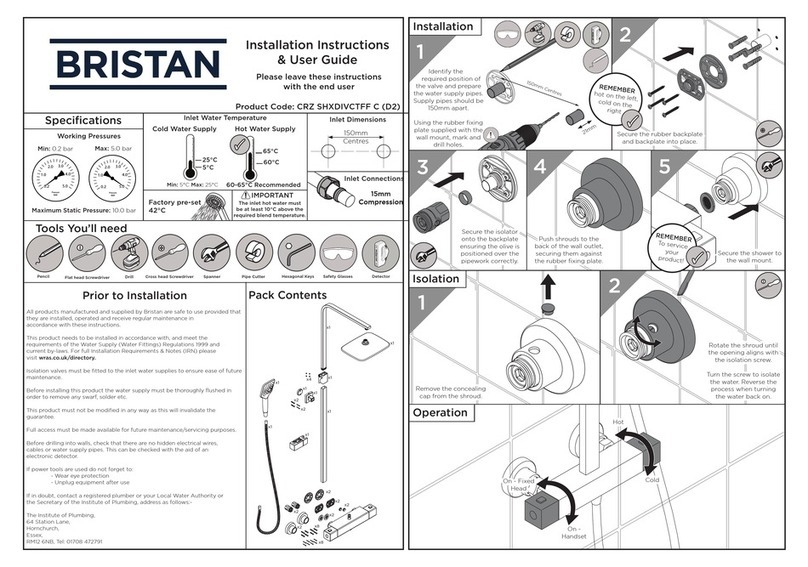
Bristan CRZ SHXDIVCTFF C Wiring diagram

Bristan

Bristan CRZ SHXDIVCTFF C Wiring diagram

Bristan RO2 SHXAR C Mounting instructions

Bristan

Bristan RO2 SHXAR C Mounting instructions

Bristan W BATH12 C Wiring diagram

Bristan

Bristan W BATH12 C Wiring diagram

Bristan Blitz Tap Series Wiring diagram

Bristan

Bristan Blitz Tap Series Wiring diagram

Bristan DSC SHC3DIV C Wiring diagram

Bristan

Bristan DSC SHC3DIV C Wiring diagram

Bristan ALP Series Wiring diagram

Bristan

Bristan ALP Series Wiring diagram

Bristan Java Mini J MBAS C User manual

Bristan

Bristan Java Mini J MBAS C User manual

Bristan Rio RO 1/2 C User manual

Bristan

Bristan Rio RO 1/2 C User manual

Bristan IRBS1-CP Mounting instructions

Bristan

Bristan IRBS1-CP Mounting instructions

Bristan Hourglass HOU BSM C Wiring diagram

Bristan

Bristan Hourglass HOU BSM C Wiring diagram

Bristan WMNT12 Mounting instructions

Bristan

Bristan WMNT12 Mounting instructions

Bristan EV KIT-EFB C Mounting instructions

Bristan

Bristan EV KIT-EFB C Mounting instructions

Popular Plumbing Product manuals by other brands

newform BLINK 70882C instructions

newform

newform BLINK 70882C instructions

Moen MONTICELLO 4557 Illustrated Parts

Moen

Moen MONTICELLO 4557 Illustrated Parts

American Standard MADERA 3043 installation instructions

American Standard

American Standard MADERA 3043 installation instructions

Purmo OPTIMO 500E ECO Installation & operating manual

Purmo

Purmo OPTIMO 500E ECO Installation & operating manual

Franke F5LT1012 Installation and operating instructions

Franke

Franke F5LT1012 Installation and operating instructions

Moen 8131 manual

Moen

Moen 8131 manual

Bradley Advocate LA Series Installation

Bradley

Bradley Advocate LA Series Installation

American Standard Ovalyn 0495.221 Specification sheet

American Standard

American Standard Ovalyn 0495.221 Specification sheet

Balmani Solid Surface Click Flat installation guide

Balmani

Balmani Solid Surface Click Flat installation guide

Franke F5E-Therm F5ET1016 Installation and operating instructions

Franke

Franke F5E-Therm F5ET1016 Installation and operating instructions

Laufen Kartell 8.3033.1.400.302.1 manual

Laufen

Laufen Kartell 8.3033.1.400.302.1 manual

Sanela SLU 45MD Instructions for use

Sanela

Sanela SLU 45MD Instructions for use

Lamona Arroscia TAP8321 manual

Lamona

Lamona Arroscia TAP8321 manual

Axor Stark X 10070000 Assembly instructions

Axor

Axor Stark X 10070000 Assembly instructions

Hans Grohe FixFit Porter 300 Instructions for use/assembly instructions

Hans Grohe

Hans Grohe FixFit Porter 300 Instructions for use/assembly instructions

Hans Grohe Axor Starck 10456000 Instructions for use

Hans Grohe

Hans Grohe Axor Starck 10456000 Instructions for use

baliv 70 Series manual

baliv

baliv 70 Series manual

Axor One 45712 7 Series Instructions for use/assembly instructions

Axor

Axor One 45712 7 Series Instructions for use/assembly instructions

manuals.online logo
manuals.online logoBrands
  • About & Mission
  • Contact us
  • Privacy Policy
  • Terms and Conditions

Copyright 2025 Manuals.Online. All Rights Reserved.