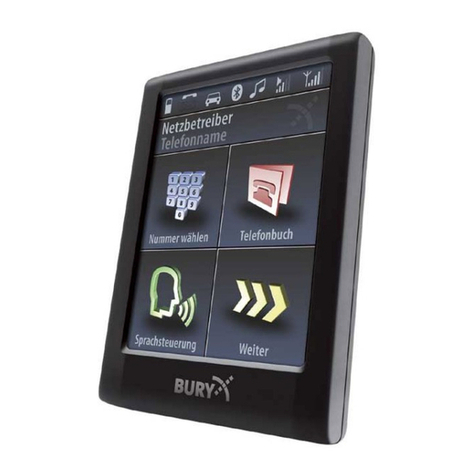
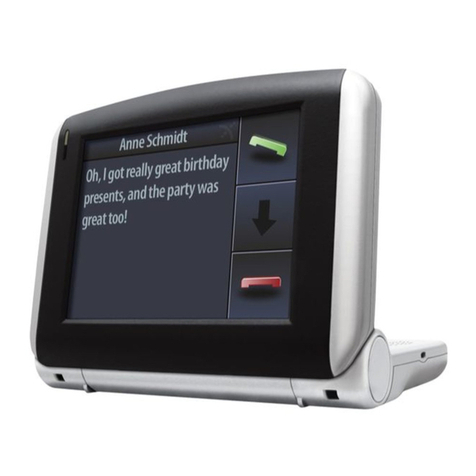
BURY CC 3100 Instruction manual

CC 3100
QUICK USER GUIDE
GUIDE DE DÉMARRAGE
GUÍA RÁPIDA
60_0917_0_01_040716_A6_Short manual_CC 3100 with ISO.indd 1 2016-07-01 08:44:39

60_0917_0_01_040716_A6_Short manual_CC 3100 with ISO.indd 2 2016-07-01 08:44:39

3
Introductory information
Dear customer,
Congratulations on purchasing a BURY hands-free car kit. You have chosen a high quality product that
is extremely easy to use.
Chère cliente, cher client,
Vous venez d’acheter un kit mains-libres de la marque BURY et avez ainsi choisi un produit de haute
qualité ainsi que de confort d’utilisation le plus élevé.
Estimado Cliente:
Usted ha adquirido un kit de telefonía manos libres de la marca BURY, optando con ello por un producto
de alta calidad y máximo confort de manejo.
60_0917_0_01_040716_A6_Short manual_CC 3100 with ISO.indd 3 2016-07-01 08:44:39

4Installation of the hands-free car kit
Scope of supply
Alcance de suministro
Fourniture
9
60_0917_0_01_040716_A6_Short manual_CC 3100 with ISO.indd 4 2016-07-01 08:44:39

5
Scope of delivery:
1. Electronic box
2. Multifunction display with cradle and mount,
screws for the holder and rubber cover,
adhesive tape
3. Microphone
4. ISO cable harness
5. Extension cord
6. AUX-In cable
7. Micro USB charging cable
8. Quick user guide
Contenido:
1. Caja electrónica
2. Pantalla multifuncional con soporte y pie de
montaje, tornillo para el soporte y cubierta
de caucho, cinta adhesiva
3. Micrófono
4. Mazo de cables ISO
5. Cable de prolongación
6. Cable AUX-In
7. Cable de carga micro USB
8. Guía rápida
Contenu de la livraison :
1. Boîtier électronique
2. Écran multifonctionnel avec support et pied
de montage, vis pour le support et cache
en caoutchouc, ruban adhésif
3. Microphone
4. Faisceau de câble ISO
5. Rallonge
6. Câble d’entrée auxiliaire
7. Câble de charge micro-USB
8. Guide rapide
60_0917_0_01_040716_A6_Short manual_CC 3100 with ISO.indd 5 2016-07-01 08:44:39

6Installation of the hands-free car kit
Installation overview
Plano general de montaje
Vue d’ensemble du montage
60_0917_0_01_040716_A6_Short manual_CC 3100 with ISO.indd 6 2016-07-01 08:44:39

7
Conexiones en la caja electrónica:
1 Mini USB
2 Suministro de corriente/Silenciamiento
a través del mazo de cables ISO
3 Micrófono
4 LINE-IN
5 Pantalla multifuncional
Connections on the electronics box:
1 Mini-USB
2 Power supply/muting using Mute via
ISO cable tree
3 Microphone
4 LINE-IN
5 Multifunction display
Connexions au boîtier électronique :
1 Mini-USB
2 Alimentation/Mise en sourdine via
le harnais de câbles ISO
3 Microphone
4 LINE-IN
5 Écran multifonctionnel
60_0917_0_01_040716_A6_Short manual_CC 3100 with ISO.indd 7 2016-07-01 08:44:39

8Installation of the hands-free car kit
1 2 3 4
Installation of the system
Montage du système
Montaje del sistema
60_0917_0_01_040716_A6_Short manual_CC 3100 with ISO.indd 8 2016-07-01 08:44:40

9
1 2 3
4 5 6
60_0917_0_01_040716_A6_Short manual_CC 3100 with ISO.indd 9 2016-07-01 08:44:40

10 Installation of the hands-free car kit
PWR/LSP/LINE OUT
Step 1:
Pull the ISO jacks at the back of the radio off and replace them with the jacks at the ISO cable harness. Connect
the now free ISO jacks with both sockets from the ISO cable harness (see picture).
60_0917_0_01_040716_A6_Short manual_CC 3100 with ISO.indd 10 2016-07-01 08:44:40

11
If you want music or voice signals to be fed via the four LINE cables, you must adjust them accordingly to the
respective type of radio and its connections (PHONE-IN or AUX-IN). Appropriate adapters are available from
specialists shops.
Step 2:
The hands-free car kit supports the radio mute function, if this function is also supported by the radio. The mute
signal is then fed to the radio via the yellow cable of the ISO cable harness. The cable is labelled with “mute”
and must be connected to one of the three sockets (mute1, mute2, mute3). Please observe the notes on this
topic in the instruction manual of the radio concerning “Pin allocation for mute / radio mute”. Then, connect the
mute cable to the corresponding socket.
Step 3:
Insert the 24-pole molex jack (A) into the connection of the
electronic box (see picture).
60_0917_0_01_040716_A6_Short manual_CC 3100 with ISO.indd 11 2016-07-01 08:44:40

12 Installation of the hands-free car kit
- 12V Power
- 12/24V Ignition
- Ground
- Line-out 1 - Line-out 2
1-Line L + / Phone L + 1-Line R + / Phone R +
2-Line L - / Phone L - 2-Line R - / Phone R -
Connection diagram for ISO cable harness
60_0917_0_01_040716_A6_Short manual_CC 3100 with ISO.indd 12 2016-07-01 08:44:40

13
- Micro Molex 24 - ISO - connection to the electronic box (HFCK)
- connection to the vehicle’s speakers
- connection to the vehicle’s power supply
- connection to the car radio
1 - Mute 3
2 - Mute 2
3 - Mute 1
4 - Ignition
5 - Antenna
6 - Illumination
7 - Power
8 - Ground
1 - C RR-
2 - C RF-
3 - C LF-
4 - C LR-
5 - R LR-
6 - R LF-
7 - R RF-
8 - R RR-
9 - LINE R+
10 - LINE L+
11 - R-Mute
12 - Ground
13 - C RR+
14 - C RF+
15 - C LF+
16 - C LR+
17 - R LR+
18 - R LF+
19 - R RF+
20 - R RR+
21 - LINE R-
22 - LINE L-
23 - Ignition
24 - Power
60_0917_0_01_040716_A6_Short manual_CC 3100 with ISO.indd 13 2016-07-01 08:44:40

14 Installation of the hands-free car kit
PWR/LSP/LINE OUT
Paso 1:
Retire el conector ISO de detrás de la radio y sustitúyalo por el conector del arnés de cables ISO. Conecte el
conector ISO que ha quedado libre con las dos hembrillas del arnés de cables ISO (véase figura). 10
Si desea transferir música o voz a través de los cuatro cables LINE, estos deberán adaptarse a la radio corres-
pondiente y a sus conectores (PHONE-IN o AUX-IN). Puede adquirir los adaptadores correspondientes en los
comercios especializados.
Paso 2:
El kit de manos libres soporta la función de silencio de la radio, siempre que la radio también la soporte. La señal
de silencio se reproduce en la radio a través del cable amarillo del arnés de cables ISO. El cable está marcado
con “mute” y se debe conectar a una de las tres hembrillas (mute 1, mute 2, mute 3). Observe las indicaciones
en el manual de uso de la radio sobre “Asignación de pines para mute / Silencio de la radio”. A continuación,
conecte el cable de silencio (mute) a la hembrilla correspondiente. 11
Paso 3:
Conecte el conector Molex de 24 pines (A) en la conexión de la caja electrónica (véase figura). 11
Esquema de conexiones para el arnés de cables ISO 12
- Conexión ISO Micro Molex 24 a la caja electrónica
- Conexión a los altavoces del vehículo
- Conexión a la red de a bordo
- Conexión a la radio del coche
60_0917_0_01_040716_A6_Short manual_CC 3100 with ISO.indd 14 2016-07-01 08:44:40

15
PORT PWR/LSP/LINE OUT
Étape 1 :
Retirez le connecteur ISO à l’arrière de l’autoradio et remplacez-le avec le connecteur du faisceau de câbles ISO.
Le connecteur ISO est maintenant libre. Veuillez le connecter avec les deux ports du faisceau de câbles ISO (voir
la figure). 10
Si vous souhaitez transférer la musique ou la parole de votre interlocuteur par le câble à quatre LINE, alors il faut
les faire correspondre à l’autoradio donné et les adapter à ses ports de connexion (PHONE-IN ou AUX-IN). Les
adaptateurs appropriés sont disponibles auprès votre revendeur.
Étape 2 :
Le kit mains-libres supporte la fonction de mise en sourdine de l’autoradio si elle est également supportée par
l’autoradio. Le signal de mise en sourdine est transmis via le câble jaune du faisceau de câbles ISO à l’autoradio.
Le câble est identifié avec « mute » et doit être connecté à l’un des trois ports (mute 1, mute 2 ou mute 3). Dans
ce cas, veuillez tenir compte des instructions dans le chapitre « Configuration des broches pour mute/mise en
sourdine de l’autoradio » du manuel de l’utilisateur de l’autoradio. Ensuite, branchez le câble Mute au port de
connexion correspondant. 11
Étape 3 :
Branchez le connecteur Molex à 24 broches (A) dans le port de connexion du boîtier électronique (voir la figure).
11
Schéma de câblage pour le faisceau de câbles ISO. 12
- Micro Molex 24 - ISO - Raccordement au boîtier électronique
- Raccordement au haut-parleur auto
- Raccordement au réseau de bord
- Raccordement à l’autoradio
60_0917_0_01_040716_A6_Short manual_CC 3100 with ISO.indd 15 2016-07-01 08:44:40

16 Installation of the hands-free car kit
123
456
79
*
#
PIN: 1234
“CC 3100”
Establishing a
Bluetooth
connection
Establecer una conexión
Bluetooth
Etablir une connexion
Bluetooth
60_0917_0_01_040716_A6_Short manual_CC 3100 with ISO.indd 16 2016-07-01 08:44:40

17
Operating guideline
You can enter a telephone number here
Aquí puede introducir un número de teléfono
Ce sous-menu vous permet de saisir un numéro
de téléphone
You can open the telephone book here
Aquí puede abrir la agenda de teléfonos
Ce sous-menu vous permet d’ouvrir le répertoire
You can start the voice control here
Aquí puede ejecutar el control por voz
Ce sous-menu vous permet de démarrer
la commande vocale
You can flick through more functions here
Aquí puede pasar a otras funciones
Ce sous-menu vous permet de consulter les autres
fonctions
60_0917_0_01_040716_A6_Short manual_CC 3100 with ISO.indd 17 2016-07-01 08:44:41

18 Operating guideline
Manejo mediante la pantalla táctil
La navegación se realiza mediante las teclas de flechas, con los símbolos rojos podrá cancelar acciones
o retrocer o, si los pulsa durante más tiempo, ir directamente al menú principal. Con los símbolos verdes
podrá confirmar o realizar acciones.
Commande via l’écran tactile
La navigation s’effectue via les touches fléchées (si disponibles) ; avec le symbole rouge, vous pouvez
annuler les actions ou reculer d’une étape et si vous appuyez pendant un certain temps, vous retournez
directement au menu principal. Le symbole vert vous permet de confirmer vos actions.
Handling via Touch screen
The operation can be carried out via possibly existing arrow keys. With the red symbols you can cancel
an action or go a step back. If you press long you will return to the main menu. With the green symbols
you can confirm actions.
Back to choose language More -> Settings -> Device -> Language
Volver a la selección de idioma Siguiente -> Ajustes -> Aparato -> Idioma
Retour à sélectionner la langue Plus -> Réglages -> Appareil -> Langue
60_0917_0_01_040716_A6_Short manual_CC 3100 with ISO.indd 18 2016-07-01 08:44:41

19
Further Information
A detailed instructions manual for the CC 3100 is available on our website under the follow-
ing address: www.bury.com
Have a good trip!
Une notice d’utilisation détaillée pour CC 3100 est disponible sur notre site Internet
à l’adresse : www.bury.com
Nous vous souhaitons un bon voyage !
Encontrará un manual de instrucciones más detallado sobre el CC 3100 de BURY en nuestra pági-
na web con la dirección: www.bury.com
Le deseamos un buen viaje.
Approvals and declaration of conformity
Federal Communications Commission (FCC) Compliance Statement - United States
This device complies with part 15 of the FCC Rules. Operation is subject to the following two conditions:
1 This device may not cause harmful interference, and
2 the device must accept any interference received, including interference that may cause undesired op-
eration. Changes or modifications not expressly approved by the party responsible for compliance could
void the user’s authority to operate the equipment.
FCC ID: QZ9-CC3100
Remark:
The CC3100 FCC Label mark is placed on to the electronics box.
60_0917_0_01_040716_A6_Short manual_CC 3100 with ISO.indd 19 2016-07-01 08:44:41

20 Further Information
Permisos y declaraciones de conformidad
Comisión Federal de Comunicaciones (FCC) Declaración de Conformidad – Estados Unidos
Este dispositivo cumple con la parte 15 de las reglas FCC. La operación está sujeta a las siguientes dos
condiciones:
1 Este dispositivo no puede causar interterencia perjudicial, y
2 el dispositivo debe aceptar cualquier interferencia recibida, incluyendo interferencia que pueda causar
operaciones no deseables. Los cambios y modificaciones no aprobados explícitamente por la parte res-
ponsable del cumplimiento, puede anular la autoridad del usuario para operar el equipo.
FCC ID: QZ9-CC3100
Comentarios:
La etiqueta CC3100 FCC está situada sobre la caja de electrónicos.
Homologations et déclarations de conformité
Déclaration de conformité de la Commission fédérale des communications (FCC) – États-Unis
Cet appareil est conforme à la partie 15 des Règles de la FCC. Le fonctionnement est soumis aux deux
conditions suivantes:
1 Cet appareil ne doit pas provoquer d’interférence nuisible et
2 cet appareil doit accepter toute interférence reçue, y compris les interférences qui peuvent provoquer
un fonctionnement non désiré. Tout changement ou modification n’ayant pas été expressément approuvé(e)
par la partie responsable de la conformité pourrait annuler l’autorisation d’utiliser l’équipement.
FCC ID: QZ9-CC3100
Remarque:
Le marquage CC3100 FCC est placé sur le boîtier électronique.
60_0917_0_01_040716_A6_Short manual_CC 3100 with ISO.indd 20 2016-07-01 08:44:41
Other manuals for CC 3100
1
Table of contents
Other BURY Automobile Accessories manuals
BURY
BURY CC 9010 User manual

BURY
BURY CC 9048 Instruction manual

BURY
BURY UNI Take&Talk User manual

BURY
BURY CC 9040 User manual

BURY
BURY CC 9058 Instruction manual

BURY
BURY Motion User manual

BURY
BURY UNI Take&Talk User manual

BURY
BURY POWERMOUNT Series User manual

BURY
BURY Crystal User manual

BURY
BURY AD 9060 User manual

BURY
BURY Smart User manual

BURY
BURY CC 9058 User manual
BURY
BURY RC 9060 User manual

BURY
BURY CV 9040 Plus User manual

BURY
BURY CC 9045 User manual

BURY
BURY CC 9060 Plus User manual

BURY
BURY AC 5120 User manual

BURY
BURY CC 9060 Time User manual

BURY
BURY CC 9048 User manual

BURY
BURY CC 9056 Plus Instruction manual