by.schulz M.1 User manual

M.1
INSTALLATION + OPERATING INSTRUCTIONS
Platform-Pedal
GRIPTAPE
EN

Installation + Operating Instructions by.schulz M.1Pedal 3/82/8 Installation + Operating Instructions by.schulz M.1Pedal
2. SAFETY INSTRUCTIONS
Before the rst ride:
We strongly recommend that you check your bike in gen-
eral, and the operational safety of the M.1 pedals in par-
ticular, before every ride.
Make sure that the pedals can rotate freely around the
pedal axles without resistance.
INTRODUCTION
Thank you for choosing a by,schulz product. Please read
these instructions carefully before assembly and use, and
keep them in a safe place. If you have any further ques-
tions about this product, please contact your dealer.
We wish you a safe ride!
TABLE OF CONTENTS Page
1. Usage approval 02
2. Safety instructions 03
3. Scope of delivery 03
4. Function / Features 03
5. Installation requirements 04
6. Technical data 04-05
7. Components / Exploded view 05
8. Installation 05
8.1 Tools 05
8.2 Mounting the M.1 pedals 05-06
9. Maintenance / Care 07
1. USAGE APPROVAL
The pedals of the by,schulz M.1 series are designed for use
with bikes, pedelecs, cargo bikes and e-bikes up to 45 km/h.
They are NOT suitable for extreme
loads that occur during downhill, dual slalom or freeriding, or
for riding proles with jumps.
The by,schulz M.1 pedals made of high-strength aluminum
are tested according to the following DIN standards with in-
creased test load, and approved for a rider weight of max.
150 kg.
3. SCOPE OF DELIVERY
· Right pedal
· Left pedal
· Instruction manual
4. FUNCTION / FEATURES
The M.1 pedal is designed for bicycles, e-bikes and cargo
bikes. The robust aluminum body of the M.1, with an over-
all height of only 19mm is much atter than usual, but still
compliant with StVZO (german traffic laws) due to new
narrow reectors.
The large tread surface is covered with non-slip 3M Grip-
tape, so that a safe standing is guaranteed during the
ride. The solid and high-quality axles and bearings from
the MTB range, also offer high reliability with low main-
tenance.
5. INSTALLATION REQUIREMENTS
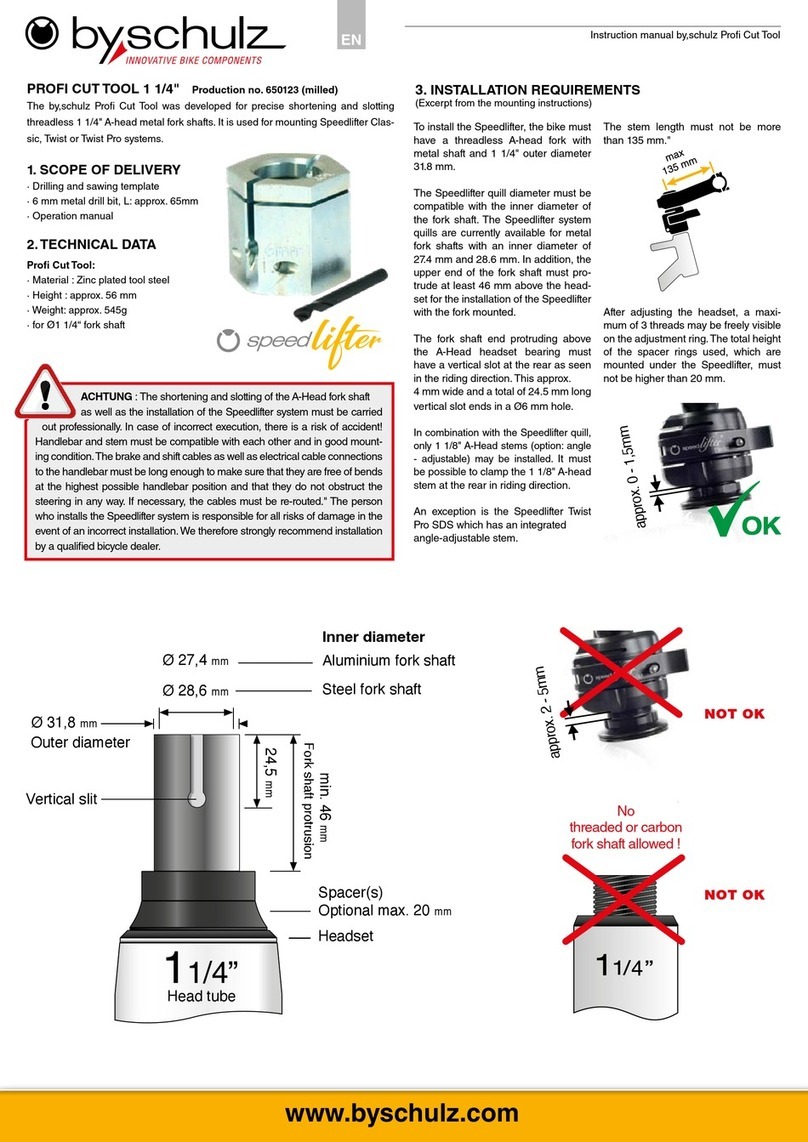
The by,schulz M.1 pedal, is equipped with a 9/16" thread.
Make sure that the crank arms of your bike have the same
thread.
1. These instructions contain important informa-
tion on the proper installation, use and care of
the by,schulz M.1 pedals. Read the instructions care-
fully and completely. It is important that you follow the
listed warning and safety instructions. Failure to do so
may result in damage and personal injury. The company
by,schulz, and its sales partners are not liable for dam-
ages caused by incorrect installation, operation, main-
tenance or use!
2. Check the installation requirements before installa-
tion. If you do not have the appropriate expertise and /
or tools, we strongly recommend installation by a dealer.
3. If the pedals are damaged after a fall, replace them to
avoid any resulting accident risks.
TIGHTENING TORQUE: This symbol re-
fers to an important screw connection that must be
tightened with an exact tightening torque. The cor-
rect tightening torque is either listed on the compo-
nent itself or in these operating instructions. A torque
wrench is required for execution! Screw connections
that are not tightened correctly can loosen or break
without warning. This can cause a fall or lead to dam-
age and personal injury!
Installation + Operating Instructions by.schulz M.1Pedal 5/84/8 Installation + Operating Instructions by.schulz M.1Pedal
6. TECHNICAL DATA
·Pedal type : Platform bicycle pedal
·Pedal body : Aluminium, AL-6061-T6
·Color : black anodized
·Tread : Griptape 3M, on both sides
·Pedal axle : 9/16 inch thread, chromoly steel
·Pedal bearings : industrial ball bearing, plain bearing
·Weight : approx. 520 g / pair
·Dimensions (W x H x D) : approx. 102 x 90 x 19 mm
·Rider weight : max. 150 kg
·StVZO compliant (German traffic laws)
7. COMPONENTS
1. Griptape 3M (2x)
2. Reector holder, rubber (2x)
3. Pedal reector (2x)
4. Industrial ball bearing
5. Safety nut M6
6. Dust cap with external thread,
aluminium, 6mm Allen key
7. MTB axle, chromoly-steel, 8mm Allen key
8. Bearing seal, rubber
9. Plain bearing bushing, metal coated
10. Pedal body, aluminium
8. INSTALLATION
8.1 TOOLS :
To install the by,schulz M.1 M-Line pedals you need the
following tools and utilities:
·Torque wrench, min. 40 Nm setting range
·Allen bit 8 mm
·Bearing grease, or mounting paste
Height 19 mm
9/16"
Width 102 mm
Length 90 mm
1
2
3
4
10
9
8
7
5
6

Installation + Operating Instructions by.schulz M.1Pedal 7/86/8 Installation + Operating Instructions by.schulz M.1Pedal
Riding direction
Riding direction
Tightening
Tightening
L
R
8 mm
8.2 MOUNTING THE M.1 PEDALS :
For easy identication, the M.1 pedals are marked with la-
bels. The left pedal marked "L" is additionally marked with
a ring groove on the pedal axle (see Fig. 8.1), and must be
mounted on the left side of the bike in the riding direction.
Likewise, the one marked with "R" must be mounted on
the right side. The sides must not be mounted the other
way round, as this could damage the threads on the crank
arms and pedals.
When screwing the pedal into the crank arm, make sure
that it is not at an angle. If the pedals cannot be screwed
in with little hand force, please contact a dealer!
1. Remove any pedals that may be installed. To loosen the
pedals, screw in reverse to the direction of travel. If you
have any difficulties, please contact the manufacturer or
a dealer.
2. Clean the threads of the crank arms and apply some
bearing grease or assembly paste to the threads of the
pedals.
3. Screw the right pedal (marked "R") clockwise into the
thread of the right crank arm using an 8 mm Allen key.
4. Tighten the screw from the back of the crank arm with a
torque of approx. 25 - 30 Nm.
5. Repeat steps 2. to 4. on the left side of the bike with the
left pedal marked "L". Screw counterclockwise here.
Finally, check that the pedals are correctly mounted and
rotate freely.
9. MAINTENANCE / CARE
After the rst approx. 100 km of driving, the pedal axle
must be retightened with approx. 30 Nm. Have this check
performed and documented by a dealer annually there-
after, or after approx. 2000 km. The pedal axle, which
is sealed on both sides, and the bearings are mainte-
nance-free and do not require lubrication.
Keep the axles and bearings of the by,schulz M.1 pedals
free of dirt and mud. Clean them regularly. Tough dirt
can usually be removed with warm water and commer-
cially available dish soap. Do not use a steam cleaner
or harsh cleaning agents such as acetone, trichloroeth-
ylene or methylene, as these cleaning agents attack the
components, seals and bearings. Watch out for damage,
deformation or other changes to the components of the
M.1 pedals. The product must not be disassembled or
technically modied, otherwise there is a risk of injury!
The wear and tear caused by normal use of the product,
is excluded from the warranty!
Regular maintenance guarantees you a long driving
pleasure and perfect functionality. If you do not have the
necessary expertise, or have questions regarding opera-
tional safety, have this service performed by a dealer.
Fig. 8.2 : Left pedal with
ring groove = Left-hand thread
Fig. 8.1 : Right pedal without
ring groove = Right-hand thread
Note : When screwing in pedals, the turning
movement is in the direction of the front wheel,
and the loosening in the direction of the rear wheel!
Observe the specied torque of 30-35 Nm!

www.byschulz.com
by,schulz © 2023
No reprints, translations or copies of any kind allowed without the prior written approval of by.schulz GmbH. Subject to technical alterations, errors and
misprints excepted. Used photos can varying from the original product. by,schulz GmbH, Saarbrücken / Germany
M-M1-20230324-EN / AN-12304
by,schulz GmbH
Bühlerstraße 121
D-66130 Saarbrücken
GERMANY
Tel : +49(0)681-95 97 25 0
Fax : +49(0)681-95 97 25 20
info@byschulz.com
www.byschulz.com
www.byschulz.com
www.youtube.com
Operating instructions
available for download:
Installation videos
available under :
Table of contents
Other by.schulz Bicycle Accessories manuals

by.schulz
by.schulz Stem Alpha +10 SDS Installation instructions

by.schulz
by.schulz e-Bikelifter BM-60 User manual

by.schulz
by.schulz G.2 ST Manual

by.schulz
by.schulz Stem Alpha 35 SDS Installation instructions

by.schulz
by.schulz D.2 ST-Ri User manual

by.schulz
by.schulz 650123 User manual

by.schulz
by.schulz D.1 Ri User manual

by.schulz
by.schulz Speedlifter 640119 User manual

by.schulz
by.schulz D.2 ST-Ro User manual

by.schulz
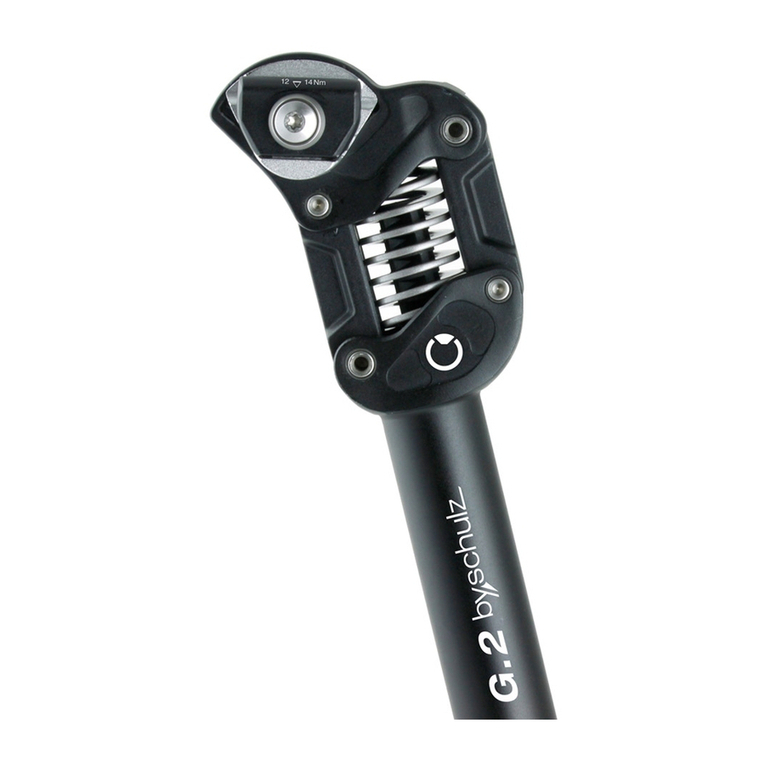
by.schulz G.2 ST User manual