manuals.online logo
Brands
  1. Home
  2. •
  3. Brands
  4. •
  5. Byron
  6. •
  7. Accessories
  8. •
  9. Byron Home Easy HE-413 User manual

Byron Home Easy HE-413 User manual

RE-INVENTING THE HOME
HOME
easy
HE-413 Remote control
Outdoor PIR & Socket
V1.0 Installation:
The HE-413 Outdoor PIR Kit adds extra security and ease
of use to your Home Easy products
PIR:
  -Selectable timer setting
  -10Metre Detection Range
  -IP44 Weather Proof
  -25 Metre Wire Free Range
  -Battery Powered 3*AAA
Socket:
  -3000W Load Max
  -Indoor use only
The HE-413 allows you to control your HomeEasy Receiver sockets or modules
via a wire free remote control PIR sensor.
When the PIR beam is broken the outdoor PIR will switch on your Remote
control socket for between 15 seconds and 4 Minutes.
Ideal for controlling out door lighting, staircase lighting and house hold
lighting for added security.
Compatible with all HomeEasy products.
1. Fist select your required location, it's recommended that the PIR is installed
approximately 3 metres off the ground (ideally under the eaves of the building)
and, away form direct sources of sunlight or heat.
Warning: Avoid installing the Remote Control PIR onto metallic surfaces
and above heating vents as this will affect the operating performance.
2. Remove the PIR unit form the base and using the mounting bracket as a
template mark and drill appropriate holes and fix the bracket securely using
the appropriate screws and wall plugs (included).
1. Unclip the battery cover from the bottom of the
PIR using a small screw driver.
Changing Batteries:
2. Remove the batteries and replace using 3
new 'AAA' batteries, making sure the polarity
is correct.
Always dispose of old batteries in an
environmentally responsible way
3. Replace the battery cover making sure the rubber seal is correctly
aligned and firmly push the case together.
Rubber seal
Avoid Direct Heat
Sources
Detection Distance
easy
HOME
rrr
C H Byron
34, Sherwood Rd
Aston Fields
Bromsgrove
B60 3DR
Contact Details:
433MHz
R&TTE
APPROVED
CH Byron Electrical United Kingdom. www.chbyron.com
A
B
DK
FIN
F
D
GR
LT
IRL
I
L
NL
P
E
S
UK
BG
CZ
EST
H
IS
LV
M
N
SK
SLO
CH
PL
RO
0560
Tel: 0845 2301231
Fax: 01527 557701
Web: www.chbyron.com
E-mail:
[email protected]
No Activation:  -Check the battery life and pairing with receiver socket or 

  module.
Receiver stays ON -The PIR might be receiving false signals due to the 
continuously: selected location, try adjusting the angle.
Radom Activation: -Wind/rain can cause the PIR unit to activate , try a new  
location if needed.
-Small animals can activate the PIR.
-Try selecting a new address code.
-Passing traffic or pedestrian can activate the PIR, alter 
  the detection angle.
Contact:   Helpline: 0845 2301 231
RF Range: The radio signals operating distance is reduced when the signal has
to pass through walls.The radio signals achieve a range of 25m; this can be
reduced depending on the type of material
TIMBER CONCRETE
METAL GLASS
PLASTICS
10 - 15%
BRICK
10 - 40%
40- 80%
10 - 40%
90% 5 - 15%
Range
Reduction Guide:
Detection Area:
Help Section :
Product Specification:
Remote Control: HE-403
Battery: 3 * AAA
Range: 25Metres (Open Distance)
Frequency: 433.92MHz
IP44 Weather Proof
Warning: Never Exceed the Product Specification
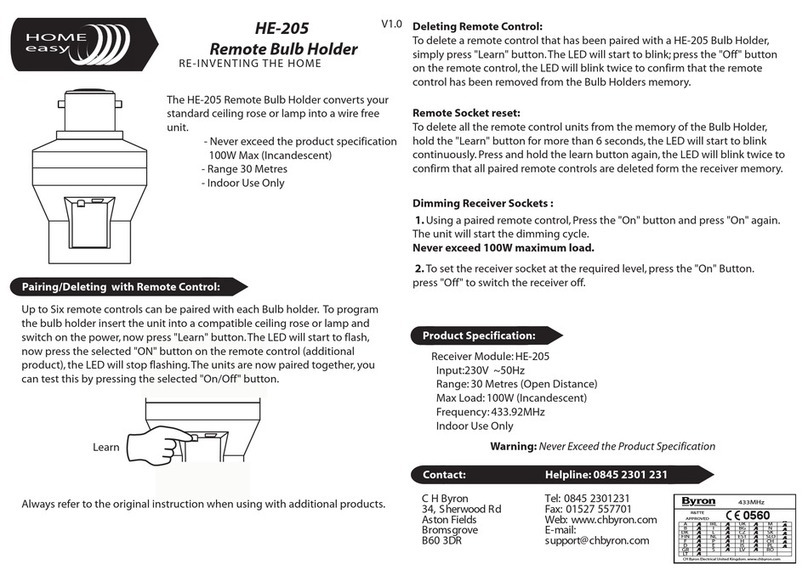
Up to Six remote control units can be paired with each
HomeEasy Receiver socket or module, to pair the
outdoor PIR with a receiver unit,remove the battery
cover and, slide the switch to DEL.
Deleting Remote Control:
To delete the PIR from the memory of a HomeEasy remote control receiver
socket or module, simply press the "Learn" button.The LED will start to blink;
slide the "LEARN" switch to "DEL", the LED will blink twice to confirm that the
remote control has been removed from the receiver sockets memory.
Pairing/Deleting with Remote Control:
Now press the "Learn" button,the LED will start to flash, now slide the
"LEARN" switch to "SET", the units are now paired together.
Setting Timer :
The HomeEasy Outdoor PIR will switch on the receiver socket or module for a
predefined period of time when activated,this can be set between 15 seconds
and 4 minutes. Timer Setting:
1min:
15 sec:4 min(max):
The PIR detection area is 110 degrees,this can be reduced using the clip-on
covers (included).if required the covers can be cut to size.
if required the covers can be cut to size.
N/A:
Day/Night Setting:
The PIR can operate in 24Hr a day or night
mode (Low Level Conditions <10Lux).To
select night only mode, remove the cover
from the bottom of the PIR and press the
"LUX" button as shown below.
Remote Socket: HE-310
Max Load: 3000W (Max)
Indoor Use Only
To select the time period, remove the
battery cover and using a small screw
driver rotate the dial to select the
required time.
Remote Socket reset:
To delete all the remote control units from the memory of the receiver
socket, hold the "Learn" button for more than 6 seconds, the LED will start
to blink continuously. Press and hold the "Learn" button again, the LED
will blink twice to confirm that all paired remote controls have been
deleted from the receiver sockets memory.

Other Byron Accessories manuals

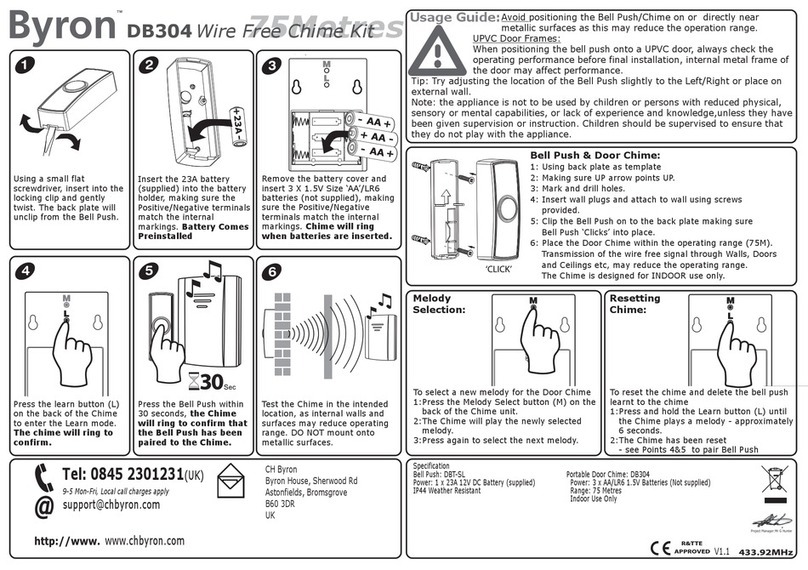
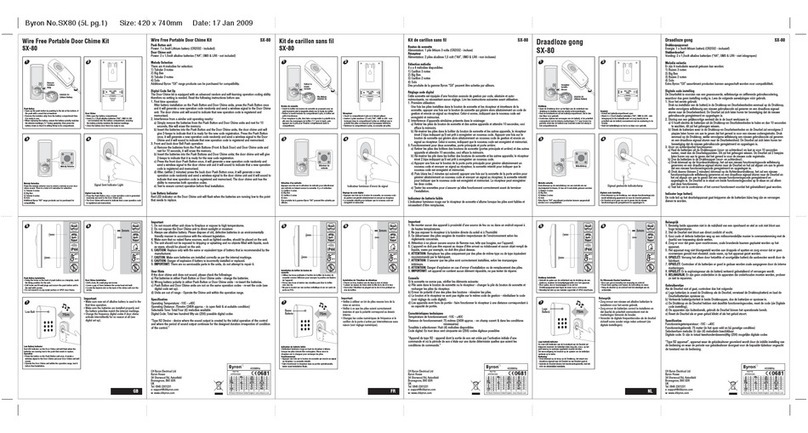
Byron B304 User manual

Byron

Byron B304 User manual

Byron SX-252 Owner's manual

Byron

Byron SX-252 Owner's manual

Byron SX-21 Owner's manual

Byron

Byron SX-21 Owner's manual

Byron SX-60i Owner's manual

Byron

Byron SX-60i Owner's manual

Byron 1217 Owner's manual

Byron

Byron 1217 Owner's manual

Byron SX83 Owner's manual

Byron

Byron SX83 Owner's manual

Byron DB421E-F User manual

Byron

Byron DB421E-F User manual

Byron SX-5i Owner's manual

Byron

Byron SX-5i Owner's manual

Byron DIC-24815 User manual

Byron

Byron DIC-24815 User manual

Byron BY30 User manual

Byron

Byron BY30 User manual

Byron SX-120 Owner's manual

Byron

Byron SX-120 Owner's manual

Byron SX-86 Owner's manual

Byron

Byron SX-86 Owner's manual

Byron DB303 Owner's manual

Byron

Byron DB303 Owner's manual

Byron SX-8i Owner's manual

Byron

Byron SX-8i Owner's manual

Byron SX228 Owner's manual

Byron

Byron SX228 Owner's manual

Byron B002E User manual

Byron

Byron B002E User manual

Byron TX12 User manual

Byron

Byron TX12 User manual

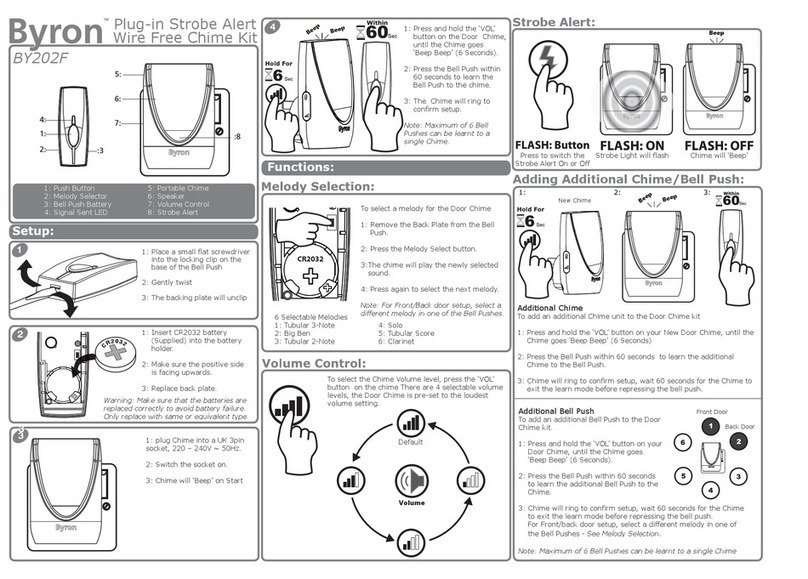
Byron BY202F Owner's manual

Byron

Byron BY202F Owner's manual

Byron SX-245 Owner's manual

Byron

Byron SX-245 Owner's manual

Byron SX-6 Owner's manual

Byron

Byron SX-6 Owner's manual

Byron TX-2 User manual

Byron

Byron TX-2 User manual

Byron SX-208 User manual

Byron

Byron SX-208 User manual

Byron BY201 Owner's manual

Byron

Byron BY201 Owner's manual

Byron Home Easy HE-301 User manual

Byron

Byron Home Easy HE-301 User manual

Popular Accessories manuals by other brands

KROHNE OPTISENS TSS 2000 Handbook

KROHNE

KROHNE OPTISENS TSS 2000 Handbook

SICK deTem2 Core operating instructions

SICK

SICK deTem2 Core operating instructions

Thermo Scientific BB 150 user manual

Thermo Scientific

Thermo Scientific BB 150 user manual

ABB CMS-12xPS installation manual

ABB

ABB CMS-12xPS installation manual

PRESONUS AudioBox iOne HOOK-UP GUIDE

PRESONUS

PRESONUS AudioBox iOne HOOK-UP GUIDE

iB COLUMBO user manual

iB

iB COLUMBO user manual

Obelink TREFFER MINI PITCHING INSTRUCTION

Obelink

Obelink TREFFER MINI PITCHING INSTRUCTION

Craftsman 316.792401 Operator's manual

Craftsman

Craftsman 316.792401 Operator's manual

Asus ABTU001 user manual

Asus

Asus ABTU001 user manual

Corradi EXYL manual

Corradi

Corradi EXYL manual

SICK GLD20 operating instructions

SICK

SICK GLD20 operating instructions

KROHNE OPTIFLUX 6000 quick start

KROHNE

KROHNE OPTIFLUX 6000 quick start

LEGRAND HPM Serenity instruction manual

LEGRAND

LEGRAND HPM Serenity instruction manual

optris CS series Operator's manual

optris

optris CS series Operator's manual

Pepperl+Fuchs NJ10-30GM50-E2-V1-3G-3D instruction manual

Pepperl+Fuchs

Pepperl+Fuchs NJ10-30GM50-E2-V1-3G-3D instruction manual

Norazza DD3001 features and benefits

Norazza

Norazza DD3001 features and benefits

poly-planar IP-100 installation instructions

poly-planar

poly-planar IP-100 installation instructions

Oregon Scientific WA633 user manual

Oregon Scientific

Oregon Scientific WA633 user manual

manuals.online logo
manuals.online logoBrands
  • About & Mission
  • Contact us
  • Privacy Policy
  • Terms and Conditions

Copyright 2025 Manuals.Online. All Rights Reserved.