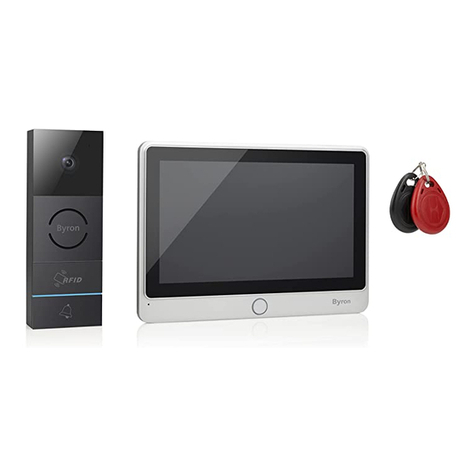
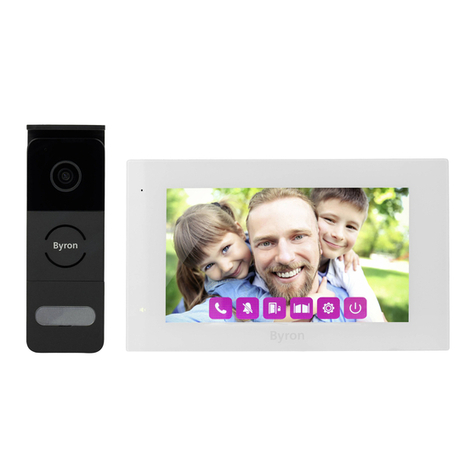
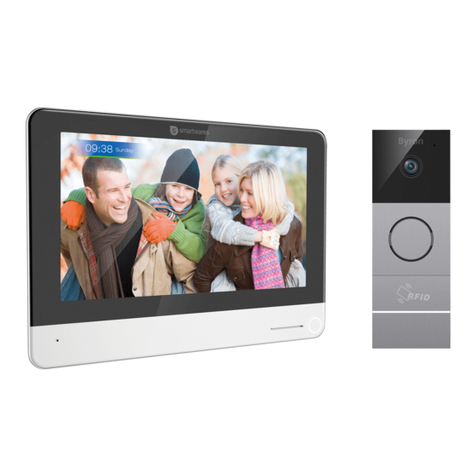
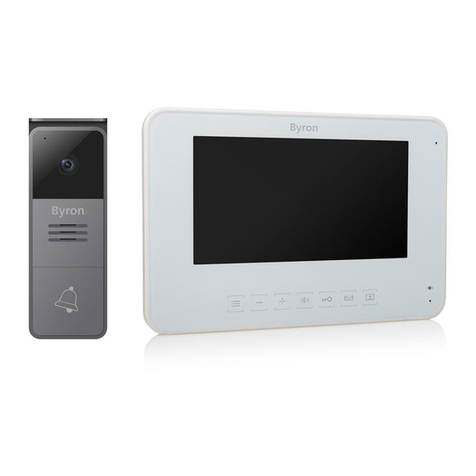
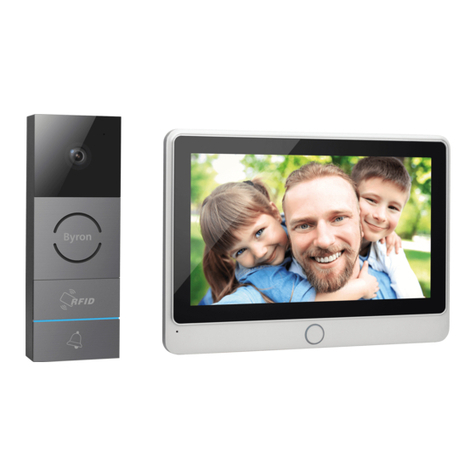
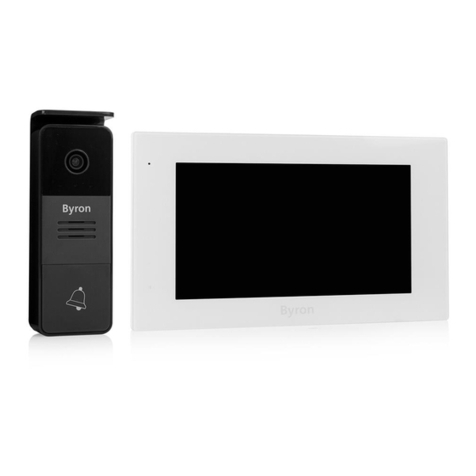
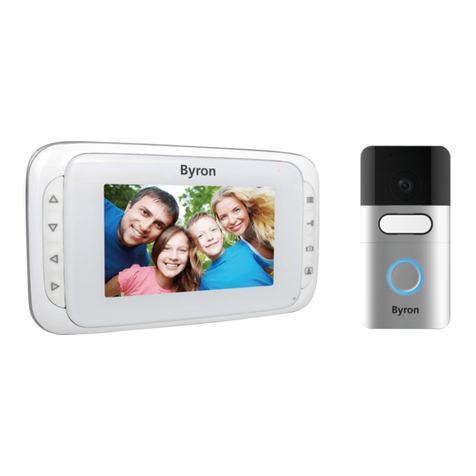
Byron DIC-24512 User manual

DIC-24512

2

Byron Table of Contents
3
Table of Contents
1 Safety ..........................................................................................................................................................................................................5
1.1 Installation Safety...............................................................................................................................................................................5
1.2 Operation Safety ................................................................................................................................................................................5
2 Parts description .......................................................................................................................................................................................5
2.1 What's in the box................................................................................................................................................................................5
2.2 Indoor unit (monitor)...........................................................................................................................................................................5
2.3 Outdoor unit (doorbell) .......................................................................................................................................................................6
3 Installation..................................................................................................................................................................................................6
3.1 Fix the mounting plate of the indoor unit (monitor) ............................................................................................................................6
3.2 Fix the mounting plate of the outdoor unit (doorbell) .........................................................................................................................6
3.3 Electrical installation ..........................................................................................................................................................................6
3.3.1 Connecting the indoor unit (monitor) to the outdoor unit (doorbell) .................................................................................... 6
3.3.2 Connecting the AC adapter................................................................................................................................................. 7
3.3.3 Mount the indoor unit and outdoor unit ............................................................................................................................... 7
3.3.4 Connecting a gate opener (not included)............................................................................................................................ 7
3.3.5 Connecting a door lock (not included) ................................................................................................................................ 7
4 Basic functions ..........................................................................................................................................................................................7
5 Frequently asked questions .....................................................................................................................................................................8
6 Specifications ............................................................................................................................................................................................8

Instruction manual
5
1 Safety
1. Please read these instructions carefully before installing and
using the product.
2. Do not cut the power supply cable to extend it; the device
(transformer) will not work with a longer cable. Do not plug in the
device until all the wiring has been finished.
1.1 INSTALLATION SAFETY
1. Keep children and bystanders away while installing the products.
Distractions can cause you to lose control.
2. Do not overreach when installing this product. Keep proper
footing and balance at all times. This enables better control in
unexpected situations.
3. This product is not a toy. Mount it out of reach of children.
1.2 OPERATION SAFETY
1. Do not operate electrically powered products in explosive
atmospheres, such as in the presence of flammable liquids ,
gases, or dust. Electrically powered products create sparks which
may ignite the dust or fumes.
2. The warnings, precautions, and instructions discussed in this
instruction manual cannot cover all possible conditions and
situations that may occur. It must be understood by the operator
that common sense and caution are factors which cannot be built
into this product, but must be supplied by the operator.
3. Do not expose the Power Adapter of this product to rain or wet
conditions. Water entering the Power Adapter will increase the
risk of electric shock.
4. Do not abuse the Power Cord. Never use the cord for unplugging
the plug from the outlet. Keep cord away from heat, oil, sharp
edges or moving parts. Damaged or entangled cords increase
the risk of electric shock.
5. The adapter must match the outlet. Never modify the plug in any
way. Unmodified plugs and matching outlets will reduce risk of
electric shock.
2 Parts description
2.1 WHAT'S IN THE BOX
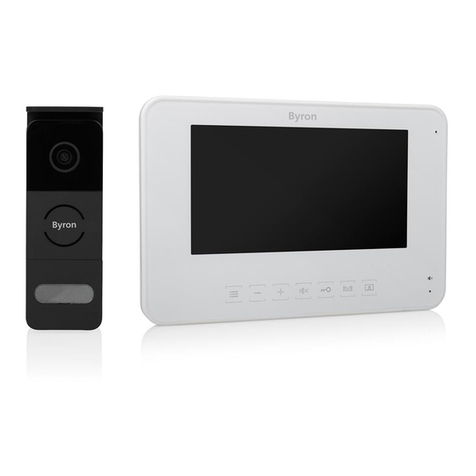
1. Indoor unit (monitor)
2. Outdoor unit (doorbell)
3. Mounting plate outdoor unit (doorbell)
4. Mounting plate indoor unit (monitor)
5. AC adapter
6. Cables
7. Screws and plugs
8. Instruction manual
2.2 INDOOR UNIT (MONITOR)
1. Screen
2. Menu
3. Intercom
4. (+) button
EN

Instruction manual
6
5. Open gate
6. Open door lock
7. (-) button
2.3 OUTDOOR UNIT (DOORBELL)
1. Microphone
2. Camera lens
3. Night vision light
4. Speaker
5. Call button
3 Installation
3.1 FIX THE MOUNTING PLATE OF THE
INDOOR UNIT (MONITOR)
To mount the monitor, you will need the following tools:
üA suitable screwdriver for the included screws.
üA drill and suitable drill bit for the included screw plugs.
A. Position the provided mounting plate where desired.
B. Mark the screw positions with a pen.
C. Drill the necessary holes.
D. Insert the plugs.
E. Pull the required cables through the mounting plate.
F. Fasten the mounting plate with the screws.
3.2 FIX THE MOUNTING PLATE OF THE
OUTDOOR UNIT (DOORBELL)
To mount the outdoor unit, you will need the following tools:
üA suitable screwdriver for the included screws.
üA drill and suitable drill bit for the included screw plugs.
A. Position the provided mounting plate where desired.
B. Mark the screw positions with a pen.
C. Drill the necessary holes.
D. Insert the plugs.
E. Use a knife or sharp object to puncture the cable gland.
F. Pull the required cables through the cable gland.
G. Fasten the mounting plate with the screws.
3.3 ELECTRICAL INSTALLATION
3.3.1 Connecting the indoor unit (monitor) to
the outdoor unit (doorbell)
To connect the terminal blocks, you will need the following tool:
üA small flat head screw driver.
A. On the indoor unit (monitor): Loosen the terminal screws. (See
sticker on the indoor unit for position.)
B. Insert the wires with the cable shoes (See sticker on the indoor
unit for position.)
C. Fasten the terminal screws.
D. On the outdoor unit (doorbell): Loosen the terminal screws. (See
sticker on the outdoor unit for position.)
E. Insert the wires. (See sticker on the outdoor unit for position.)
F. Fasten terminal screws.

Instruction manual
7
3.3.2 Connecting the AC adapter
A. Locate the “DC IN” on the back of the monitor.
B. Insert the AC adapter connector.
C. After wiring the outdoor unit: Plug in the AC adapter into a
compatible wall outlet.
3.3.3 Mount the indoor unit and outdoor unit
To mount the indoor and outdoor unit, you will need the following
tools:
üA suitable screwdriver for the included screws.
A. Attach the indoor unit and outdoor unit to the mounting plates.
B. Fasten the screw at the bottom of the outdoor unit.
3.3.4 Connecting a gate opener (not included)
To connect the gate opener, you will need the following tool:
üA small flat head screw driver.
A. On the monitor: Loosen the terminal screws. (see sticker on the
monitor for position)
B. Insert the wires. (see sticker on the monitor for position)
ðIt is important that the + and – wires are in the correct position.
A. Fasten the terminal screws.
B. On the gate opener: (See the manual provided with your gate
opener.)
3.3.5 Connecting a door lock (not included)
It is possible to connect a lock to the outdoor unit that can be opened,
using the monitor. Door locks are sold separately. Article no: DB5005
& DB5005L
To connect the door lock, you will need the following tool:
üA small flat head screw driver.
A. On the outdoor unit: Loosen the terminal screws. (see sticker on
the outdoor unit for position)
B. Insert the wires (any order)
C. Fasten the terminal screws.
D. On the lock: Loosen the two terminal screws. (See the manual
provided with your door lock.)
E. Insert the wires (any order)
F. Fasten the terminal screws.
4 Basic functions
No: Button: Description
1 Menu This menu contains settings for:
• Brightness
• Color saturation
• Contrast
2 Intercom Used to communicate with the outside unit.
3 + Used to step forward in the menu.
4 - Used to step backwards in the menu.
5 Gate
opener
Opens the gate.
EN
Instruction manual
8
No: Button: Description
6 Door lock Opens the door lock.
Table1: Buttons and functions
5 Frequently asked questions
Problem Solution
• The indoor unit does not
switch on.
• Make sure that the monitor is
connected to the power
source.
• Make sure the adapter plug is
properly pushed in to the
power outlet.
• The ring tone volume is too
low.
• Perhaps you extended the
cable. Extending the cable
can reduce the volume due to
being too long or too thin.
• I connected the indoor unit to
a lock but it does not work.
• Check if the lock is connected
properly and that a suitable
lock with an external power
source is used.
• I hear interference on the line. • Move other electronics away
from the unit to minimize
interference.
• Perhaps the cable is too long
or the wire too thin.
• There is no sound between
the outdoor unit and the
indoor unit.
• The microphone may be
obstructed. Clean the
microphone.
• Check that the cables are
connected and fastened
properly.
6 Specifications
Monitor
Screen size 4.3"(Diagonal) inch
Color Configuration R.G.B.delta
Video System PAL/NTSC
Effective Pixels 480(RGB)X272
Consumption Current 300±500mA
Operation Temperature -10°C ~ +50°C
Operation Humidity 85%(Max)
Supply Voltage DC 15V 1A
Doorbell
Imaging Sensor Type 1/4"CMOS
View Angle about 100o
Minimum Illumination 0Lux
Night vision distance 0.5 ~ 1m

Instruction manual
9
Operating Temperature -10°C ~ +50°C
Operating Humidity ≤85%RH
7 Environment
This appliance should not be put into the domestic garbage at
the end of its durability, but must be offered at a central point for the
recycling of electric and electronic domestic appliances. This symbol
on the appliance, instruction manual and packaging puts your
attention to this important issue. The materials used in this appliance
can be recycled. By recycling of used domestic appliances you
contribute an important push to the protection of our environment.
Ask your local authorities for information regarding the point of
recollection.
Support
You can find all available information and spare parts at
www.chbyron.eu
Please read manual before use, and store it carefully for future use
and maintenance.
You can also check out our YouTube videos by scanning the QR
code below with your phone!
EN

Inhalt Byron
10
Inhalt
1 Sicherheit .................................................................................................................................................................................................12
1.1 Sicherheit bei der Montage ..............................................................................................................................................................12
1.2 Betriebssicherheit ............................................................................................................................................................................12
2 Teilebeschreibung ...................................................................................................................................................................................12
2.1 Lieferumfang ....................................................................................................................................................................................12
2.2 Innenmodul (Monitor).......................................................................................................................................................................13
2.3 Außenmodul (Türklingel)..................................................................................................................................................................13
3 Montage ....................................................................................................................................................................................................13
3.1 Bringen Sie die Montageplatte des Innenmoduls (Monitor) an. .......................................................................................................13
3.2 Bringen Sie die Montageplatte des Außenmoduls (Türklingel) an...................................................................................................13
3.3 Elektroinstallation.............................................................................................................................................................................14
3.3.1 Anschluss des Innenmoduls (Monitor) am Außenmodul (Türklingel) ............................................................................... 14
3.3.2 Anschluss des Netzteils .................................................................................................................................................... 14
3.3.3 Montage des Innen- und des Außenmoduls ..................................................................................................................... 14
3.3.4 Anschluss eines Toröffners (nicht im Lieferumfang)......................................................................................................... 14
3.3.5 Anschluss eines Türschlosses (nicht im Lieferumfang) .................................................................................................... 15
4 Grundfunktionen......................................................................................................................................................................................15
5 Häufig gestellte Fragen ...........................................................................................................................................................................15

Byron Inhalt
11
6 Technische Daten ....................................................................................................................................................................................16
7 Umwelt ......................................................................................................................................................................................................16

Bedienungsanleitung
12
1 Sicherheit
1. Lesen Sie vor der Benutzung des Produkts bitte aufmerksam
diese Betriebsanleitung.
2. Schneiden Sie das Netzkabel nicht durch, um es zu verlängern.
Das Gerät (Transformator) funktioniert mit einem längeren Kabel
nicht. Schließen Sie das Gerät erst an, wenn die gesamte
Verdrahtung fertiggestellt ist.
1.1 SICHERHEIT BEI DER MONTAGE
1. Halten Sie Kinder und Zuschauer fern, während Sie die Produkte
montieren. Ablenkung kann dazu führen, dass Sie die Kontrolle
verlieren.
2. Lehnen Sie sich bei der Montage dieses Produkts nicht zu weit
hinaus. Achten Sie jederzeit darauf, einen sicheren Stand zu
haben und das Gleichgewicht zu behalten. So können Sie auf
unerwartete Situationen besser reagieren.
3. Dieses Produkt ist kein Spielzeug. Montieren Sie es außerhalb
der Reichweite von Kindern.
1.2 BETRIEBSSICHERHEIT
1. Benutzen Sie elektrisch betriebene Produkte nicht in
explosionsgefährdeten Bereichen (z.B. mit entflammbaren
Flüssigkeiten, Gase oder brennbarem Staub). Elektrisch
betriebene Produkte erzeugen Funken, die Staub oder Dämpfe
entzünden können.
2. Die in diesem Handbuch erwähnten Warnungen,
Vorsichtsmaßnahmen und Anweisungen können nicht alle
möglicherweise auftretenden Bedingungen und Situationen
abdecken. Der Benutzer muss verstehen, dass gesunder
Menschenverstand und Vorsicht Faktoren sind, die sich nicht in
dieses Produkt integrieren lassen, sondern vom Benutzer
beizusteuern sind.
3. Setzen Sie das Netzteil dieses Produktes weder Regen noch
Feuchtigkeit aus. In das Netzteil eindringendes Wasser erhöht die
Gefahr eines Stromschlags.
4. Achten Sie auf die sachgemäße Benutzung des Netzkabels.
Ziehen Sie nie am Netzkabel, um den Stecker aus der Steckdose
zu ziehen. Schützen Sie das Netzkabel vor Hitze, Öl, scharfen
Kanten oder sich bewegenden Teilen. Beschädigte oder
verhedderte Kabel erhöhen die Gefahr eines Stromschlags.
5. Das Netzteil muss für die Steckdose geeignet sein. Nehmen Sie
keinesfalls Veränderungen am Stecker vor. Unveränderte Stecker
und geeignete Steckdosen senken die Gefahr eines
Stromschlags.
2 Teilebeschreibung
2.1 LIEFERUMFANG
1. Innenmodul (Monitor)
2. Außenmodul (Türklingel)
3. Montageplatte Außenmodul (Türklingel)
4. Montageplatte Innenmodul (Monitor)
5. Netzteil
6. Kabel

Bedienungsanleitung
13
7. Schrauben und Dübel
8. Bedienungsanleitung
2.2 INNENMODUL (MONITOR)
1. Bildschirm
2. Menü
3. Sprechanlage
4. Taste (+)
5. Tor öffnen
6. Türschloss öffnen
7. Taste (-)
2.3 AUSSENMODUL (TÜRKLINGEL)
1. Mikrofon
2. Kameralinse
3. Nachtsichtlicht
4. Lautsprecher
5. Ruftaste
3 Montage
3.1 BRINGEN SIE DIE MONTAGEPLATTE DES
INNENMODULS (MONITOR) AN.
Um den Monitor anzubringen, brauchen Sie folgende Werkzeuge:
üEinen geeigneten Schraubendreher für die beiliegenden
Schrauben.
üEine Bohrmaschine mit geeignetem Bohrer für die beiliegenden
Dübel.
A. Platzieren Sie die mitgelieferte Montageplatte wie gewünscht.
B. Markieren Sie mit einem Stift die Schraubenpositionen.
C. Bohren Sie die erforderlichen Löcher.
D. Setzen Sie die Dübel ein.
E. Führen Sie die erforderlichen Kabel durch die Montageplatte.
F. Befestigen Sie die Montageplatte mit den Schrauben.
3.2 BRINGEN SIE DIE MONTAGEPLATTE DES
AUSSENMODULS (TÜRKLINGEL) AN.
Um das Außenmodul anzubringen, brauchen Sie folgende
Werkzeuge:
üEinen geeigneten Schraubendreher für die beiliegenden
Schrauben.
üEine Bohrmaschine mit geeignetem Bohrer für die beiliegenden
Dübel.
A. Platzieren Sie die mitgelieferte Montageplatte wie gewünscht.
B. Markieren Sie mit einem Stift die Schraubenpositionen.
C. Bohren Sie die erforderlichen Löcher.
D. Setzen Sie die Dübel ein.
E. Öffnen Sie die Kabeldurchführung mit einem Messer oder einem
scharfen Gegenstand.
F. Führen Sie die erforderlichen Kabel durch die Kabeldurchführung.
G. Befestigen Sie die Montageplatte mit den Schrauben.
DE

Bedienungsanleitung
14
3.3 ELEKTROINSTALLATION
3.3.1 Anschluss des Innenmoduls (Monitor)
am Außenmodul (Türklingel)
Um die Klemmenblöcke anzuschließen, brauchen Sie folgendes
Werkzeug:
üEinen kleinen Schlitzschraubendreher.
A. Am Innenmodul (Monitor): Lösen Sie die Klemmenschrauben.
(Siehe Aufkleber am Innenmodul für die Position.)
B. Führen Sie die Drähte mit den Kabelschuhen ein (siehe Aufkleber
am Innenmodul für die Position).
C. Ziehen Sie die Klemmenschrauben fest.
D. Am Außenmodul (Türklingel): Lösen Sie die Klemmenschrauben.
(Siehe Aufkleber am Außenmodul für die Position.)
E. Führen Sie die Drähte ein. (Siehe Aufkleber am Außenmodul für
die Position.)
F. Ziehen Sie die Klemmenschrauben fest.
3.3.2 Anschluss des Netzteils
A. Achten Sie auf den Anschluss „DC IN“ auf der Monitorrückseite.
B. Schließen Sie den Netzteilstecker an.
C. Nach dem Anschließen des Außenmoduls: Schließen Sie das
Netzteil an einer geeigneten Steckdose an.
3.3.3 Montage des Innen- und des
Außenmoduls
Um das Innen- und das Außenmodul anzubringen, brauchen Sie
folgende Werkzeuge:
üEinen geeigneten Schraubendreher für die beiliegenden
Schrauben.
A. Bringen Sie das Innen- und das Außenmodul an den jeweiligen
Montageplatten an.
B. Ziehen Sie die Schraube unten am Außenmodul fest.
3.3.4 Anschluss eines Toröffners (nicht im
Lieferumfang)
Um den Toröffner anzuschließen, brauchen Sie folgendes Werkzeug:
üEin kleiner Schlitzschraubendreher.
A. Am Monitor: Lösen Sie die Klemmenschrauben (siehe Aufkleber
am Monitor für die Position).
B. Führen Sie die Drähte ein (siehe Aufkleber am Monitor für die
Position).
ðEs ist wichtig, dass die Drähte + und – korrekt positioniert sind.
A. Ziehen Sie die Klemmenschrauben fest.
B. Am Toröffner: (Siehe Bedienungsanleitung für den Toröffner.)

Bedienungsanleitung
15
3.3.5 Anschluss eines Türschlosses (nicht im
Lieferumfang)
Am Außenmodul kann ein Türschloss angeschlossen werden, das
sich mit dem Monitor öffnen lässt. Türschlösser werden separat
angeboten. Artikelnr.: DB5005 und DB5005L
Um das Türschloss anzuschließen, brauchen Sie folgendes
Werkzeug:
üEinen kleinen Schlitzschraubendreher.
A. Am Außenmodul: Lösen Sie die Klemmenschrauben (siehe
Aufkleber am Außenmodul für die Position).
B. Führen Sie die Drähte ein (beliebige Reihenfolge).
C. Ziehen Sie die Klemmenschrauben fest.
D. Am Türschloss: Lösen Sie die beiden Klemmenschrauben. (Siehe
Bedienungsanleitung für das Türschloss.)
E. Führen Sie die Drähte ein (beliebige Reihenfolge).
F. Ziehen Sie die Klemmenschrauben fest.
4 Grundfunktionen
Nr.: Taste: Beschreibung
1 Menü Enthält folgende Einstellungsoptionen:
• Helligkeit
• Farbsättigung
• Kontrast
2 Sprechanl
age
Dient zur Kommunikation mit dem Außenmodul
3 + Ein Schritt vor im Menü
Nr.: Taste: Beschreibung
4 - Ein Schritt zurück im Menü
5 Toröffner Öffnet das Tor
6 Türschlos
s
Öffnet das Türschloss
Tabelle1: Tasten und Funktionen
5 Häufig gestellte Fragen
Problem Lösung
• Das Innenmodul lässt sich
nicht einschalten.
• Stellen Sie sicher, dass der
Monitor an die
Stromversorgung
angeschlossen ist.
• Stellen Sie sicher, dass der
Netzteilstecker korrekt an
einer Steckdose
angeschlossen ist.
• Der Klingelton ist zu leise. • Eventuell haben Sie das
Kabel verlängert. Eine
Kabelverlängerung kann die
Lautstärke verringern, falls
das verwendete Kabel zu
lang oder zu dünn ist.
DE

Bedienungsanleitung
16
• Das Innenmodul ist an einem
Schloss angeschlossen, das
aber nicht funktioniert.
• Kontrollieren Sie, ob ein
geeignetes Schloss mit einer
externen Stromversorgung
benutzt wurde und dieses
korrekt angeschlossen ist.
• In der Leitung sind
Störgeräusche zu hören.
• Entfernen Sie andere
elektronische Geräte aus der
Umgebung der Einheit, um
die Störeinflüsse zu
minimieren.
• Eventuell ist das Kabel zu
lang oder zu dünn.
• Zwischen Außen- und
Innenmodul wird kein
Tonsignal übertragen.
• Eventuell ist das Mikrofon
blockiert. Reinigen Sie das
Mikrofon.
• Überprüfen Sie, ob die Kabel
korrekt angeschlossen und
fixiert sind.
6 Technische Daten
Monitor
Bildschirmgröße 4,3Zoll(diagonal)
Farbkonfiguration R.G.B. Delta
Videosystem PAL/NTSC
Effektive Pixel 480(RGB)x272
Leistungsaufnahme 300±500mA
Betriebstemperatur -10°C ~ +50°C
Betriebsfeuchte 85% (max.)
Versorgungsspannung DC 15V / 1A
Türklingel
Bildsensortyp 1/4Zoll CMOS
Sichtwinkel ca. 100°
Min. Lichtintensität 0Lux
Nachtsichtreichweite 0,5 ~ 1m
Betriebstemperatur -10°C ~ +50°C
Betriebsfeuchte ≤85%rel.
7 Umwelt
Dieses Gerät darf am Ende seiner Lebenszeit nicht im
Hausmüll entsorgt werden, sondern muss an einer Sammelstelle für
das Recyceln von elektrischen und elektronischen Haushaltsgeräten
abgegeben werden. Das Symbol auf dem Gerät, in der
Bedienungsanleitung und auf der Verpackung macht Sie auf dieses
wichtige Thema aufmerksam. Die in diesem Gerät verwendeten
Materialien können recycelt werden. Durch das Recyceln gebrauchter
Haushaltsgeräte leisten Sie einen wichtigen Beitrag zum
Umweltschutz. Fragen Sie Ihre örtliche Behörde nach Informationen
über eine Sammelstelle.

Bedienungsanleitung
17
Support
Sämtliche verfügbaren Informationen und Ersatzteile finden Sie unter
www.chbyron.eu
Lesen Sie die Anleitung vor dem Gebrauch vollständig durch. Heben
Sie die Anleitung zum späteren Nachschlagen und zu
Wartungszwecken auf.
Sie können sich auch unsere YouTube-Videos ansehen, indem Sie
den QR-Code unten mit Ihrem Smartphone scannen!
DE

Sommaire Byron
18
Sommaire
1 Sécurité.....................................................................................................................................................................................................20
1.1 Sécurité lors de l'installation.............................................................................................................................................................20
1.2 Sécurité de fonctionnement .............................................................................................................................................................20
2 Description des pièces............................................................................................................................................................................20
2.1 Contenu de l'emballage ...................................................................................................................................................................20
2.2 Unité intérieure (écran) ....................................................................................................................................................................21
2.3 Unité extérieure (sonnette) ..............................................................................................................................................................21
3 Installation................................................................................................................................................................................................21
3.1 Fixer la plaque de montage de l'unité intérieure (écran)..................................................................................................................21
3.2 Fixer la plaque de montage de l'unité extérieure (sonnette)............................................................................................................21
3.3 Installation électrique .......................................................................................................................................................................21
3.3.1 Raccordement de l'unité intérieure (écran) à l'unité extérieure (sonnette) ....................................................................... 21
3.3.2 Connexion de l'adaptateur secteur ................................................................................................................................... 22
3.3.3 Monter l'unité intérieure et l'unité extérieure ..................................................................................................................... 22
3.3.4 Raccordement d'un ouvre-portail (non inclus) .................................................................................................................. 22
3.3.5 Raccordement d'une serrure de porte (non inclus)........................................................................................................... 22
4 Fonctions de base ...................................................................................................................................................................................23
5 Questions fréquemment posées ............................................................................................................................................................23

Byron Sommaire
19
6 Spécifications ..........................................................................................................................................................................................23
7 Environnement.........................................................................................................................................................................................24

Manuel
d'instructions
20
1 Sécurité
1. Veuillez lire attentivement ces instructions avant d'installer et
d'utiliser le produit.
2. Ne coupez pas le câble d'alimentation pour le rallonger; l'appareil
(transformateur) ne fonctionnera pas avec un câble plus long. Ne
pas brancher l'appareil tant que tout le câblage n'est pas terminé.
1.1 SÉCURITÉ LORS DE L'INSTALLATION
1. Tenir les enfants et les curieux à l'écart pendant l'installation des
produits. La moindre distraction pourrait vous faire perdre votre
contrôle.
2. Ne pas aller trop loin lors de l'installation de ce produit. Gardez
toujours une bonne assise et un bon équilibre. Ceci vous permet
de mieux garder le contrôle en cas d'imprévu.
3. Ce produit n'est pas un jouet. Installez-le hors de portée des
enfants.
1.2 SÉCURITÉ DE FONCTIONNEMENT
1. N'utilisez pas d'appareils électriques dans des atmosphères
explosives, par exemple en présence de liquides inflammables,
de gaz ou de poussières. Les produits électriques créent des
étincelles qui peuvent enflammer la poussière ou les vapeurs.
2. Les avertissements, précautions et instructions figurant dans ce
mode d'emploi ne peuvent pas couvrir toutes les conditions et
situations susceptibles de se produire. L'opérateur doit bien
comprendre que le bon sens et la prudence sont des facteurs qui
ne peuvent être intégrés dans ce produit, c'est à lui d'en faire
preuve.
3. Attention à ne pas exposer l'adaptateur secteur de cet appareil à
la pluie ou à l'humidité. Si de l'eau pénètre dans l'adaptateur
secteur, cela augmente le risque de choc électrique.
4. Ne malmenez pas le cordon d'alimentation. N'utilisez jamais le
cordon pour débrancher la fiche de la prise de courant. Éloignez
le cordon de la chaleur, de l'huile, des bords coupants ou de
pièces mobiles. Des cordons endommagés ou emmêlés
augmentent le risque de choc électrique.
5. L'adaptateur doit correspondre à la prise de courant. Ne modifiez
jamais la fiche. Les fiches intactes avec les prises
correspondantes réduiront le risque de choc électrique.
2 Description des pièces
2.1 CONTENU DE L'EMBALLAGE
1. Unité intérieure (écran)
2. Unité extérieure (sonnette)
3. Plaque de montage unité extérieure (sonnette)
4. Plaque de montage unité intérieure (écran)
5. Adaptateur CA
6. Câbles
7. Vis et chevilles
8. Mode d'emploi
Table of contents
Languages:
Other Byron Intercom System manuals

Byron
Byron DIC-24712 User manual

Byron
Byron DIC-24312 User manual

Byron
Byron LySonix 3000 User manual

Byron
Byron MP001 Instruction manual

Byron
Byron DIC-24112 User manual

Byron
Byron DIC-24615 User manual

Byron
Byron 765 User manual

Byron
Byron DIC-24112 User manual

Byron
Byron SX304 User manual

Byron
Byron DIC-24102 User manual

Byron
Byron DIC-23312 User manual

Byron
Byron W255 User manual

Byron
Byron BY101 User manual

Byron
Byron DIC-22815 User manual

Byron
Byron BY206 User manual

Byron
Byron DIC-22815 User manual

Byron
Byron DIC-25712 User manual

Byron
Byron DIC-24122 User manual

Byron
Byron DIC-24712 User manual

Byron
Byron DIC-25312 User manual