manuals.online logo
Brands
  1. Home
  2. •
  3. Brands
  4. •
  5. Caltrend
  6. •
  7. Automobile Accessories
  8. •
  9. Caltrend TY252 User manual

Caltrend TY252 User manual

I n s t a l l a t i o n
I n s t r u c t i o n s
2 1 2 1 S o u t h A n n e S t r e e t
S a n t a A n a , C A 9 2 7 0 4
800- 8 4 6 - 8621
F o r G e n e r a l I n f o r m a t i o n
o r W a r r a n t y c o n t a c t :
s u p p o r t @ c a l t r e n d . c o m
Part# TY252
Row: Rear- 40/50/40 Split
Bench
Application Available for: Toyota Highlander 2008-
2013
Parts included:
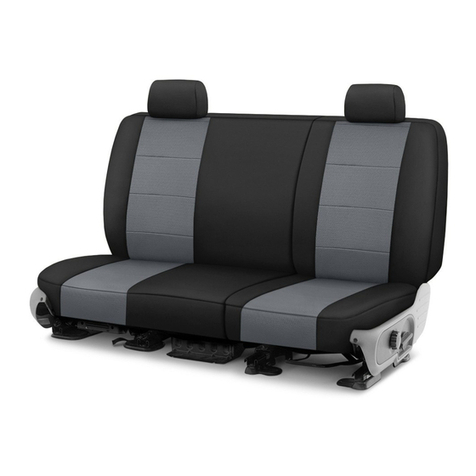
Backrests-3 Headrest-3
Bottom Cushion-3 Armrest-2
Part# TY252 Rear- 40/20/40 Split Bench
Step #1- Prepare Seats
Remove headrest from mounts and set
them aside.
Step #2-Install 40% Backrest
Step #3- Install 40% Backrest
Step#4- Install 20% Backrest
Step#5-Install 20% Backrest
Step#6- Install 20% Cushion
Plaace the cover over the cushion, matching
its contours and cutouts. Then secure the fit
by attaching the velcros together.
Step#7- Install 40% Cushion
Place the cover onto the cushion,
matching its contours, and cutouts. Then
tuck in the top piece of the cover, sending
the buckles to the back.
Step#8- Install 40% Cushion
Tuck in the sides to send the side buckle,
and strap under the seat. Then buckle the
straps accordingly, make sure to pull on
the straps tightly, so that the cover is
well fitted.
Step#9-Install Armrest
Place the cover over the armrest, matching
its contours and cutouts. Then secure the fit
by wrapping it with the elastic.
Pull the latch located
on the side of the
backrest, and push it
forward. Then place
the cover over the
backrest but under
the safety restraint,
matching its contours
and cutouts. Tuck in
the top piece of the
cover, sending the
velcro to the back.
Place the cover over the backrest,
matching its contours, and cutouts.
Then secure the fit with the velcros.
Fold down the second center seatback
while pulling the seatback lock release
strap. Pull the lock release lever to
remove the second center seat, located
at the back bottom of the seat.
Pull the velcro
through the
back, and secure
the fit by
attaching the
velcros together.
Zip the zipper as
well. Also attach
the velcro patch
on the back top
corner of the
backrest, and
attach the velcro
of the cover to
it.
Step#10- Install Headrest
Step#11- Finishing Touch
**Enjoy your CalTrend Seat
Covers***
***In case of dirty or stained
covers hand wash with mild
detergent and air dry. NEVER
MACHINE WASH OR DRY. The
material may come apart from
lamination or foaming. This
will also void any warranty.***
Place the cover over the headrest, matching
its contours, and cutouts. Make sure to
place the solid piece of the cover to the
front. Secure the fit with the velcro.
Once all covers have been installed
adjust the seating and headrests to
their regular position. Tuck all straps
underneath the seating. Now you
are ready to enjoy your CalTrend
Seat Covers 

Other Caltrend Automobile Accessories manuals

Caltrend CV580 User manual

Caltrend

Caltrend CV580 User manual

Caltrend TY458 User manual

Caltrend

Caltrend TY458 User manual

Caltrend JP113 User manual

Caltrend

Caltrend JP113 User manual

Caltrend JP212 User manual

Caltrend

Caltrend JP212 User manual

Caltrend CR159 User manual

Caltrend

Caltrend CR159 User manual

Caltrend TY295 User manual

Caltrend

Caltrend TY295 User manual

Caltrend KA120 User manual

Caltrend

Caltrend KA120 User manual

Caltrend CV518 User manual

Caltrend

Caltrend CV518 User manual

Caltrend TY280 User manual

Caltrend

Caltrend TY280 User manual

Caltrend CR174 User manual

Caltrend

Caltrend CR174 User manual

Caltrend CV445 User manual

Caltrend

Caltrend CV445 User manual

Caltrend FD332 User manual

Caltrend

Caltrend FD332 User manual

Caltrend LY115 User manual

Caltrend

Caltrend LY115 User manual

Caltrend BM110 User manual

Caltrend

Caltrend BM110 User manual

Caltrend FD356 User manual

Caltrend

Caltrend FD356 User manual

Caltrend TY379 User manual

Caltrend

Caltrend TY379 User manual

Caltrend DG264 User manual

Caltrend

Caltrend DG264 User manual

Popular Automobile Accessories manuals by other brands

JKS PN 6155 Installation

JKS

JKS PN 6155 Installation

Fabbri 17424500 Assembly instructions

Fabbri

Fabbri 17424500 Assembly instructions

Axxess AXGMLN-02 installation instructions

Axxess

Axxess AXGMLN-02 installation instructions

BlueTrek Surface Sound Compact user guide

BlueTrek

BlueTrek Surface Sound Compact user guide

Tellur CK-B1 user manual

Tellur

Tellur CK-B1 user manual

Schnierle VanX instruction manual

Schnierle

Schnierle VanX instruction manual

Roxor 1203AUA00041N Work instructions

Roxor

Roxor 1203AUA00041N Work instructions

Kuda-Phonebase 1660 Installation instruction

Kuda-Phonebase

Kuda-Phonebase 1660 Installation instruction

Thule C27 user manual

Thule

Thule C27 user manual

Calearo 7677950 installation instructions

Calearo

Calearo 7677950 installation instructions

Cruz Alu Cargo R Assembly instructions

Cruz

Cruz Alu Cargo R Assembly instructions

Go Rhino 5934048T installation instructions

Go Rhino

Go Rhino 5934048T installation instructions

Flowmaster FORCE II 817546 installation manual

Flowmaster

Flowmaster FORCE II 817546 installation manual

AMP Research PowerStep XTreme 78121-01A installation guide

AMP Research

AMP Research PowerStep XTreme 78121-01A installation guide

Kuda-Phonebase 292370 Installation instruction

Kuda-Phonebase

Kuda-Phonebase 292370 Installation instruction

Rampage 14301 Bracket Installation

Rampage

Rampage 14301 Bracket Installation

Nitrous Express 15788 installation instructions

Nitrous Express

Nitrous Express 15788 installation instructions

kincrome K12070 Owner's assemble and Operating manual

kincrome

kincrome K12070 Owner's assemble and Operating manual

manuals.online logo
manuals.online logoBrands
  • About & Mission
  • Contact us
  • Privacy Policy
  • Terms and Conditions

Copyright 2025 Manuals.Online. All Rights Reserved.