manuals.online logo
Brands
  1. Home
  2. •
  3. Brands
  4. •
  5. Canon
  6. •
  7. Printer
  8. •
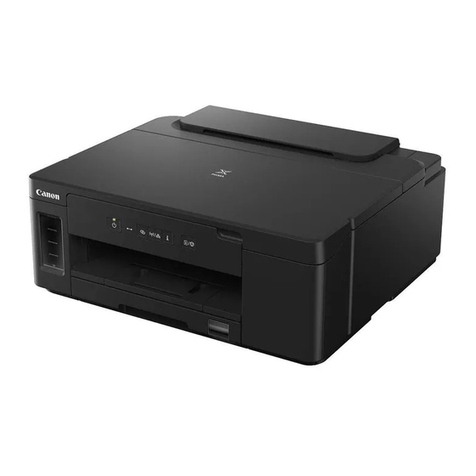
  9. Canon MP282 User manual

Canon MP282 User manual

This manual suits for next models

1

Other Canon Printer manuals

Canon S830D User manual

Canon

Canon S830D User manual

Canon 2171B002 User manual

Canon

Canon 2171B002 User manual

Canon S1 imagePASS Series Reference guide

Canon

Canon S1 imagePASS Series Reference guide

Canon imagePROGRAF iPF6350 User manual

Canon

Canon imagePROGRAF iPF6350 User manual

Canon TZ-5300 User manual

Canon

Canon TZ-5300 User manual

Canon BJC-3000 Series User manual

Canon

Canon BJC-3000 Series User manual

Canon BJC-3000 Series User manual

Canon

Canon BJC-3000 Series User manual

Canon ImageRunner 4045 Administrator guide

Canon

Canon ImageRunner 4045 Administrator guide

Canon TS6420 Setup guide

Canon

Canon TS6420 Setup guide

Canon PIXMA Pro9000 Mark II Series User manual

Canon

Canon PIXMA Pro9000 Mark II Series User manual

Canon Pixma TR150 User manual

Canon

Canon Pixma TR150 User manual

Canon imageclass MF229DW User manual

Canon

Canon imageclass MF229DW User manual

Canon g3000 series User manual

Canon

Canon g3000 series User manual

Canon MX320 User manual

Canon

Canon MX320 User manual

Canon imageFORMULA DR-6030C User manual

Canon

Canon imageFORMULA DR-6030C User manual

Canon iP4000 - PIXMA Photo Printer User manual

Canon

Canon iP4000 - PIXMA Photo Printer User manual

Canon iX7000 Series User manual

Canon

Canon iX7000 Series User manual

Canon iP1700 - PIXMA Color Inkjet Printer User manual

Canon

Canon iP1700 - PIXMA Color Inkjet Printer User manual

Canon MF832Cdw User manual

Canon

Canon MF832Cdw User manual

Canon PIXMA Pro9000 Mark II Series Instruction Manual

Canon

Canon PIXMA Pro9000 Mark II Series Instruction Manual

Canon PIXMA TS5340a User manual

Canon

Canon PIXMA TS5340a User manual

Canon CLBP360PS Ver-up User manual

Canon

Canon CLBP360PS Ver-up User manual

Canon PIXMA MX360 Series Instruction and safety manual

Canon

Canon PIXMA MX360 Series Instruction and safety manual

Canon PIXMA TS5000 Series User manual

Canon

Canon PIXMA TS5000 Series User manual

Popular Printer manuals by other brands

Evolis Elypso user guide

Evolis

Evolis Elypso user guide

Lexmark 522n - C Color Laser Printer Service manual

Lexmark

Lexmark 522n - C Color Laser Printer Service manual

Panduit COUGAR LS9Q Operator's manual

Panduit

Panduit COUGAR LS9Q Operator's manual

Olivetti PG L2140 Operation guide

Olivetti

Olivetti PG L2140 Operation guide

Samsung SL-M2820DW user manual

Samsung

Samsung SL-M2820DW user manual

Kyocera FS-9530DN specification

Kyocera

Kyocera FS-9530DN specification

Lexmark Infoprint 1332 user manual

Lexmark

Lexmark Infoprint 1332 user manual

Epson M1120 user guide

Epson

Epson M1120 user guide

TransAct POSJET 1500 Spare parts

TransAct

TransAct POSJET 1500 Spare parts

Telpar MTP-1500 user manual

Telpar

Telpar MTP-1500 user manual

Star DP8340 SERIES user manual

Star

Star DP8340 SERIES user manual

MGI JETVARNISH 3DS user manual

MGI

MGI JETVARNISH 3DS user manual

Kyocera TASKalfa PA4500ci Operation guide

Kyocera

Kyocera TASKalfa PA4500ci Operation guide

Emaar EP-360 user manual

Emaar

Emaar EP-360 user manual

Fujitsu DL7400 user manual

Fujitsu

Fujitsu DL7400 user manual

Centronics 101A Technical manual

Centronics

Centronics 101A Technical manual

Logic Controls LR1100 user manual

Logic Controls

Logic Controls LR1100 user manual

Epson ActionLaser Plus user manual

Epson

Epson ActionLaser Plus user manual

manuals.online logo
manuals.online logoBrands
  • About & Mission
  • Contact us
  • Privacy Policy
  • Terms and Conditions

Copyright 2025 Manuals.Online. All Rights Reserved.

How to Use This Manual
Printing This Manual
MC-4700-V1.00
Basic Guide
Describes the summary of
this product.
Advanced Guide
Describes the detailed
function of this product.
Troubleshooting
Page 1 of 707 pagesCanon MP280 series On-screen Manual
How to Use This Manual
Printing This Manual
MP-4500-V1.00
Advanced Guide
Contents
Overview of the Machine
Main Components
LED Display and Basic Operations
Copying
Copying Documents
Copying Photos
Fit-to-Page Copying
Scanning
Saving Scanned Data on the Computer
Printing from Your Computer
Printing Photos (Easy-PhotoPrint EX)
Printing Documents
Printing Web Pages (Easy-WebPrint EX)
Starting Various Software Applications
Loading Paper / Originals
Loading Paper
Loading Originals
Routine Maintenance
When Printing Becomes Faint or Colors Are
Incorrect
Replacing a FINE Cartridge
Cleaning the Machine
Appendix
Legal Limitations on Use of Your Product and
Use of Images
Tips on How to Use Your Machine
Page 2 of 707 pagesMP280 series Basic Guide
Advanced Guide Troubleshooting
Contents > Overview of the Machine
Overview of the Machine
This section shows the component names of the machine and describes the basic operations you need
to know before using it.
Main Components
Front View
Rear View
Inside View
Operation Panel
LED Display and Basic Operations
Page top
Page 3 of 707 pagesOverview of t e Mac ine
Advanced Guide Troubleshooting
Contents > Overview of the Machine > Main Components
C001
Main Components
Front View
Rear View
Inside View
Operation Panel
Front View
(1) Document Cover
Open to load an original on the Platen Glass.
(2) Paper Support
Raise and tip back to load paper in the Rear Tray.
(3) Rear Tray
Load various sizes or types of paper which you can use on the machine. Two or more sheets of the same
size and type of paper can be loaded at the same time, and fed automatically one sheet at a time.
See Loading Paper .
(4) Paper Guides
Slide to align with both sides of the paper stack.
(5) Paper Output Tray
Opens automatically when printing or copying starts and printed paper is ejected.
(6) Output Tray Extension
Open to support the printouts. Open it when printing or copying.
Page 4 of 707 pagesMain Components
(7) Platen Glass
Load an original to copy or scan.
(8) Operation Panel
Use to change the settings of the machine or to operate it.
See Operation Panel.
Note
The LED and lamps on the Operation Panel other than the POWER lamp will go out if the
machine is not operated for about 5 minutes. To restore them, press any button except the
ON button or perform the print operation.
Rear View
(9) USB Port
Plug in the USB cable to connect the machine with a computer.
Important
Do not touch the metal casing.
Do not plug in or unplug the USB cable while the machine is printing or scanning originals
with the computer.
(10) Power Cord Connector
Plug in the supplied power cord.
Inside View
Page 5 of 707 pagesMain Components
(11) Ink Cartridge Locking Covers
Lock the FINE Cartridges into place.
(12) FINE Cartridge Holder
Install the FINE Cartridges.
The Color FINE Cartridge should be installed into the left slot ( ) and the Black FINE Cartridge should be
installed into the right slot ( ).
(13) FINE Cartridges (Ink Cartridges)
A replaceable cartridge that is integrated with Print Head and ink tank.
Note
For details on installing the FINE Cartridges, refer to the printed manual: Getting Started.
(14) Scanning Unit (Cover)
Scans originals. Open it to replace the FINE Cartridges or remove jammed paper inside the machine. When
opening the Scanning Unit (Cover), lift it with the Document Cover closed.
(15) Scanning Unit Support
Holds the Scanning Unit (Cover) while it is open.
Important
The area (A) indicated in the figure below may be splattered with ink. It does not affect the
performance of the machine.
Do not touch the area (A). The machine may not print properly if you touch it.
Operation Panel
Page 6 of 707 pagesMain Components
(1) ON button / POWER lamp
Turns the power on or off. Before turning on the power, make sure that the Document Cover is closed.
Important
Disconnecting the power plug
When disconnecting the power plug after turning off the power, be sure to confirm that
the POWER lamp is not lit. If the power plug is disconnected from the wall outlet while the
POWER lamp is lit or flashing, the machine may become unable to print properly since the
Print Head is not protected.
Note
POWER and Alarm lamps
You can check the status of the machine with the POWER lamp and Alarm lamp.
- POWER lamp is off: The power is off.
- POWER lamp lights green: The machine is ready to print.
- POWER lamp flashes green: The machine is initializing or shutting down.
- Alarm lamp lights or flashes orange: An error has occurred and the machine is not
ready to print. For details, refer to "Troubleshooting" in the on-screen manual:
Advanced
Guide.
- POWER lamp flashes green and Alarm lamp flashes orange alternately: An error that
requires contacting the service center may have occurred. For details, refer to "
Troubleshooting" in the on-screen manual:
Advanced Guide
.
(2) LED (Light Emitting Diode)
Displays the number of copies, Maintenance code, or operational status such as an error code.
(3) [+] button
Specifies the number of copies.
(4) Ink lamps
Light or flash orange when ink runs out, etc. The lamp on the left indicates the Color FINE Cartridge status
and the lamp on the right indicates the Black FINE Cartridge status.
(5) Paper button
Selects the page size and media type.
(6) SCAN button
Starts scanning the original to save it on the computer.
(7) Stop/Reset button
Cancels operations. You can also press this button to cancel a print, copy, or scan job in progress.
(8) Color button *
Starts color copying. You can also press this button to finalize your selection for the setting item.
Page 7 of 707 pagesMain Components
(9) Black button*
Starts black & white copying. You can also press this button to finalize your selection for the setting item.
(10) Fit to Page button / Fit to Page lamp
Enables the Fit-to-Page copy function. When the Fit-to-Page copy function is enabled, the Fit to Page lamp
lights up and you can copy the original automatically enlarged or reduced to fit the selected page size.
When the Fit-to-Page copy function is disabled, you can make copies in the same size as the original.
(11) (Maintenance) button
Specifies the Maintenance code.
(12) Paper lamp
Lights to indicate the page size and media type selected with the Paper button.
(13) Alarm lamp
Lights or flashes orange when an error occurs, such as paper-out or ink-out.
* In the software applications or manuals, the Black and Color buttons are collectively called the "Start" or "OK"
button.
Page top
Page 8 of 707 pagesMain Components
Advanced Guide Troubleshooting
Contents > Overview of the Machine > LED Display and Basic Operations
C002
LED Display and Basic Operations
You can use the machine to make copies or perform maintenance operations without a computer.
This section describes the LED display and basic operations on the Operation Panel.
The number 1appears on the LED normally when turning on the power.
The LED display indicates the machine status as follows.
Machine Status LED Display
While copying Number of copies (flashing)
While printing, scanning, or performing
maintenance operations
(flashing in order)
When an error occurs Eand number appear alternately.
For details on the error codes, refer to " Troubleshooting" in
the on-screen manual:
Advanced Guide
.
Pand number appear alternately.
An error that requires contacting the service center may
have occurred.
For details, refer to "Troubleshooting" in the on-screen
manual:
Advanced Guide
.
While the Scanning Unit (Cover) is
open
(flashing)
Number of Copies
When copying starts, the specified number of copies appears on the LED. While copying is in progress,
the number on the LED flashes and decreases by one to indicate the remaining number of copies to be
made.
Each time you press the [ +] button, the number on the LED increases by one. When Fappears, the
number of copies is set to "20". Press the [ +] button again to return to "1".
Maintenance Codes
To perform maintenance of the machine, press the (Maintenance) button repeatedly until the desired
Page 9 of 707 pagesLED Display and Basic Operations
code appears on the LED, and then press the Black or Color button.
Maintenance
Code Operation See
Prints the nozzle check pattern. Printing the Nozzle Check Pattern
Cleans the Print Head. Cleaning the Print Head
Cleans the Print Head deeply. Cleaning the Print Head Deeply
Prints the print head alignment
sheet.
Aligning the Print Head
Scans the print head alignment
sheet to align the Print Head
automatically.
Aligning the Print Head
Prints the current head position
adjustment values.
Aligning the Print Head
Cleans the Paper Feed Roller. Cleaning the Paper Feed Roller
Cleans the inside of the machine. Cleaning the Inside of the Machine (Bottom Plate
Cleaning)
Switches the size of paper loaded
in the Rear Tray between A4 and
8.5" x 11" (Letter).
(This setting is used for making
copies.)
Switching the Page Size between A4 and 8.5" x
11" (Letter)
Sets the machine to prevent paper
abrasion.
Refer to "Paper Is Smudged/Printed Surface Is
Scratched" in "Troubleshooting" of the on-
screen manual:
Advanced Guide
.
Error Codes
When an error occurs, Eand number appear alternately on the LED to indicate the error code.
e.g. "E, 1, 6"
(flashing in order)
Note
For details on the error codes, refer to " Troubleshooting" in the on-screen manual:
Advanced
Guide.
If an error code with Pappears, an error that requires contacting the service center may have
occurred.
For details, refer to "Troubleshooting" in the on-screen manual:
Advanced Guide
.
Page top
Page 10 of 707 pagesLED Display and Basic Operations