manuals.online logo
Brands
  1. Home
  2. •
  3. Brands
  4. •
  5. Canon
  6. •
  7. Printer
  8. •
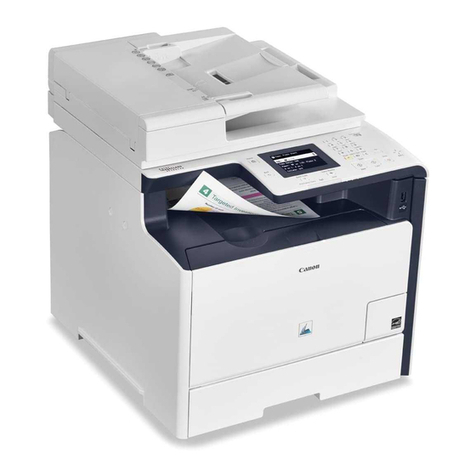
  9. Canon PIXMA MP568 User manual

Canon PIXMA MP568 User manual

繁體中文
한국어
ENGLISH



입문 가이드
기기를 사용하기 전에 이설명서를 읽도록 하십시오. 나중에 참고할 수있도록 이를 가까운 곳에 보관해 두십시오.
入門指南
確保在使用本機之前閱讀本手冊。請妥善保管以便日後使用。
Getting Started
Make sure to read this manual before using the machine. Please keep it in hand for future reference.
■



•



•



•











•



•


•
이문서에서 사용되는 기호
■
모델 번호: K10343 (MP568)
Microsoft는Microsoft Corporation의등록 상표입니
다.
•
Windows는미국 및/또는 기타 국가에서의
Microsoft Corporation의상표 또는 등록 상표입니
다.
•
Windows Vista는미국 및/또는 기타 국가에서의
Microsoft Corporation의상표 또는 등록 상표입니
다.
•
조작에 대한 참고나 추가 설명과
같은 내용에 대한 지침입니다.
중요한 정보를 포함한 지침입니다.
반드시 이러한 안내를 읽으십시오.
완료하는 데일정한 시간이 걸리는
조작을 설명합니다.
Windows에서의 조작을 의미합니
다.
Macintosh에서의 조작을 의미합니
다.
Internet Explorer는미국 및/또는 기타 국가에서 등
록된 Microsoft Corporation의상표 또는 등록 상표
입니다.
•
Macintosh, Mac 및AirPort는미국 및기타 국가에
서등록된 Apple Inc.의상표입니다.
•
Bonjour는미국 및기타 국가에서 등록된 Apple Inc.
의상표입니다.
•
本文件中使用的符號
■
型號:K10343 (MP568)
Microsoft 為Microsoft Corporation 的註冊商標。
•
Windows 為Microsoft Corporation 在美國和 /或其
他國家 /地區的商標或註冊商標。
•
Windows Vista 為Microsoft Corporation 在美國和 /
或其他國家 /地區的商標或註冊商標。
•
表示操作注釋或附加說明。
包含重要資訊的說明。務必閱讀這
些指示。
描述需要一段時間完成的操作。
指示 Windows 中的操作。
指示 Macintosh 中的操作。
Internet Explorer 為Microsoft Corporation 在美國和 /
或其他國家 /地區的商標或註冊商標。
•
Macintosh、Mac 和AirPort 為Apple Inc. 在美國和
其他國家 /地區註冊的商標。
•
Bonjour 為Apple Inc. 在美國和其他國家 /地區註
冊的商標。
•
Symbols Used in This
Document
■
Model Number: K10343 (MP568)
Windows is a trademark or registered trademark
of Microsoft Corporation in the U.S. and/or other
countries.
•
Windows Vista is a trademark or registered
trademark of Microsoft Corporation in the U.S.
and/or other countries.
•
Instructions as notes for operation
or additional explanations.
Instructions including important
information. Be sure to read these
indications.
Descriptions for operations that
take some time to complete.
Indicates operations in Windows.
Indicates operations in Macintosh.
Microsoft is a registered trademark of Microsoft
Corporation.
•
Internet Explorer is a trademark or registered
trademark of Microsoft Corporation in the U.S.
and/or other countries.
•
Macintosh, Mac, and AirPort are trademarks
of Apple Inc., registered in the U.S. and other
countries.
•
Bonjour is a trademark of Apple Inc., registered in
the U.S. and other countries.
•
1
2
3
4
5
6
1
2
3
4
5
6
1
2
3
4
5
6
1
2
3
4
5
6
1
■














목차
■
준비 2
전원 켜기 5
프린트 헤드 설치하기 7
잉크 탱크 설치하기 11
연결 방법 선택하기 16
소프트웨어 설치하기 - USB - 17
무선 설치 26
WPS를사용한 무선 설치 33
연결 상태 확인하기 36
소프트웨어 설치하기 - 무선 - 38
용지 로드하기 58
설명서 소개 62
Solution Menu 63
기기를 사용해 봅니다! 64
目錄
■
準備 2
開啟電源 5
安裝列印頭 7
安裝墨水盒 11
選擇連接方式 16
安裝軟體 - USB - 17
無線設定 26
使用 WPS進行無線設定 33
確認連接狀態 36
安裝軟體 - 無線 - 38
載入紙張 58
手冊介紹 62
Solution Menu 63
嘗試使用本機! 64
Contents
■
Preparation 2
Turn the Power On 5
Install the Print Head 7
Install the Ink Tanks 11
Select Connection Method 16
Install the Software - USB - 17
Wireless Setup 26
Wireless Setup Using WPS 33
Conrm Connection Status 36
Install the Software - Wireless - 38
Loading Paper 58
Introduction of Manuals 62
Solution Menu 63
Try Using the Machine! 64
1
2

■
 
 
준비
연결 유형
■
USB 연결 무선 연결
USB 케이블이 필요됩니다.
IEEE802.11b/g를지원하는 액세스 포인트나 라우터가 필요됩니다.
準備
連接類型
■
USB 連接 無線連接
需要 USB 電纜線。
需要支援 IEEE802.11b/g 的存取點或路由器。
Preparation
Connection Types
■
A USB cable is required.
USB Connection Wireless Connection
An access point or router that supports IEEE802.11b/g is required.
A
3
■



□

•


•
포함된 항목 점검하기
■
기기를 켜기 전에 기기 내부와 외부의 모든 오렌지색 테이프 및보호 시트를 제거합니다.
프린트 헤드는 용지 출력 트레이(A)의내부에 위치하여 있습니다. 용지 출력 트레이를 열고 이
를꺼냅니다.
위치 선택□
기기 위로 물체가 떨어질 수있는 곳에 기기를 설치하지 마십시오. 기기 내부로 물체
가떨어져 기기가 고장날 수있습니다.
•
기기 위에 어떠한 물건도 놓지 마십시오. 커버를 열때이가 기기에 떨어져 고장날 수
있습니다.
•
檢查包裝箱中包含的物品
■
開啟本機之前,請移除本機內部和外部所有的橙色膠帶和保護材料。
列印頭置放於出紙托盤 (A) 內。開啟出紙托盤並將其取出。
選擇位置
□
請勿將本機安裝在物件可能掉落在其上的位置。物件可能會掉落到本機內部,導致
故障。
•
請勿在本機上方放置任何物件。開啟蓋板時物件可能會掉落到本機中,導致故障。
•
Before turning on the machine, remove all orange tape and protective sheets from
the inside and outside of the machine.
Check the Included Items
■
The Print Head is placed inside of the Paper Output Tray (A). Open the Paper Output Tray
and take it out.
Do not install the machine where an object may fall on it. The object may fall inside
the machine, resulting in malfunction.
•
Do not place any object on top of the machine. It may fall into the machine when
opening covers, resulting in malfunction.
•
Choosing a Location□
4
•
•
•
•
설명서•
Setup CD-ROM(드라이버, 어플리케이션 및전자 안내서를 포함함)•
보증서•
기기를 컴퓨터에 연결해 주는 USB 케이블이 필요합니다.•
手冊
•
安裝光碟 (包含驅動程式、應用程式和電子手冊 )
•
保固單
•
USB 電纜線是連接本機和電腦所必需的。
•
Manuals•
Setup CD-ROM (containing the drivers, applications and on-screen manuals)•
Warranty•
A USB cable is necessary to connect the machine with your computer.•
12
A
B
C
2
5

••

•

전원 켜기
조작 유닛(B)을열고 전원 버튼(C)을눌러 기기를 켭니다.
기기 후방 좌측에 전원 코드를 연결한 다음 코드의 다른 한끝을 콘센트에
연결합니다.
이단계에서는 USB 케이블을 연결하지 마십시오.•
문서 커버(A)가닫혀 있는지 확인합니다.•기기에서 작동 소음이 발생할 수있습니다. 이는 정상적인 작동 현상입니다.•
開啟電源
將電源線插入本機的左後方,然後將另一端連接到壁裝電源。
開啟操作單元 (B) 並按電源按鈕 (C) 開啟本機。
請勿在此步驟連接 USB 電纜線。
•
確保文件蓋板 (A) 已關閉。
•本機可能會發出一些運行噪音。這是正常的操作。
•
Turn the Power On
Do NOT connect the USB cable at this stage.•
Plug the power cord into the back left of the machine, then connect the
other end to the wall outlet.
Open the Operation Unit (B) and press the ON button (C) to turn on the
machine.
Make sure that the Document Cover (A) is closed.• The machine may make some operating noises. This is normal operation.•
34
D
F
E
6

•
{}
조작판에서 {또는 }버튼(D)을사용하여 LCD(E)의언어를 선택한 다음 OK 버튼을 누릅니다.
LCD에원하지 않는 언어가 표시된 경우, 뒤로 버튼(F)을눌러 언어 선택(Language selection) 화면으로 돌아갑니다.•
위화면이 표시되면 OK 버튼을 누르고 다음 단계로 이동합니다.
使用操作面板上的 {或}按鈕 (D) 為LCD(E) 選擇語言,然後按 OK 按鈕。
如果 LCD 螢幕上顯示的不是所需的語言,按返回按鈕 (F) 返回至語言選擇 (Language selection) 螢幕。
•
顯示以上螢幕時,按 OK 按鈕並轉到下一步。
Use the {or }button (D) on the Operation Panel to select the language for the LCD (E),
then press the OK button.
If an unintended language is displayed on the LCD, press the Back button (F) to return to the Language selection screen.•
When the above screen is displayed, press the OK button and go to the
next step.
1
A
C B
C
2
7



•


프린트 헤드 설치하기
프린트 헤드를 조심스럽게 취급하십시오. 이
를떨어뜨리거나 이에 지나친 압력을 가하지
마십시오.
•
용지 출력 트레이(A)를연다음 스캔 유닛(커버)(B)을멈출 때까지 올립니다.
문서 커버(C)를닫고 스캔 유닛(커버)과함께 이를 올립니다.
安裝列印頭
小心處理列印頭。請勿將其掉下或過度用力擠
壓。
•
開啟出紙托盤 (A),然後抬起掃描單元 (機蓋 )(B) 直至其停止。
關閉文件蓋板 (C) 並將其與掃描單元 (機蓋 )一起抬起。
Install the Print Head
Handle the Print Head carefully. Do not drop
or apply excessive pressure to it.
•
Open the Paper Output Tray (A), then lift the Scanning Unit (Cover) (B) until it stops.
Close the Document Cover (C) and lift it with the Scanning Unit (Cover).
2
D
E
F
3
8
•

•

•
프린트 헤드 홀더가 이동하지 않는 경우, 기기가 켜져 있는지 확인합니다.•
프린트 헤드 홀더 이동 시소음이 발생합니다. 이는 정상적인 작동 현상입니다.•
프린트 헤드 홀더의 프린트 헤드 잠금 레버(E)를이가 멈출 때까지 단단히 올립니다.
프린트 헤드 홀더(F)의내부를 만지지 마십시오. 이를 만지면 올바르게 인쇄되지 않을 수있습니다.•
프린트 헤드 홀더(D)가설치 위치로 이동하였는지 확인합니다.
如果列印頭固定座未移出,確保本機已開啟。
•
列印頭固定座在移動時會發出噪音。這是正常的操作。
•
穩固地抬起列印頭固定座的列印頭鎖定桿 (E) 直至其停止。
請勿觸摸列印頭固定座 (F)的內部。如果觸摸此區域,本機可能無法正確列印。
•
確保列印頭固定座 (D) 移至安裝位置。
The Print Head Holder makes a noise as it moves. This is normal operation.•
If the Print Head Holder does not move, make sure that the machine is turned on.•
Firmly raise the Print Head Lock Lever (E) of the Print Head Holder until it stops.
Do not touch the inside of the Print Head Holder (F). The machine may not print properly if you touch it.•
Make sure that the Print Head Holder (D) moves to the installation
position.
5
4
G
H
9
•
 
•
오렌지색 보호 캡을 제거합니다.은색 패키지에서 프린트 헤드를 꺼냅니다.
프린트 헤드가 들어 있는 상자의 내부 또는 보호 캡의 내부에 투명하거나 연한 파란색 잉크가 묻어 있을 수있으나 이는 인쇄 품질에 영향을 주지 않습니다. 이러한 항목들을 다룰 때잉크가 묻지 않도록 조심하십시오.•
프린트 헤드의 내부(G) 또는 금속 부분(H)을만지지 마십시오. 이를 만지면 올바르게 인쇄되지 않을 수있습니다.•
取下橙色保護蓋。
列印頭包裝袋的內部或保護蓋的內側可能會有一些透明或淺藍色墨水——這對列印品質沒有影響。處理這些物件時,請注意不要將墨水濺到身上。
•
從銀色包裝袋中取出列印頭。
請勿觸摸列印頭的內部 (G) 或金屬零件 (H)。如果接觸此區域,本機可能無法正確列印。
•
Remove the orange protective cap.
There may be some transparent or light blue ink on the inside of the bag the Print Head comes in, or the inside of the protective cap - this has no effect on print quality. Be careful not to get ink on yourself when
handling these items.
•
Remove the Print Head from the silver package.
Do not touch the inside (G) or metal parts (H) of the Print Head. The machine may not print properly if you touch them.•
76
10
•
•
•
•
 
프린트 헤드를 홀더의 측면에 부딪히지 마십시오.•
밝은 환경에서 설치하십시오.•
프린트 헤드 잠금 레버를 꽉잡고 이를 천천히 낮춥니다.•
프린트 헤드를 설치한 후에는 불필요하게 이를 제거하지 마십시오.•
보기와 같이 프린트 헤드를 앞으로 기울여 이를 제자리에 장착합니다.프린트 헤드 잠금 레버를 완전히 내립니다.
請勿使列印頭敲擊到固定座的側面。
•
請在明亮的環境下進行安裝。
•
緊握列印頭鎖定桿並輕輕地將其放下。
•
一旦安裝了列印頭,請勿將其隨意取出。
•
向前傾斜列印頭並如圖所示將其安裝在適當位置。 完全地放下列印頭鎖定桿。
Do not knock the Print Head against the sides of the holder.•
Install in a well-lit environment.•
Hold the Print Head Lock Lever rmly and lower it gently.•
Once you have installed the Print Head, do not remove it unnecessarily.•
Tilt the Print Head forward and set it in place as shown. Lower the Print Head Lock Lever completely.
1
1
2
2
11

•
•



•
잉크 탱크 설치하기
잉크 탱크를 조심스럽게 취급하십시오. 이를 떨어뜨리거나 지나친 압력을 가하지 마십시오.•
스캔 유닛(커버)을10분넘게 열어 둘경우, 프린트 헤드 홀더가 오른쪽으로 이동합니다. 이
런경우에는 스캔 유닛(커버)을닫고 다시 엽니다.
•
오렌지색 테이프(1)를화살표 방향으로 당겨 보호 필름을 벗기고 필름(2)
을완전히 제거합니다.
반드시 제공된 잉크 탱크를 사용하십시오.•
安裝墨水盒
小心處理墨水盒。請勿將其掉下或過度用力擠壓。
•
如果掃描單元 (機蓋 )開啟的時間超過 10 分鐘,列印頭固定座將移至右側。在此情況下,
關閉並重新開啟掃描單元 (機蓋 )。
•
按照箭頭所示的方向拉橙色膠帶 (1) 以撕下保護薄膜並將薄膜 (2) 完全
地取下。
務必使用隨附的墨水盒。
•
Install the Ink Tanks
Handle the ink tanks carefully. Do not drop or apply excessive pressure to them.•
Pull the orange tape (1) in the direction of the arrow to peel off the
protective film and remove the film (2) completely.
If the Scanning Unit (Cover) is left open for more than 10 minutes, the Print Head Holder
moves to the right. In this case, close and reopen the Scanning Unit (Cover).
•
Be sure to use the supplied ink tanks.•
23
A
B
C
12


•


•
•

왼쪽 엄지로 누르고 있는 동안 잉크 탱크 하단에 위치한 오렌지색 보호 캡(A)을비틀어
제거합니다.
잉크 탱크의 옆면에 압력을 가하지 마십시오. 잉크가 튈수있습니다.•
잉크 탱크를 기울인 다음 라벨 하단에 삽입하고 슬롯의 뒷부분에 밀착합니다.
잉크 탱크의 전기 접점(B) 또는 열려 있는 잉크 포트(C)를만지지 마십시오. 이를 만지면 올바르게 인쇄되
지않을 수있습니다.
•
밝은 환경에서 설치하십시오.•
라벨과 잉크 탱크의 컬러가 일치한지 확인합니다.
使用左手拇指向下按的同時,扭掉位於墨水盒底部的橙色保護蓋 (A)。
請勿推擠墨水盒側面;墨水可能會濺出。
•
傾斜墨水盒,然後將其插入到標籤下面並使其緊靠插槽的後端。
請勿觸摸墨水盒上的電氣觸點 (B) 或敞開的墨水埠 (C)。如果觸摸這些區域,本機可能無法正確列印。
•
請在明亮的環境下進行安裝。
•
確保標籤的顏色與墨水盒一致。
While pressing down with your left thumb, twist off the orange protective cap (A)
located on the bottom of the ink tank.
Do not push the sides of the ink tank; ink may splash.•
Tilt the ink tank, then insert it under the label and against the back end of the slot.
Do not touch the electrical contacts (B) or open ink port (C) on the ink tank. The machine may not print
properly if you touch them.
•
Install in a well-lit environment.•
Make sure that the color of the label matches the ink tank.
5
4
13
•





기타 모든 잉크 탱크를 같은 방법으로 설치합니다.
모든 잉크 램프가 빨간색으로 켜져 있는지 확인합니다.
잉크 탱크를 모두 설치합니다.
잉크 탱크를 설치한 후에는 불필요하게 이를 제거하지 마십시오.•
딸깍 소리가 날때까지 잉크 탱크의 PUSH 표시를 단단히 누릅니다.
설치가 올바르게 완료되면 잉크 램프가 빨간색으로 켜집니다.
按照相同方法安裝所有的墨水盒。
確保所有的墨水指示燈亮起紅色。
安裝所有的墨水盒。
一旦安裝了墨水盒,請勿將其隨意取出。
•
用力按墨水盒上的 PUSH 標記直至發出卡嗒聲。
正確完成安裝後,墨水指示燈亮起紅色。
Install all the other ink tanks in the same way.
Once you have installed the ink tanks, do not remove them unnecessarily.•
Make sure all the Ink lamps light red.
Install all the ink tanks.
Press the PUSH mark on the ink tank firmly until it clicks.
When the installation is completed properly, the Ink lamp lights red.
7
6
F
D
E
14


•
•


•

 •

한장의 A4 또는 Letter 크기의 보통 용지를 카세트(F)에로드한
다음 OK 버튼을 누릅니다.
자세한 내용은 58페이지의 "용지 로드하기"를참조하십시오.•
스캔 유닛(커버)(D)을약간 올린 다음 이
를가볍게 닫습니다.
보기와 같이 LCD가변경될 때까지(약3분) 기다리고 다음 단계로 이동합니
다.
•
LCD에에러 메시지가 표시된 경우, 프린트 헤드 및잉크 탱크가 정확하게 설치되어 있는지 확인합니다.•
인쇄를 준비할 때기기에서 약간의 작동 소음이 발생할 수있습니다. 이는
정상적인 작동 현상입니다.
•
용지 출력 트레이(E)를닫습니다.
在紙匣 (F) 中載入一張 A4 或Letter 大小的一般紙張,然後按
OK 按鈕。
關於詳細資訊,請參閱第 58 頁的「載入紙張」。
•
稍微地抬起掃描單元 (機蓋 )(D),然後輕
輕地將其關閉。
請等待至 LCD螢幕變為如圖所示螢幕 (大約 3分鐘 )並轉到下一步。
•
如果 LCD螢幕上顯示錯誤訊息,確保列印頭和墨水盒已正確地安裝。
•
本機準備列印時可能會發出一些運行噪音。這是正常的操作。
•
關閉出紙托盤 (E)。
Load a sheet of A4 or Letter-sized plain paper into the
Cassette (F), then press the OK button.
For details, refer to "Loading Paper" on page 58.•
Lift the Scanning Unit (Cover) (D)
slightly, then gently close it.
Wait until the LCD changes as shown in the illustration (about 3 minutes)
and go to the next step.
•
If an error message is displayed on the LCD, make sure that the Print Head and the ink tanks are correctly installed.•
The machine may make some operating noises when preparing to print.
This is normal operation.
•
Close the Paper Output Tray (E).
8 9
15
 
{}

•
•
OK 버튼을 누릅니다.대기 화면이 표시됩니다.
더나은 인쇄 품질을 위해 사진을 인쇄하기 전에 프린트 헤드를 정렬할 것을 권장합니다. 프린트 헤드를 정렬하려면 {또는 }버
튼을 사용하여 헤드 정렬 수행(Perform head alignment)을선택하고 OK 버튼을 누릅니다. 정렬에 대한 내용은 73페이지의 "프린
트헤드 정렬"의절차를 따르십시오.
•
프린트 헤드 정렬을 언제든지 수행할 수있습니다. 자세한 내용은 기본 가이드 전자 안내서를 참조하십시오.•
按OK 按鈕。 顯示待命螢幕。
為了得到更好的列印效果,建議列印相片前校準列印頭。要校準列印頭,使用 {或}按鈕選擇執行列印頭校準 (Perform head
alignment),然後按 OK 按鈕。請按照第 73 頁「校準列印頭」中的步驟進行校準。
•
可以隨時執行列印頭校準。關於詳細資訊,請參閱電子手冊:《基本指南》。
•
Press the OK button.
For better print results, it is recommended that you align the Print Head before printing photos. To align the Print Head, use the {
or }button to select Perform head alignment, then press the OK button. Follow the steps in "Align the Print Head" on page 73
for alignment.
•
You can perform Print Head Alignment at any time. For details, refer to the on-screen manual: Basic Guide.•
The standby screen is displayed.
3
16


 










연결 방법 선택하기
시스템 환경에 따라 연결 방법을 선택하여 기기를 컴퓨터에 연결합니다.
USB 연결 무선 연결
네트워크에 연결된 컴퓨터에서 기기를 사용하는 경우에 권장합니
다.
추가 컴퓨터에 설치
사용하려는 컴퓨터에만 소프트웨어를 설치합니다.
네트워크에 연결되지 않은 한대의 컴퓨터에서만 기기를
사용하는 경우에 이연결 방법으로 설치할 것을 권장합니
다.
17페이지의 "소프트웨어 설치하기 -
USB -"로이동하십시오.
26페이지의 "무선 설치"로이동하십시오.
38페이지의 "소프트웨어 설치하기 - 무선 -"으로 이동하십시오.
인터넷
인터넷
選擇連接方式
根據使用的系統環境,選擇將本機連接到電腦的方式。
USB 連接 無線連接
在連接到網路的電腦上使用本機時,建議使用此連接方式。
安裝額外的電腦
僅在要使用的電腦上執行軟體安裝。
在單台未連接到網路的電腦上使用本機時,建議使用此連
接方式。
轉到第 17 頁的「安裝軟體 - USB -」。
轉到第 26 頁的「無線設定」。
轉到第 38 頁的「安裝軟體 -無線 -」。
網際網路
網際網路
Select Connection Method
USB Connection
Go to "Install the Software - USB -" on
page 17.
Go to "Wireless Setup" on page 26.
Select the method to connect the machine to the computer according to your system environment.
Wireless Connection
This is recommended installation when you use the
machine on single computer, which is not networked.
This is the recommended when using the machine on a computer
connected to a network.
Set Up Additional Computers
Go to "Install the Software - Wireless -" on page 38.
Perform only the software installation on the computer you want
to use.
Internet
Internet
4
17

•
•
•
•


•
•









소프트웨어 설치하기 - USB -
설치하기 전에 실행 중인 모든 어플리케이션을 종료합니다.•
관리자(또는 관리자 그룹의 구성원)로로그온합니다.•
설치 진행 중에 사용자를 전환하지 마십시오.•
설치하는 동안 인터넷 연결이 필요할 수있습니다. 연결 비용이 부과됩니다.•
설치 진행 중에 컴퓨터를 다시 시작해야 할수있습니다. 화면의 설명에 따라 다시 시작하는 동안 Setup
CD-ROM을제거하지 마십시오. 컴퓨터를 다시 시작하면 설치는 계속됩니다.
•
Mac OS 9, Mac OS X Classic 환경 또는 Mac OS X v.10.3.8 또는 그이전 버전은 지원되지 않습니다.•
기기를 컴퓨터에 연결하여 사용하려면 드라이버를 포함한 소프트웨어를 컴퓨터
의하드 디스크에 복사(설치)하여야 합니다. 설치 과정은 약20분정도 소요됩니
다.(설치 시간은 컴퓨터 환경이나 설치할 어플리케이션 개수에 따라 다릅니다.)
아래 화면은 Windows Vista 운영 체제 Ultimate Edition(이하 "Windows Vista") 및
Mac OS X v.10.5.x를기준으로 합니다.
USB 연결에는 USB 케이블이 필요됩니다.
USB 케이블
安裝軟體 - USB -
安裝前請退出所有正在執行的應用程式。
•
以管理員 (或管理員組成員 )身分登入。
•
請勿在安裝過程中切換使用者。
•
在安裝期間可能需要連接網際網路。會發生連接費用。
•
在安裝過程中可能需要重新啟動電腦。按照螢幕上的說明進行操作,並且請勿在重新啟動過程中取出安
裝光碟。一旦電腦重新啟動,安裝會繼續進行。
•
不支援 Mac OS 9、Mac OS X Classic環境或 Mac OS X 10.3.8或更早版本。
•
要透過連接到電腦使用本機,需要將包括驅動程式在內的軟體複製 (安裝 )到電
腦的硬碟。安裝過程大約需要 20 分鐘。(根據電腦環境或要安裝的應用程式數
量的不同,安裝時間也會有所不同。)
以下螢幕基於 Windows Vista Ultimate Edition 作業系統 (以下簡稱為「Windows
Vista」)和Mac OS X 10.5.x。
對於 USB 連接,需要 USB 電纜線。
USB 電纜線
Install the Software - USB -
Quit all running applications before installation.•
Log on as the administrator (or a member of the Administrators group).•
Do not switch users during the installation process.•
Internet connection may be required during the installation. Connection fees apply.•
It may be necessary to restart your computer during the installation process. Follow the on-screen
instructions and do not remove the Setup CD-ROM during restarting. The installation resumes once
your computer has restarted.
•
Mac OS 9, Mac OS X Classic environments, or Mac OS X v.10.3.8 or earlier are not supported.•
To use the machine by connecting it to a computer, software including the
drivers needs to be copied (installed) to the computer's hard disk. The
installation process takes about 20 minutes. (The installation time varies
depending on the computer environment or the number of applications to
be installed.)
The screens below are based on Windows Vista operating system Ultimate
Edition (hereafter referred to as "Windows Vista") and Mac OS X v.10.5.x.
USB cable
For a USB connection, a USB cable is required.
18
1
2
3
1
2
3
1
2
3
1
2
3


□


 

 
새하드웨어 발견(Found New Hardware) 또는 새하드웨어 발견 마법사(Found
New Hardware Wizard) 대화 상자가 나타나는 경우:
□
드라이버 설치 전USB 케이블을 기기에 연결한 경우, 이화면이 나타납니다.
컴퓨터에 연결된 USB 케이블을 제거하십시오.
대화 상자가 닫힐 수있습니다. 이런 경우에는 부터 계속합니다.
취소(Cancel)를클릭하여 대화 상자를 종료합니다.
부터 계속합니다.
如果出現找到新硬體 (Found New Hardware) 或尋找新增硬體精靈 (Found
New Hardware Wizard) 對話方塊:
□
安裝驅動程式前,如果將 USB 電纜線連接到本機,則會出現此螢幕。
取下連接到電腦的 USB 電纜線。
對話方塊可能會關閉。在此情況下,從 繼續操作。
按一下取消 (Cancel) 退出對話方塊。
從繼續操作。
If the Found New Hardware or Found New Hardware Wizard dialog box
appears:
□
If you connect a USB cable to the machine before installation of the drivers, this
screen appears.
Remove the USB cable connected to your computer.
Proceed from .
The dialog box may close. In this case, proceed from .
Click Cancel to quit the dialog box.

Other Canon Printer manuals

Canon imageprograf IPF785 User manual

Canon

Canon imageprograf IPF785 User manual

Canon LR1 User manual

Canon

Canon LR1 User manual

Canon imageRUNNER ADVANCE 715 IFZ Installation guide

Canon

Canon imageRUNNER ADVANCE 715 IFZ Installation guide

Canon BJC-800 Instruction Manual

Canon

Canon BJC-800 Instruction Manual

Canon BJC-50 Instruction Manual

Canon

Canon BJC-50 Instruction Manual

Canon imageGLASS MF455dw User manual

Canon

Canon imageGLASS MF455dw User manual

Canon PIXMA MP170 User manual

Canon

Canon PIXMA MP170 User manual

Canon QY8-1360-000 User manual

Canon

Canon QY8-1360-000 User manual

Canon imageCLASS LBP247dw User manual

Canon

Canon imageCLASS LBP247dw User manual

Canon iPF9000 - imagePROGRAF Color Inkjet Printer User manual

Canon

Canon iPF9000 - imagePROGRAF Color Inkjet Printer User manual

Canon LBP352 User manual

Canon

Canon LBP352 User manual

Canon BJC-250 Series User manual

Canon

Canon BJC-250 Series User manual

Canon LASER SHOT LBP6000 User manual

Canon

Canon LASER SHOT LBP6000 User manual

Canon imageRUNNER 2320 User manual

Canon

Canon imageRUNNER 2320 User manual

Canon PIXMA mini320 Series User manual

Canon

Canon PIXMA mini320 Series User manual

Canon iP4500 - PIXMA Color Inkjet Printer Manual

Canon

Canon iP4500 - PIXMA Color Inkjet Printer Manual

Canon HC-4200 User manual

Canon

Canon HC-4200 User manual

Canon C1538P User manual

Canon

Canon C1538P User manual

Canon imagePROGRAF W8400D User manual

Canon

Canon imagePROGRAF W8400D User manual

Canon imagePRESS Lite C270 User manual

Canon

Canon imagePRESS Lite C270 User manual

Canon i860 Series User manual

Canon

Canon i860 Series User manual

Canon PIXMA MP970 User manual

Canon

Canon PIXMA MP970 User manual

Canon SELPHY CP790 User manual

Canon

Canon SELPHY CP790 User manual

Canon GX5000 Series User manual

Canon

Canon GX5000 Series User manual

Popular Printer manuals by other brands

Oki T400 user guide

Oki

Oki T400 user guide

SWIZ PP-38T5 user manual

SWIZ

SWIZ PP-38T5 user manual

Epson R320 - Stylus Photo Color Inkjet Printer Product information

Epson

Epson R320 - Stylus Photo Color Inkjet Printer Product information

Lexmark 10Z0100 user guide

Lexmark

Lexmark 10Z0100 user guide

Printek Interceptor 800 Series Integrator's manual

Printek

Printek Interceptor 800 Series Integrator's manual

EFI Fiery X3eTY2 Configuration and setup

EFI

EFI Fiery X3eTY2 Configuration and setup

Digital Equipment DEClaser 2200 installation guide

Digital Equipment

Digital Equipment DEClaser 2200 installation guide

Monarch 9825 Reference manual

Monarch

Monarch 9825 Reference manual

Epson TM-L90 series Start here

Epson

Epson TM-L90 series Start here

Cashino KMP-II user manual

Cashino

Cashino KMP-II user manual

Intermec PB40 quick start guide

Intermec

Intermec PB40 quick start guide

Aisino RCK-600 user guide

Aisino

Aisino RCK-600 user guide

Ricoh SP 330DN Service manual

Ricoh

Ricoh SP 330DN Service manual

Lexmark MS610 Series Specfications

Lexmark

Lexmark MS610 Series Specfications

Brightek E30 Quick install

Brightek

Brightek E30 Quick install

Intermec EasyCoder PX6i quick start guide

Intermec

Intermec EasyCoder PX6i quick start guide

SEWOO WTP-100 Technical manual

SEWOO

SEWOO WTP-100 Technical manual

Wincor Nixdorf TH180 user manual

Wincor Nixdorf

Wincor Nixdorf TH180 user manual

manuals.online logo
manuals.online logoBrands
  • About & Mission
  • Contact us
  • Privacy Policy
  • Terms and Conditions

Copyright 2025 Manuals.Online. All Rights Reserved.