manuals.online logo
Brands
  1. Home
  2. •
  3. Brands
  4. •
  5. cantaport
  6. •
  7. Shelter
  8. •
  9. cantaport PJF Series User manual

cantaport PJF Series User manual

HZ1747-E
1
Cantaport made in Japan certified to AU standards
PJF-series M connection manual
Thank you very much for choosing our company's Cantaport products.
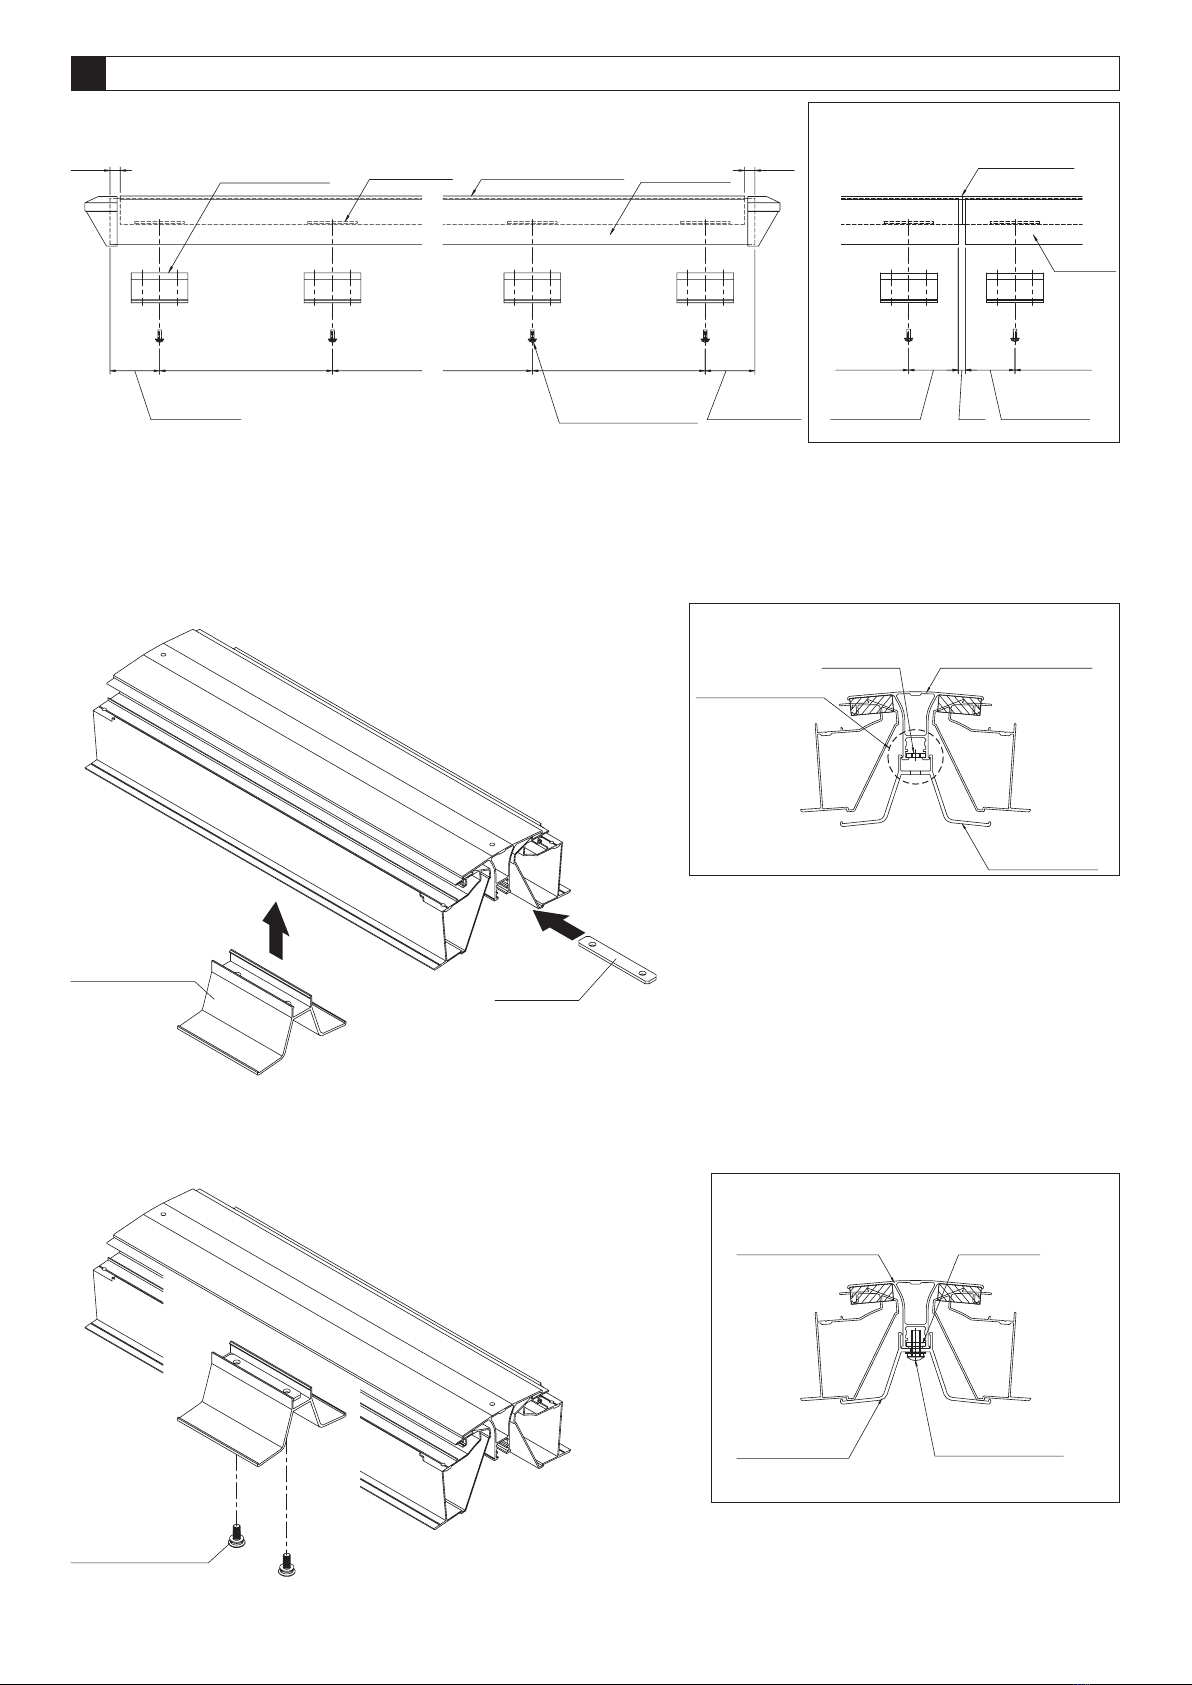
Please be sure to thoroughly read these instructions for assembling the Cantaport product in conjunction with the engineering
details. DIY or Authorisied Cantaport installations must follow the manufactures assembling manual to avoid warranty cover.
Please retain the manual for future reference and maintenance inspection.
Precautions during construction
□The Cantaport is a simple structure. Do not change or remodel it without gaining
certification from Cantaport to avoid warranty or danger to public.
□The snow accumulation strength is 600N/m2 (61.2kg/m2) which corresponds to 20cm
of fresh snowfall (specific weight 0.3). Do not install in heavy snow area.
□Do not install it in the place where snow slides down from the building roof directly.
There is a possibility that products are damaged by snow falling.
□When installing it besides wall, etc., keep enough clearance between the product and
the wall due to avoid damage during strong winds. 100mm-200mm clearance.
□Do not install in locations subject to strong wind directly/constantly underneath the roof.
□When installing, it is recommended to install the front frame facing towards the building to reduce the wind effect.
□When installing with side panel please be sure to install the support post.
□Positioning the posts so that they do not affect underground services (water supply, drain pipes, etc.).
□When moving the posts, please follow the manufactures specifications detailed in this manual.
□Install so that the exhaust of hot-water steam, heating fumes and/or car exhaust do not directly hit the surface of the supports
and around the entire frame. This may cause discolouration of the surface structure.
enough
space enough
space
concretewall
etc
TO BE READ INCONJUCTION WITH THE PJR SINGLE
INSTALLATION MANUAL.
Notes for M connection of 2-post type and 3-post type
□In case of M connection of 2-post type and 3-post type, add the post and beam to 2-post type in the center. And
move the post position of 2-post type adjusting to post position of 3-post type.
Notes for in-line connection and in-line short extension of M-connection type
①Strike the front frames and do sealing work (below figure A part).
②Peel the back sheet of water proof cover and attach the water proof cover on the joint part. Then do sealing work to
part B.
※In case of in-line connection of M-connection type, cover the joint part with the water proof cover.
2-post type
post
3-post type
beam
Water proof cover
Connecting material
Adhesive tape
Sealing
Front frame
Strike
A part
B part
B part
2
PartsID Content
Description Quantity
M-connecting
materialset
Connecting
material
PJFG-M14
PJFG-M22
PJFG-M29
PJFG-M43
PJFG-M51
PJFG-M58
1
M-connecting
partsset
Beamconnecting
bracket
GB8089
Backplate
GB8241
Frontframe
connectingpart
GB8242
Connectingcap
GB8244
Drillingscrew
4×10×8
Assemblingmanual
HZ1747
SpringWasher
8
PJFG-B
PJFG-B-1
4
2
PJFG-B
PJFG-B-1
ShapePartsID Content
Description Quantity
M-connection
in-linepart
Waterproofcover
GB8203
PJR-GWC 1
Shape
4
2
PJFG-B
PJFG-B-1
4
2
PJFG-B
PJFG-B-1
2
−
PJFG-B
PJFG-B-1
3(2)
−
PJFG-B
PJFG-B-1
9(8)
5(4)
PJFG-B
PJFG-B-1
Washer
8
8
4
PJFG-B
PJFG-B-1
16
8
PJFG-B
PJFG-B-1
Hexagonbolt
M8×85
8
4
PJFG-B
PJFG-B-1
Nut
M8
8
4
PJFG-B
PJFG-B-1
1
−
PJFG-B
PJFG-B-1
Smalltrussscrew
5×15×10
Parts contents
Please open the captioned carton and check all contents in advance.
Please check the parts defective or any damage.
After opening the carton boxes, please store the products so that they are not damaged.
We packed some extra screw in the parts box.(x)number is necessary Q'ty for installation.
□
□
□
□
3
①:
In case of
D18+D18 D=3712mm
②:
In case of
D21+D21 D=4318mm
③:
In case of
D24+D24 D=4922mm
④:
In case of
D27+D27 D=5524mm
⑤:
In case of
D30+D30 D=6126mm
⑥:
In case of
D33+D33 D=6728mm
a:
In case of
D18+D21 D=4014mm
b:
In case of
D18+D24 D=4317mm
c:
In case of
D18+D27 D=4618mm
d:
In case of
D18+D30 D=4919mm
e:
In case of
D18+D33 D=5220mm
f:
In case of
D21+D24 D=4620mm
g:
In case of
D21+D27 D=4921mm
h:
In case of
D21+D30 D=5222mm
i:
In case of
D21+D33 D=5523mm
j:
In case of
D24+D27 D=5223mm
k:
In case of
D24+D30 D=5524mm
l:
In case of
D24+D33 D=5825mm
m:
In case of
D27+D30 D=5825mm
n:
In case of
D27+D33 D=6126mm
o:
In case of
D30+D33 D=6427mm
In case of a, implant the post for D21 21.1mm deeper than the post for D18.
In case of b, implant the post for D24 41.6mm deeper than the post for D18.
In case of c, implant the post for D27 62.6mm deeper than the post for D18.
In case of d, implant the post for D30 83.6mm deeper than the post for D18.
In case of e, implant the post for D33 104.7mm deeper than the post for D18.
In case of f, implant the post for D24 20.4mm deeper than the post for D21.
In case of g, implant the post for D27 41.5mm deeper than the post for D21.
In case of h, implant the post for D30 62.5mm deeper than the post for D21.
In case of i, implant the post for D33 83.6mm deeper than the post for D21.
In case of j, implant the post for D27 21.1mm deeper than the post for D24.
In case of k, implant the post for D30 42.1mm deeper than the post for D24.
In case of l, implant the post for D33 63.1mm deeper than the post for D24.
In case of m, implant the post for D30 21.0mm deeper than the post for D27.
In case of n, implant the post for D33 42.1mm deeper than the post for D27.
In case of o, implant the post for D33 21.1mm deeper than the post for D30.
1Installation of connecting material
Installation procedure
After installing the roof as below figure, install the connecting material on the front frame.
※Before installing the roof panels, install the connecting material.
■Post out/out dimensionPlease implant the post as below in order to
adjust the top end of the roof.
D=D1+D2+20
D1 20 D2
4
■Dimension of holes on beam
※Install the connecting bracket
right and left equally.
For beam without beam caps For beam attached caps
2Install beam connecting bracket
Connect the beams with the beam connecting bracket as the clearance
between D1 front frame and D2 front frame is 20mm.
Washer 8
φ9
Make holes on-site
Connecting material
Beam
Beam connecting bracket
Hexagon bolt
M8×85
Washer 8
Spring washer 8
Nut M8
Front frame
20
D1 D2
55
35
70
55
35
70
φ9 
through hole
D1 D2
55
30.5
65.5
55
30.5
65.5
φ9 
through hole
D1 D2
5
■Section figure
3Attach the front frame connecting parts
■Attach the front frame connecting parts
※In case of in-line connection of M-connecting type
①Insert the back plate into the connecting material
②Hold the connecting material from upside and set in the front frame connecting parts to the connecting material.
※
The front frame connecting parts can be hooked to the connecting material temporarily by pushing up (see figure A).
※Position the back plate at equal interval and set in the front frame connecting parts.
■Figure A: temporary fixing
③Fix the front frame connecting parts to the back plate inserted into
the connecting material with small truss screw 5×15×10.
Front frame
connecting part
Back plate
Small truss screw
5×1 5×1 0
Connecting material
Connecting material
Front frame
connecting part
※Temporary fixing
Back plate
Set in Insert
Front frame
connecting part
Back plate
Small truss screw
5×1 5×1 0
Equal interval
Equal interval Equal interval
Equal interval
Front frame
Connecting material
Front frame
connecting part
Back plate
Small truss screw
5×15×10
70
210(W22)
70
210(W22)
14.5
14.5
70
210(W22)
70
210(W22)
Front frame
Equal interval Equal interval
10
Connecting material
(Strike)
6
4Attaching the connecting cap
①Insert the connecting cap to connecting material and fix with drilling screw 4×10×8.
②Do sealing work to the touching part.
Drilling screw
4×1 0×8
Front frame
Connecting cap
Connecting material
Sealing
7

This manual suits for next models

8

Other cantaport Shelter manuals

cantaport Assembly Instructions User manual

cantaport

cantaport Assembly Instructions User manual

cantaport PJR Series User manual

cantaport

cantaport PJR Series User manual

cantaport KCR User manual

cantaport

cantaport KCR User manual

cantaport PJF Series User manual

cantaport

cantaport PJF Series User manual

Popular Shelter manuals by other brands

Kiwi Camping Oasis 3 quick start guide

Kiwi Camping

Kiwi Camping Oasis 3 quick start guide

Texsport Item 01085 instructions

Texsport

Texsport Item 01085 instructions

Harnois PLUS 12 quick start guide

Harnois

Harnois PLUS 12 quick start guide

Sojag MERIDIEN Assembly manual

Sojag

Sojag MERIDIEN Assembly manual

Shelters4Less SR1603 Assembly instructions

Shelters4Less

Shelters4Less SR1603 Assembly instructions

SURF & TURF 6m Awning Extender instructions

SURF & TURF

SURF & TURF 6m Awning Extender instructions

Gazebo penguin 77006393 instruction manual

Gazebo penguin

Gazebo penguin 77006393 instruction manual

Storage Canopy C4060R Assembly instructions

Storage Canopy

Storage Canopy C4060R Assembly instructions

Luoman Lillevilla 490 Assembly and Maintenance

Luoman

Luoman Lillevilla 490 Assembly and Maintenance

ThePondguy PondShelter 160350 Installation & maintenance manual

ThePondguy

ThePondguy PondShelter 160350 Installation & maintenance manual

Décor et Jardin 48220S000 Assembly Notice

Décor et Jardin

Décor et Jardin 48220S000 Assembly Notice

Sojag Four Seasons 999-6158717 Assembly manual

Sojag

Sojag Four Seasons 999-6158717 Assembly manual

Sealey GSS3030/G.V3 quick start guide

Sealey

Sealey GSS3030/G.V3 quick start guide

NBB SR8306 Assembly instructions

NBB

NBB SR8306 Assembly instructions

NBB SR7901 Assembly instructions

NBB

NBB SR7901 Assembly instructions

Kozyard Morgan Assembly manual

Kozyard

Kozyard Morgan Assembly manual

Storage Canopy C3340DTR Assembly instructions

Storage Canopy

Storage Canopy C3340DTR Assembly instructions

ShelterLogic 23530 Assembly instructions

ShelterLogic

ShelterLogic 23530 Assembly instructions

manuals.online logo
manuals.online logoBrands
  • About & Mission
  • Contact us
  • Privacy Policy
  • Terms and Conditions

Copyright 2025 Manuals.Online. All Rights Reserved.