5
Instructions d'utilisation
Le rongeur de Kerrison démontable V. Mueller™ est
un instrument à actionnement manuel utilisé pour la
coupe ou l'incision osseuse lors d'interventions
chirurgicales sur le crâne ou la colonne vertébrale.
Références catalogue
NL4291-71T, NL4291-72T, NL4291-73T, NL4291-74T,
NL4291-75T, NL4291-76T, NL4291-81T, NL4291-82T,
NL4291-83T, NL4291-84T, NL4291-85T, NL4291-86T,
NL4291-91T, NL4291-92T, NL4291-93T, NL4291-94T,
NL4291-95T, NL4291-96T, NL4291-71, NL4291-72,
NL4291-73, NL4291-74, NL4291-75, NL4291-76,
NL4291-81, NL4291-82, NL4291-83, NL4291-84,
NL4291-85, NL4291-86, NL4291-91, NL4291-92,
NL4291-93, NL4291-94, NL4291-95, NL4291-96,
NL4291-01, NL4291-02, NL4291-03, NL4291-04,
NL4291-05, NL4291-06, NL4291-21, NL4291-22,
NL4291-23, NL4291-24, NL4291-25, NL4291-26,
NL4291-01T, NL4291-02T, NL4291-03T, NL4291-04T,
NL4291-05T, NL4291-06T, NL4291-21T, NL4291-22T,
NL4291-23T, NL4291-24T, NL4291-25T, NL4291-26T
Présentation
Les dispositifs V. Mueller sont fournis non stériles.
Ils doivent être nettoyés et stérilisés avant leur
utilisation.
imites du retraitement
La multiplication des retraitements a un impact
limité sur ces dispositifs. Leur durée de vie est
normalement déterminée par l'usure et les
dommages résultant de leur utilisation.
Avertissements
Les dispositifs doivent être utilisés conformément à
ce mode d'emploi. Veuillez lire toutes les sections de
cette notice avant toute utilisation. Un usage
incorrect de ce dispositif peut causer des blessures
graves. En outre, le dispositif doit être correctement
entretenu sous peine de ne plus être stérile au
moment de son utilisation sur le patient et
d'occasionner des blessures graves au patient ou au
personnel soignant.
Mises en garde
En cas de discordances entre ce mode d'emploi et
les directives de votre établissement et/ou les
instructions fournies par le fabricant de votre
équipement de nettoyage/stérilisation, veuillez porter
ces discordances à l'attention du responsable
approprié de l'hôpital afin qu'une solution soit
trouvée avant de procéder au nettoyage et à la
stérilisation de vos dispositifs.
Si un dispositif est utilisé pour une tâche autre que
celle prévue, vous risquez généralement de
l'endommager ou de le casser.
Avant toute utilisation, inspectez le dispositif pour
vérifier qu'il est dans un bon état de fonctionnement.
N'utilisez pas un dispositif qui ne peut pas remplir
sa fonction initiale de façon satisfaisante ou qui est
endommagé.
Seules les procédures de nettoyage et de
stérilisation détaillées dans ce mode d'emploi ont été
validées.
Instructions de pré-traitement
Commencez le nettoyage du dispositif 2 heures
avant son utilisation.
Transportez les dispositifs selon la procédure de
transport établie par votre établissement.
Rincez ou essuyez le dispositif dès que possible
après utilisation pour éliminer les souillures
importantes.
Tous les dispositifs doivent être traités en position
ouverte/détendue pour permettre à la solution
d'atteindre toutes les surfaces.
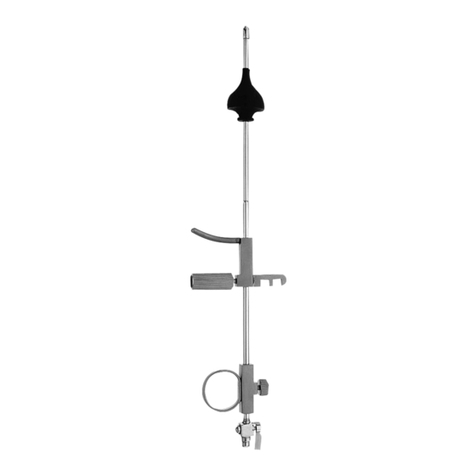
Rongeur de Kerrison démontable
a. Ouvert/détendu
b. ermé
c.Gâchette
d. Rail de coupe supérieur
e. Poignée avant
f.Appuie-pouce
g.Mécanisme de connexion
h. Connexion de rail supérieure
Instructions d'utilisation du dispositif
Démontage
1. Orientez l'instrument de sorte que l'extrémité
fonctionnelle se trouve face à vous.
2. Saisissez la poignée du rongeur de Kerrison en
plaçant votre pouce sur la partie supérieure de la
gâchette et vos doigts sous l'appuie-pouce.
(Figure 1)
3. Saisissez la poignée avant avec l'autre main.
(Figure 2)
4. Appuyez sur la gâchette avec votre pouce et
maintenez-la enfoncée.
5. Guidez la poignée avant vers l'arrière jusqu'à ce
que le mécanisme de connexion se
désenclenche. (Figures 3 et 4)
Remarque : la gâchette doit rester constamment
enfoncée.
Remarque : vous entendrez un déclic lorsque le
mécanisme de connexion sera correctement
désenclenché.
6. Lorsque vous entendez ce déclic et voyez que le
mécanisme de connexion est correctement
désenclenché, guidez la poignée avant vers
l'avant jusqu'à ce que la gâchette couvre
entièrement le mécanisme de connexion.
(Figures 5 et 6)
7. Relâchez la gâchette.
8. Déposez le rail de coupe de la pointe. (Figure 7)
9. Procédez au nettoyage et à la lubrification si
nécessaire.
Montage
1. Assurez-vous que la poignée se trouve en
position ouverte/détendue et que le mécanisme
de connexion est enclenché. (Figures 8 et 9)
Remarque : si le mécanisme de connexion est
désenclenché, le rail de coupe supérieur ne
s'alignera pas correctement. (Suivez les étapes 4-7
de la section Démontage ci-dessus).
Proofed by: Date:
Dimensions checked: Copy checked:
DCN 43808
Vernon Hills, IL
Richard Cisneroz
02-18-16
36-10023B
fr
