manuals.online logo
Brands
  1. Home
  2. •
  3. Brands
  4. •
  5. CareCo
  6. •
  7. Mobility Aid
  8. •
  9. CareCo Tuni Spectra User guide

CareCo Tuni Spectra User guide

Spectra
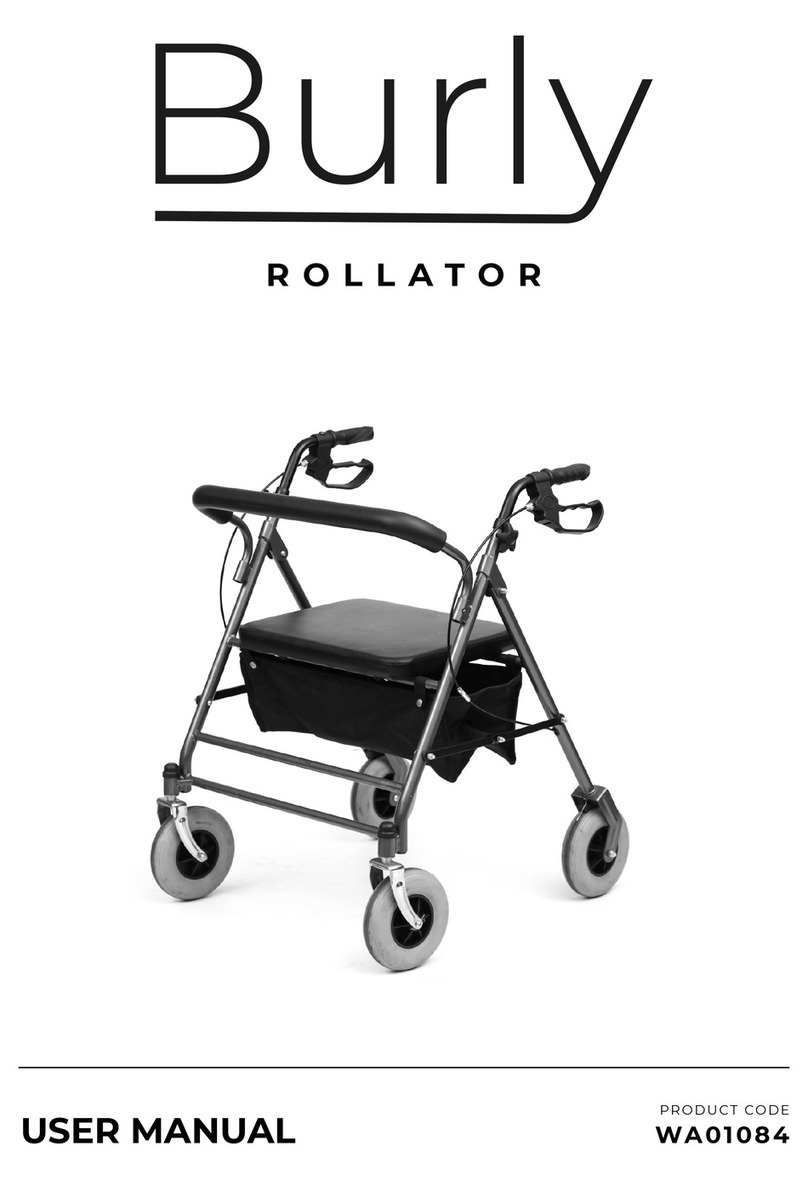
Rollator
OWNERS HANDBOOK
Product Code: WA01064
Your Tuni Spectra Rollator
1. The Tuni Spectra Rollator folds to a
compact size for easy storage.
2. Height-adjustable handles for the user’s
safety and comfort are included.
3. Swivel front wheels offer easy control.
4. The curb climber design manoeuvres easily
over obstructions.
5. There is a brake system for parking
and stopping.
6. Reflectors on the handgrips and front and
back wheels are included for the
user’s safety.
Product Features
Thank you for purchasing the Tuni Spectra
Rollator. The Spectra Rollator has been
designed and manufactured to meet our own
high level of specifications and we hope you
will be delighted with your purchase.
The Spectra Rollator is a lightweight and
portable rollator designed to aid the user to
walk and offer stability and security to the user.
The Spectra is designed for use indoors and
outdoors and will take a maximum user weight
of 136kg.
NOTE: Check all parts for shipping damage. In
case of shipping damage, DO NOT use –
contact the dealer/carrier for further instruction.
Rollator Dimensions: 68cm (Length) x
64cm (Width) x 81.5 - 94.5cm (Height)
Seat Dimensions: 22cm (Depth) x 45cm (Width)
Folded Dimensions: 87cm (Length) x
25.5cm (Width) x 35cm (Height)
Brake Method: Handle Brake
Max User Weight: 136kg
Introduction
Specification
Ensure rollator is level to the ground before
using. All screws must be tightened, ensuring
there is no movement.
DO NOT hang anything on either side frame. This
will: (A) cause side tube to bend, and make the
rollator unstable, and/or (B) cause rollator to tip,
resulting in injury or damage.
Remove the rollator from the box. Lay the
rollator down on the floor with the handle tubes
on top. Unhook the red levers from the inside of
the leg tubes. Push the handle tubes forward so
that they are standing upright at a right angle to
the leg tubes, as shown in figure 1:
Pull the black metal levers on each side
backwards to push the washer inwards. Clasp
into the plastic slot on the leg tubes - this will
“snap” into position as in figure 2:
Read Before Use
Opening
Figure 1
To open the rollator, open the handles away
from each other as shown in figure 3. Press the
seat downwards. Continue pushing the seat
downwards until it clicks into the plastic slots
on each side. The rollator will remain open as
shown in figure 4:
Figure 3
Figure 2
Figure 4
To fold the rollator pull the handle in the centre
of the seat upwards to unclip the seat. Continue
pulling the seat upwards. Push the handles to-
wards each other to close the rollator as shown
in figure 5:
Folding
Figure 5
To completely fold the rollator, unlock the left
and right black metal levers from the slots on
the leg tubes. Rotate by 90 degrees and place
towards the front wheel. Pull the handle tubes
carefully down towards the back wheels. The
red levers will engage and click into place when
this is fully folded. The rollator can now be
stored or transported as necessary.
Assembly: Insert the wheel axle into the hole
inside the wheel support. When a “click” is
heard, the wheel is fixed into the correct
position - see figure 6.
Disassembly: Press the red button with one
hand. Take the wheel kit out of the wheel
support with the other hand as per figure 7:
Assembling and Disassembling the
Quick Release Kit
The rollator height should be adjusted so that
when the user’s arm is down by their side, the
handgrip is at wrist height. This will ensure the
arms are at an approximate 20°-30° bend when
using the rollator.
Push the metal button on
the handle tube in. Slide
the handle tube up or down
to the desired height.
Ensure the metal button
protrudes through the
appropriate adjustment
hole on the handle tube as
in figure 8:
Note: DO NOT remove the brake cable from the
handle tube or the brakes will not work.
For the brakes to function properly, the brake
cable should be flush alongside the frame and
correctly hidden inside the tube.
Adjusting the Handle Tube
Figure 6 Figure 7
Figure 8
To release the brake system, loosen the brake
nut on the inside of the leg tube in a clockwise
direction as shown in figure 9:
Figure 9
Figure 10 Figure 11
Note: To loosen the
brake, rotate the nut
anti-clockwise.
Pull the top of the brake handles up towards the
hand grips to activate the hand brake.
To remain stationary, continue to hold the brake
handles up.
To continue mobility, release the brake handles.
To lock the hand brake, push down on the
bottom portion of the brake handle as shown in
figure 10 until an audible “click” is heard:
To release, pull up on the top part of the brake
handle as in figure 11:
Using the Hand Brake
To ensure the safe operation of the rollator,
these instructions MUST be followed:
DO NOT install or use this equipment before
reading and understanding this instruction
sheet. Please keep this manual properly for
future reference. If you are unable to
understand the warnings, cautions or
instructions, contact a healthcare professional,
dealer or technical personnel before attempting
to install this equipment – otherwise, injury or
damage may occur.
Each individual should consult with their
physician or therapist to determine proper
adjustment and usage.
Rollators are NOT intended to be self-propelled
while seated. DO NOT use the rollator on the
stairs or on elevators/escalators, please be
careful when using on slope.
It is recommended that a physical/occupational
therapist should assist in the height adjustment
of the rollator for maximum support and correct
brake activation, the fixture of the screw, the
position of the quick release/assembly kits.
Always ensure screws are fastened to the
connector, so that the connector cannot move
when forced. Ensure all copper balls fully
protrude through adjustment holes.
Safety Summary
Failure to follow these warnings can result in
personal injury. Care should be taken to ensure
that ALL hand and height adjustment are secure
and that moving parts are in good working
order before using this or any mobility aid. In
the process of using, all wheels must always be
in contact with the ground. This will ensure the
rollator is properly balanced. Before using the
seat, the brake must be in the locking position.
When using a rollator in the stationary state,
the hand brake must be locked.
After unfolding or assembling the rollator,
ensure that the seat support tube is securely
locked in the side slot and the quick release/
assembly kits are in their correct position and
locked. Ensure the rollator is level to the ground
before using. All screws must be tightened,
ensuring there is no movement.
DO NOT: hang anything on either side frame. This
will: (A) cause the side tube to bend, and make the
rollator unstable, and/or (B) cause the rollator to
tip, resulting in injury or damage.
• Ensure that every part of the rollator is
secure at ALL times.
• Check all screws regularly and make sure
the seat tubes are fixed into the side slot
properly - if not, press it again to secure.
• Ensure the quick release wheels are
assembled correctly.
Care and Maintenance
• Ensure that every part of the rollator is
secure at ALL times.
•
Ensure the metal buttons are protruding
from the handle tube.
• Replace any broken, damaged or worn
items immediately.
• Wash the bag with water or gentle
detergent.
• Clean wheels with warm water and
detergent, dry wheels with a clean cloth.
Note: If wheels squeak, please add 3-in-1
lubricating oil regularly.
Your Tuni branded product is under warranty
to be free from defects in material and
workmanship for one year from date of receipt.
The warranty does not extend to non-durable
parts, such as rubber accessories, castors and
grips, which are subject to normal wear and tear
and require periodic replacement.
If you have any queries please contact your
supplier.
The manufacturer reserves the right to alter without notice any weights, measurements
or other technical data shown in this manual. All figures, measurements and capacities
shown in this manual are approximate and do not constitute specifications.
Warranty

This manual suits for next models

1

Other CareCo Mobility Aid manuals

CareCo WA01055 User guide

CareCo

CareCo WA01055 User guide

CareCo Breeze 8 User manual

CareCo

CareCo Breeze 8 User manual

CareCo ProLite Carbon X User manual

CareCo

CareCo ProLite Carbon X User manual

CareCo ZEST User manual

CareCo

CareCo ZEST User manual

CareCo GoodKnight BD06023 User manual

CareCo

CareCo GoodKnight BD06023 User manual

CareCo FRONTIER MS01010033.TIM User manual

CareCo

CareCo FRONTIER MS01010033.TIM User manual

CareCo ProLite NERO SPORT User manual

CareCo

CareCo ProLite NERO SPORT User manual

CareCo Kona User guide

CareCo

CareCo Kona User guide

CareCo PRIMA WA04032 User manual

CareCo

CareCo PRIMA WA04032 User manual

CareCo SAMBA DUO User manual

CareCo

CareCo SAMBA DUO User manual

CareCo ProLite Carbon X-TRAIL User manual

CareCo

CareCo ProLite Carbon X-TRAIL User manual

CareCo Pano 2.0 User manual

CareCo

CareCo Pano 2.0 User manual

CareCo Pano Walker Programming manual

CareCo

CareCo Pano Walker Programming manual

CareCo Burly User manual

CareCo

CareCo Burly User manual

CareCo Rollafold User guide

CareCo

CareCo Rollafold User guide

CareCo Comet User manual

CareCo

CareCo Comet User manual

CareCo BA07036 User manual

CareCo

CareCo BA07036 User manual

CareCo DL06107 User manual

CareCo

CareCo DL06107 User manual

CareCo iCONNECT STEALTH User manual

CareCo

CareCo iCONNECT STEALTH User manual

CareCo Deluxe Duo Programming manual

CareCo

CareCo Deluxe Duo Programming manual
CareCo Access-Tec MS09130 User manual

CareCo

CareCo Access-Tec MS09130 User manual

CareCo ALPINE User manual

CareCo

CareCo ALPINE User manual

CareCo Orbit WA01060 User guide

CareCo

CareCo Orbit WA01060 User guide

CareCo MS05016 User manual

CareCo

CareCo MS05016 User manual

Popular Mobility Aid manuals by other brands

Columbia Medical TheraPedic Explorer manual

Columbia Medical

Columbia Medical TheraPedic Explorer manual

Vitea Care VCBP0021 user manual

Vitea Care

Vitea Care VCBP0021 user manual

Schuchmann fridolin 1. Instructions for use

Schuchmann

Schuchmann fridolin 1. Instructions for use

Mobility Research CRAWLAHEAD user guide

Mobility Research

Mobility Research CRAWLAHEAD user guide

Handicare SystemRoMedic ReTurn7500 Service manual

Handicare

Handicare SystemRoMedic ReTurn7500 Service manual

PROTEOR HYDEAL II 1P120 Instructions for use

PROTEOR

PROTEOR HYDEAL II 1P120 Instructions for use

SALJOL Page user manual

SALJOL

SALJOL Page user manual

Paravan SPACE DRIVE II operating instructions

Paravan

Paravan SPACE DRIVE II operating instructions

Hoggi BINGO Evolution Service instructions

Hoggi

Hoggi BINGO Evolution Service instructions

Z-Tec ZT-FALCON user manual

Z-Tec

Z-Tec ZT-FALCON user manual

BHM Medical Voyager Duo Instructions for use

BHM Medical

BHM Medical Voyager Duo Instructions for use

Gemino 60 Walker user manual

Gemino

Gemino 60 Walker user manual

Pride Go-Chair owner's manual

Pride

Pride Go-Chair owner's manual

HEPRO Gripo manual

HEPRO

HEPRO Gripo manual

HOMCOM 713-145V00 manual

HOMCOM

HOMCOM 713-145V00 manual

Dietz TAIMA user manual

Dietz

Dietz TAIMA user manual

NRS Healthcare M48465 User instructions

NRS Healthcare

NRS Healthcare M48465 User instructions

Rehaforum MEDICAL Actimo Arthro instruction manual

Rehaforum MEDICAL

Rehaforum MEDICAL Actimo Arthro instruction manual

manuals.online logo
manuals.online logoBrands
  • About & Mission
  • Contact us
  • Privacy Policy
  • Terms and Conditions

Copyright 2025 Manuals.Online. All Rights Reserved.