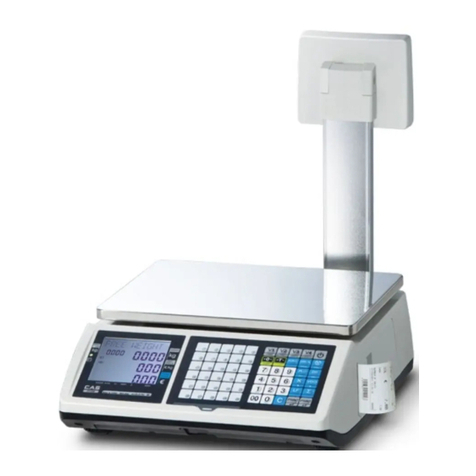
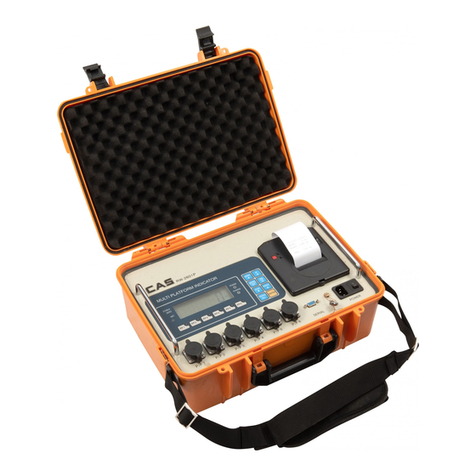
CAS CCB Series User manual

2

3
NOTE
(1) The unauthorized copying of some or all of this manual is prohibited.
(2) The information contained herein is subject to change without notice.
(3) If there are any questions such as wrong or missing parts of the contents
listed in this manual, please contact us.
(4) To improve the product performance, functions can be changed with no
notice.
(5) Please understand that CAS does not have responsibility for a demand
related to loss, lost profit etc. caused by operating the product, regardless
of the third clause.
This is warning & caution mark
This is hazard alert mark
This is useful information mark

4
CONTENTS
1. Precautions.....................................................5
2. Main Features................................................5
3. Specifications..................................................6
4. Description of Panels and Symbols...........8
5. How to Use a Rechargeable Battery .........9
6. General Functions.......................................10
7. Setting Mode................................................11
8.Test Mode......................................................16
9. IR Remote Controller................................17
10. Wireless Specification (Fmodel)............17
11. Real Time Clock (Fmodel)......................18
12. Wireless Pairing (Fmodel)......................19
13. Check Message..........................................20

5
1. Precautions
Please be informed that we’re not responsible for any incident or
mishap caused by partial modification of this product. To avoid such
situation, customers need to contact our customer service team or
system installation staff in advance, and any modification should be
conducted under our surveillance.
Do not put too much pressure to keys. Light touching is enough to operate products.
Do not use inflammable substances for cleaning.
Do not use the product in the rain. Keep it dry.
Avoid sudden changes of temperature if possible
Do not use the product in a place with a high-voltage current or severe electronic
noise.
Keep the product in a dry place.
Do not use the product in a place with strong direct sunlight and dust.
Do not use the product in a place with severe vibration.
Check the supply voltage.
Please check if the safety hook is connected well before you install our CCB,
so that the SHACKLE is not separated.
2. Main Features
Swivel hook
Big size display
Easy to exchange battery pack (Li-Po battery)
Standard IR remote controller
LAN communication is possible using the ZigBee (F model)
ZigBee wireless application and real time clock (F model)

6
3. Specifications
◆Overallview
◆Dimensions
MODEL
Max
(kg/lb)
e=d=
(kg/lb)
Weight
(kg)
DIMMENSION(mm)
H
A
W
B
CCB-1TL(F)
1,000/2,000
0.2/0.5
8.9
407
62
50
25
CCB-3TL(F)
2,500/5,000
0.5/1
15.2
525
73
57
34
CCB-5TL(F)
5,000/10,000
1/2
16.7
525
73
57
40
CCB-10TL(F)
10,000/20,000
2/5
26.9
697
101
83
55
(F) means that ZigBee wireless option is applied to product.

7
◆Specifications
MODEL
CCB-L
Display
6 digit FSTNLCD 30mm &LEDbacklight
Operatingtime
Approx. 12 hr
Battery
3.7V
Poweradaptor
5V 1A
Displaylamp
Lowbattery, Zero, Tare, Hold, Stable
Function
ON/OFF,Zero,Tare, HOLD, *
Temperature
-20℃~ +60℃
Max. tare weight
FullTare
Safetyoverload
150% ofcapacity
Zero point
Within 2% of Maximum Weight
Initial zeroband
Within 10% of MaximumWeight
Parts
Infraredcontroller, Power adaptor, Manual
◆Parts
[Rechargeableadaptor]
[Cranescale] [Infraredremotecontroller]

8
4. Description of Panels and Symbols
◆Display
Displaytheweightdata&message
Displayedwhentheweightisstable
Indicatestheweighingunit
IndicateswhentheZigBeecommunicatesdata
Indicateswhentheweightiszero
Indicateswhenthetareisincluded
Indicateswhentheholdfunctionisset
Indicateswhenabatteryhastoberecharged
◆Keypad
Poweronandoffthescale.
Returnthedisplaytozero
Usedtoweighanitembyusingthecontainer
Usedtochangeunit
Usetoturnonandoffthebacklight/holdfunction

9
5. How to Use a Rechargeable Battery
(1)Methodofrechargebattery
■ Checkthepowersupplyvoltage.
■ Ifadaptorisstillbeingcharged,theREDlampisonasbelowpicture.
■Ifachargingiscompleted,theREDlampisoff.
Thebatterychargingtimetakesabout6hours.
(Thebatterychargingtimeissubjecttobechangedaccordingtobatterycondition.)
Clamp
(2)Methodofexchangebatterypack
■ Turnclampsthatexitonbothsidesofchargertotherightinaquarter
■ Pulloutabatterypack
■ Insertingisinreverse
(3) Batterypackspecifications
Nominalcapacity
4000mAH
Nominalvoltage
3.7V
(4) Lowbatterylamp
Inordertopreventtheelectricdischarge,after LOW BATTERY LAMP ison, thepower will
beturnedoffautomaticallyafterabout1~5hours.
(It’s subjected to be changed according to using conditions.)

10
6. General Functions
(1)Zerofunction
Use to correct drifted zero value when the scale is unloaded, and motion is not detected.
ThisfunctionworkswhenZEROKEYispressed,andtheZEROLAMPison.
(2) Settingtareweightfunction.
PresstheTARE KEY. Then, thescalewill memorize the weight ofthetareand willdisplay
zerovalue ‘0’kg. The TARELAMPwillbeon.
To escape this function, remove everything from the scale, and press the TARE or ZERO
KEY.Then,theTARELAMPwillbeoffandthisfunctionisterminated.
(3) Holdfunction(F08ofsettingmodemustbesetto4)
Automaticholdfunction
■ Press *KEYwhenthescaleisempty(Initialzerostate).
■ The weight display will indicate .HOLDLAMPison.
■ After loading a thing, if the weight turns stable then, a display shows and
averageweightwillappear.
■ The weight of a loadedthingisdisplayed.
■ To escape the automatic hold mode, when zero point is on, press * KEY.
Then,themessageof isdisplayedandHOLDLAMPisoffandnormal
weighing modeisreverted.
Manualholdfunction
■ Press *KEYloadingathing.
■ This messageof isdisplayedandsequentiallythemessageof is
shownwithappearingtheaverageweight.
■ The weight of a loaded thing is displayed.
■ To escape the manual hold mode, remove everything from a hook, or press the *KEY.
Then,HOLDLAMPwillbeoffandthescalechangesfromaholdmodetoanormal
mode.
11
7. Setting Mode
(1)Howtoenterthismode
PresstheON/OFFKEYwhilepressingtheTAREKEY.
Changedvaluesaresavedafterruntothefinalmenu.
(2) Keyboard
: Usedtosetupaninitialzerovalue(0).
: Used tomovetheinputvaluetotheleftorrightbyoneplace.
: Usedtoincreasethesettingconstantonebyone.
: Usedtosavethevalueandtomovenextmenu.
(3) Menu
■F01: Number of scales to be linked wireless (1~9)
Setting Menu
Description
F01-1
Very fast
F01-5
Normal
F01-9
Very slow
■F02: Weight backup (0,1)
Setting Menu
Description
F02-0
Not used
F02-1
Used
■F03: Stable condition set of weight (1~9)
Setting Menu
Description
F03-1
Sensitive
F03-5
Normal
F03-9
Insensitive
■F04: Automatic zero condition (00~99)
Setting Menu
Description
F04-00
No compensation
F04-23
Compensation for gradual change below 1d for 3 sec.
F04-99
Compensation for gradual change below 4.5d for 9 sec.

12
■F05: Adjustment the hold speed (1~9)
Setting Menu
Description
F05-1
Very fast
F05-5
Normal
F05-9
Very slow
■F06: Auto hold (0,1)
Setting Menu
Description
F06-0
Manual
F06-1
Automatic
F08 of setting mode must be set to 4.
Refer to “6. General Functions”
■F07: Initialization hold weight (1~9)
Setting Menu
Description
F07-1
Zero (0)
F07-3
Below 3 division
F07-9
Below 9 division
■F08: Function * key (0~4)
Setting Menu
Description
F08-0
LCD Type : Back light ON/OFF
F08-1
Data send to PRINTER
F08-2
Data send to PC
F08-3
Use to clear previously added weights.
F08-4
Use as Hold key
■F09:Item number (Identification number of each Item) (0~9)
Setting Menu
Description
F09-0
Item No.0
F09-5
Item No.5
F09-9
Item No.9

13
■F10: Weighing data send format (0~4)
Setting Menu
Description
F10-0
Not used
F10-1
Send the print format by automatically at stable
F10-2
Send the weighing data1) by automatically at stable
F10-3
Send the print format by automatically at HOLD
F10-4
Send the weighing data by automatically at HOLD
Please select this mode if you used the wireless printer.
In case of F10-1/3, the print form data(refer to F11) is send to printer
and printer is printing with the print form. At this time, the printer
mode of YJ380T must change to the NORMAL MODE.
In case of F10-2/4, the 22bytes wireless data is send to printer and
printer is printing with the itself format. At this time, the printer mode
of YJ380T must change to the KEY MODE.
22bytes data
Type:EIA-RS-232C
Method:Full-duplex,asynchronoustransmissionFormat
①Baudrate:9600bps
②Databit:8,Stopbit:1,Paritybit:None
③Code:ASCII
④Format(22bytes)
Header1 Header2 ID Data Unit Terminator
S
T
,
G
S
,
,
0
.
0
l
b
CR
LF
Lampstatus
Header 1
ST
Stable weight data (0x53) (0x54)
US
Unstable weight data (0x55) (0x53)
OL
Overload (0x4F) (0x4C)
HD
Hold weight data (0x48) (0x44)
Header 2
GS
Gross data (0x47) (0x53)
NT
Net data (0x4E) (0x54)

14
ID
Command address ID is selected in F02 (If ID is 1, 0x31 is sent)
Lamp
Statue
Bit7
Bit6
Bit5
Bit4
Bit3
Bit2
Bit1
Bit0
1
Stable
1
Hold
1
Net
Tare
Zero
Data
Example 1) 13.5 lb ‘’, ‘’, ‘’, ‘’, ‘1’, ‘3’, ‘.’, ‘5’
Example 2) 135 lb ‘’, ‘’, ‘’, ‘’, ‘1’, ‘3’, ‘5’, ‘’
Example 3) -13.5 lb ‘-’, ‘’, ‘’, ‘’, ‘1’, ‘3’, ‘5’, ‘’
Unit
Kg
(0x6B) (0x67)
g
(0x20) (0x67)
lb
(0x6C) (0x62)
Terminator
CRLF
(0x0D) (0x0A)
■F11: Print form (0,1)
Setting Menu
Description
F11-0
Form 0 (Data and time, serial No., Item No., weight)
F11-1
Form 1 (Data and time, weigh No., Item No., weight)
The serial number is not saved.
[FORM 0] [FORM 1]
2013.10.13 12:00
012, ID_9, 131 lb
■F12:Print line feed (0~9)
Setting Menu
Description
F12-0
1 line feed after printing
F12-5
6 line feed after printing
F12-9
10 line feed after printing
■F13: Initialization of number measured daily (weigh No.) (0,1)
Setting Menu
Description
F13-0
Maintain current number
F13-1
Initialization (starting from No.1)
Maximum ofnumber is 999, and if it exceeds the number is initialized to 1.
2013.10.13 12:00
SN_001, ID_9, 25 lb

15
■F14: Stream wireless mode (0~2)
Setting Menu
Description
F14-0
Not used
F14-1
ZigBee communicate with CRD series and CRC-100
F14-2
ZigBee communicate with CRC-200 dongle
In case of F14-2, refer to the 22bytes data format.
■F15:Back light mode(0~2)
Setting Menu
Description
F15-0
Manual ON/OFF
F15-1
Automatic ON/OFF (Weighing : ON / Zero : OFF)
F15-2
Always ON
■F16:Back light brightness level control (1~9)
Setting Menu
Description
F16-1
10%
F16-5
50%
F16-9
100%

16
8. Test Mode
(1)Howtoenterthismode
PresstheON/OFFKEY whilepressingtheZEROKEY.
(2) Menu
■TEST 1: Display test
Display
Description
TEST1runsautomaticallyandadisplayison.
IfpressENTERKEY,moveintonextmenu.
■TEST 2: Keyboard test
Key
Display
Description
1
Ifyoupressthekeythatyouwanttotest,thekey
numberisappearedonthedisplay.
IfpressENTERKEY,movesintonextmenu.
2
3
4
■TEST 3: A/D
Display
Description
ThevalueistheconversionconstantforA/D.
Thevaluemaybedifferentaccordingtoscalemodels.
If pressENTERKEY,moveintonextmenu.
Pleasecheckifthedisplayednumberiseasilychangedwithgivingforcetoahook.
Ifthedisplayingnumberisnotchangedorremains‘0’, then it needs the serviceafter
sales.
■TEST 4: Back light test
Display
Description
If youpresstheZEROKEYonce,backlightturnsonand
onceagain,backlightisturnsOFF.
If pressENTERKEY,moveintoweighingmode.

17
9. IR Remote Controller
■:Usetopoweroffthescale
(Power-ONisavailableonlyonscale.)
■: Sameasscale’skeyboard
■: Usedtoaddweights.
IfpressaSUMKEY,thesumofweightsisdisplayed.
Afterthat,about2seclater,aweighingmodeisreverted.
Weightoflessthan5digitsisnotsummed.
Maximumofsumweightsis99999,andifitexceeds
the weightsisinitializedtozero.
Type
Infrared
Available Distance
6 m ~ 10 m
Available Angle
60°
Power
3V (1.5V AA 2 EA)
10. Wireless Specification (F model)
“F”modeliscommunicateswithourwirelessdisplayandcontroller.
Ifyouareusingawirelessdongle,youcancommunicatewithPCandprinter.
RF frequency range
2400 ~ 2483.5 MHz
Output power
Max. 4dBm
Channel width
2 MHz
Frequency offset
< ±30ppm
Transmit data rate
250Kbps,500Kbps
Receiver sensitivity
-99dBm (PER <1%)
Maximum input level
0dBm
RF In/out impedance
50 ohm (TXRF, RXRF)
Spurious(2nd harmonics)
< -30dBm
Radio link effective range
Approx. 100M (Open space)

18
11. Real Time Clock (F model)
(1)Howtoenterthismode
PresstheON/OFFKEYwhilepressingtheZEROKEY.
(2) Keyboard
: Used tomovetheinputvaluetotheleftorrightbyoneplace.
: Usedtoincreasethesettingconstantonebyone.
: Usedtosavethevalueandtomovenextmenu.
(3) Menu
Display
Description
Yearinputreadiness.
ModifytheyearbypressingthenumericalkeysandpressENTERkey
Month&dateinputreadiness.
ModifythedatebypressingthenumericalkeysandpressENTERkey
Timeinputreadiness.
ModifythetimebypressingthenumericalkeysandpressENTERkey
Theend

19
12. Real Time Clock (F model)
Step
Operation & Description
1
How to enter the pairing mode
1) CCB crane scale
Whenthedisplayisoff,pressON/OFFkeywhilepressing*key.
When“=”(Firmwareversion)isdisplayed,presskg/lbkey.
Then,“ ” isdisplayed.
2) CRD-F wireless display
PresstheON/OFFkeytopoweronandimmediatelypresskg/lb key.
Andpressthekg/lbkeyagain.
Then,“ ” isdisplayed.
3) CRC-100 controller
Whenthedisplayisoff,pressON/OFFkeywhilepressingENTERkey.
When“=”(Firmwareversion)isdisplayed,press3key.
Then,“ ” isdisplayed.
4) CRC-200 wireless dongle
PresstheSETKEYforthe5secondswiththepoweronthatconnected.
Then,thegreenlightisblinking.
2
Pairing
When“ ” isdisplayedatbothproducts,ifyoupress*keyofCCB
cranescale,pairingwillfinish.
Pleasecheck“ ” messageatbothproducts.
(CRC-200:greenlightwillbeturnon)
Ifendingmessageisnotappear,pleaserepeatthepairing.

20
13. Check Message
Datainaninternalstoragevalueareerasedowingtoanyelectronicimpact.
Pleasecontactustoresolvethistechnicalproblem.
SomethingwronginaLoadcellconnectionorinanA/Dconversion.
Pleasecontactustoresolvethistechnicalproblem.
Whenathingisover-weighedwithinthemaximumweightvalue,theerrormessage
isdisplayed.
Donotweighthethingwhosethelimitofamaximumweightvalueisexceeded.
Ifaloadcellisbroken,thentheloadcellhastobereplaced.

21
MEMO
This manual suits for next models
8
Table of contents
Other CAS Scale manuals
Popular Scale manuals by other brands

Dynalab
Dynalab DGRL-01-01 operating manual

Silvercrest
Silvercrest 66593 Operation and safety notes

Silvercrest
Silvercrest SPW 180 D4 User manual and service information

Proficook
Proficook PC-KW 1221 instruction manual

q-Tech
q-Tech EZ-60 Installation and operating instructions

ACU-RITE
ACU-RITE 939 instruction manual