manuals.online logo
Brands
  1. Home
  2. •
  3. Brands
  4. •
  5. Casio
  6. •
  7. Cash Register
  8. •
  9. Casio SE-S2000 Manual

Casio SE-S2000 Manual

Other manuals for SE-S2000

1

Other Casio Cash Register manuals

Casio SR-C550 User manual

Casio

Casio SR-C550 User manual
Casio SE-S3000 User manual

Casio

Casio SE-S3000 User manual

Casio CE-6000 Owner's manual

Casio

Casio CE-6000 Owner's manual

Casio SR-C4500 User manual

Casio

Casio SR-C4500 User manual

Casio PCR-360 Assembly instructions

Casio

Casio PCR-360 Assembly instructions

Casio TE-2200 User manual

Casio

Casio TE-2200 User manual

Casio PCR T265 - Electronic Cash Register User manual

Casio

Casio PCR T265 - Electronic Cash Register User manual

Casio PCRT275 - Cash Register w/ 15 Depts User manual

Casio

Casio PCRT275 - Cash Register w/ 15 Depts User manual

Casio EX-830 User manual

Casio

Casio EX-830 User manual

Casio EX-843 User manual

Casio

Casio EX-843 User manual

Casio PCR-T276 User manual

Casio

Casio PCR-T276 User manual
Casio TE-2000 User manual

Casio

Casio TE-2000 User manual

Casio QT-8000C User manual

Casio

Casio QT-8000C User manual

Casio TK-7500 User manual

Casio

Casio TK-7500 User manual

Casio 140CR - Cash Register User manual

Casio

Casio 140CR - Cash Register User manual

Casio TK-810 Assembly instructions

Casio

Casio TK-810 Assembly instructions

Casio 210ER Assembly instructions

Casio

Casio 210ER Assembly instructions

Casio PCR T265 - Electronic Cash Register User manual

Casio

Casio PCR T265 - Electronic Cash Register User manual

Casio SE-S3000 User manual

Casio

Casio SE-S3000 User manual
Casio PCR-1000 User manual

Casio

Casio PCR-1000 User manual

Casio PCR 272 - Cabinet Design Cash Register User manual

Casio

Casio PCR 272 - Cabinet Design Cash Register User manual

Casio CE-3700 User manual

Casio

Casio CE-3700 User manual

Casio TE8000 User manual

Casio

Casio TE8000 User manual

Casio TE-3000S - Cash Register User manual

Casio

Casio TE-3000S - Cash Register User manual

Popular Cash Register manuals by other brands
Royal 480nt operating manual

Royal

Royal 480nt operating manual

Olivetti ECR 8200 S user guide

Olivetti

Olivetti ECR 8200 S user guide

TEC TEC FS-3600 owner's manual

TEC

TEC TEC FS-3600 owner's manual

Integrated System Laboratory ISL 4006 user manual

Integrated System Laboratory

Integrated System Laboratory ISL 4006 user manual

Sam4s ER-380 Operation and program manual

Sam4s

Sam4s ER-380 Operation and program manual

Sharp XE-A206 Guía de inicio Rápido

Sharp

Sharp XE-A206 Guía de inicio Rápido

Samsung ER 5215 Operator's manual

Samsung

Samsung ER 5215 Operator's manual

Toast Toast Quick setup guide

Toast

Toast Toast Quick setup guide

QUORION CR 1200 user manual

QUORION

QUORION CR 1200 user manual

Olivetti ECR 7700 LD eco Plus user guide

Olivetti

Olivetti ECR 7700 LD eco Plus user guide

Sharp XE-A137-WH Operation Basic user manual
Sharp

Sharp XE-A137-WH Operation Basic user manual

Sharp XE-A203 - Cash Register Thermal Printing Graphic Logo... instruction manual

Sharp

Sharp XE-A203 - Cash Register Thermal Printing Graphic Logo... instruction manual

TEC TEC MA-1060 owner's manual

TEC

TEC TEC MA-1060 owner's manual

American Changer CLASSIC Series Operation manual

American Changer

American Changer CLASSIC Series Operation manual

Sharp XE-A130 Bedienungsanleitung

Sharp

Sharp XE-A130 Bedienungsanleitung

Sam4s ER-5100? SERIES Service manual

Sam4s

Sam4s ER-5100? SERIES Service manual

Sharp ER-2540 Service manual

Sharp

Sharp ER-2540 Service manual

Sharp ER-2540 Service manual

Sharp

Sharp ER-2540 Service manual

manuals.online logo
manuals.online logoBrands
  • About & Mission
  • Contact us
  • Privacy Policy
  • Terms and Conditions

Copyright 2025 Manuals.Online. All Rights Reserved.

C:\Users\Nick\AppData\Local\Microsoft\Windows\Temporary Internet Files\Content.Outlook\LK4QWJEV\SE-S2000.doc QS12 - 1 -
WWW.HOTPOS.COM.AU
TECHNICAL INFORMATION FOR THE QUICK SETUP OF CASIO CASH REGISTERS
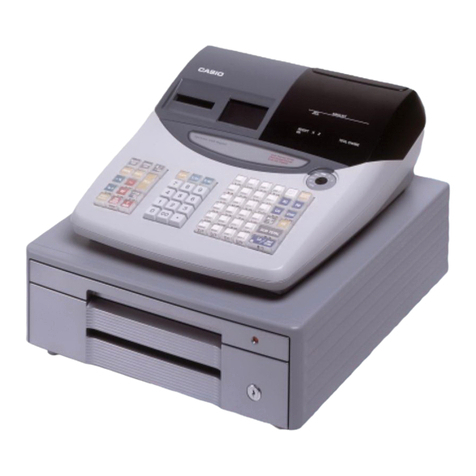
CASIO SE-S2000 Cash Register
MAC Clear ECR
Set mode switch to off
Hold Down the [JOURNAL FEED] button
Turn Key to PGM while still holding down the [JOURNAL FEED] button
After 5 seconds release the [JOURNAL FEED] button
‘0000000000’ will appear on the display and the register is now ready to receive it’s
MAC code
Enter 13000
Press Sub Total
Insert Memory Batteries
Set Register For Australian GST
Turn Key to X
Enter 01012001
Press Sub Total
Press Cash
Set Time
Turn Key to Program
Enter time in 24 hr format HH:MM eg 4:30pm = 16:30
Press the” X/Date Time” Key
Press “Clear” [C] Key
Set Date
Turn Key to Program
Enter date as YY:MM:DD
Press the “X/Date Time” Key
Press “Clear” [C] Key
C:\Users\Nick\AppData\Local\Microsoft\Windows\Temporary Internet Files\Content.Outlook\LK4QWJEV\SE-S2000.doc QS12 - 2 -
Set GST for Departments
Turn Key to PGM
Enter 1 Press Subtotal (PGM 1)
Press TAX PGM until the tax you want is selected (01 for GST, 00 for no tax)
Press Departments
Press Subtotal when finished ALL
Set Prices for Departments
Turn Key to PGM
Enter 1 Press Subtotal (PGM 1)
Enter Price without using decimal point e.g. 150 =$1.50
Press the Department Key you want to set the price against
Press Subtotal when finished ALL
Set Names of Departments
Turn Key to PGM
Enter 2 Press Subtotal (PGM 2)
Press the Department key that you want to name eg Department 1
Use the Numeric Keys to choose the letters you want to use. There are 3 letters on the
leading edge of each key. To move to the next letter use the arrow on the 00 key.
Press Cash
Press Subtotal when finished ALL
C:\Users\Nick\AppData\Local\Microsoft\Windows\Temporary Internet Files\Content.Outlook\LK4QWJEV\SE-S2000.doc QS12 - 3 -
Change Receipt Header
Turn Key to PGM
Enter 2 Press Subtotal (PGM 2)
Enter the number of the line of the receipt you wish to program e.g. 232
Press Subtotal
Use the Numeric Keys to choose the letters you want to use. There are 3 letters on the
leading edge of each key. To move to the next letter use the arrow on the “00” key.
Press Cash
Press Subtotal when finished ALL
Line #
Description
Default (24 Characters)
132
1st Line of Logo Message
YOUR RECEIPT
232
2nd Line of Logo Message
THANK YOU
332
3rd Line of Logo Message
CALL AGAIN
432
4th Line of Logo Message
532
1st Line of Commercial
Message
632
2nd Line of Commercial
Message
732
3rd Line of Commercial
Message
832
4th Line of Commercial
Message
932
1st Line of Bottom Message
1032
2nd Line of Bottom Message
1132
3rd Line of Bottom Message
1232
4th Line of Bottom Message
:
:
4032
1st Line of Australian GST
Message
TAX INVOICE
4132
2nd Line of Australian GST
Message
* INDICATES
4232
3rd Line of Australian GST
Message
TAXABLE SUPPLY
C:\Users\Nick\AppData\Local\Microsoft\Windows\Temporary Internet Files\Content.Outlook\LK4QWJEV\SE-S2000.doc QS12 - 4 -
Changing between Graphic Logo and Text receipt
Turn Key to PGM
Enter 3 Press Subtotal (PGM 3)
Enter 2122
Press Subtotal
Enter Data from Table below e.g. Text Receipt + Bottom Message = 4000200004
Press Cash
Press Subtotal to Finish
Logo Message Type
a
0 = Text
2 = Graphic
(a+b)
= 0 - 6
Print Watermark
b
0 = Yes
4 = No
Always 000
000
Print Commercial Message on Receipts
a
0 = No
1 = Yes
(a + b)
= 0 - 3
Print Bottom Message on Receipts
b
0 = No
2 = Yes
Always 0000
0000
Print Australian GST MOF Message
0 = No
4 = Yes
= 0 - 4
Sending the Graphic Logo to the ECR
Start the Program Called ‘CV10’
Create a New Store by Clicking New
Give it a Store Name
Select the ECR Type by pressing New
Then Click OK
Then Click OK again.
At this point you should close down the program and create a Graphic logo using the
next procedure ‘Creating Graphic Logo for Receipt Message’
Double Click ‘Graphic Logo’
Your Graphic Logo should appear in the New Window.
If it has not, close down the program and try the procedure below again.
Double click on the your graphic logo.
It should now be sending to the ECR.
C:\Users\Nick\AppData\Local\Microsoft\Windows\Temporary Internet Files\Content.Outlook\LK4QWJEV\SE-S2000.doc QS12 - 5 -
Creating Graphic Logo for Receipt Message
Open the Windows Program Called ‘Paint’
The program should automatically create a new Blank Canvas
Click on the Image Menu
Select the Attributes Option
Change the Width to be 384 pixels
Change the Height to be 168 pixels
Change the colours to be ‘Black and White’
Press OK
At this point, you can create an Image any way you want.
Then Save the Bitmap by Clicking on the File Menu
Select Save As
Save the File to the Folder
‘C:\cvw\store001\Te100\Logo’ Folder. This may change if you have used more than one
store or installed it to another folder.