GUARANTEE
The warranty period for this product is 24 months, beginning from the manufacturer date. During this period, if the product does not
work correctly, due to a defective component, the product will be repaired or substituted at our discretion. The guarantee does not
cover the plastic container integrity. After-sale service is supplied at the factory.
Fabricant de Contrôle d’Accès depuis 1985 Manufacturing Access Control since 1985
The installer’s choice
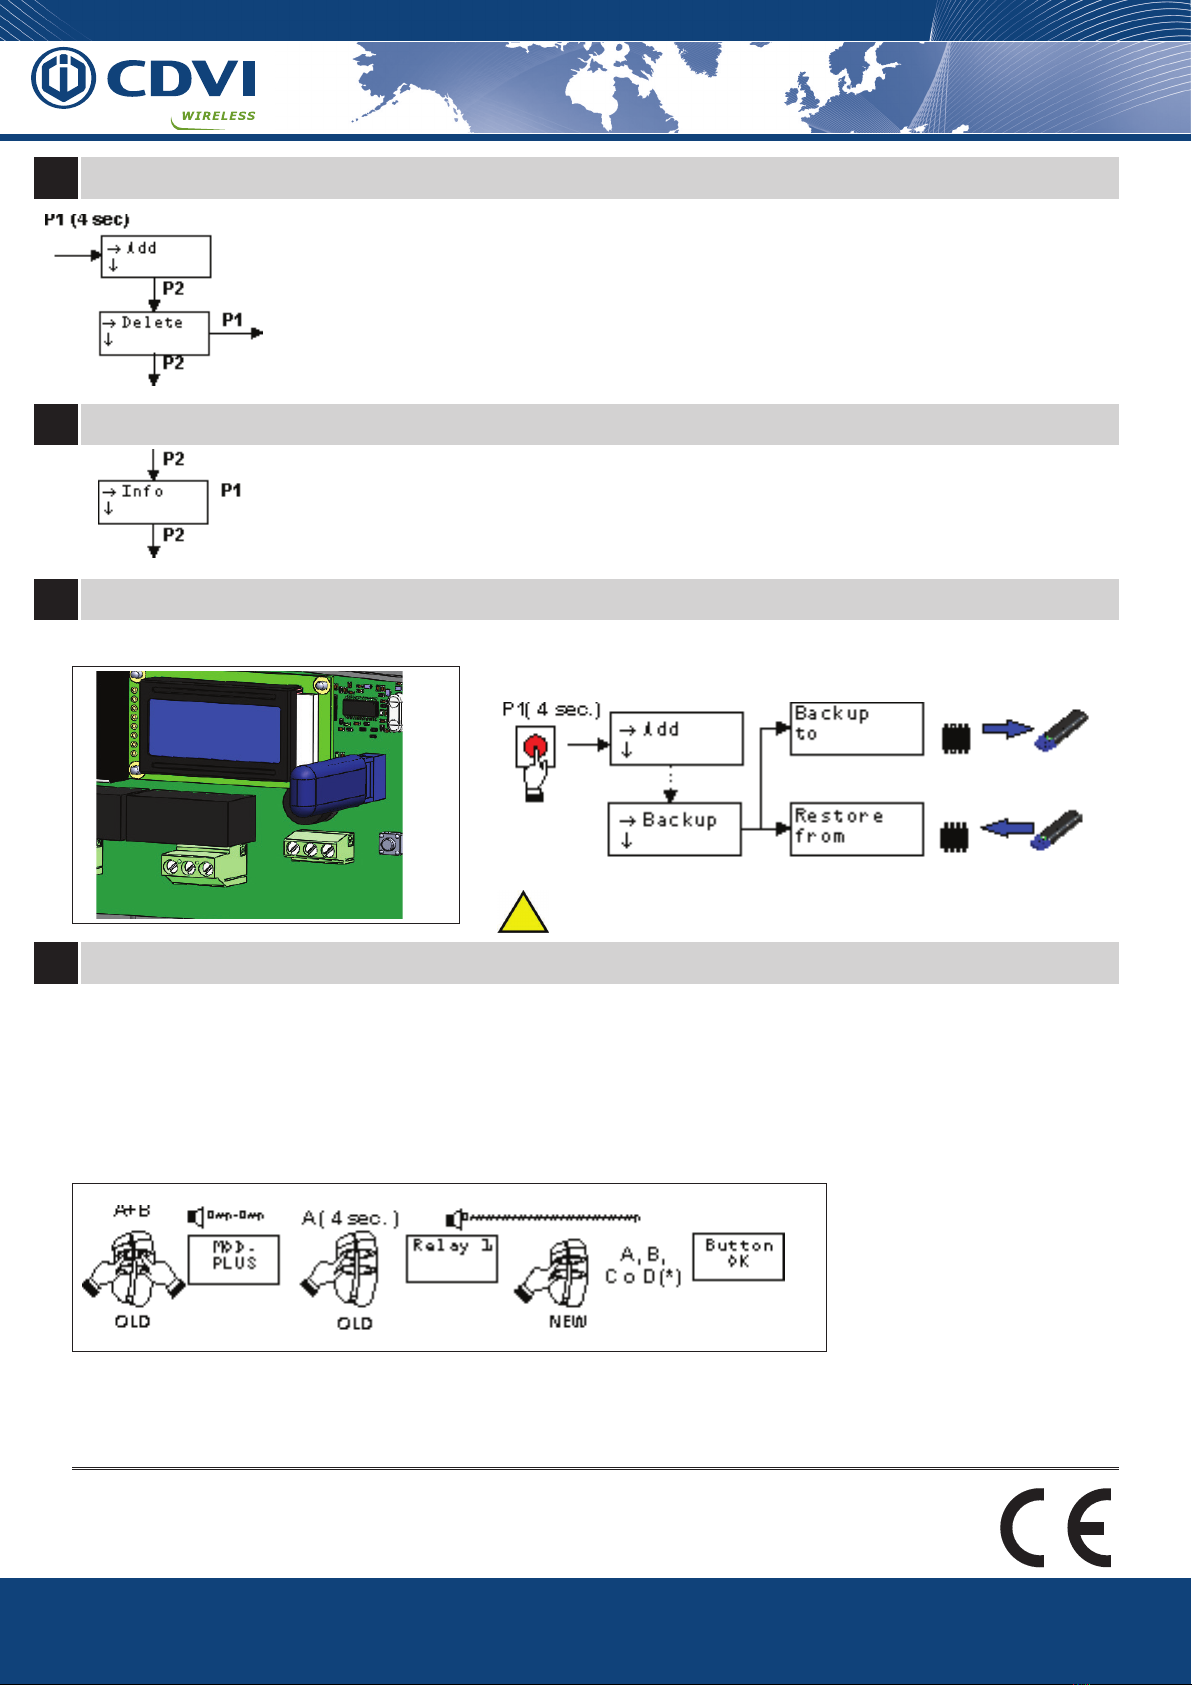
14 Memorization Plus
13 Backup / Restore
(*) : Push the button of the new
transmitter before the end of
the beep.
NOTE : If the option «PLUS LIMITED» is set, the transmitter which «opens» the memorization can be only the rst transmitter memorized.
If the option PLUS is OFF the remote memorization is disabled.
If the option PLUS is ON the remote memorization of a new transmitter can be done using any transmitter already in memory.
The memorization PLUS is active only if there is, at least, one transmitter in the memory. When the memory is empty, the memorization of the rst
transmitter can be effected only using the buttons P1 and P2.
!(*) Attention : this operation will overwrite all data of the internal memory
Manufactured by : CDVI Wireless SPA - Via Piave, 23 - 31020 S.Pietro di Feletto (TV) - Italy
Tel : +39-0438-450860 - Fax : +39-0438-455628
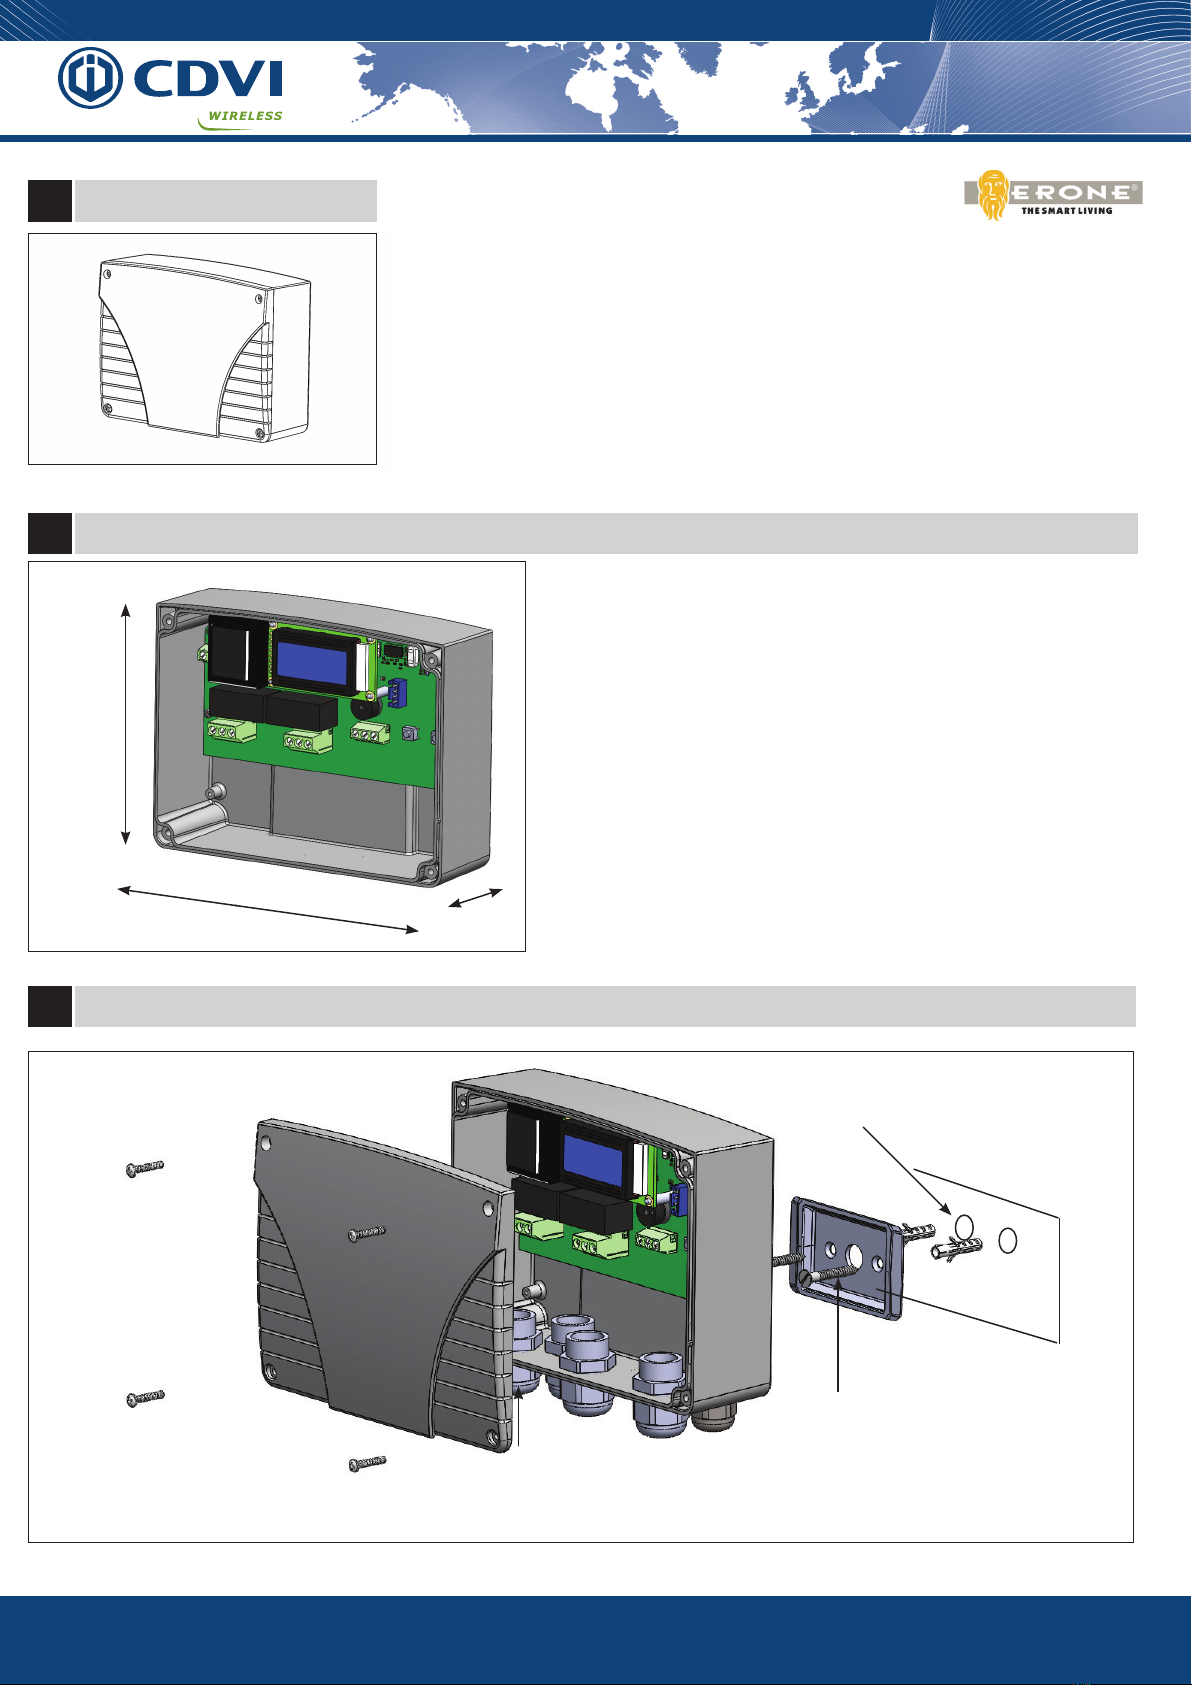
External
Internal
External
Internal
Save
Restore (*)
MEM.
MEM.
MEM.
MEM.
Allows to create a backup of the memory data-base and save it onto an external
memory ( type SEL2641-MXPL) ( g. 6)
Plug-in the memory in the proper receiver connector
The memorization PLUS allows to add a new transmitter remotely, without using the push-buttons P1 & P2. It’s enough to use a transmitter «Ma-
ster».
A transmitter «Master» can be :
1) the rst transmitter added;
2) any transmitter memorized and changed as «master» using the Add Master submenu ;
The PLUS feature can be : ON, Limited or OFF
• Plus ON : remote transmitter memorization enabled;
• Plus Limited : remote transmitter memorization enabled only using a TX «master» ( see g. 7 );
• Plus OFF : remote transmitter memorization disabled;
11 Menu Delete
12 Menu Info
Delete TX : Delete a transmitter. It’s necessary to have the transmitter available because the
system requires the RF transmission;
Delete Button : Delete the single button of a transmitter;
Delete by List : Delete a transmitter from a list. In this case it is enough to know the S/N of the transmitter
to be deleted to nalize the cancellation;
Delete All TX : Delete all transmitters;
Delete setting : Reset to factory default: delete all the transmitters and reset the relay operating mode
to PULSE.
For all the options, use P2 to scroll and P1 to conrm
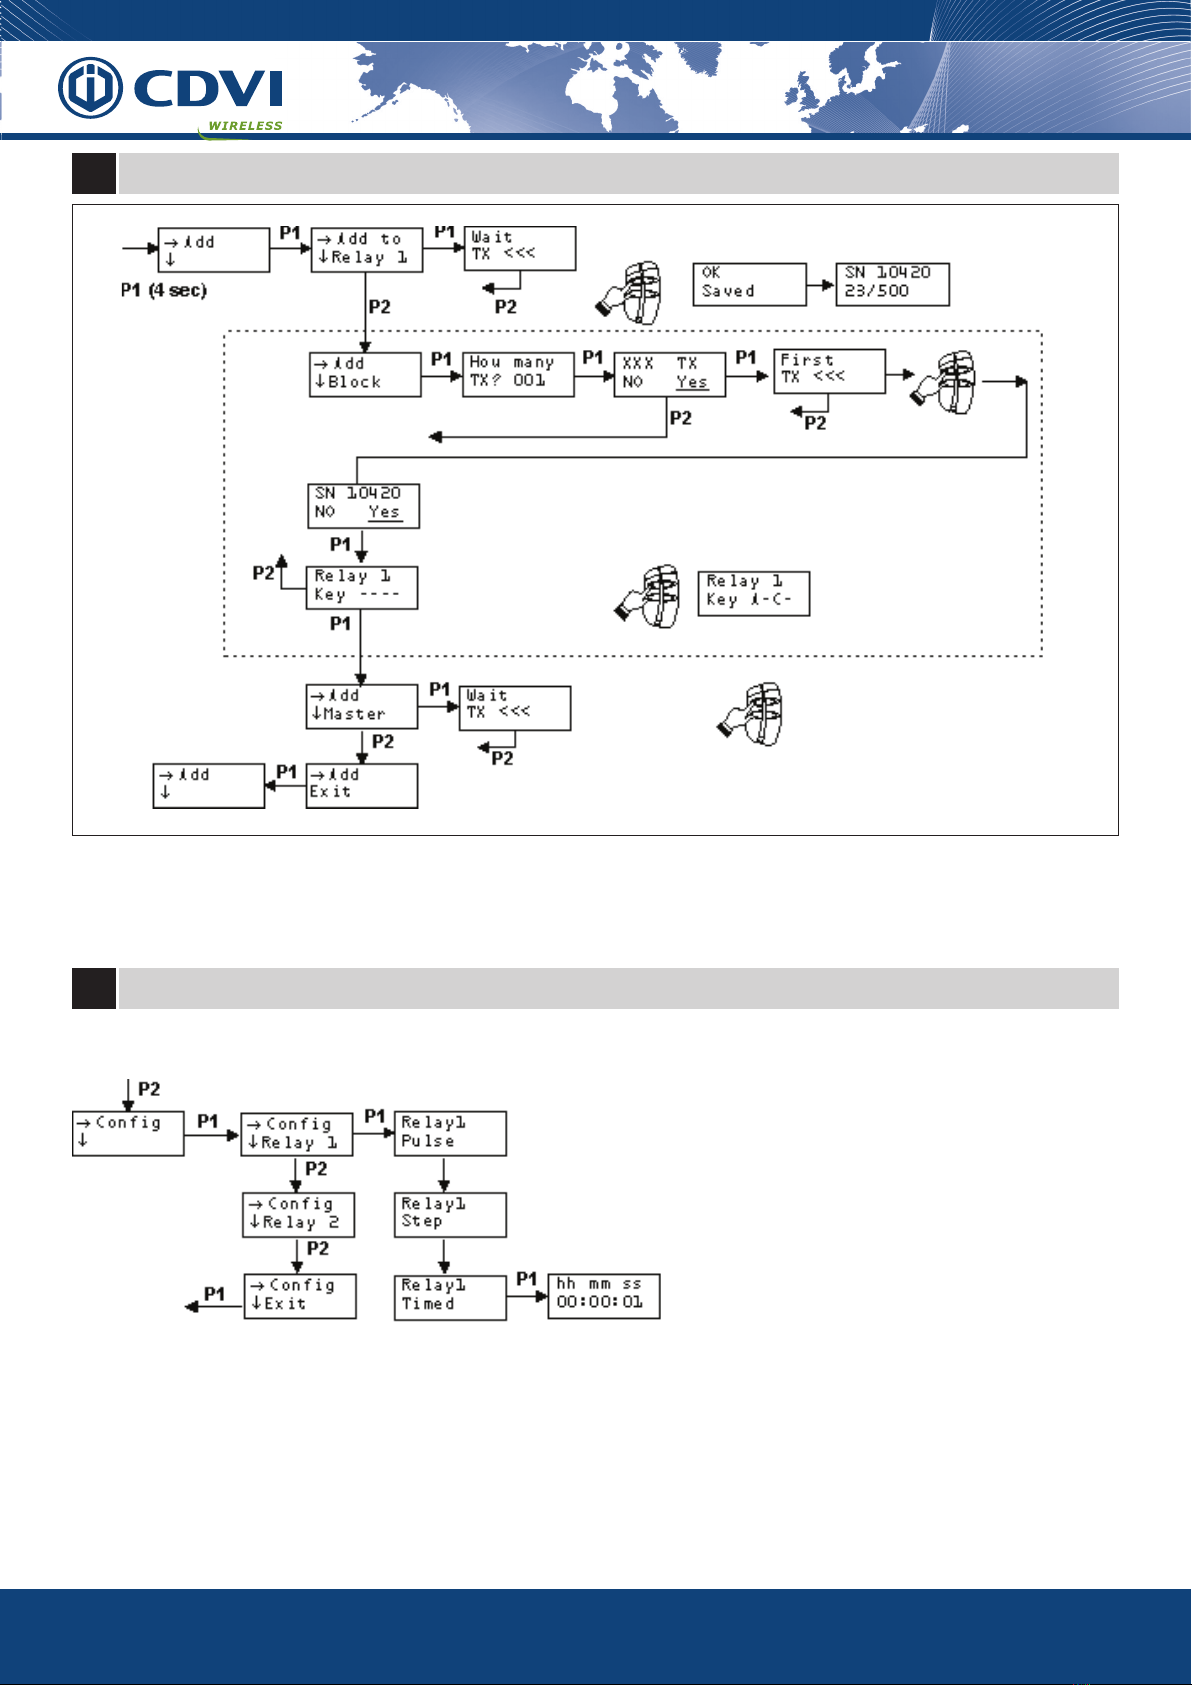
Info relay : Display relay operating mode
Info N. Users : Display number of Tx memorized
Info List : List of Transmitters
Info Version : SW release.
For all the options, use P2 to scroll and P1 to conrm
Fig.7
ERONE
XPL2V
Fig. 6
IS-XPL2VERUK Rev.2 on 20/1/2020