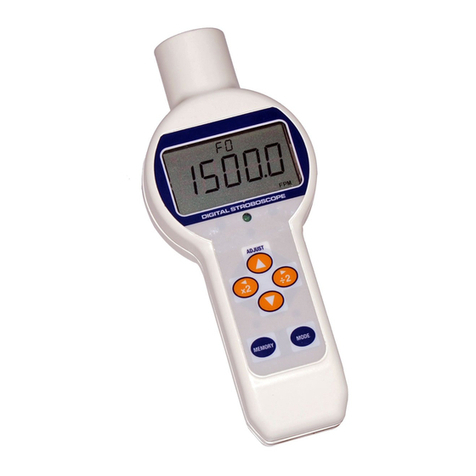
Check-line DT-725 User manual

– 1 –
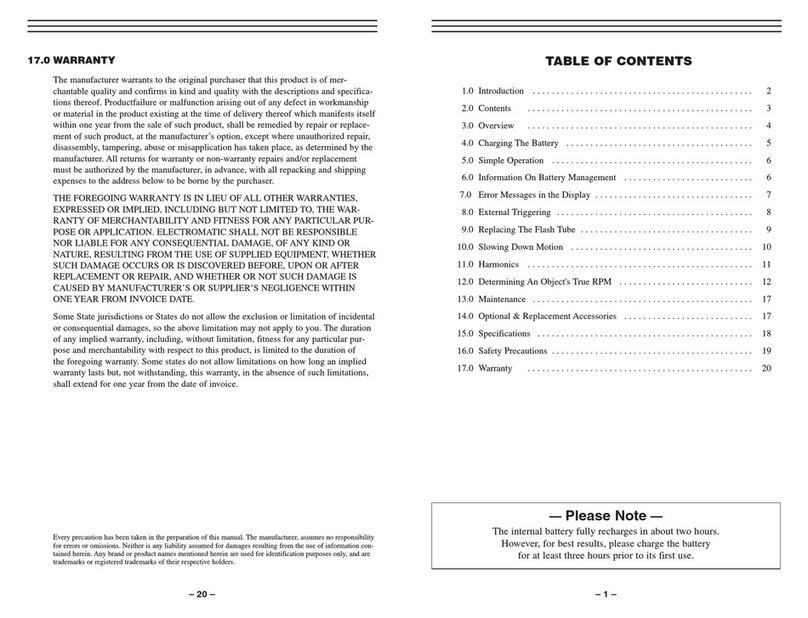
TABLE OF CONTENTS
1.0 Introduction . . . . . . . . . . . . . . . . . . . . . . . . . . . . . . . . . . . . . . . . . . . . . . . 02
2.0 Overview . . . . . . . . . . . . . . . . . . . . . . . . . . . . . . . . . . . . . . . . . . . . . . . . . 02
2.1 Controls
2.2 Kit Option
3.0 Battery Usage (DT-725 only) . . . . . . . . . . . . . . . . . . . . . . . . . . . . . . . . . 03
3.1 Battery Charging
3.2 Battery Replacement
4.0 Operation . . . . . . . . . . . . . . . . . . . . . . . . . . . . . . . . . . . . . . . . . . . . . . . . . 04
4.1 Internal Triggering
4.2 External Triggering
4.3 Synchronous Output Signal
4.4 Using A Tripod
5.0 Memory . . . . . . . . . . . . . . . . . . . . . . . . . . . . . . . . . . . . . . . . . . . . . . . . . . 06
6.0 True RPM. . . . . . . . . . . . . . . . . . . . . . . . . . . . . . . . . . . . . . . . . . . . . . . . . 06
7.0 Flash Tube Replacement . . . . . . . . . . . . . . . . . . . . . . . . . . . . . . . . . . . . . 07
8.0 Specifications . . . . . . . . . . . . . . . . . . . . . . . . . . . . . . . . . . . . . . . . . . . . . . 08
9.0 Warranty . . . . . . . . . . . . . . . . . . . . . . . . . . . . . . . . . . . . . . . . . . . . . . . . . .
WARNING
1. Do not look at the emitted light for long periods of
time, it can be harmful to the eyes.
2. Do not disassemble or repair the unit while in
operation.
3. Do not operate or store the instrument in the
following places: explosive areas, areas near
water, oil, dust or chemicals, or areas where
the temperature is above 104°F
(40 °C).
– 8 –
8.0 SPECIFICATIONS
Flashing Range 40 – 12,500 FPM (Flashes Per Minute)
Accuracy ±0.02% of reading
Resolution 0.1 , 40.0 – 4,999.9 FPM
0.2 , 5,000.0 – 7,999.8 FPM
0.5 , 8,000.0 – 9,999.5 FPM
1.0 , 10,000.0 – 12,500.0 FPM
Display 5-Digit LED, 0.3" (8mm) height
Rate Divide by 2, Multiply by 2
Update Time Ext. mode: varies with flashing rate
Operating Time 1 hour when fully charged (Model DT-725)
Continuous (Model DT-721)
Flash Tube/Power Live Xenon, 10 W, 100 million flashes
Flash Duration 10 – 15 μs
Signal Output NPN Open Collector (24 VDC max., 50 mA)
150 μs typical
Phase Shift Internal mode only by using the “+” and “–” switches
Ext. Trigger a) 12-24 VDC thru a 3-wire NPN output sensor
(requires external power supply)
Input Signal b) 12 VDC thru a 2-wire proximity sensor (leakage
current 1 mA max.,Load current 8 mA min.)
c) Switch or Relay contact
Operating Temp. 32°–104° F (0 – 40° C)
Dimensions 9" L x 4.3" W x 8.5" H (228.6 x 109.2 x 216.9mm)
(Height includes handle)
Weight DT-725 2.75 lbs (1.25 Kgs)
DT-721 1.5 lbs. (0.7 Kg)
4.3"(109.2mm) 4.3"(109.2mm)9"(228.6mm)
8.5"
(228.6mm)

– 2 –
1.0 INTRODUCTION
The Check•Line®DT-721(AC-powered) and DT725 (battery powered) Digital
Stroboscopes are highly stable, industrial-quality instruments for non-contact
RPM measurement as well as for inspecting and observing moving parts
by “freezing” or “slowing down” the action.
2.0 OVERVIEW
2.1 Control Panel
Setter: The setter changes the flash
rate. Tune CW to increase the rate,
turn CCW to decrease the ratee.
x2 Switch; Pressing “x2” will double and
display the flashing rate.
1/2 Switch: Pressing the “1/2” will divide
flashing rate by two and display it.
Plus (+) Switch: When object appears to
be standing still, pressing “+” will give the
illusion that the object is moving towards the
opposite direction of rotation. This action
increases the rate slightly (phase shift) and is
used to place the object in desired position.
Minus (–) Switch: When object appears to
be standing still, pressing “–” will give the
illusion that the object is moving towards the
rotating direction. This action decreases the
rate slightly (phase shif) and is used for the
same reason as above.
Input and Output Connectors:
Phonejack (3.5 mm)
Tip: Signal
Sleeve: GND
Power switch with lock option
Power cord (DT-721 only, not shown)
2.2 Kit Option
A “Kit” option is offered which also
includes a carrying case and spare
flash tube at minimal additional cost.
Setter
Input &
Output
Connectors
– 7 –
7.0 FLASH TUBE REPLACEMENT
When FPM reading is displayed but unit is not flashing, the flash tube may need
to be replaced.The procedure is as follows:
1. Unplug line cord from power line (DT-721). Turn power switch OFF.
IMPORTANT: Wait a few minutes until stroboscope is cool before replacing
flash tube.
2. Remove protective window by removing the
four (4) screws on the face of the instrument.
3. Use a rag and pull the tube out of its socket
by rocking it slightly back and forth.
IMPORTANT: Do not use bare hands to remove
the tube, it may break and cause injury.
4. Insert new tube using the technique mentioned
above. Make sure that the tube is placed vertically
in the socket (see diagram below) otherwise it will
touch the reflector. Tube should be set symetrically
within the neck of the reflector.
5. Replace the protective window.

– 3–
3.0 BATTERY USAGE (DT-725 ONLY)
Model DT-725 is equipped with an internal, lead acid, rechargeable battery that
provides one hour of continuous operation.
NOTE: Charge battery for approx. 15 hrs. before using the instrument
for the first time.
When battey power is low, the Low Batt indicator on the display will light up.
3.1 Charging the battery
1. Turn power off.
2. Instert AC adapter into the
receptacle in the bottom of the
instrument handle..
3. Approximate charging time:2 hours.
NOTE: The charger adapter may also be
used to power the instrument
continuously.
3.2 Replacing the battery
The life of the built-in battery should be approximately 300 charges. When
the time period between charges becomes increasingly shorter, replace the
battery.
– 6–
5.0 MEMORY
When the strobe is turned off and on again at a later time, it will start to flash at
the previous displayed rate regardless if the setter has been moved or not.
6.0 TRUE RPM
All strobes give the illusion of stopped motion when flashing in submultiples of
the true speed.
To obtain the correct rpm, turn knob from highest fpm downward. When the first
single image appears, read the true rpm. To verify it, press the “1/2” key. A single
image will appear again.
Rotation of shaft
(rpm)
Number of
flashes (rpm)
Flashes/
rpm shaft
Number of
stopped images
at
1,500 rpm
6,000 4 times 4
4,500 3 times 3
3,000 2 times 2
1,500 1 times 1
750 1/2 times 1
500 1/3 times 1
AC adapter/charger receptacle
CAUTION
Only charge the
instrument using the
AC adapter/charger
provided.

– 4–
4.0 OPERATION
4.1 Internal Triggering
1. DT-721 only: Firmly plug the power cord into a 100 VAC (Japan),
120 VAC (US) or 230 VAC (Europe) power source.
DT-725 only: Charge battery for approx. 15 hrs. before using strobe
for the first time (see section 2.3).
2. Aim light beam at the object under observation. The best distance
between the strobe and moving object is approximately 2 ft (61 cm).
3. Measure rpm by turning setter. Turn the setter to adjust the flashing rate
to the rotational speed of the object. To reach the desired rate faster, use
the 1/2 or x2 switches (see Section 2.1).
4.2 External Triggering
1. Connect wires according to connector
pin designation:
Tip: signal
Sleeve: Gnd (ground)
2. Pull power trigger switch and lock it.
When the ext phone jack is inserted
in unit, the strobe automatically switches
from the internal mode to the external.
3. The strobe will flash every time the sensor
puts out a pulse. Input signal requirements
are listed below:
a. 12 – 24 VDC thru a 3-wire NPN sensor.
(Requires external power supply).
b. 12 VDC thru a 2-wire proximity sensor.
(Leakage Current 1 mA max. Load
current 8 mA min.)
c. Switch or Relay Contact.
4. If the input signal frequency exceeds upper
or lower limits, the alarm mark will be
displayed and the strobe will stop flashing.
ELECTROMATICCHECK
•LINE®
– 5–
4.3 Synchronous Output Signal
The Synchronous output signal appears on the tip of the output phone jack.
See below
4.4 Using A Tripod
1. To mount the strobe on a tripod or any other mounting surface, place
a 1/4– 20unc screw, 8mm or shorter, through the tripod screw hole on
the bottom.

ELECTROMATIC Equipment Co., Inc. (ELECTROMATIC) warrants to the
original purchaser that this product is of merchantable quality and confirms
in kind and quality with the descriptions and specifications thereof. Product
failure or malfunction arising out of any defect in workmanship or material in the
product existing at the time of delivery thereof which manifests itself within one
year from the sale of such product, shall be remedied by repair or replacement of
such product, at ELECTROMATIC’s option, except where unauthorized repair,
disassembly, tampering, abuse or misapplication has taken place, as determined
by ELECTROMATIC. All returns for warranty or non-warranty repairs and/or
replacement must be authorized by ELECTROMATIC, in advance, with all
repacking and shipping expenses to the address below to be borne by the
purchaser.
THE FOREGOING WARRANTY IS IN LIEU OF ALL OTHER WARRANTIES,
EXPRESSED OR IMPLIED, INCLUDING BUT NOT LIMITED TO, THE
WARRANTY OF MERCHANTABILITY AND FITNESS FOR ANY
PARTICULAR PURPOSE OR APPLICATION. ELECTROMATIC SHALL NOT
BE RESPONSIBLE NOR LIABLE FOR ANY CONSEQUENTIAL DAMAGE,
OF ANY KIND OR NATURE, RESULTING FROM THE USE OF SUPPLIED
EQUIPMENT, WHETHER SUCH DAMAGE OCCURS OR IS DISCOVERED
BEFORE, UPON OR AFTER REPLACEMENT OR REPAIR, AND WHETHER
OR NOT SUCH DAMAGE IS CAUSED BY MANUFACTURER’S OR
SUPPLIER’S NEGLIGENCE WITHIN ONE YEAR FROM INVOICE DATE.
Some State jurisdictions or States do not allow the exclusion or limitation of
incidental or consequential damages, so the above limitation may not apply to
you. The duration of any implied warranty, including, without limitation, fitness
for any particular purpose and merchantability with respect to this product, is
limited to the duration of the foregoing warranty. Some states do not allow
limitations on how long an implied warranty lasts but, not withstanding, this
warranty, in the absence of such limitations, shall extend for one year from the
date of invoice.
ELECTROMATIC Equipment Co., Inc.
600 Oakland Ave. Cedarhurst, NY 11516—USA
Tel: 1-800-645-4330/ Tel: 516-295-4300/ Fax: 516-295-4399
Every precaution has been taken in the preparation of this manual. Electromatic
Equipment Co., Inc., assumes no responsibility for errors or omissions. Neither is
any liability assumed for damages resulting from the use of information contained
herein. Any brand or product names mentioned herein are used for identification
purposes only, and are trademarks or registered trademarks of their respective
holders.
9.0 WARRANTY

Models DT-721 / DT-725
DIGITAL STROBOSCOPE/TACHOMETER
Operating Instructions
CHECK
•LINE®
BY ELECTROMATIC
Distributed by: ABQ Industrial LP USA
Tel: +1 (281) 516-9292 / (888) 275-5772 eFax: +1 (866) 234-0451
Web: https://www.abqindustrial.net E-mail: [email protected]
This manual suits for next models
1
Table of contents
Other Check-line Test Equipment manuals

Check-line
Check-line CP-425-KIT User manual

Check-line
Check-line TI-25P User manual

Check-line
Check-line PK2 User manual

Check-line
Check-line TTC Series User manual

Check-line
Check-line MiniTest 7200 FH Manual

Check-line
Check-line TSV-1000 User manual

Check-line
Check-line DT-311D User manual

Check-line
Check-line DS-2000LED User manual

Check-line
Check-line NS-600 User manual

Check-line
Check-line FGV-XY User manual