Chiayo SDR-1932 User manual

Printed in Taiwan, March 2010 12I1206
SDR-1932
SQ-1016/SM-1016
CHIAYO ELECTRONICS CO.,LTD
GREEN PRODUCT
UHF Dual Channel Diversity Wireless Microphone
Operation Manual

8 9 10 11 12 13 1415 16
7
1 2 2
3 3
4 4
5 5
6 6
1
General.
Thank you for choosing Chiayo wireless microphone system !
Our products are designed to last and for user friendly operation.
Each system consists of :
- a receiver
- a handheld or beltpack transmitter
- other necessary accessories
This system has 16 factory preprogrammed frequencies and is ready for immediate use
after switch-on. However, all frequency settings can be changed to suit your individual
needs, if required.
There are two types of transmitter versions :
The Handheld transmitter (SQ-1016) is completely wireless microphone itself. It only
accepts dynamic or condenser microphone capsule modules which are specially
designed by Chiayo.
The Beltpack transmitter (SM-1016) can accept a wide range of inputs including Uni-
and Omni-directional lavalier microphone, headset microphone, guitar / instrument
input or other line input audio sources.
For more details, please take a few minutes to read this operation manual to have a
thorough understanding of the functions and operation of both transmitter and receiver.
Parts and functions
1. Power switch
2. Volume control
3. RF diversity A B indicator
4. 7-segment channel display
5.AF indicator
6. Channel selector
7. Antenna 2 (TNC socket)
8.CH2 squelch control. Clockwise to increase level.
6
7. Turn off the transmitter when not in use. Remove the batteries if the transmitter is not
to be used for a period of time.
8. If the volume Control of the receiver is set too high, it may over-drive the input of the
mixer and cause distortion. Conversely, if the receiver output is set too low, the overall
signal-to-noise ratio of the system may be reduced. Adjust the output level of the
receiver such that highest sound pressure level going into the microphone causes no
input overload in the mixer, and yet permits the mixer level controls to operate in their
normal range (not too high or too low). This provides the optimum signal-to-noise
ratio for the entire system.
Simple DIY trouble shooting:
Case study 1:Both Transmitter & Receiver are on, but no RF signal received.
Probability 1:Transmitter and Receiver are having different frequencies.
Solution:Change either Transmitter and Receiver to the same frequency.
Probability 2:Transmitter is faulty.
Solution:When situation 1 is verified to be correct, then either Transmitter or Receiver
is faulty. To prove this transmitter is faulty, please use another functional
transmitter (if any) of the same model and same frequency to test with the
receiver, If this transmitter with the same frequency could trigger on the
receiver, then this proves that the other transmitter is faulty. Send it back to
Chiayo's authorized agent for service.
Probability 3:Receiver is faulty
Solution:When situations 1 & 2 failed to bring any result, then the receiver could be
faulty. To verify, please use another functional receiver (if any) of the same
model and same frequency to double check and send it back to Chiayo's
authorized agent for service.
Case study 2:Transmitter could not be switched on.
Solution:Battery is weak or wrongly installed. If not in this case, please check
according to 1.2 above.
Case study 3:Strong interference signal received.
Solution:If interference could not be solved by adjusting the squelch (SQ) control to
maximum, please stop using this particular frequency (for a crystal locked
system) and change to another set of a different frequency. For a PLL system,
please switch over to another interference-free channel.
9. Mic/Line level switch (CH2)
10. Mix output on/off switch
11. CH2 audio output (mixed)
12. CH1 audio output
13. Mic/Line level switch (CH1)
14. CH1 squelch control. Clockwise to increase level.
15. DC in
16. Antenna 1 (TNC socket)

2
Making changes to various settings on SDR-1932 receiver
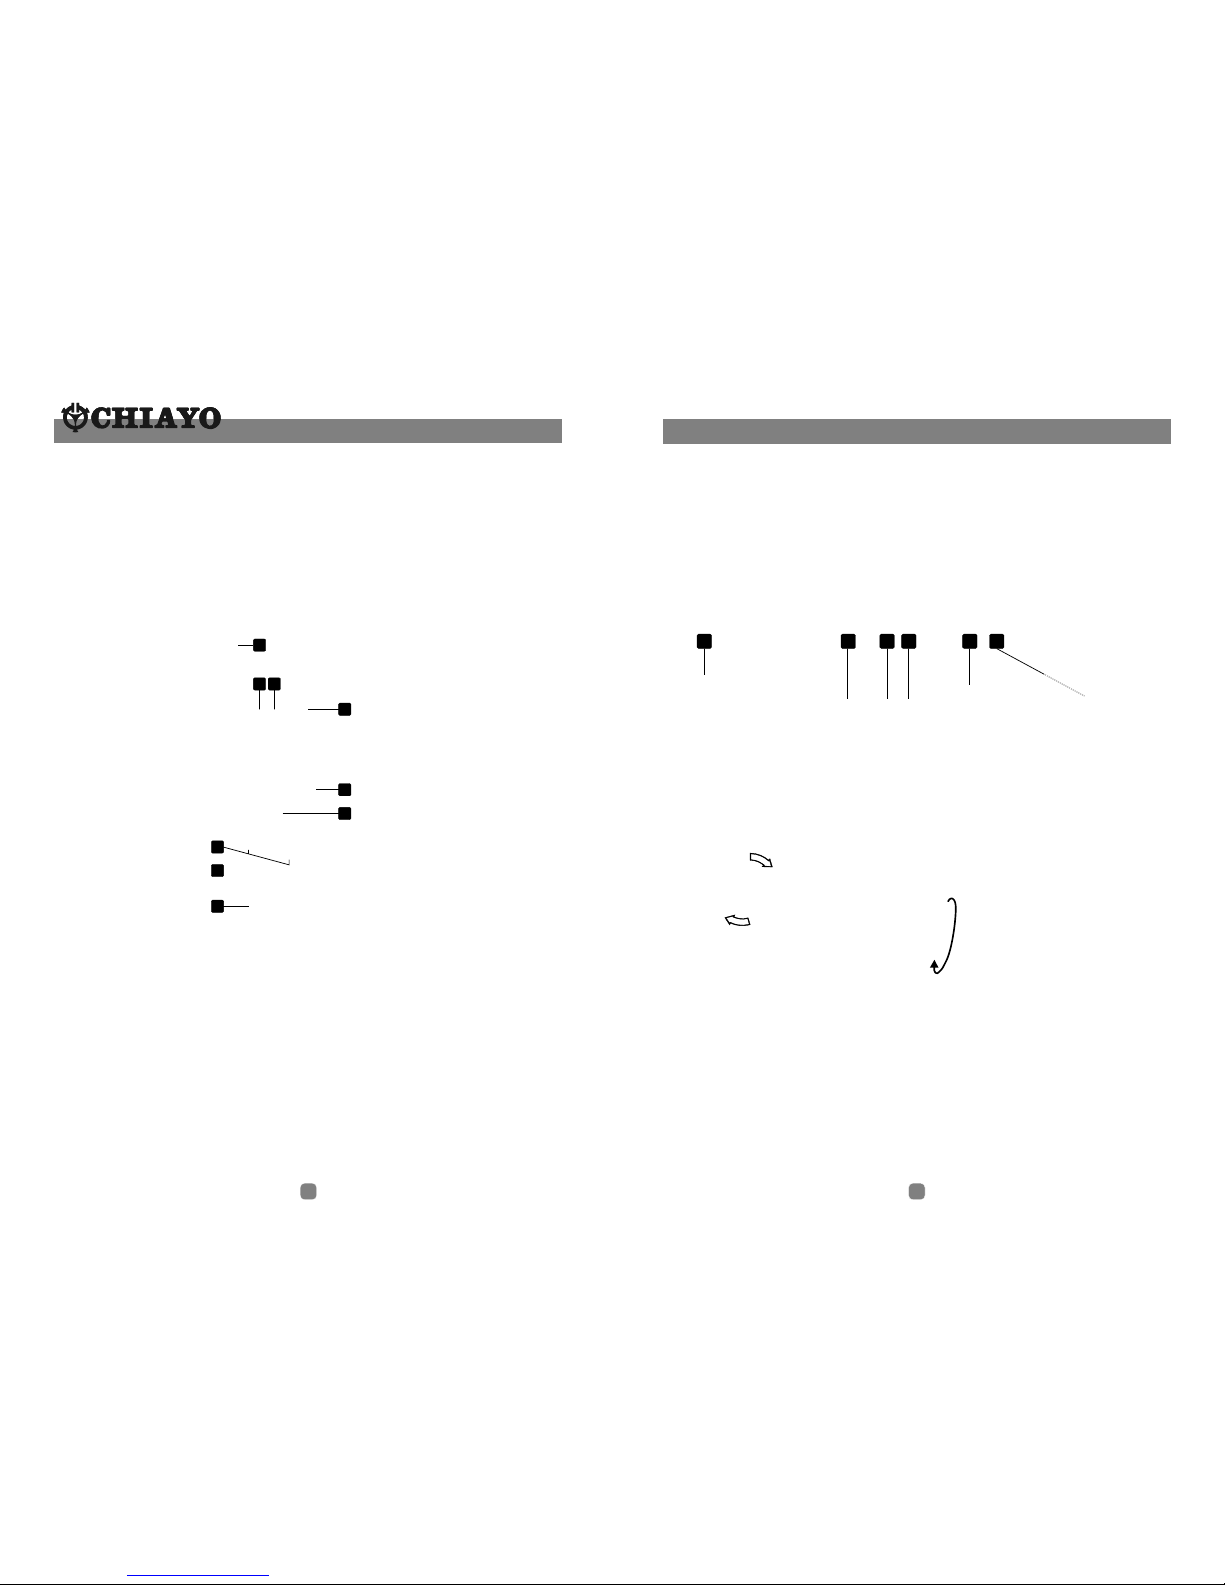
1. Changing CHANNEL / FREQUENCY
This can only be done by pressing UP or DOWN buttons.After a desired channel is
selected, it will be automatically saved and stored into the memory.
2. Adjusting VOLUME level
Volume level can be adjusted by rotating the designated volume knob. Clockwise to
increase the volume and counterclockwise to decrease the volume.
3. Adjusting SQUELCH level
The squelch control is on the back of the receiver. When strong interference happens
to the operation, you can use a small screw driver to increase the squelch level by
turning the switcher clockwise. If the interference is too strong even the level is
already set to maximum, the currently in-use channel is not applicable in this location
and a change to channel is recommended.
Receiver installation
For best operation, the receiver should be at least 1m
above the ground and 1m away from a wall or metal
surface to minimize reflections. The transmitter
should also
be at least 1m away from a wall or metal surface to
minimize reflections. The transmitter should also be at
least 1m away from the receiver.
Keep antennas away from noise source such as
motors, automobiles, neon light as well as large metal
objects.
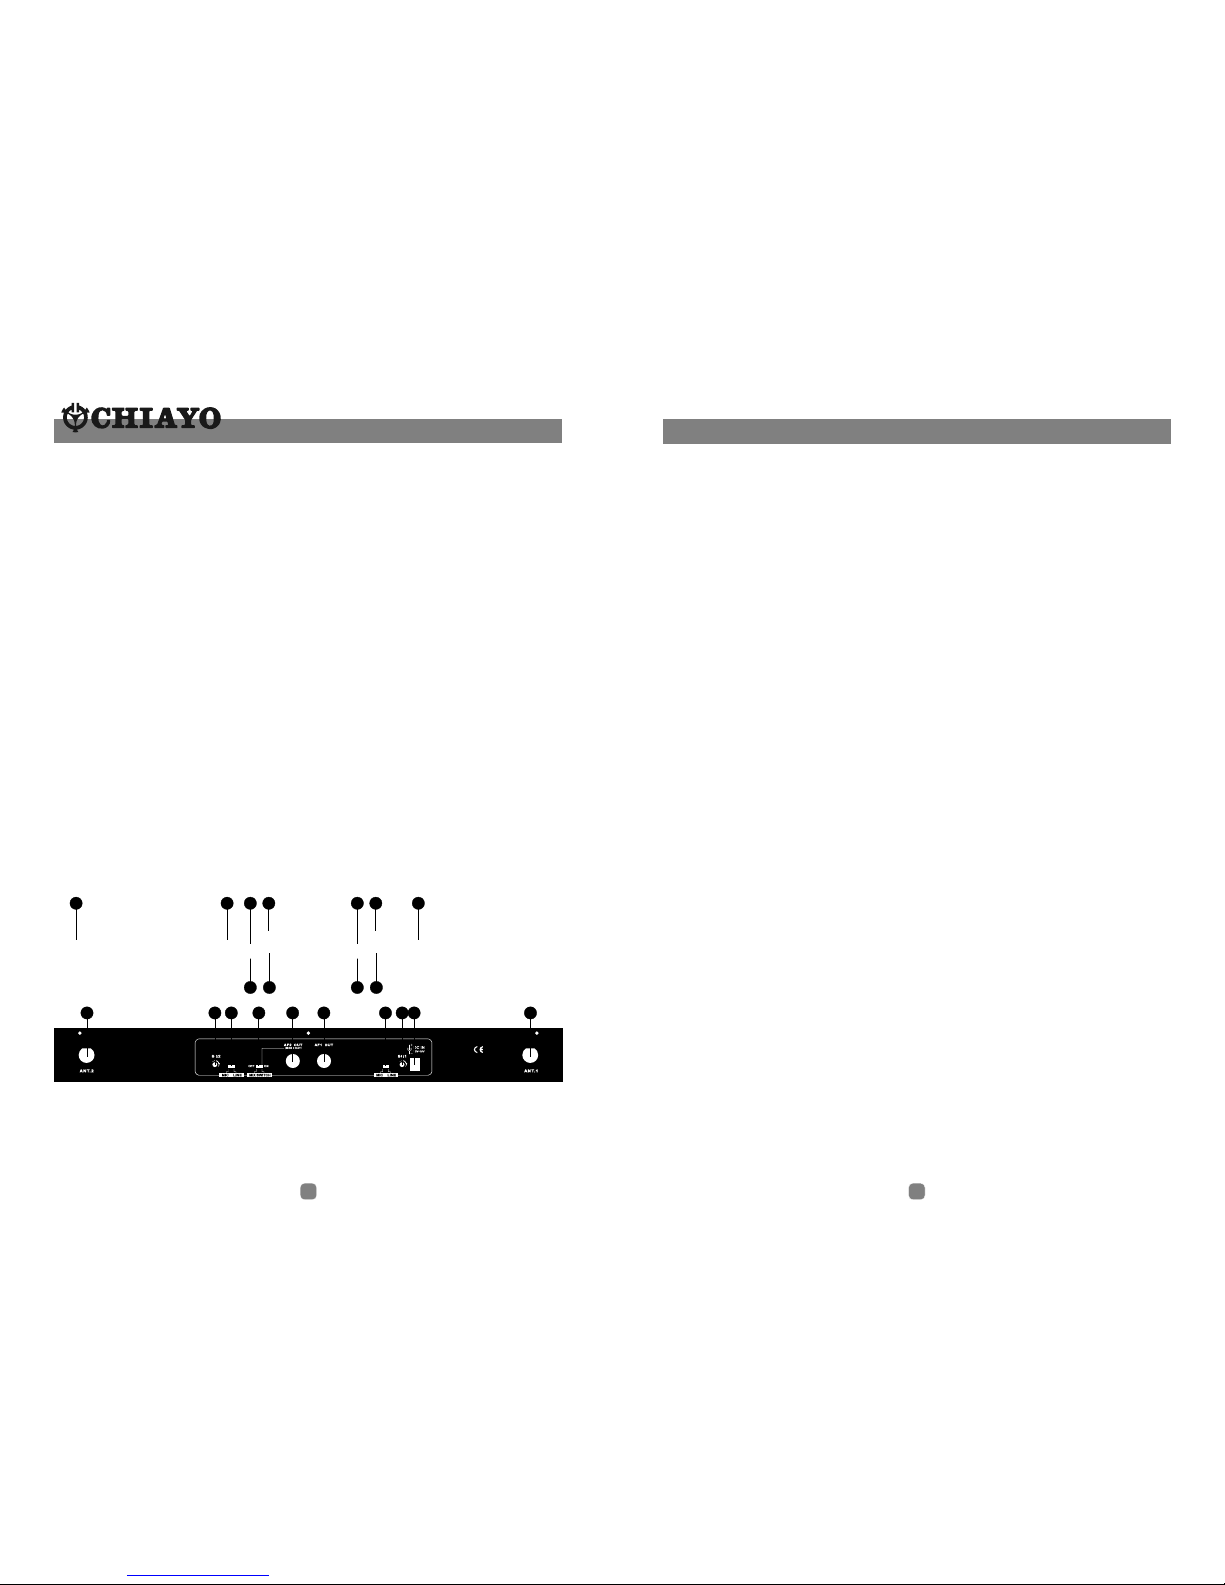
There are 2 audio output jacks, AF1 and AF2, in the receiver rear panel. AF1 is for
channel 1 while AF2 for channel 2. The audio output of channel 2 can be mixed with
channel 1 by switching MIX SWITCH to ON, otherwise its output is independent.
Besides, there is a MIC/LINE selector for both AF1 and AF2. If handheld/headset/
lavalier microphone is used, please switch to MIC. If instrument cable is connected to
beltpack transmitter, please switch to LINE.
5
Operation
Chiayo Transmitters and Receivers have factory preset to allow immediate usage after
switch-on.
However, please note that the transmitter Sensitivity function is dependent on
application such as close proximity singing or tripod mouth speech. To avoid
overmodulation and distortion, please check whether the preset sensitivity level is
suitable for your particular application. For close proximity singing purposes, please
select lowest sensitivity level whereas for tripod mount speech purposes, please
select a higher sensitivity level.
If you have made changes to the setting, after making proper selection on Transmitter
and Receiver settings the system is ready for operation. However, both antennas of the
receiver must be installed to assure a good reception.
First switch on the receiver by pressing the Power On / Off switch. The LED display will
show the channel last stored. Then switch on the matching transmitter with the correct
matching frequency.
The LED RF indicator on the receiver front panel will light up to indicate RF signal
been received. If not in this case, please check and verify the frequency setting on
both transmitter and receiver. When transmitter is moving around, the Diversity A B
switch will light on alternately to indicate the stronger reception from either A or B
antenna.
When voice is spoken into the microphone, the LED AF indicator on the receiver front
panel will light on and flash according to the intensity of the AF signal.
There are two different audio outputs at the rear side of the receiver: Balanced (
microphone level) and Unbalanced (LINE leve ). Please select the matching output to
match the input of the connecting Mixer or Amplifier.
Tips to obtain the best results for a wireless microphone system
1. For transmitter, please use only fresh alkaline batteries. Do not use general purpose
(carbon zinc) battery.
2. Transmitter and receiver should be as close as possible, but not less than 1m.
3. Position the receiver well so as to minimize possible obstruction between it and the
transmitter. Line of sight is best.
4. If external antenna is used, low loss RF shielded cable should be used and the length
of the cable should not exceed 3m.
5.The receiver antenna should be kept as far away as possible from any metal surface.
6. A receiver can not receive signals from two transmitters at the same time.
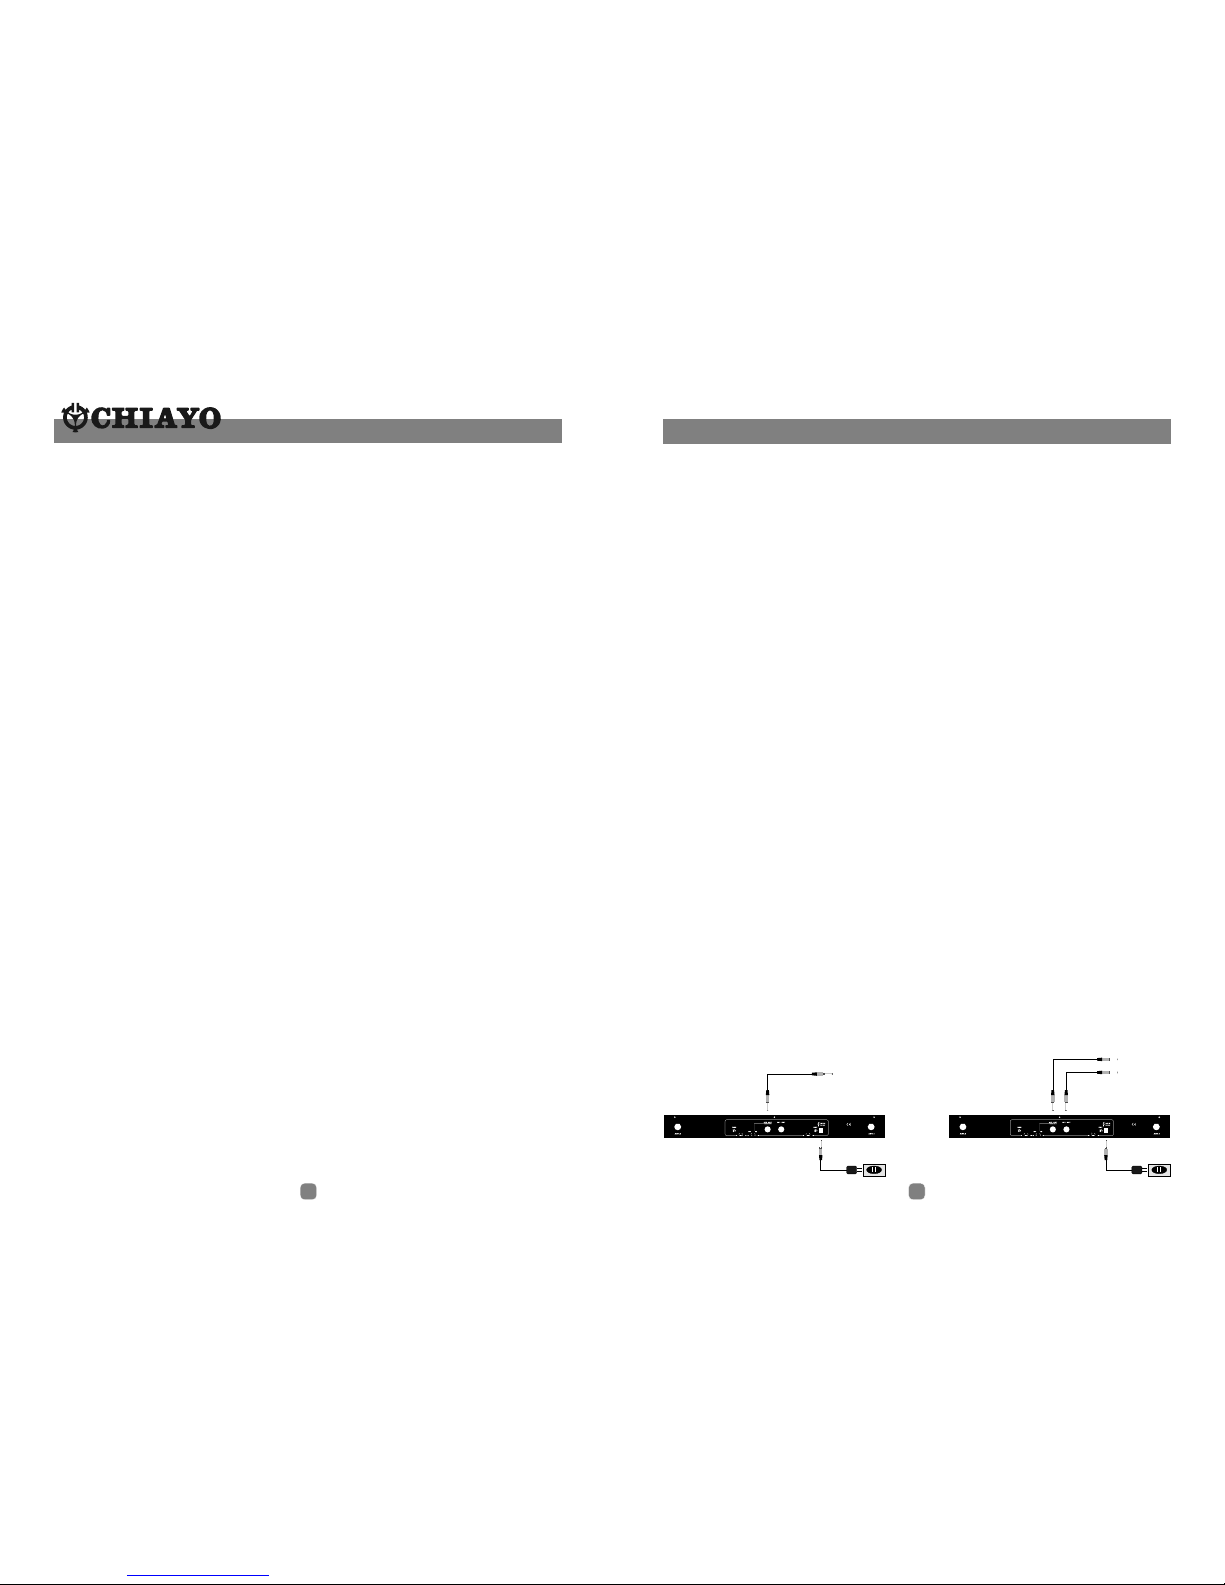
Mixer / Amplifier
individual audio output
Mixer / Amplifier
mixed audio output (MIX SWITCH to ON)
AF2 audio output (MIX SWITCH to OFF)

3
Battery Installation
SM-1016 uses 2 pieces of " AA" size batteries (Alkaline battery is recommended ).
To install or remove the batteries, press the release buttons(5) at the edges of the
transmitter to open or close the cover.
Please remove the batteries if SM-1016 is going to be unused for over a couple of days.
Just place them back to the compartment when you are using it next time.
Channel selection and gain adjust
Channel selector and gain adjust are hidden in the battery compartment.
Channel selection can be made by rotating the selector with a small screw driver.
Gain adjust for Lavalier and Headset microphones can be done by adjusting the MT
switch, whereas GT switch is for the gain adjust of electric Guitar and other high-
impedance line level inputs.
UHF BELTPACK TRANSMITTER SM-1016
Parts and functions
1. Antenna
2. Battery low indicator
3. Power on/off
4. Mini XLR connector
5. Cover-release button
6. Battery compartment
7. Charging contacts
8. Lavalier microphone
9. Mic clip
10. Channel selector
11. GT control
12. MT control
10
11 12
1
23
4
5
6
8
7
9
4
UHF HANDHELD MICROPHONE SQ-1016
Parts and functions
1. Mic capsule module
2. Battery low indicator
3. Power on/off
4. Channel selector
5. Battery compartment
6. Charging port
Changing mic capsule & Battery installation
First unscrew the metal grill from the housing, take out the capsule and then replace it with a
new one. Either dynamic or condenser type can be chosen to fit your requirement for any
application.
SQ-1016 uses 2 pieces of "AA " size batteries (Alkaline battery is recommended ).
To install or remove the batteries, rotate its battery compartment from the housing and then
place the batteries into it according to correct polarity.
Please remove the batteries if SQ-1016 is going to be unused for over a couple of days.
Just place them back to the compartment when you are using it next time.
Channel selection can be made by rotating the selector(4) with a small screw driver. User can
easily tell which channel has been chosen by referring to the number above the selector.
Changing channels
1 2 3456
This manual suits for next models
2
Other Chiayo Microphone manuals

Chiayo
Chiayo DH2400 User manual

Chiayo
Chiayo SQ-5100 IrDA User manual

Chiayo
Chiayo SQ-1016 User manual

Chiayo
Chiayo NH-3100 User manual

Chiayo
Chiayo GMW-216 User manual

Chiayo
Chiayo GMW-200 User manual

Chiayo
Chiayo ITX2 User manual

Chiayo
Chiayo GM-200 User manual

Chiayo
Chiayo SQ-6100 IrDA User manual

Chiayo
Chiayo GM-243 User manual