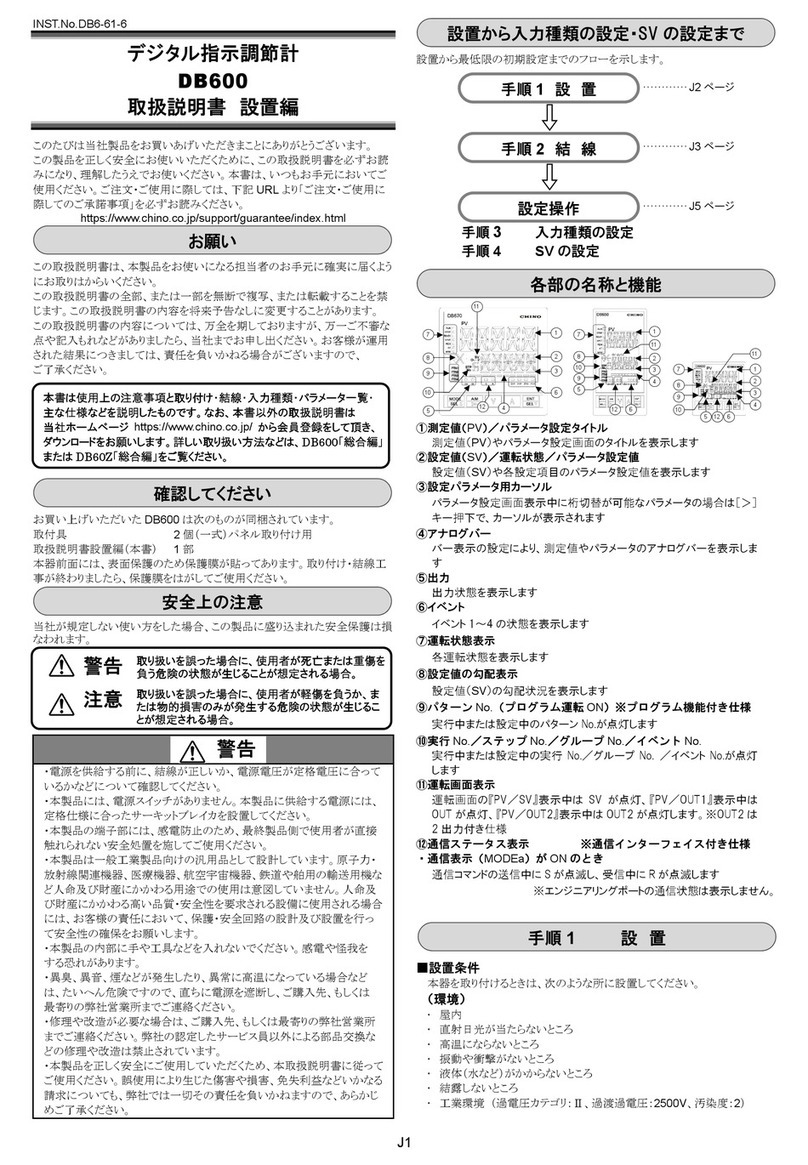
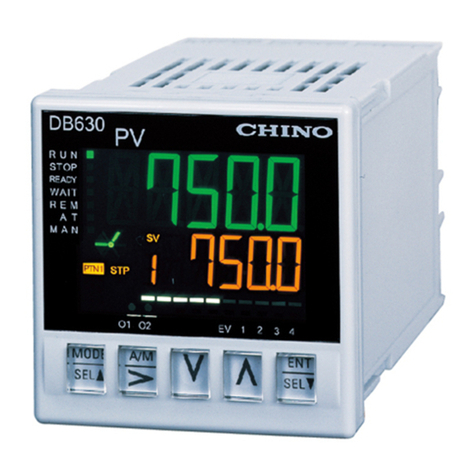
Chino LT830 Series User manual

INST.№INE‑350
Please make sure that this manual is handed to the final user of the instrument.
COMMUNICATIONS
INTERFACES
LT830 SERIES
Retain this manual apart from the
instrument and in an easily
DIGITAL INDICATING
CONTROLLER

Contents
INTRODUCTION 1
1 GENERAL 2
1.1 RS-232C Communications Interface 2
1.2 RS-485 Communications Interface 2
2 COMMUNICATIONS PROTOCOL 2
3 COMMUNICATIONS SPECIFICATIONS 3
4 SETTING OF COMMUNICATIONS PARAMETERS 3
4.1 Setting of Protocol(PtCL)4
4.2 Setting of Communications Function(FUnC)4
4.3 Setting of Instrument No.(AdrS)5
4.4 Setting of Transmission speed(rAtE)5
4.5 Setting of Character(CHAr)5
5 CONNECTIONS 6
5.1 Connection Precautions 6
5.2 Communications Cables 8
5.3 RS-485 Connections 10
6 MODBUS PROTOCOL 11
6.1 Message Transmission Modes 12
6.2 Data Time Interval 13
6.3 Message Configuration 13
6.4 Creating a Message 22
6.5 Function Code 24
6.6 Processing in Abnormal Status 28
6.7 Table of LT830-Reference 30
6.8 Table of Input types & SV_Dot 34
6.9 Remote SV Setting Through Communication 34
7 COMMUNICATIONS TRANSMISSION AND COMMUNICATIONS
REMOTE 35
7.1 General 35
7.2 Communications Specifications 35
7.3 Programming Communications Transmission 36
7.4 Programming Communications Remote 36
7.5 Programming Communications Transmission/Remote Parameters 37
7.6 Connections
7.7 Temperature Control Examples 39
40

−1−
INTRODUCTION
This instruction manual describes the specifications and operation built-in communications interfaces
(RS-485) of the LT830 series Digital Indicating Controllers.
Be sure to confirm the model code of the LT830 controllers you purchased as this determines the
required option.
L T 8 3 0□□0 0 0−□□□
Event output/Communications IF/CT
0: None
1: 2 points of Event output
2: 2 points of Event output+ Communications IF+CT
1. Other Instruction Manual to be consulted.
This instruction manual is for the communications interface only. For the running and operation,
please refer to the following instruction manuals.
1. LT830 series Digital Indicating Controllers (Manual No. LT8-11-□)
2. SC8-10 Line Converter (Manual No. SC8-10-□)
* Also refer to the instruction manual of the computer being used.
2. Caution Display
This manual contains explanation of precautions. Observe these precautions when operating and
handling the communications interfaces, otherwise the instrument may be damaged, resulting in a
deterioration in its performance, or operation failures may also occur.
(1) The right is reserved to change the contents of this manual at
any time without notice.
(2) The contents of this manual have been prepared professionally.
However, if you have any questions, or notice of error or an
omission of descriptions found on this manual, please contact
your nearest CHINO sales agent.
(3) CHINO Corporation is not responsible for any results influenced
by the operation of this communications interface, irrespective
of item (2) above.
Caution
Caution

−2−
1GENERAL
There are one types of communication interfaces RS-485 available between the LT830 controllers
and personal computers (PCs).
PCs can be used to receive measured data from the LT830 controllers, program different parameters
and issue control commands. The number of LT830 controllers that are connectable to a PC is up to
31 for the RS-485.
1.1 RS-232C Communications Interface
The RS-232C is the data communications standard being set and issued by EIA (Electronic Industries
Association) in the USA and JIS C 6361 in Japan.
This standard is a basic interface between MODEM and connected data terminal units, and specifies
electrical and mechanical specifications only. Most of the RS-232C communications interface is being
used for personal computers and industrial instruments do not completely conform to this standard at
present, and have different signal wire numbers, connectors to those specified in the standard. Also,
since this standard does not specify any software parts, or so-called [data transmission procedures],
units having the RS-232C communications interface can not be interconnected with each other
unconditionally. With these reasons, users must survey and check the specifications and transmission
procedures in advance of units being connected. However, if the counter unit is for a personal
computers or similar device which can optionally program the specifications, then all the units can be
combined by having proper programs prepared by a program designer.
In addition, when a RS-232C standard is investigated, the method of having JIS C 6361 referred to is
the easiest.
1.2 RS-485 Communications Interface
The RS-485 communications interface can communicate with multiple LT830 controllers (up to 31
sets) in parallel by signals conforming to RS-485.
There are few personal computers which provide RS-485 communications interface. However, since
these communications interfaces are characterized with serial communications, these are easily
connectable to the personal computer having the RS-232C communications interface by using an
RS-485 ⇔RS-232C signal converting unit. A line converter (Model SC8-10: sold separately) is
available for RS-485 ⇔RS-232C signal conversion at CHINO.
2COMMUNICATIONS PROTOCOL
LT830 controller has a MODOBUS communication protocol.
MODBUS Protocol (MODBUS is the registered trademark of Schneider Automation Inc.)
MODBUS Protocol has RTU mode and ASCII mode that can be selected by key programming.
MODBUS protocol provides the function of transmitting measured data as well as the programming
and operating function.

−3−
3COMMUNICATIONS SPECIFICATIONS
* Communication system: Half-duplex start-stop synchronization (polling selecting system)
* Protocol: MODBUS protocol
* Transmission speed: 19200, 9600 bps selectable
* Start bit: 1 bit
* Data length: 7 bits (ASCII)/8 bits (RUT/ASCII) selectable
* Parity bit: Even / Odd / Disabled selectable
* Stop bit: 1 bit / 2 bits selectable
* Transmission code: Binary (RTU) / ASCII (ASCII) (depending on protocol)
* Error check: LRC (ASCII)/CRC-16 (RTU) Depending on protocol
* Data transmission procedure: None
* Signals in use: Transmitted and received data only (no control signal in use)
4 SETTING OF COMMUNICATIONS
PARAMETERS
Follow the flow chart and set up 5 items such as “Protocol”, “Communications function”, “Instrument
No.”, “Transmission speed” and “Character”.
(Operation screen)
Mode.1
Mode.6
Remote/
Local
Digital
transmission
Remote shift
Protocol
Press 2 seconds at any screen to go back to “mode 6”.
Character
Transmission
speed
Instrument
No.
function
When you set the parameter (writing), set the key lock at first.
LT830 controller is always ready for communication. It responds at anytime to data requests from the
personal computer. However, when you set the parameter or control the instrument from the personal
computer, you need to set key lock (lock 3) on LT830 at first. Key lock will be set at the front key on
LT830 or through personal computer communication. If you try to set the parameter or operate
instrument from the personal computer at Non-lock, Lock1, Lock 2 LT830 will show error code 12H.
(See paragraph 6.6)
5times
2seconds
4times

−4−
4.1 Setting of Protocol (PtCL)
(1) Pressto see
.
(2) Choose the protocol by pressingand , then press to register.
Kind Protocol Default
MODBUS RTU
MODBUS ASCII
*When you change the protocol, the communication function will become initial value.
4.2 Setting of Communications Function (FUnC)
(1) Press, then you will see
(2) Choose the communications function by pressingand, then pressto register.
Kind Function Protocol Details Default
Upper
Communication
Set up the upper communication when you communicate
with the personal computer.
Communications
Transmission
MODBUS
By setting up “trs.2” at communications transmission, the
transmitting date at LT830 will be sent to LT830 that was
set up with [CoM]. It also transmits SV No. and
Run/Ready information.
(See 7Communications Transmission and
Communications Remote)
Type of transmission data can be set at “mode 7”, which
is digital transmission.
PV Transmit the measured data (default).
SV Transmit the set up value.

−5−
4.3 Setting of Instrument No. (AdrS)
From one to a few LT830, which communicate with personal computer, will be set the instrument
Number that dose not fell on another LT830
(1) Pressto display
(2) Choose the instrument number (from 1 to 99) by pressing or , then press to
register.
The instrument number should be from 1 to 99, and should not fell on another LT830.(default 1)
4.4 Setting of Transmission speed (rAtE)
Operate LT830 and personal computer by the same Transmission speed.
(Usually, the default 9600 bps is fine.)
(1) Pressto display see
(2) Choose the Transmission speed by pressing or , then press to register
Transmission speed : 9600, 19200 (19.2k) bps (default is 9600 bps.)
4.5 Setting of Character (CHAr)
(1) Pressto display
(2) Choose the character by pressing or, then press to register.
Kind Bit length Parity Stop bit Default value
1 1
2
Even
2
3 1
4
7bit
Odd 2
5 1
6 None 2
7 1
8 Even 2
9 1
10
8bit
Odd 2
5
*If the protocol is MODBUS RTU, 8 bit length is the only choice.
CAUTION

−6−
5CONNECTIONS
5.1 Connection Precautions
5.1.1 Communication Terminals
Disposition of terminals are different from each communications interface.
◇Terminal block type
◇Socket type
5.1.2 Total extension of RS-485 communications cable is up to 1.2km.
The wiring interval between each instrument is option, but the total extension distance of cable is
within 1.2km.
(Line converter the final end of LT830 controllers)
№
RS-485
⑥
SA
⑦
SB
⑧
SG
Total extension of cable: Within 1.2km
Line converter
LT
830
RS-485
■■■
SG SB SA
About 200 ㎜
* The communications cable is included with the socket
【Connector】
LT830 side
Green:SG
White:SB
Black:SA
The cable end is solder-plated.
Please prepare an extendable
cable at your end.
Housing Parts Number : XHP-3(JST)
Recommendation wire size : AWG30 ~ 22

−7−
5.1.3 Noise preventive terminals
Separate the communications cable from drive power cables and other communications cable more
than 50cm so as not to be affected by noises.
5.1.4 Crimp style terminals
Falling off of connections is one of communications
failures. Terminate the communications cable with an [O]
or [Y] type crimp style terminal having an insulation sleeve.
(The terminal screws of LT830 controllers and line
converters are M3.5mm.)
5.1.5 Mount an insulation resistor
For using the RS-485 communications interface, mount a 100 Ωresistor to the LT830 controller
connected at the final end. (For details, see Section 5.3)
[A general metal film resistor can be used. The resistor (sold separately) is available at CHINO.]
5.1.6 Number of LT230 controllers connectable
For RS-485: Up to 31 sets
Insulation sleeves
O type crimp terminal
3.7 more
7 or less
3.7 more
7 or less
Y type crimp terminal
Insulation sleeves
(mm)

−8−
5.2 Communications Cables
Make ready cables dedicated to communications before performing connection. Dedicated
communications cables (sold separately) are available at CHINO.
5.2.1 Communications cables for RS-232SC(Between PC and line converter)
(1) Connection between PC (with 9 pin-terminal) and line converter.
Cable 9-pin connector RS-232C cable with O-shaped crimp terminal
Style
Internal wiring
Type code RZ-CRS6
Cable length of 1 to 15 m (To be specified)
(2) Connection between PC (with 25 pin-terminal) and line converter.
Cable 25-pin connector RS-232C cable with O-shaped crimp terminal
Style
Internal wiring
Type code
RZ-CRS2
Cable length of 1 to 15 m (To be specified)
1
2
3
4
5
6
7
8
9
10
11
12
13
14
15
16
17
18
19
20
21
22
23
24
25
RD
SD
SG
25-pinconnector
to PC
To line converter
In case of NEC's PC98 series (except NX)
SD
RD
SG
SD
RD
SG
1
2
3
4
5
6
7
8
9
RS-232C cable (max. length of 15 m)
RD
SD
SG
9-pin connector
to PC
To line converter
RS-232C cable (max. length of 15 m)

−9−
5.2.2 Communications cables for RS-485
(1) Connection between line converter and LT830 controller
Cable
O-shaped crimp terminal RS-485 cable with O-shaped crimp terminal (for line converter)
Style
The cable consists of a twisted dual-core CVVS wires with SG (signal grounding)
wire at both ends. Cut off the SG wire on the line converter side because this has
no SG terminal.
Internal wiring
Type code RZ-LEC (for line converter)
Cable length of 1 to 200 m (To be specified)
(2) Connection between LT830 controller and LT230 controller
Cable
O-shaped crimp terminal RS-485 cable with O-shaped crimp terminal (for parallel connection)
Style
The cable consists of a twisted dual-core CVVS wires with SG (signal grounding)
wire at both ends.
Internal wiring
Type code
RZ-CSS1Z2(0.2m)orRZ-LEC (For parallel connection)
Cable length of 1 to 200 m (To be specified)
RDA
RDB
SG
SA
SB
SG
SA
SB
SG
SA
SB
SG
RDA(black)
RDB
(
white
)
SG(green)
SA(black)
SB(white)
SG(green)
To line converter To LT830 controller
SA(black)
SB(white)
SG(green)
SA(black)
SB(white)
SG(green)
To LT830 controller To LT830 controller

−10−
5.3 RS-485 Connections
This paragraph describes the method of connecting the RS-485 communications interface to the
personal computer by using the line converter (Model SC8-10: sold separately). Since the line
converter and the personal computer use three control signal of Send, Receive and Signal ground
only. Since general personal computers are controlled by control signals, the computer does not
function by only connecting three signal cables without wiring processing inside the connectors.
Wiring processing depends upon the control signals being controlled by the personal computer. For
details, read the instruction manual for the personal computer used.
[please refer to the following instruction manual for line converter (Model SC8-10: sold separately).]
9-pin connector
SD
RD
SG
1
2
3
4
5
6
7
8
RDA
RDB
LT830 LT830 LT830
Termination
resistor 100Ω
Line converter
In case of RS-485
SA
SG
SA
SB
SG
6
6
7
SB
7
8
8
6
7
SA
SB
SG
8
6
7
8
9
1
2
3
4
5
CS
ER
DR
RS
Please do not connect SG line to FG
terminal or the grounding terminal of
apparatus.
Caution

−11−
6MODBUS PROTOCOL
Basic Procedures of Communications and Precautions
CAUTION
1. When you set the parameter (writing), set the key lock at first.
LT830 controller is always ready for communication. It responds at anytime to data requests
from the personal computer. However, when you set the parameter or control the instrument
from the personal computer, you need to set key lock (lock 3) on LT830 at first. Key lock will
be set at the front key on LT830 or through personal computer communication. If you try to set
the parameter or operate instrument from the personal computer at Non-lock, Lock1, Lock 2
LT830 will show error code 12H.(See paragraph 6.6)
2. Take care of command re-transmission as there is no control signal line in use.
Since the LT830 controllers’ serial interfaces communicate freely without using any control line,
a reception failure may occur under some conditions. Exercise care when resending a command.
3. Don't disconnect or short any cables or instruments constituting the serial
interface, or turn the power on or off during communications.
Don't disconnect or short any cables or instruments constituting the serial interface, or turn
the power on or off during communications, or the operation may stop or lead to a malfunction.
When this happens, all the components of the serial interface must be reset to repeat the
operation from the beginning.
4. Send the next command after making sure that the communications drive has
been turned off.
For RS-485 communications interface, multiple instruments are connected to the
same communications line, only one instrument, of which instrument No. is specified by the
PC, drives the communications line. The communications drive is turned off at a certain
time (approx. 5 msec) after sending the last character so that all the characters are safely
received by the personal computer. If the PC sends a command to the next unit before
the communications drive is turned off, signals interfere with each other resulting in some
communication failure. Exercise caution when you use a high-speed PC.

−12−
6.1 Message Transmission Modes
There are two modes of message transmission, RTU (Remote Terminal Unit) and ASCII, which can be
selected by key programming.
(Table 1 Comparison between RTU and ASCII modes)
Item RTU mode ASCII mode
Interface RS-485
Interface(At the time of line converter use) RS-232C, RS-422A
Communications system Half-duplex start-stop synchronization
Transmission speed 9600, 19200bps
Character code Binary ASCII
Vertical Parity
Error check Horizontal CRC-16 LRC
Start bit 1 bit
Data bit 8 bits 7 bits, 8 bits
Parity bit Disabled, even, odd Disabled, even, odd
Character
Configuration
Stop bit 1, 2 bit
Message start code None : (Colon)
Message stop code None CR, LF
Data time interval 28 bit-time or less 1 second or less
6.1.1 Transmitted data
The RTU-mode data is transmitted in binary numbers. In ASCII mode, the 8-bit binary data of RTU is
separated into higher-order 4 bits and lower-order 4 bits and both are turned into characters (0 - 9,
A - F).
Example) RTU mode
ASCII mode
67H
36H (“6”)
89H
37H (“7”)
ABH
38H (“8”)
39H (“9”)
41H (“A”)
42H (“B”)
Length of the RTU-mode message is half that of an ASCII-mode message, ensuring a more efficient
transmission.
6.1.2 Message frame configuration
The RTU-mode data consists only of a message section.
The ASCII mode data consists of a start character [: (colon, 3AH)], a message and a stop character
[(CR (carriage return, 0DH) + LF (line feed, 0AH) ].
RTU ASCII
Message
:Message CR LF
The ASCII mode has the advantage of easier troubleshooting because its message has a start character [ : ].

−13−
6.2 Data Time Interval
In RTU mode: Below 28 bit-time (2.9 msec. at 9600 bps, 1.4 msec. at 19200 bps)
In ASCII mode: Below 1 second
When sending a message, keep the time interval of data constituting one message not longer than the
time specified above. When the time interval of data is longer than the above, the receiver unit (i.e.,
this controller) recognizes that the data transmission from the sending unit is complete, so that the
subsequent data is processed as an abnormally received message.
While the message characters must be consecutively sent in RTU mode, the ASCII modes allows for
a maximum interval of 1 second between characters, making it possible to use a master unit (PC) with
a relatively slow processing speed.
6.3 Message Configuration
The MODBUS message has the following configuration in both RTU and ASCII modes.
Slave address
Function code
Data
Error check
6.3.1 Slave address
The slave address can be programmed in advance by key operation within a range between 1 and 99.
The master unit usually communicates with one slave unit. While messages from the master unit are
received commonly by all the units in connection, only the slave unit corresponding to the slave
address included in the command message responds to the message sent.
The slave address “0” is used for a message from the master unit addressed to all the slave units
(broadcast message). The slave units do not send a response back to the master unit.
6.3.2 Function code
Function codes refer to the functions to be executed by the slave units. The data is generally classified
as follows. Refer to the reference table for details.
(1) Digital parameters : AT Start
(2) Digital input data : Event status.
(3) Analog parameters : Information on various parameters. Numerical values should be :
kept within the 16-bit range between –32768 and 32767 (see the
reference table for details).
(4) Analog input data
: Information on measured data. Numerical values within the range
of 16-bits are delivered as an output.

−14−
(Table 2. Function code table)
Code Functions Unit
MODBUS original functions (ref.)
01 Read digital (ON/OFF) parameter 1 bit Read coil status
02 Read digital input data 1 bit Read input relay status
03 Read analog parameter 16 bit Read hold register contents
04 Read analog input data 16 bit Read input register contents
05 Write digital parameter 1 bit Change single coil status
06 Write analog parameter 16 bit Write into single hold register
08 Send received data (for diagnosis) Loop-back test
15 Write two or more digital parameters Change multiple coils status
16 Write two or more analog parameters Write into multiple hold registers
6.3.3 Data section
Data configurations depend on the function codes. A master request consists of the code number of
the data to be read or written (Relative No. to be calculated from the Reference No. described below)
and the number of data pieces. Response from slave units consists of data responsive to the request.
Every MODBUS basic data consists of 16-bit integers, with or without codes depending on individual
data. It is thus configured as integers with their decimal places assigned to separate addresses, or
normalized with the upper and lower limits specified by the scale with fixed decimal places. The LT830
controllers employ the system of assigning the decimal places to separate addresses.
6.3.4 Reference Nos.
Data in the LT830 controllers have “Reference No. ” assigned to each of them which is required for
reading and writing the data. The data in the LT830 controllers are classified into “Digital parameter”,
“Digital input data”, “Analog input data”, “Analog parameter” depending on their type. The Nos. In the
message are designated by the “Relative Nos. ” corresponding to the Reference Nos.
(Table 3. Reference Nos. and Relative Nos.)
Data type Reference No. Relative No.
MODBUS original (for reference)
Digital parameter 1 to 10000 Reference No. – 1 Coil
Digital input data 10001 to 20000 Reference No. – 10001 Input relay
Analog input data 30001 to 40000 Reference No. – 30001 Input register
Analog parameter 40001 to 50000 Reference No. – 40001 Hold register
Example) “The Relative No” of the measured value (PV) at “Reference No. 30101” is “100”.

−15−
(Table 4. Quick search table for LT830-Reference Nos.)
Data type Parameters Reference No Corresponding
function code
Reference
table
Digital parameter AT start 101 01(READ)
05(WRITE)
Section 6.7.3
(P.33)
Digital input data Error status
Event status 10004 to 10120 02(READ) Section 6.7.4
(P.33)
Analog input data
Measured data(PV/SV/MV)
Run parameter
Event status
30101 to 30142 04(READ) Section 6.7.2
(P.32 to 33)
Analog parameter
Set up parameter
Linear decimal point
One kind parameter
Control output at Ready
SV rise ramp
SV fall ramp
PV start
No.1/No.2parameter
SV
EV1/EV2 setting
P/I/D
Output limiter L
Output limiter H
Variation limiter
Instrument Operation
Key lock
Run/ready
Remote SV setting
40008
40114 to 40119
40201 to 40211
49501 to 49512
03(READ)
06(WRITE)
16(WRITE)
Section 6.7.1
(P.30)
(P.30)
(P.30 to 31)
(P.31 to 32)

−16−
6.3.5 Error check
Error check for transmission frames is different between the transmission modes.
RTU mode: CRC-16
ASCII mode: LRC
6.3.5.1 Calculation of CRC-16
In the CRC system, the information to be transmitted is divided by a generating polynomial, the
resulting remainder being added to the end of the data. The generation polynomial is as follows.
1 + X2+ X15 + X16
The data from its slave address to its end is calculated in the following procedure.
1) Initialize the CRC-16 data (assumed as X) (= FFFFH)
2) Exclusive logical sum (EX–OR) between data 1 and X X
3) Shift X one bit to the right X
4) When a carry is generated, take A001H and EX–OR. If not, go to 5). X
5) Repeat 3) and 4) until shifting 8 times.
6) EX–OR between the next data and X X
7) Same as 3) to 5)
8) Repeat up to the last data
9) Create a message in the sequence from lower to upper orders of the calculated 16-bit data (X).
Example) Since CRC-16 is 1241H for the data 02H 07H , the error check data will be 41H 12H .

−17−
Example1)Cprogramming
/*****CRC‑16PROGRAM*****/
#include<stdio.h>
#include<conio.h>
voidmain(void)
{
unsignedint iLoopCnt;
unsignedshort usData;
unsignedshort usCrcData;
unsignedshort usErrChkData;
int iDummy;
usCrcData=0xffff;
printf("HexDATA([q]=END)>¥n");
while(scanf("%x",&usData)!=0){
usCrcData=usData^usCrcData;
for(iLoopCnt=0;iLoopCnt<8;iLoopCnt++){
if(usCrcData&0x0001){
usCrcData=usCrcData>>1;
usCrcData=usCrcData^0xa001;
}else
usCrcData=usCrcData>>1;
}
}
}
printf("CRC‑16DATA=%xH¥n",usCrcData);
usErrChkData=(usCrcData>>8)│(usCrcData<<8);
printf("CRC‑16ENDIANDATA=%xH",usErrChkData);
iDummy=getch();
}

−18−
Example2)MicrosoftVisualBasic.NET
'*****CRC‑16PROGRAM*****
FunctionfncCalcCrc(ByValsCharDataAsString)AsString
DimintLoopCnt1AsInteger
DimintLoopCnt2AsInteger
DimintLoopCnt3AsInteger
DimintSdChrCntAsInteger
DimintCrc16DataAsInteger
DimintCarryFlgAsInteger
DimstrWorkBufAsString
Dimint2ByteImage(16)AsInteger
DimstrCRCAsString
intSdChrCnt=Len(sCharData)/2
intCrc16Data=&HFFFF
ForintLoopCnt1=1TointSdChrCnt
intCrc16Data=intCrc16DataXorVal("&H"+Mid(sCharData,2*intLoopCnt1‑1,2))
ForintLoopCnt2=0To7
ForintLoopCnt3=0To15
If(intCrc16DataAnd(2^intLoopCnt3))=0Then
int2ByteImage(intLoopCnt3)=0
Else
int2ByteImage(intLoopCnt3)=1
EndIf
NextintLoopCnt3
intCarryFlg=int2ByteImage(0)
ForintLoopCnt3=1To15
int2ByteImage(intLoopCnt3‑1)=int2ByteImage(intLoopCnt3)
NextintLoopCnt3
int2ByteImage(15)=0
intCrc16Data=0
ForintLoopCnt3=0To15
intCrc16Data=intCrc16Data+((2^intLoopCnt3)*int2ByteImage(intLoopCnt3))
NextintLoopCnt3
IfintCarryFlg=1Then
intCrc16Data=intCrc16DataXor&HA001
EndIf
NextintLoopCnt2
NextintLoopCnt1
strWorkBuf="0000"
Mid(strWorkBuf,5‑Len(Hex(intCrc16Data)))=Hex(intCrc16Data)
Table of contents
Other Chino Controllers manuals

Chino
Chino KP3000 User manual

Chino
Chino JW Series User manual

Chino
Chino KP1000 User manual

Chino
Chino KP 2000 Series User manual

Chino
Chino GT120 Series User manual

Chino
Chino DB600 Series User manual

Chino
Chino DB630E User manual

Chino
Chino DB600 Series User manual

Chino
Chino LT300 Series User manual

Chino
Chino JU Series User manual