manuals.online logo
Brands
  1. Home
  2. •
  3. Brands
  4. •
  5. Cisco
  6. •
  7. Telephone
  8. •
  9. Cisco UNIFIED 9971 User manual

Cisco UNIFIED 9971 User manual

Reference Guide
Cisco
9900
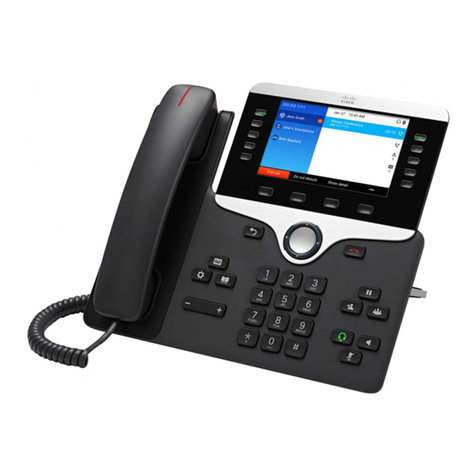
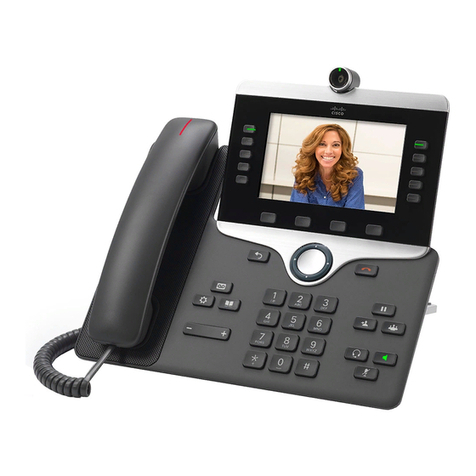
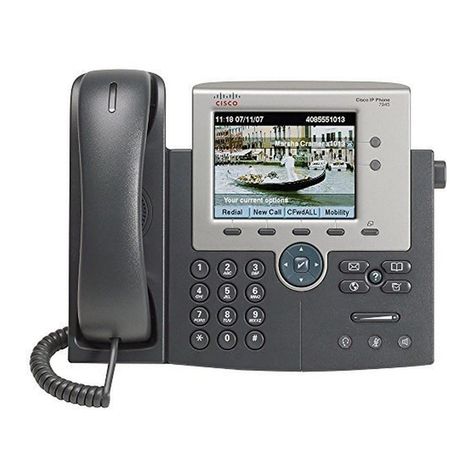
Overview of a Cisco Phone
Model depicted is a 9971
Camera
Turn ring to
Open/Close
(if equipped)
Session Buttons
Each corresponds to an Active
Call or Call Function. Call info and
status icons appear in the Session
Label to the left of the button.
Calls are displayed in order,
oldest (at the top) to newest.
Press an Active Session button to
Answer call, or to return to a held
call.
Press an Idle Session button to
perform call functions, such as to
place a call or view call history.
LEDs on button change to
indicate call status.
Soft Keys
Displays available features and/
or actions. (Pending model,
press button or touch screen.)
Applications Button
Use to access call history,
preferences, and phone
information.
Programmable Feature
Buttons
Phone Line, Speed Dial, or
Calling Features
Pressing a lie button will
display the Session Buttons,
which will show the Active
Calls for that line.
Handset Light Strip
Flashes to indicate an incoming
call, or Solid to indicate new
voice mail message(s).
9900R (Revised 11/19/2013)
Header Line
Displays date &
tune, Call Line ID
information, and
Phone Status
New Call Icon
Press Session
button/touch
screen icon (if
capable) to make
a new call
Back Button
Returns to previous screen/
menu.
Release/Disconnect
Press to end call or an active
session.
Navigation Pad
Provides 4-way navigation &
“Select” button (round center)
Conference Button
HoldTransfer
Dial Pad
Allows you to dial phone numbers, enter
letters, and choose menu items (by entering
the item number).
Speakerphone
On/Off
Mute
On/Off
Headset
On/Off
(if equipped)
Volume Control
Increase/decrease volume.
Controls handset, headset, and
speakerphone volume (off-hook)
and ringer volume (on-hook).
Voice Mail
Press to access voice mail
system.
Contacts Menu
Opens/closes the Contacts menu.
Use to access personal and
corporate directories,.
www.its.ny.gov/telecommunications
How To... Directions...
Place a Call Internal and External:
1. Lift handset or press the Speaker button.
2. Dial the 10-digit number.
To make a second call:
1. While on active call, press Hold soft key to hold first call.
2. Press New Call soft key. After dial tone, dial 10-digit number.
To pre-dial:
1. With handset on-hook, dial the 10-digit number.
2. Press the Dial soft key, and pick up the handset.
To correct a dialing error, press the < (backspace) soft key to erase.
Soft Keys The display is dynamic and changes according to your phone activity. Available features appear across the
bottom of your display in groups of four. These features are soft key labels. The phone may have more than
four available features. To view additional features, press the More soft key. To use these features, press the
corresponding soft key located directly below the features.
Redial Press Redial soft key to redial last number dialed.
To redial from Calls Log:
1. While phone is idle, press Navigation Pad Down Arrow. A history list is displayed.
2. Use Navigation Arrows to scroll through list. Highlight desired number.
3. Press Dial soft key.
Hold and Resume To Hold: While connected, press the Hold button. Corresponding Session button label will show an icon,
indicating the call is on hold.
To Resume: Use the Navigation Pad to highlight the desired call. Press the Resume soft key to reconnect.
Or press the desired Session button to reconnect.
To Answer a second call, press the blinking Session button. The first call is automatically placed on hold.
PickUp
To answer call in Your PickUp group:
1. Lift handset.
2. Press PickUp soft key to be connected to the incoming call:
a. To answer call, press Answer soft key.
b. To divert to your voicemail, press iDivert soft key.
c. To send call back to original called number, let call ring.
Abbreviated/
Speed Dial
All Abbreviated/Speed Dial configuration MUST be done via the Self Care Portal.
To use a Speed Dial code:
1. With the handset down, enter the Abbreviated/Speed Dial code.
2. Press More button.
3. Press the AbbrDial soft key.
4. Lift handset.
Reference Guide
Cisco
9900
Reference Guide for Cisco 9900 Series Phones
www.its.ny.gov/telecommunications
Reference Guide
Cisco
9900
How To... Directions...
Transfer 1. While connected, press Transfer button. Call is automatically placed on hold. A new line is automatically
activated, and a dial tone is heard.
2. Dial the number to which you want to transfer.
3. While second line is ringing, you may perform either:
a. Supervised Transfer (preferred): Wait on line to announce the call. Then press Transfer (soft
key or fixed button) to connect the two callers.
b. Unsupervised Transfer: Press Transfer button again.
Use the Swap soft key to toggle between two calls prior to completing the transfer.
To cancel a transfer, press the Blinking Line button to reconnect to caller.
To cancel and reconnect to original call, press Cancel, and then Resume soft keys.
Transfer to Unity
Voice Mail
To Transfer a call directly to Unity Voice Mail:
1. While connected, press Transfer button.
2. Dial * and the 10-digit number where the call should be transferred.
3. Press Transfer button.
Conference Call 1. While connected, press Conference button. Call is automatically placed on hold. A new line is
automatically activated, and a dial tone is heard.
2. Dial 10-digit number of second party. Wait for second call to connect, and announce conference.
3. Press Conference (soft key or fixed button) to add party to the conference call.
4. To drop the last call and return to the conference, press the flashing line button.
Use the Swap soft key to toggle between two calls prior to adding to the conference. Repeat steps to
conference up to four parties, including you.
Join If you have calls on multiple Session buttons, you can connect them together in a conference call.
1. While connected on one Session button, press the Conference button. This call is automatically placed
on hold.
2. Press the held Session button that you wish to conference in. The two Session buttons are now joined
together in a conference call, on one Session button.
Call Forward To activate:
1. Press Forward All soft key, and dial the 10-digit number.
2. To cancel, press Forward Off soft key.
To forward all calls to voice mail (optional):
1. Press Foward All soft key.
2. Press Messages button.
3. To cancel forwarding to voice mail, press Foward Off soft key.
4. After Call Forward is off, the display will briefly display the status message, “Call Forwarding is off.”
To forward a non-primary line (2nd line)
1. Press the line button twice.
2. Press the Call Forward soft key.
3. Dial the 10-digit number.
To Cancel:
1. Press the line button twice.
2. Press the Forward Off soft key.
www.its.ny.gov/telecommunications
Reference Guide for Cisco 9900 Series Phones
Reference Guide
Reference Guide for Cisco 9900 Series Phones
Cisco
9900
How To... Directions...
iDivert Diverts sends a call to voice mail.
Press iDivert soft key.
Park To Park a call and for retrieval at another phone:
1. While on active call, press the Park soft key. The LCD screen displays the call park number (i.e. *XXXX).
2. Make a note of the number and hang up. Call will time out in 120 seconds and ring back to original
phone.
To retrieve a parked call from any phone, dial * and the 4-digit number.
Applications Call History
To view Call History:
1. Press the Applications button.
2. Highlight Call History, and press Select button or dial digit.
3. Use Navigation Bar to scroll though list. Soft Keys provide the following choices:
a. Call: Use to dial the number, if available.
b. Details: View call information.
c. Clear: Clears entire call history.
d. Edit Dial: Make changes to number.
e. Delete: Delete specific call from the history log.
6. Press the Exit soft key to exit the menu.
To view Placed Calls Log: With handset on-hook, press Navigation Bar Arrow UP.
Details of a call record include, when available:
●Called number ●Calling number
●Time of day
Preferences
1. Press the Applications button.
2. Use the Navigation Bar to highlight Preferences.
3. Press Select soft key.
4. Select Ringtone to change ring type. Scroll through list, Play, Set, and then Apply the change.
5. Select Contrast. Use the Navigation Bar arrows to adjust the display lighter or darker.
Accessories
1. Bluetooth
2. Expansion Module
3. Analog Headset
Contacts To Access the Contacts Menu:
1. Press Contacts button.
2. Use the Navigation Bar to scroll, highlight Personal Directory or Corporate Directory.
3. Press Select button to choose.
Use Navigation Bar to scroll through search choices (first/last name, nickname, or number, where
applicable). See your System Administrator for your user ID and PIN, to access the Personal Directory.
Personal Directories must be created in the Self Care Portal. See
Self Care Portal User Guide
for more
information.
www.its.ny.gov/telecommunications

Other manuals for UNIFIED 9971

17

Other Cisco Telephone manuals

Cisco 3951 User manual

Cisco

Cisco 3951 User manual

Cisco 8851 User manual

Cisco

Cisco 8851 User manual

Cisco 8875 Operator's manual

Cisco

Cisco 8875 Operator's manual

Cisco DX650 User manual

Cisco

Cisco DX650 User manual

Cisco 525 End 2012 User manual

Cisco

Cisco 525 End 2012 User manual

Cisco Small Business Pro SPA 504G User manual

Cisco

Cisco Small Business Pro SPA 504G User manual

Cisco BroadSoft BroadWorks Spectralink 84 Series User manual

Cisco

Cisco BroadSoft BroadWorks Spectralink 84 Series User manual

Cisco SPA 303 User manual

Cisco

Cisco SPA 303 User manual

Cisco 6851 User manual

Cisco

Cisco 6851 User manual

Cisco IP DECT 6800 Series User manual

Cisco

Cisco IP DECT 6800 Series User manual

Cisco 6945 Series User manual

Cisco

Cisco 6945 Series User manual

Cisco 8945 Operator's manual

Cisco

Cisco 8945 Operator's manual

Cisco ATA186-I1 Operator's manual

Cisco

Cisco ATA186-I1 Operator's manual

Cisco SPA 508G User manual

Cisco

Cisco SPA 508G User manual

Cisco SPA-500 Series Guide

Cisco

Cisco SPA-500 Series Guide

Cisco 7912 User manual

Cisco

Cisco 7912 User manual

Cisco Cisco 7960 User manual

Cisco

Cisco Cisco 7960 User manual

Cisco Cisco 7960 User manual

Cisco

Cisco Cisco 7960 User manual

Cisco Small Business Pro SPA 504G User manual

Cisco

Cisco Small Business Pro SPA 504G User manual

Cisco SPA525 Instruction Manual

Cisco

Cisco SPA525 Instruction Manual

Cisco 9900 Series User manual

Cisco

Cisco 9900 Series User manual

Cisco 7961 User manual

Cisco

Cisco 7961 User manual

Cisco 8800 Series Instruction manual

Cisco

Cisco 8800 Series Instruction manual

Cisco E20 User manual

Cisco

Cisco E20 User manual

Popular Telephone manuals by other brands

Steren TEL-300 quick start guide

Steren

Steren TEL-300 quick start guide

LG-Ericsson LDP-6212D Getting started

LG-Ericsson

LG-Ericsson LDP-6212D Getting started

British Telecommunications (BT) Marquis user guide

British Telecommunications (BT)

British Telecommunications (BT) Marquis user guide

Videx 3676 installation manual

Videx

Videx 3676 installation manual

Obihai OBi1022 Features guide

Obihai

Obihai OBi1022 Features guide

Panasonic KX-UTG 300B Quick reference guide

Panasonic

Panasonic KX-UTG 300B Quick reference guide

Ericsson R250S troubleshooting guide

Ericsson

Ericsson R250S troubleshooting guide

RCA 25214RE1 Specifications

RCA

RCA 25214RE1 Specifications

PCS Digital PCS Digital Suite 64 user guide

PCS Digital

PCS Digital PCS Digital Suite 64 user guide

GE 25922EE1 Specifications

GE

GE 25922EE1 Specifications

Motorola V60i user guide

Motorola

Motorola V60i user guide

GAI-Tronics Auteldac 4 Installation and user guide

GAI-Tronics

GAI-Tronics Auteldac 4 Installation and user guide

Auerswald COMfort 300 user manual

Auerswald

Auerswald COMfort 300 user manual

Siemens OpenStage15 user guide

Siemens

Siemens OpenStage15 user guide

Profoon TX-129vm user manual

Profoon

Profoon TX-129vm user manual

SW Comms Alcatel OXO 8038 Quick user guide

SW Comms

SW Comms Alcatel OXO 8038 Quick user guide

Aastra Clearspan 6731i reference guide

Aastra

Aastra Clearspan 6731i reference guide

Guardian Telecom VR81 Installation & operation

Guardian Telecom

Guardian Telecom VR81 Installation & operation

manuals.online logo
manuals.online logoBrands
  • About & Mission
  • Contact us
  • Privacy Policy
  • Terms and Conditions

Copyright 2025 Manuals.Online. All Rights Reserved.