manuals.online logo
Brands
  1. Home
  2. •
  3. Brands
  4. •
  5. College Park
  6. •
  7. Medical Equipment
  8. •
  9. College Park Truper Owner's manual

College Park Truper Owner's manual

TECHNICAL INSTRUCTIONS
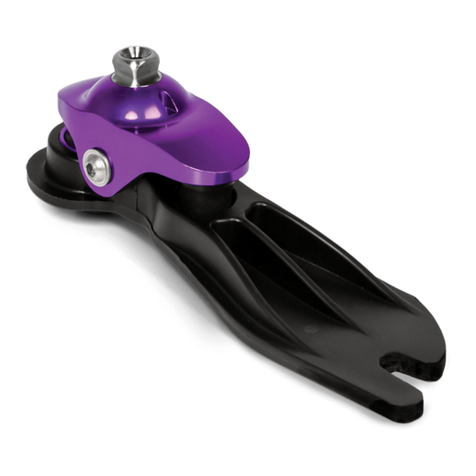
The durable Truper was designed to combine stability, dynamic response
and two flexible size ranges to take on the toughest of childhood challenges.
The foot’s dynamic response stores and releases energy for a smooth and
controlled transition from standing to running.
PACKAGE CONTENTS TOOLS REQUIRED
(1) Truper Foot
(1) Foot Shell
(1) CPI Sock™
(1) Optional Sealing Boot
(1) TruLube™ Lubricant
(2) 4mm Hex Keys
RECOMMENDED
FootHorn™
OPTIONAL
Exo Block Kit
Exo Pyramid Tool Kit
176 INSTPTIS 120821
MADE IN THE USA
EMERGO EUROPE, 2513 BH, The Hague, NetherlandsCollege Park Industries, Warren, MI 48088 USA
©2012 College Park Industries, Inc. All rights reserved. College Park, Stride Control, Gait Matching and Truper are registered trademarks of
College Park Industries. ALX, FootHorn, Integrated Pyramid, CPI Sock and TruLube are trademarks of College Park Industries.
800.728.7950 |586.294.7950 |college-park.com
Stride Control Adjustment
The adjustable Stride Control gives you the ability to customize an individual’s gait timing, fine-
tuning the foot’s response by either turning it clockwise/ counterclockwise. This adjustment
affects both plantar and dorsiflexion resistance without the need to change soft components.
The Truper ships with a medium Stride Control setting. If new bumpers are fitted, set the
preload to 3-turns (medium preload) from the point of initial contact with the Foreheel Bone
assembly. If an additional 1-1/2 turns are required to attain the desired resistance, then a
change in bumpers is recommended.
Dynamic Adjustments
DESIRED RESULT ALIGNMENT CHANGE COMPONENT CHANGE
Firmer Toe Response Plantarflex the Truper or move
load line posterior
Increase Stride Control
Front Bumper up one step firmer
Softer Toe Response Dorsiflex the Truper or move
load line anterior
Decrease Stride Control
Front Bumper down one step softer
Firmer Heel Response Dorsiflex the Truper or move
load line anterior
Increase Stride Control
Rear Bumper up one step firmer
Softer Heel Response Plantarflex the Truper or move
load line posterior
Decrease Stride Control
Rear Bumper down one step softer
For detailed instructions, including growth adjustments, refer to the Truper Technical Manual.
Gait Matching® Guidelines
Contact College Park Technical Service if you have questions about modifying the gait match.
WARRANTY
The Truper Limited Warranty Period is (1) year from the date of purchase. For service or
questions about the warranty, reference the warranty card included with your order or
contact College Park Customer Service.
Technical Assistance / Emergency Service 24-7-365
College Park’s regular office hours are Monday thru Friday, 8:30 am – 5:30 pm (EST). After hours,
an emergency Technical Service number is available to contact a College Park representative.
GENERAL INSTRUCTIONS
Endoskeletal Mounting
Use only high quality proximal endoskeletal components (22 mm).
Exoskeletal Mounting
1 Remove Exo Ankle Bone, then attach to College Park Exo Block with anti-rotation pin(s)
oriented. Apply Loctite® 242 to mounting bolt. Torque to 47 N·m (35 ft·lbs).
To skip alignment and lamination, go to Step 9.
2 If using the alignable Exo option, attach Exo Pyramid Tool to Exo Block with four 5 mm
screws. Torque to 15 N·m (11 f t·lbs).
3 Attach 22 mm endo components to the Exo Pyramid Tool and temporarily mount the socket.
4 Re-attach the ankle bone to foot, donning CPI Sock and foot shell, then perform a dynamic
alignment.
5 Remove foot from Exo Block.
6 Mount aligned prosthesis in transfer jig. Lock socket and Exo Block in position.
7 Remove endo components and Exo Pyramid Tool.
8 Use desired method to span Exo Block to the socket and remove from jig. Shape and
laminate to desired finish. Do not remove foam from the top of the Exo Block.
9 Re-attach ankle bone to foreheel.
10 Re-assemble foot, don CPI Sock and foot shell.
Assembly and Disassembly
1 Use the FootHorn to don and doff the Foot Shell. Remove the CPI Sock and replace
as needed.
2 Use a 4 mm hex key to reduce the preload on the bumpers by turning the Stride Control
adjuster counter-clockwise. Record the number of turns for use in re-assembly.
3 Use two 4 mm hex keys to remove the axial pin screw and axial pin.
4 Remove the ankle bone from the foreheel to access the front and rear bumpers and
ankle bushings.
5 For re-assembly, lubricate the axial pin, inside and outside of the ankle bushings and ankle
bushing pocket, then reverse steps 1-4. Torque axial pin screw to 4 N·m (36 in·lbs).
Do Not lubricate front and rear bumpers.
Static Alignment
For optimal function have the patient’s weight balanced between the forefoot and heel.
The load line divides the foot at 1/3 heel lever and 2/3 toe lever.
WARNING
■Do not expose this product to corrosive materials, salt water or pH extremes.
■Failure to follow these technical instructions or use of this product outside the scope of its Limited Warranty may
result in injury to the patient or damage to the product.
■Any further disassembly or modification of components will void the warranty.
FOOT COMPONENTS
The following diagram is to help familiarize you with the Truper’s unique parts. They are refer-
enced in the instructions, and used in assembling the foot or talking with technical service.
Stride Control
Adjustment
6
5
5
3
4
2
1
3
COMPONENTS
1 Endo Ankle Bone
2 Foreheel Bone
3 Bumpers (2)
4 Axial Pin
5 Ankle Bushings (2)
6 Axial Pin Screw
Torque 4 N·m (36 in·lbs)
OPTIONAL EXO MOUNT
7 Exo Pyramid Tool
8 Exo Block
9 Exo Ankle Bone
10 Exo Mounting Bolt
Torque 47 N·m (35 ft·lbs) 7
8
9
10

Other manuals for Truper

1

Other College Park Medical Equipment manuals
College Park metro liners genesee User manual

College Park

College Park metro liners genesee User manual

College Park Sidekicks Owner's manual

College Park

College Park Sidekicks Owner's manual

College Park Capital hydraulic knee User manual

College Park

College Park Capital hydraulic knee User manual

College Park ODYSSEY K2 Owner's manual

College Park

College Park ODYSSEY K2 Owner's manual

College Park Guardian Owner's manual

College Park

College Park Guardian Owner's manual

College Park Breeze Owner's manual

College Park

College Park Breeze Owner's manual

College Park Odyssey K3 Owner's manual

College Park

College Park Odyssey K3 Owner's manual

College Park LTI BOSTON User manual

College Park

College Park LTI BOSTON User manual

College Park venture Owner's manual

College Park

College Park venture Owner's manual

College Park celsus iVT User manual

College Park

College Park celsus iVT User manual

College Park LTI BOSTON DIGITAL ARM User manual

College Park

College Park LTI BOSTON DIGITAL ARM User manual

College Park Odyssey K3 Owner's manual

College Park

College Park Odyssey K3 Owner's manual

College Park Velocity Owner's manual

College Park

College Park Velocity Owner's manual

College Park Accent Owner's manual

College Park

College Park Accent Owner's manual

College Park Trustep Owner's manual

College Park

College Park Trustep Owner's manual

College Park CAPITAL Owner's manual

College Park

College Park CAPITAL Owner's manual

College Park Espire Elbow Pro User manual

College Park

College Park Espire Elbow Pro User manual

College Park Victor Owner's manual

College Park

College Park Victor Owner's manual

College Park Tribute Owner's manual

College Park

College Park Tribute Owner's manual

College Park Guardian User manual

College Park

College Park Guardian User manual
College Park Espire Classic Plus User manual
College Park

College Park Espire Classic Plus User manual

College Park Espire Classic Plus User manual

College Park

College Park Espire Classic Plus User manual

College Park AXIS User manual

College Park

College Park AXIS User manual
College Park venture Owner's manual

College Park

College Park venture Owner's manual
Popular Medical Equipment manuals by other brands

Fukuda Denshi HS-8000 Series Service manual

Fukuda Denshi

Fukuda Denshi HS-8000 Series Service manual

medi Spinomed Instructions for use

medi

medi Spinomed Instructions for use

GERLINK UTAMA MANDIRI Gerlip HFNC 01 Manual book

GERLINK UTAMA MANDIRI

GERLINK UTAMA MANDIRI Gerlip HFNC 01 Manual book

Pressalit Max-Ability R8595 Installation drawing

Pressalit

Pressalit Max-Ability R8595 Installation drawing

BioStable HAART 201 Instructions for use

BioStable

BioStable HAART 201 Instructions for use

Health Care Logistics 10650 Assembly instructions

Health Care Logistics

Health Care Logistics 10650 Assembly instructions

Vermeiren 1030 quick start guide

Vermeiren

Vermeiren 1030 quick start guide

Riester ALL PUPIL II Wall mounting and safety instructions

Riester

Riester ALL PUPIL II Wall mounting and safety instructions

L'DOCILE LDNB2320 Instructions for use

L'DOCILE

L'DOCILE LDNB2320 Instructions for use

Direct Supply Panacea 6300 Assembly and operation manual

Direct Supply

Direct Supply Panacea 6300 Assembly and operation manual

Concentric Medical FlowGate2 Instructions for use

Concentric Medical

Concentric Medical FlowGate2 Instructions for use

Innova ITM5900 owner's manual

Innova

Innova ITM5900 owner's manual

Rocket PSU Portable Suction Unit Quick user guide

Rocket

Rocket PSU Portable Suction Unit Quick user guide

Alaris Medical Systems Medley 8000 Series Directions for use

Alaris Medical Systems

Alaris Medical Systems Medley 8000 Series Directions for use

Cattani ASPI-JET 6 Operator's handbook

Cattani

Cattani ASPI-JET 6 Operator's handbook

COOK Medical Balloon Ureteral Dilator Instructions for use

COOK Medical

COOK Medical Balloon Ureteral Dilator Instructions for use

Fukuda Denshi HJ-500 Service manual

Fukuda Denshi

Fukuda Denshi HJ-500 Service manual

Ossur OFM1 Instructions for use

Ossur

Ossur OFM1 Instructions for use

manuals.online logo
manuals.online logoBrands
  • About & Mission
  • Contact us
  • Privacy Policy
  • Terms and Conditions

Copyright 2025 Manuals.Online. All Rights Reserved.