manuals.online logo
Brands
  1. Home
  2. •
  3. Brands
  4. •
  5. Contro l4
  6. •
  7. Touch Panel
  8. •
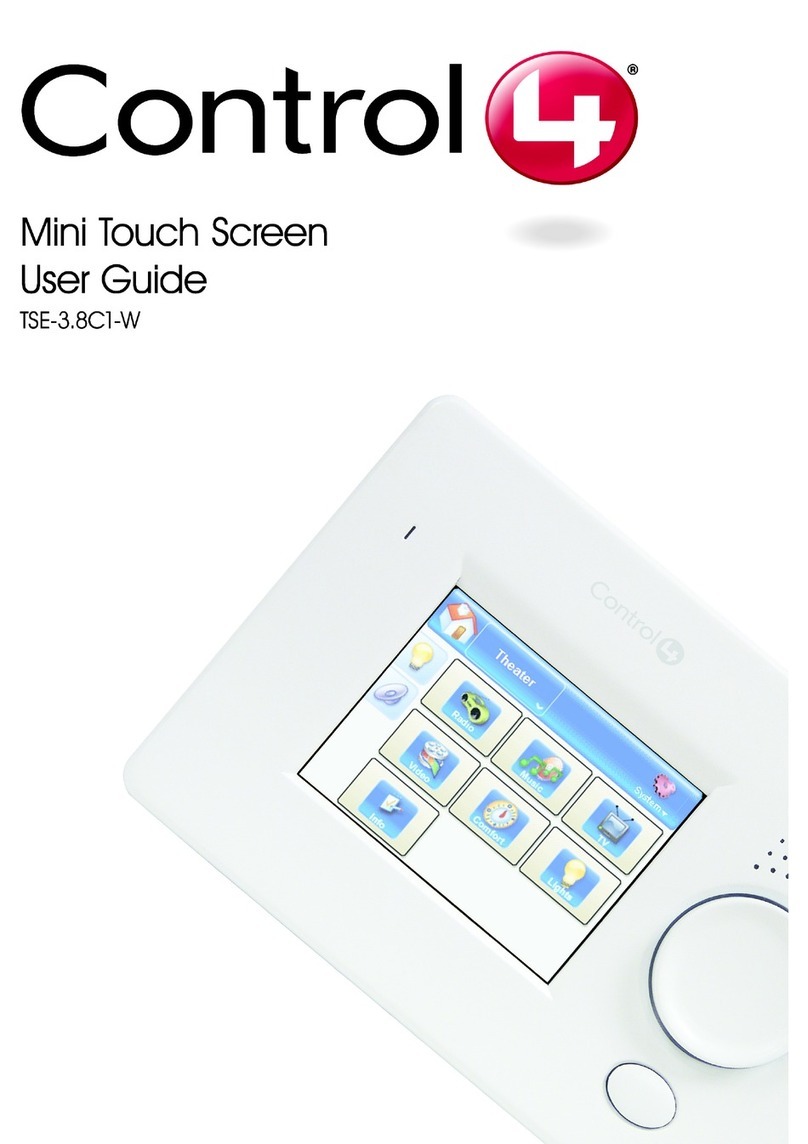
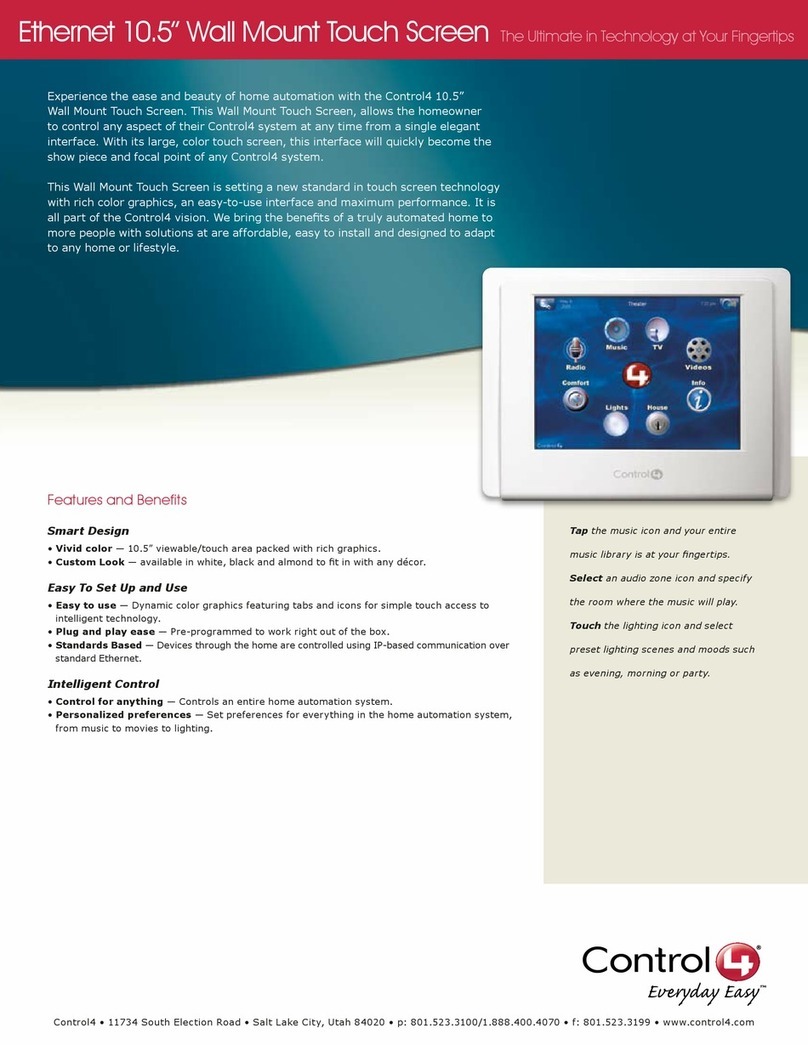
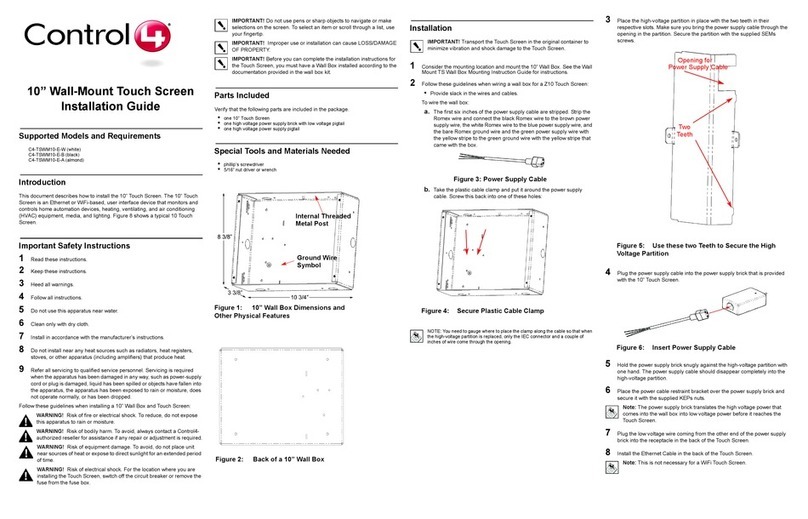
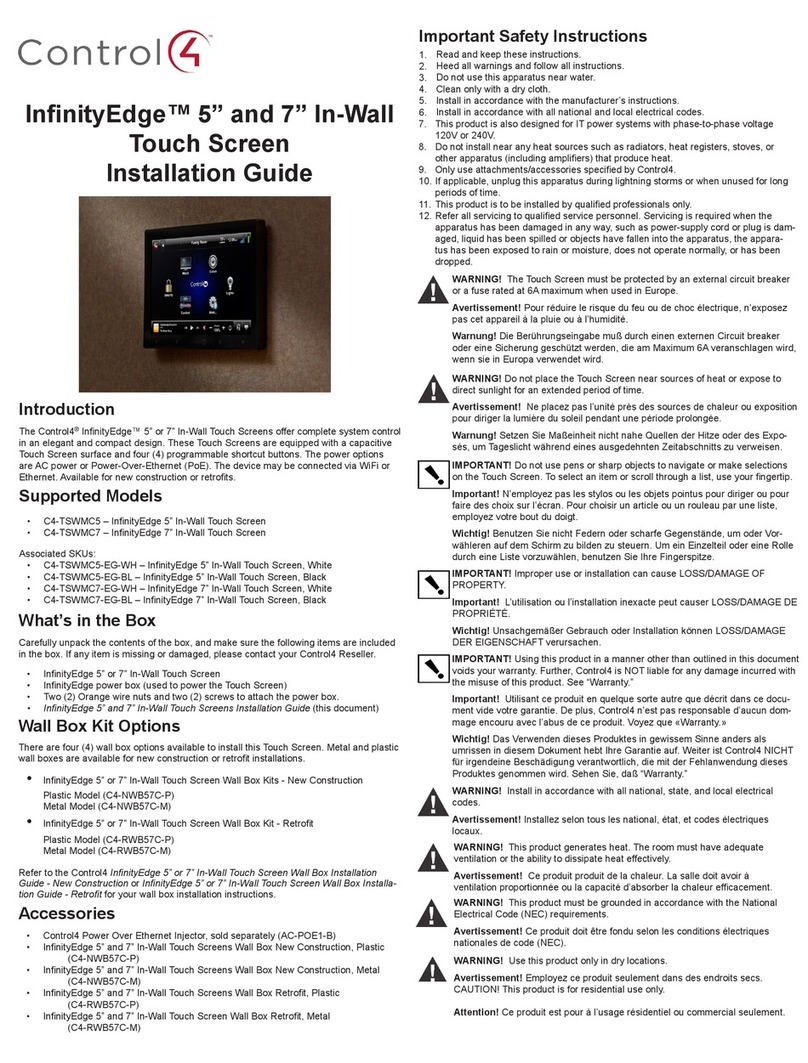
  9. Contro l4 C4-TSWMC5-EG-WH User manual

Contro l4 C4-TSWMC5-EG-WH User manual

™
(C4-NWB57C-P)
• 5”and7”In-WallTouchScreensWallBoxNewConstruction,Metal(C4-
NWB57C-M)
• 5”and7”In-WallTouchScreensWallBoxRetrot,Plastic(C4-RWB57C-P)
• 5”and7”In-WallTouchScreenWallBoxRetrot,Metal(C4-RWB57C-M)
Requirements for In-Wall Installations
Toinstallthe5”or7”TouchScreen,youneedthefollowing:
• AHomeControllerfullyinstalledandconguredwithaControl4®system.
• Control45”and7”TouchScreencustomwallboxinstalled.See“WallBoxKit
Options”inthisdocument.
• IfusingEthernetwithPoEpower:
-AnEthernetnetworkinstalledandavailablethatincludesagateway/router/
switch.
-Control4PoEInjector(model#AC-POE1-B)oranotherthird-partyPoE
Injectororswitch(whicharecertiedtoUL/ANSIstandards).
-Two(2)EthernetCAT5cablestosupportyourPoEInjector:(1)onethatruns
fromtheEthernetgateway/router/switchtothePoEInjector/switchand(2)
onethatrunsfromthePoEInjector/switchtotheEthernetTouchScreenwall
box.
• IfusingEthernetwithACpower:
-AnEthernetnetworkinstalledandavailablethatincludesagateway/router/
switch.
-Accesstoin-wallACpower(aneutralconnectionisrequired).
-One(1)EthernetCAT5cablethatrunsfromtheEthernetgateway/router/
switchtotheTouchScreen.
• IfusingwirelesswithACpower:
-Wirelessnetwork(WiFi802.11b/g)installedandavailablewithawireless
accesspoint(WAP).
-Accesstoin-wallACpower(aneutralconnectionisrequired).
-A14-gaugeelectricalwirelongenoughtopullbetweentheTouchScreen
andthepowersource.
Placement, Network Connection, and Power
Options
PlacetheTouchScreeninaconvenientlocationateyelevel,typicallynearthe
entranceoftheroom,approximately57to61inchesfromtheoor(seeFigure1).
Figure1.TouchScreenPlacement

New Device
AC Power (unless using PoE)
ThisdeviceusesanEthernetorWiFinetworkconnection,andcanbepowered
usingPoEorACpower.Note:DonotattempttousePoEandACatthesametime.
Option 1: Ethernet Connection with a PoE Injector or a
Third-Party Injector or Switch
PoEinjectselectricalcurrentintotheEthernetcableusingaPoEInjector(model
#AC-POE1-B)orathird-partyPoEsolutiontoprovidetheTouchScreenwithpower
andanetworkconnection.The5”and7”TouchScreensworkwiththeControl4
PoEInjectororathird-partyPoEInjector.TosetupyourPoEandEthernet
connectionwithaPoEInjector,seeFigure2.
Introduction
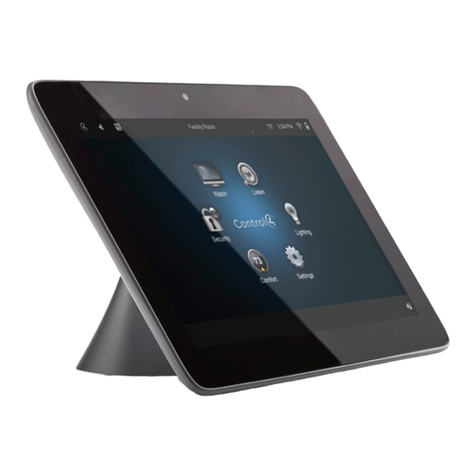
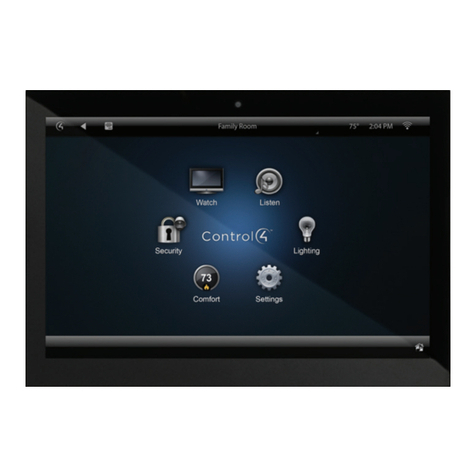
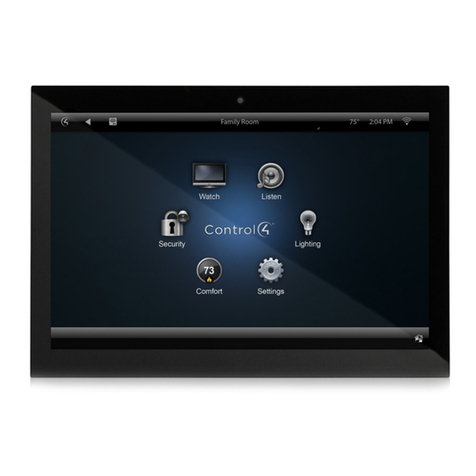
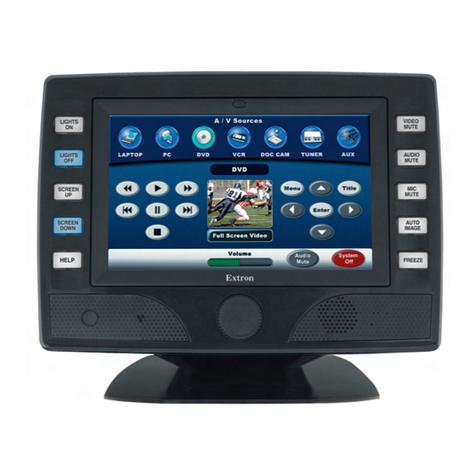
TheControl4®5”or7”In-WallTouchScreenoerscompletesystemcontrol
inanelegantandcompactdesign.TheseTouchScreensareequippedwitha
capacitiveTouchScreensurfaceandfour(4)programmableshortcutbuttons.The
poweroptionsareACpowerorPower-Over-Ethernet(PoE).Thedevicemaybe
connectedviaWiFiorEthernet.Availablefornewconstructionorretrots.
Supported Models
• C4-TSWMC5–5”In-WallTouchScreen
• C4-TSWMC7–7”In-WallTouchScreen
AssociatedSKUs:
• C4-TSWMC5-EG-WH–5”In-WallTouchScreen,White
• C4-TSWMC5-EG-BL–5”In-WallTouchScreen,Black
• C4-TSWMC7-EG-WH–7”In-WallTouchScreen,White
• C4-TSWMC7-EG-BL–7”In-WallTouchScreen,Black
Box Contents
Carefullyunpackthecontentsofthebox,andmakesurethefollowingitems
areincludedinthebox.Ifanyitemismissingordamaged,pleasecontactyour
Control4Reseller.
• 5”or7”In-WallTouchScreen
• Powerbox(usedtopowertheTouchScreen)
• Two(2)Phillipsheadscrewstoattachthepowerboxtothewall
• Warrantycard
Wallbox Kit Options
Therearefour(4)wallboxoptionsavailabletoinstallthisTouchScreen.Metaland
plasticwallboxesareavailablefornewconstructionorretrotinstallations.
• 5”or7”In-WallTouchScreenWallBoxKits-NewConstruction
PlasticModel(C4-NWB57C-P)
MetalModel(C4-NWB57C-M)
• 5”or7”In-WallTouchScreenWallBoxKit-Retrot
PlasticModel(C4-RWB57C-P)
MetalModel(C4-RWB57C-M)
RefertotheControl45” or 7” In-Wall Touch Screen Wall Box Installation Guide
- New Constructionor5” or 7” In-Wall Touch Screen Wall Box Installation Guide -
Retrofitforyourwallboxinstallationinstructions.
Accessories
• Control4PowerOverEthernetInjector,soldseparately(AC-POE1-B)
• 5”and7”In-WallTouchScreensWallBoxNewConstruction,Plastic
5”and7”In-Wall
TouchScreens
InstallationGuide
Figure2.EthernetModel-RequiresEthernetConnectiontoPoEInjector
PlacethePoEInjectornearyourgateway/router/switch.PulltheEthernetcable
fromthatlocationtowhereyouwanttoinstalltheTouchScreen.
Option 2: Ethernet Connection with AC
NoPoEInjectorisneededforEthernetwithACpower;theEthernetisconnected
directlytotheswitch.Thispowerconnectionrequiresbothneutralandhot
connections(seeFigure3).
Figure3.Ethernet-RequiresConnectiontoEthernetandACPower
Option 3: WiFi Connection with AC
WiFiplacement:PlacetheTouchScreenaboveapowersource,forexample,an
outlet.EnsurethatyouhaveWiFiinthehome(seeFigure4).
Figure4.WiFi-RequiresACPowerandWAP
Front and Rear Panel Description
Front View
Figure5.FrontView-5”or7”In-WallTouchScreen
1 Display:5”or7”viewingarea,TouchScreenwith800x480resolution.
2 Shortcut buttons (4):Forcustomprogramming;toinitiateanactionor
sequenceofactions.UseComposerProorComposerHEtocongurethese
buttons.
3 Touch Screen Removal:SmallholelocatedundertheTouchScreentoremove
theTouchScreenfromthewall.
-Front dimensions.5”TouchScreen(HxWxD):3.15”x4.8x0.9”(80mm
x122mmx23mm);7”TouchScreen(HxWxD):4.6”x6.9x0.9”(117mmx
175mm)x23mm)
-Wall box dimensions.5”or7”TouchScreens(HxWxD):2.7”x4.1”x2.4”
(68mmx104mmx61mm)
-Power box dimensions.5”or7”TouchScreens(HxWxD):2.8”x4.5”x1.8”
(71mmx114mmx46mm)
Back View
Figure6.BackView-5”or7”In-WallTouchScreenandPowerBox
1 Wire Connection:Hot(H)usesBlackwire;Return(R)usesWhitewire.
2 RJ-45 port for Ethernet Connection:Ethernetportavailableforeithera
standardEthernetsourcethatprovidesnetworkcommunicationonlyORa
PoEsourcethatprovidespowertothedeviceandnetworkcommunication.
Installation
WARNING!ForthelocationwhereyouareinstallingtheTouchScreen,
switchothecircuitbreakerorremovethefusefromthefusebox.
AVERTISSEMENT!Pourl’endroitoùvousinstallezl’écrantactile,coupezle
disjoncteurouenlevezlefusibledelaboîtedefusible.
WARNUNG!FürdiePosition,inderSiedieBerührungseingabeanbringen,
denCircuitbreakerausschaltenoderdieSicherungvomSicherungKasten
entfernen.
3
1
2
1
2
™
IMPORTANT!Whencuttingtheopeningforthewallbox,DONOTcutthe
openingtoolarge.Beconservativeandcautiouslyenlargeitasneeded.
IMPORTANT!Encoupantl’ouverturepourlaboîtedemur,necoupez
pasl’ouverturetropgrande.Soyezconservateuretagrandissez-avec
précautionlacommenécessaire.
WICHTIG!WennSiedieönungfürdenWandkastenschneiden,
schneidenSieNICHTdiegroßeönungzu.SeienSiekonservativund
vergrößernSieesvorsichtig,wiegebraucht.
IMPORTANT!Beforeyoucancompletetheseinstructionsbelow,youmust
haveaControl45”or7”TouchScreenwallboxinstalledaccordingtothe
documentationprovidedinthewallboxkit.See“Accessories”fordetails.
IMPORTANT!Encoupantl’ouverturepourlaboîtedemur,necoupez
pasl’ouverturetropgrande.Soyezconservateuretagrandissez-avec
précautionlacommenécessaire.Voyezque<<Accessories>>.
WICHTIG!BevorSiedieseAnweisungendurchführenkönnen,müssen
SieeinControl47haben“derBerührungseingaben-Wandkasten,
derentsprechenddenUnterlagenangebrachtwird,dieinden
Wandkasteninstallationssatzbereitgestelltwerden.SehenSiedaß
“Accessories.”
Network Options
• Power Over Ethernet (PoE):TheEthernetnetworkconnectionisprovided
throughthePoEInjector.Noadditionalwiringisneeded.
• Standard Ethernet Connection:ConnecttheTouchScreentooneoftheRJ-
45LANportsonthegateway/routerusingtheRJ-45Ethernetcable.
• WiFi Connection:TheinternalWiFiantennawillcommunicatewiththeLAN’s
WAP.IftheLANhasaWAPsetup,noadditionalwiringisneeded.
Power Configurations
• AC Power.ACpowerisusedtopowertheTouchScreenwhenusingan
EthernetorWiFinetworkconnection.
• PoE.PoEisusedtopowertheTouchScreenwhenusinganEthernetorWiFi
networkconnection.
Preparetheplasticpowerboxforinstallationintothewallboxbyinserting
eithertheEthernetcableortheACpowercableintothepowerbox(see
Figures7and8).
AC Power Connection.ThestepsbelowrepresentatypicalU.S.installation.
ConnectwirestotheACpowersourcefortheTouchScreenaccording
toyournationalandlocalelectricalcodes.Yourinstallationmayrequire
alternativewiresandaterminalblock.
• Threadthepowercablethroughthebottombackholeofthewallboxstraight
throughtotheterminal(Figure7).Removethetabcoveringtheholerst.
• Striptheblackandwhitepowerwireendsto1/4”ifnecessary.UsingaPhillips
headscrewdriver,loosenthescrewsonthepowerbox’sterminalblockand
connectthepowerwirestoeachterminal(seeFigure7).
• Capthegroundwirefromthewallifyouareusingaplasticwallbox.Attach
thegroundwiretothewallboxwhenusingametalwallbox.
Figure7.ACPowerConnection
• Alignandbendthewirescarefullytottheminsidethewallbox.
• Alignandcarefullyslidethepowerboxintothewallbox.
Power Over Ethernet (PoE) Connection.InstallaPoEInjector(sold
separately)orswitch,andthenconnectthePoEInjectortothepowerand
network.Connectittothepowerbox.Thestepsbelowdescribehowtoinstall
aControl4PoEInjector.
• ConnecttheControl4PoEInjectortoapowersource,forexample,anAC
outlet,usingthepowercord(providedwiththeunit).
• ConnectoneoftheRJ-45LANportsonthegateway/router/switchtothe
PoEInjector’sLANportusingtheRJ-45Ethernetcable.
• ConnectthePoEInjector’sPWRLAN-OUTporttotheRJ-45Ethernetcable
thatwillbeconnectedtotheTouchScreen.
• PulltheEthernetcablethroughthetopbackholeofthewallboxtothe
Ethernetconnectoronthetopbackofthepowerbox,andthenconnectit
(seeFigure8).
• Alignandcarefullyslidethepowerboxintothewallbox.UnlesstheTouch
Screenisinthepowerbox,itdoesn’tpullanypower.
Figure8.EthernetConnection
3 Securethepowerboxintothewallboxusingthescrewsprovided.Note:
Overtighteningpowerboxscrewscouldresultinapoorconnectionbetween
theTouchScreenandthepowerbox.
4 AlignandslidethebackoftheTouchScreenintothepowerbox.TheTouch
Screenismagneticandshouldsnaprightintoplace.
5 (Optional)TosecuretheTouchScreeninsidethepowerbox,removethetape
coveringthebottomsecuritypin(seeFigure9)beforeattachingtheTouch
Screentothepowerbox.
6 NotethepinholeonthebottomundersideoftheTouchScreen’sfaceplate.If
youeverneedtoremovetheTouchScreenfromthewall,dothefollowing:
• Locatethesmallpinholeonatab(rightside)underneaththeTouchScreen.
• Insertapaperclipintothehole(about1/4”).Withbothhands,lifttheTouch
Screenfromthebottomofthescreentowardyoutoremoveit(seeFigure9).
Figure9.TouchScreenPinandPinhole
7 Toprotectthescreen’sdisplay:Useoneofthescreen-saveroptionsavailable
fromtheMore>Settings>Screen Saverpage.
8 (WiFionly)ConnecttoaWAPontheTouchScreen(seeFigure10):
Figure10.WirelessConguration
• Afterinitialization,pressandholdthelargewhite4onthecenteroftheTouch
Screentoenterthecongurationscreen.
• PresstheNetworkbuttonontheTouchScreencongurationpage.The
networkcongurationscreendisplays.
• UnderWireless,selectEnable.Ifyoudon’tseethenetworkyouwant,select
Other.
• AtNetworkName,selecttoaddtheSSIDorwirelessnetworkwhenthe
keyboardappears.SelectDone.
• AtSecurity,selectNone,WEP 64,WEP 128,orWPA.AtPassword,typethe
passwordonthekeyboardthatappears.PressDone.
• SelectConnect.NoticethattheIPsettingschange.TheIPaddressissetto
DHCPbydefault.(Optional)IfyouneedtosetastaticIPaddressinstead,
completethefollowingsteps:
-OntheNetworkpage,pressStatic.
-Selecteachboxoneatatimeandtypetheaddress:IPAddress,Subnet
Mask,DefaultGateway,PreferredDNS,andAlternateDNS.Whenthe
keyboardappears,typetheaddress,andthenpressDone.
• PressOKtoreturntotheNetworkpage.YoucannowconnecttoaControl4
DirectorrunningonaControl4deviceonthenetwork.
• PressOK.
9 WhenyourTouchScreenisphysicallyinstalledandappearsonthehome
network,youcanaddandcongureittotheControl4Systemusingthe
ComposerProsoftware.SeetheComposer Pro User Guideforinformation
abouthowtoaddandidentifytheTouchScreentotheControl4System.
Restore to Factory Default
Pressandholdthered4 buttoninthetopleftcornerofthescreenuponstartup,
andfollowtheinstructionspresentedonthescreentoinitiatethefactoryrestore
processandtoresettheTouchScreentothefactorydefaultsettings.
Composer Driver Information
Chooseeitherthe5” Touch Screen(C4-TSWMC5)or7” Touch Screen(C4-
TSWMC7)driverinComposerProandaddittoyourproject.Ifthedriverdoesn’t
appearintheMyDriverslist,right-clickadriverandselecttheRestore Default List
menuoptiontorefreshthelist.
Tocheckifyouhavethecorrectdriver,afterit’sinstalledintheproject,hoverover
thedriverintheprojecttreeandtheSKUwillappear.SeetheComposer Pro User
Guideformoredetails.
WARNING!TheTouchScreenmustbeprotectedbyanexternalcircuit
breakerorafuseratedat6AmaximumwhenusedinEurope.
AVERTISSEMENT!Pourréduirelerisquedufeuoudechocélectrique,
n’exposezpascetappareilàlapluieouàl’humidité.
WARNUNG!DieBerührungseingabemußdurcheinenexternenCircuit
breakerodereineSicherunggeschütztwerden,dieamMaximum6A
veranschlagenwird,wennsieinEuropaverwendetwird.
WARNING!DonotplacetheTouchScreennearsourcesofheatorexpose
todirectsunlightforanextendedperiodoftime.

AVERTISSEMENT!Neplacezpasl’unitéprèsdessourcesdechaleurou
expositionpourdirigerlalumièredusoleilpendantunepériodeprolongée.
WARNUNG!SetzenSieMaßeinheitnichtnaheQuellenderHitzeoderdes
Exposés,umTageslichtwährendeinesausgedehntenZeitabschnittszu
verweisen.
IMPORTANT!Donotusepensorsharpobjectstonavigateormake
selectionsontheTouchScreen.Toselectanitemorscrollthroughalist,
useyourngertip.
IMPORTANT!N’employezpaslesstylosoulesobjetspointuspourdiriger
oupourfairedeschoixsurl’écran.Pourchoisirunarticleouunrouleau
paruneliste,employezvotreboutdudoigt.
WICHTIG!BenutzenSienichtFedernoderscharfeGegenstände,umoder
VorwählerenaufdemSchirmzubildenzusteuern.UmeinEinzelteiloder
eineRolledurcheineListevorzuwählen,benutzenSieIhreFingerspitze.
IMPORTANT!ImproperuseorinstallationcancauseLOSS/DAMAGEOF
PROPERTY.
IMPORTANT!L’utilisationoul’installationinexactepeutcauserLOSS/
DAMAGEDEPROPRIÉTÉ.
WICHTIG!UnsachgemäßerGebrauchoderInstallationkönnenLOSS/
DAMAGEDEREIGENSCHAFTverursachen.
IMPORTANT!Usingthisproductinamannerotherthanoutlinedinthis
documentvoidsyourwarranty.Further,Control4isNOTliableforany
damageincurredwiththemisuseofthisproduct.See“Warranty.”
IMPORTANT!Utilisantceproduitenquelquesorteautrequedécritdans
cedocumentvidevotregarantie.Deplus,Control4n’estpasresponsable
d’aucundommageencouruavecl’abusdeceproduit.Voyezque
«Warranty.»
WICHTIG!DasVerwendendiesesProduktesingewissemSinneanders
alsumrissenindiesemDokumenthebtIhreGarantieauf.Weiterist
Control4NICHTfürirgendeineBeschädigungverantwortlich,diemit
derFehlanwendungdiesesProduktesgenommenwird.SehenSie,daß
“Warranty.”
WARNING!Installinaccordancewithallnational,state,andlocalelectrical
CODES.
AVERTISSEMENT!Installezselontouslesnational,état,etcodes
électriqueslocaux.
WARNING!Thisproductgeneratesheat.Theroommusthaveadequate
VENTILATIONortheabilitytodissipateheateectively.
AVERTISSEMENT!Ceproduitproduitdelachaleur.Lasalledoitavoirà
VENTILATIONproportionnéeoulacapacitéd’absorberlachaleur
ecacement.
WARNING!Thisproductmustbegroundedinaccordancewiththe
NationalElectricalCode(NEC)requirements.
AVERTISSEMENT!Ceproduitdoitêtrefonduselonlesconditions
électriquesnationalesdecode(NEC).
WARNING!Usethisproductonlyindrylocations.
AVERTISSEMENT!Employezceproduitseulementdansdesendroitssecs.
CAUTION!Thisproductisforresidentialuseonly.
Ethernet
Connection
Speaker Insert paper clip here to
remove Touch Screen
Security pin
Power Box Wall Box
Power Cable
Terminal Block
Connect Wires
to Terminal Block
™
©2011Control4.Allrightsreserved.Control4,theControl4logo,theControl4iQlogoandtheControl4certiedlogoareregisteredtrademarksortrademarksof
Control4CorporationintheUnitedStatesand/orothercountries.Allothernamesandbrandsmaybeclaimedasthepropertyoftheirrespectiveowners.
ATTENTION!Ceproduitestpouràl’usagerésidentieloucommercial
seulement.
MAGNETWARNING!Locatedwithintheplasticenclosuresofthis
productarestrong(rareearth)magnetsthatareusedtoattachtheface
platetotheelectricalbox.Ifsomeonehandlingorusingtheproducthas
apacemaker,debrillator,orsimilarelectronicdeviceusedforhealth
purposes,avoidcloseproximity(closerthan20inches)totheproduct
untilyouconsultyourphysician.Magneticeldscancausedamageto
magneticstoragemedia(forexample,creditcards,videotapes,computer
harddrives,etc).Keepallmagnetsatleast20inchesawayfromalltypes
ofmagneticmedia.Certainelectronicdevicesaresensitivetomagnetic
FIELDSandmaybedamagedpermanentlyortemporarilydisabled
ifexposedtoamagneticeldthatistoostrong.Consulttheowner’s
manualsofyourelectronicdevicesforfurtherinformation.
INGESTEDmagnetscancauseseriousinjuriesandmayresultindeath.If
magnetshavebeeningested(oryoususpecttheymighthavebeen),seek
competentmedicalattentionimmediately.
AVERTISSEMENT!Aimants!Dansl’emballageenplastiquedeceproduit
sontinclusdesaimantstrèspuissantsutiliséspourattacherlesplaques
desurfaceauxboitesélectriques.Siquelqu’un,manipulantouutilisantce
produitestmunid’unpacemaker,débrillateurouautredispositifd’ordre
médical,ildoitéviterdesetrouveràproximité(moinsde20pouces)de
ceproduitavantd’avoirconsultésonmédecin.Leschampsmagnétiques
desaimantspeuventendommagerlestockaged’informationd’ordre
magnétique(ex:cartesdecrédit,bandesvidéo,disquesdursd’ordinateur,
etc.)Gardeztouslesaimantsaumoinsà20poucesdedistancedetout
typedestockaged’informationd’ordremagnétique.Certainsdispositifs
électroniquessontsensiblesauxchampsmagnétiquesetpeuventêtre
endommagésdefaçonpermanenteouêtredésactivéssiilssontexposés
àunchampsmagnétiquetroppuissant.Pourplusd’information,consultez
lemanueld’utilisateurpropreàvotrepièceélectronique.
SIavalés,lesaimantspeuventcauserdesblessuresgravesetaussicauser
lamort.Sidesaimantsontétéavalés(ouvousdoutezqu’ilsontpul’être)
obtenezlessoinsmédicauxdepersonnescompétentesimmédiatement.
Third-Party Trademarks
Libertas
LibertasFirmwarecopyrightstatementforTouchScreens6/26/09
Copyright(c)2006,OneLaptopperChildandMarvellCorporation.
Allrightsreserved.

Redistribution.Redistributionanduseinbinaryform,withoutmodication,arepermitted
providedthatthefollowingconditionsaremet:

*Redistributionsmustreproducetheabovecopyrightnoticeandthefollowingdisclaimerinthe
documentationand/orothermaterialsprovidedwiththedistribution.
*NeitherthenameofMarvellCorporationnorthenamesofitssuppliersmaybeusedtoendorse
orpromoteproductsderivedfromthissoftwarewithoutspecicpriorwrittenpermission.
*Noreverseengineering,decompilation,ordisassemblyofthissoftwareispermitted.
*Youmaynotuseorattempttousethissoftwareinconjunctionwithanyproductthatisoered
byathirdpartyasareplacement,substituteoralternativetoaMarvellProductwhereaMarvell
ProductisdenedasaproprietarywirelessLANembeddedclientsolutionofMarvelloraMarvell
Aliate.

DISCLAIMER.THISSOFTWAREISPROVIDEDBYTHECOPYRIGHTHOLDERSAND
CONTRIBUTORS“ASIS”ANDANYEXPRESSORIMPLIEDWARRANTIES,INCLUDING,BUTNOT
LIMITEDTO,THEIMPLIEDWARRANTIESOFMERCHANTABILITYAND
FITNESSFORAPARTICULARPURPOSEAREDISCLAIMED.INNOEVENTSHALLTHE
COPYRIGHTOWNERORCONTRIBUTORSBELIABLEFORANYDIRECT,INDIRECT,
INCIDENTAL,SPECIAL,EXEMPLARY,ORCONSEQUENTIALDAMAGES(INCLUDING,BUTNOT
LIMITEDTO,PROCUREMENTOFSUBSTITUTEGOODSORSERVICES;LOSSOFUSE,DATA,
ORPROFITS;ORBUSINESSINTERRUPTION)HOWEVERCAUSEDANDONANYTHEORYOF
LIABILITY,WHETHERINCONTRACT,STRICTLIABILITY,ORTORT(INCLUDINGNEGLIGENCE
OROTHERWISE)ARISINGINANYWAYOUTOFTHEUSEOFTHISSOFTWARE,EVENIF
ADVISEDOFTHEPOSSIBILITYOFSUCHDAMAGE.
GNU
GNUGENERALPUBLICLICENSETERMSANDCONDITIONSFORCOPYING,DISTRIBUTION
ANDMODIFICATION(Section3.b.)
YoumaycopyanddistributetheProgram(oraworkbasedonit,underSection2)inobjectcode
orexecutableformunderthetermsofSections1and2aboveprovidedthatyoualsodooneof
thefollowing:
Accompanyitwithawrittenoer,validforatleastthreeyears,togiveanythirdparty,fora
chargenomorethanyourcostofphysicallyperformingsourcedistribution,acompletemachine-
readablecopyofthecorrespondingsourcecode,tobedistributedunderthetermsofSections1
and2onamediumcustomarilyusedforsoftwareinterchange.
ThecompletetextforthislicenseisavailableontheControl4websiteat:http://www.control4.
com.
ProtectedunderU.S.Patents7,335,845,7,106,261andlicensedunderU.S.Patents5,905,442and
5,982,103
Regulatory/Safety Information
ToreviewregulatoryinformationforyourparticularControl4products,see
theinformationlocatedontheControl4websiteat:http://www.control4.com/
regulatory/
Warranty
Forcompletewarrantyinformation,includingdetailsonconsumerlegalrightsas
wellaswarrantyexclusions,visitwww.control4.com/warranty.
About this Document
PartNumber:200-00164RevJ11/09/2011

Other manuals for C4-TSWMC5-EG-WH

2

This manual suits for next models

5

Other Contro l4 Touch Panel manuals

Contro l4 c4-tst7-eg-b User manual

Contro l4

Contro l4 c4-tst7-eg-b User manual

Contro l4 C4-MTSTOT3 Series User manual

Contro l4

Contro l4 C4-MTSTOT3 Series User manual

Contro l4 T3 Series User manual

Contro l4

Contro l4 T3 Series User manual

Contro l4 C4-TSWM7-E-B User manual

Contro l4

Contro l4 C4-TSWM7-E-B User manual

Contro l4 7 Series User manual

Contro l4

Contro l4 7 Series User manual

Contro l4 InfinityEdge User manual

Contro l4

Contro l4 InfinityEdge User manual

Contro l4 C4-TSWM10-E-A User manual

Contro l4

Contro l4 C4-TSWM10-E-A User manual

Contro l4 C4-TSWM10-E-W User manual

Contro l4

Contro l4 C4-TSWM10-E-W User manual

Contro l4 C4-TSWMC5-EG-WH User manual

Contro l4

Contro l4 C4-TSWMC5-EG-WH User manual

Contro l4 C4-TST7-EG-B User manual

Contro l4

Contro l4 C4-TST7-EG-B User manual

Contro l4 TSE-3.8C1-W User manual

Contro l4

Contro l4 TSE-3.8C1-W User manual

Contro l4 C4-TW7CO User manual

Contro l4

Contro l4 C4-TW7CO User manual

Contro l4 C4-WALL7-WH User manual

Contro l4

Contro l4 C4-WALL7-WH User manual

Popular Touch Panel manuals by other brands

AirTek MFT28U quick start guide

AirTek

AirTek MFT28U quick start guide

AXIOMTEK MPC103-845 user manual

AXIOMTEK

AXIOMTEK MPC103-845 user manual

LEGRAND 5739 04 user manual

LEGRAND

LEGRAND 5739 04 user manual

Aplex APC-3215 user manual

Aplex

Aplex APC-3215 user manual

Phoenix Contact TP 3070W/P user manual

Phoenix Contact

Phoenix Contact TP 3070W/P user manual

Beckhoff CP67 Series Installation and operating instructions

Beckhoff

Beckhoff CP67 Series Installation and operating instructions

YASKAWA VIPA PPC010 CE manual

YASKAWA

YASKAWA VIPA PPC010 CE manual

Feelworld TX FT6 user manual

Feelworld

Feelworld TX FT6 user manual

ICOP Technology PPC-104T-EHL Series user manual

ICOP Technology

ICOP Technology PPC-104T-EHL Series user manual

Topcon MC-X1 Installation and Calibration Manual

Topcon

Topcon MC-X1 Installation and Calibration Manual

LOYTEC L-VIS Series installation instructions

LOYTEC

LOYTEC L-VIS Series installation instructions

Bartec POLARIS B7-72V1 Series user manual

Bartec

Bartec POLARIS B7-72V1 Series user manual

Kontron FlatView user guide

Kontron

Kontron FlatView user guide

Advantech PPC-S155T user manual

Advantech

Advantech PPC-S155T user manual

Beijer Electronics X2 pro 15 web Hardware and installation guide

Beijer Electronics

Beijer Electronics X2 pro 15 web Hardware and installation guide

Ltech EXIS quick start guide

Ltech

Ltech EXIS quick start guide

Acnodes PC6172 user manual

Acnodes

Acnodes PC6172 user manual

Avalue Technology OFP-21W33 Quick reference guide

Avalue Technology

Avalue Technology OFP-21W33 Quick reference guide

manuals.online logo
manuals.online logoBrands
  • About & Mission
  • Contact us
  • Privacy Policy
  • Terms and Conditions

Copyright 2025 Manuals.Online. All Rights Reserved.