manuals.online logo
Brands
  1. Home
  2. •
  3. Brands
  4. •
  5. CONVECTAIR
  6. •
  7. Electric Heater
  8. •
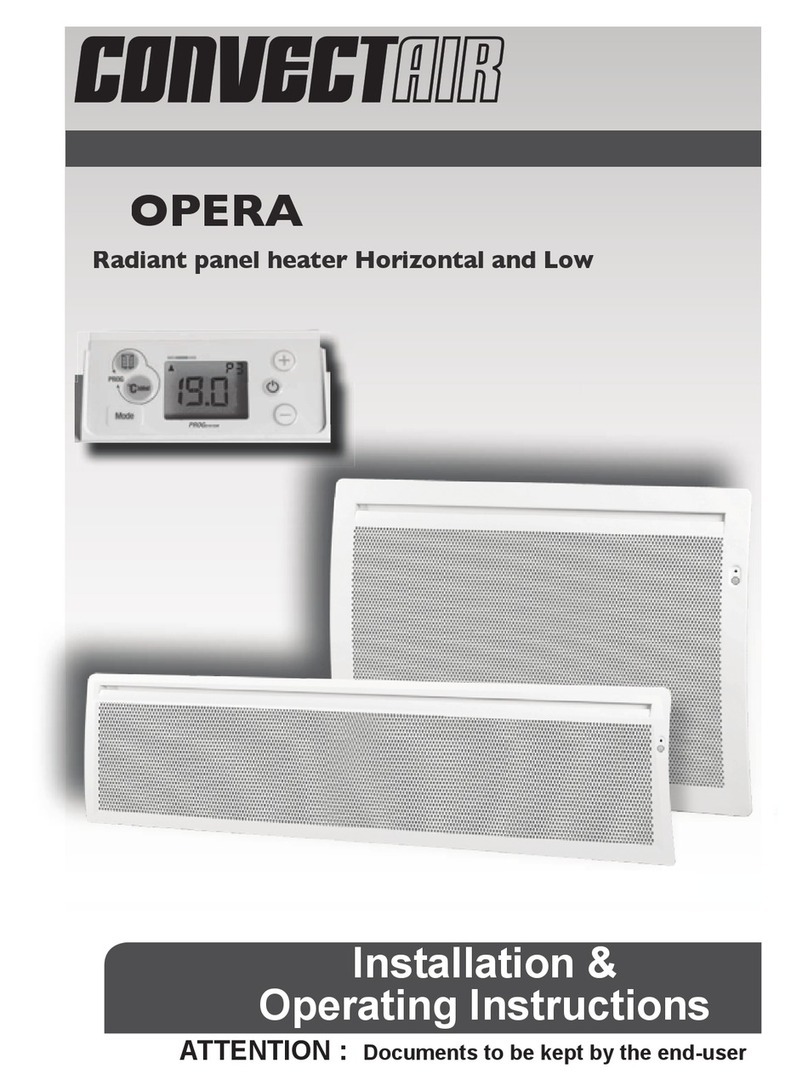
  9. CONVECTAIR Opera 12 User manual

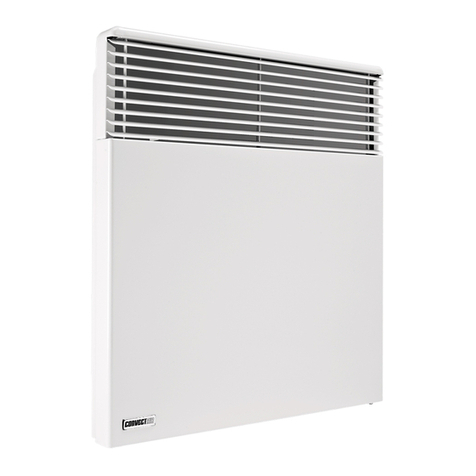
CONVECTAIR Opera 12 User manual

OPÉRA
WARMTH YOU CAN FEEL
421AA4937 A00
INSTALLATION AND
USER GUIDE
Installation and Warranty Card
To be read and retained by the user.
MESSAGE
FROM THE MANUFACTURER
Dear user,
Thank you for your trust and
congratulations on the purchase of your
new CONVECTAIR electric heater.
We design and manufacture the highest
quality devices in the electrical industry.
For the ultimate in comfort, and for
maximum performance from your devices,
please read the installation and operating
instructions included in this manual.
Thank you.
The smart technology that electric heating lacked.
Your Opera device is compatible with the Muller Intuitiv
technology that uses the detection sensor of compatible
Convectair heaters to understand your lifestyle and to suggest
concrete and appropriate measures to save energy.
Compatibility with voice assistants.
Download the Muller Intuitiv with Netatmo application on
your smartphone, insert the module (sold separately) into the
compartment provided at the back of compatible electric
heaters and use voice control via Apple Home Kit, Alexa
and Google Assistant.
Keep an eye on your energy consumption.
By tracking down even the smallest unnecessary energy
expenditure in your home, Convectair devices with Muller
Intuitiv smart technology will help you save energy.
Smart and optimized home.
Maximize your savings with precise room-by-room temperature
control, smart planning of heating using temperature settings
and customized alerts.
COMPATIBILITY
SMART ENERGY MANAGEMENT
1. SAFETY
MEASURES TO BE TAKEN
WARNING
1. Certains parts of this product can get very hot and cause
burns. Special care should be taken in the presence of
children and vulnerable people.
2. Thisdevicemaybeusedbychildren8yearsofageand
over and by people with reduced physical, sensory or
mental capabilities or lacking experience or knowledge,
if they are adequately supervised or if instructions on
the safe use of the device have been given and if the
associated risks have been understood. Children must not
play with the device. Cleaning and maintenance by the
user must not be done or performed by children without
supervision.
3. Childrenbelowtheageof3shouldbekeptatadistance
unless they are under constant supervision.
4. Childrenbetweentheagesof3and8mustnotplugin,
adjust, clean or maintain the device.
5. Childrenbetweentheagesof3and8canonlyturnthe
deviceonoro,aslongasithasbeenplacedorinstalled
in the intended normal position and that these children
are supervised or have been instructed on the safe use of
the device and clearly understand the potential dangers
involved.
6. If the device is covered up, there is a risk of overheating.
The logo shown indicates this risk.
7. It is strictly forbidden to cover up or block the air inlets
or outlets. Doing so may cause incidents or damage the
device.
Warning: Very
hot surface.
IMPORTANT :
Do not cover up.
8. Do not insert any object in the device.
9. The device must not be installed under a power socket.
10. Minimuminstallationdistancestotheoor,walls,furniture,
etc., must be respected. (FigureA). If the device is installed
in a bathroom or powder room (Figure B), it must be
installedoutsideofvolume2ataminimumdistanceof
0.5mfromthebathtuband/orshowerandmustbetted
withaclassAdierentialcircuitbreaker.
(IMPORTANT: See applicable national and local codes).
11. If the power cable is damaged, it must be replaced by
the manufacturer, its after-sales service personnel or a
similarlyqualiedpersontoavoidanydanger.
12. Avoid installing the device near a draft that could disrupt
its control unit.
13. This direct electric heater is designed to ensure space
heating of housing or rooms of an equivalent type, whether
individual or collective, new or existing.
14. Your device is already equipped with a high-precision
electronic thermostat. IT MUST NOT BE CONNECTED TO A
WALL MOUNTED THERMOSTAT.
Volume 0
Volume 1
Hors volume
Outside volume
0,5 m
1' 8"
0,5 m
1' 8"
2,25 m * - 7' 5" *
Volume 2


Figure B
B
15 cm
6 "
C
20 cm
8 "
B
15 cm
6 "
A
75 cm
30 "
E
2,5 cm
1 "
Plancher
Floor
Figure A
The installation must comply with applicable national and local
standards, and CONVECTAIR recommends that it be done by a
certiedelectrician.
This manual was prepared at the time of manufacture of the
device and in accordance with the standards applicable at the
time.
The company reserves the right to modify at any time the
Installation and User Guide to account for standards and their
evolution.
Toavoidshortcircuits,pleaseturnothepower
at the electrical panel prior to installation or repair.
If the power cable is damaged, it must be replaced by the
manufacturer, its after-sales service personnel or a similarly
qualiedpersontoavoidanydanger.
If the device has a glass front, do not use if the glass front is
damaged.
Convectairrecommendsaninstallationheightof15cm(6in.).
2.
INSTALLATION AND MOUNTING
MEASURES TO BE TAKEN
Minimum
clearances
Front
(A)
Sides
(B)
Above
(C) Below (E) Recommended
height
Opera 12
7735
75 cm
(30")
15 cm
(6")
20 cm
(8")
2.5 cm
(1")
15 cm
(6")
Opera 17
7736
75 cm
(30")
15 cm
(6")
20 cm
(8")
2.5 cm
(1")
15 cm
(6")
Opera 46
7737
75 cm
(30")
15 cm
(6")
20 cm
(8")
2.5 cm
(1")
15 cm
(6")
B
15 cm
6 "
C
20 cm
8 "
B
15 cm
6 "
A
75 cm
30 "
E
2,5 cm
1 "
Plancher
Floor
Figure A
Toinstallyourdevice15cm(6in.)fromtheoor(heightrecommendedby
CONVECTAIR), follow the instructions below:
1- Release the back panel by pinching and pulling the insertable tabs on the
back of the device (Figure C).
2- Place the center of the back panel’s lower marking holes (No.2 Figure C)
at measurement C (see tables, Figures C - D - E - F - G)fromtheoor,and
draw a mark.
3- Checkthatthebackpanelishorizontal,markthe2uppermountingholes,
thendrillthe4holes.
4-Repositionthebackpanelontothewallandsecurewith4screws
and plugs if necessary (not supplied).
Tab
Figure C
Example of back panel:
7733 500 W
2
C
3.
INSTALLATION AND MOUNTING
MEASURES TO BE TAKEN
A
D
B
C
C
DA
B
C
DA
B
C
Figure D
15 cm
6 "
45 cm
18 "
Hauteur
Height
Largeur
Width Plancher
Floor
Encombrement
de l’appareil
Size of heater Boîte de
jonction
Junction
box
Entraxe
Center
distance
DEVICES OPERA46
FIGURES D D D
Power (W) 1000 1500 2000
Measurements
cm in. cm in. cm in.
Center distance
24.8 9-3/4 24.8 9-3/4 24.8 9-3/4
Device width
44 .0 17-3/8 44.0 17-3/8 44.0 17-3/8
Device height
84.7 33-3/8 105.0 41-5/8 116.0 45-3/4
A
9.5 3-3/4 9.5 3-3/4 9.5 3-3/4
B
46.8 18-3/8 46.8 18-3/8 46.8 18-3/8
C
24.2 9-1/2 29.4 11-1/2 47.4 18-5/8
D
9.6 3-3/4 9.6 3-3/4 9.6 3-3/4
A
D
B
C
C
DA
B
C
DA
B
C
Figure E
Hauteur
Height
Largeur
Width Plancher
Floor
Encombrement
de l’appareil
Size of heater Boîte de
jonction
Junction
box
25 cm
10 " 15 cm
6 "
A
D
B
C
C
DA
B
C
DA
B
C
25 cm
10 " 15 cm
6 "
Hauteur
Height
Largeur
Width
Plancher
Floor
Encombrement
de l’appareil
Size of heater
Entraxe
Center
distance
Figure F
Boîte de
jonction
Junction
box
A
D
B
C
C
DA
B
C
DA
B
C
Hauteur
Height
Largeur
Width
20 cm
8 " 15 cm
6 "
Plancher
Floor
Encombrement
de l’appareil
Size of heater
Boîte de
jonction
Junction box
Entraxe
Center distance
Figure G
DEVICE OPERA17 OPERA12
FIGURE E F F F G G
Power (W) 500 1000 1500 2000 750 1000
Measurements cm in. cm in. cm in. cm in. cm in. cm in.
Center distance 17.7 6-7/8 31.9 12-1/2 53.4 21 22.8 9 42.8 16-7/8
Device width 53.2 20-7/8 63.7 25 84.7 33-3/8 105.7 41-5/8 89.3 35-1/8 106.0 41-3/4
Device height 44.0 17-3/8 44.0 17-3/8 44.0 17-3/8 44.0 17-3/8 28.4 11-1/8 28.4 11-1/8
A 23.0 9 26.4 10-3/8 26.2 10-2/8 31.0 12-2/8 31.5 15-3/8
B 25.8 10-1/8 25.8 10-1/8 25.8 10-1/8 6.5 2-2/8 6.5 2-4/8
C 21.3 8-3/8 21.3 8-3/8 21.3 8-3/8 21.3 8-3/8 23.8 9-3/8 23.8 9-3/8
D 22.9 9 26.3 10-3/8 26.1 10-3/8 31.0 12-2/8 31.5 13-3/8
CONVECTAIR recommends that the devices be installed by a
certiedelectrician,inaccordancewithapplicablenationaland
local codes.
The appliance must be connected to a previously installed
wall mounted rectangular junction box. Its size must be
appropriate for the connecting cable(s) and the
2-3/4"x4-1/2"(7cmx11.5cm)coverprovidedwiththe
device’s cable.
WARNING: The device must be connected to a 240-volt,
60-cycle circuit. Disconnect the power before making any
connections to avoid electric shocks or damage to the device.
1. Connect the ground wire (C) to the green wire (G)
in the junction box.
2. Connect the power supply leads to the device’s red (R)
and black (B) wires.
3. Never connect the pilot wire (purple wire) to the power
supply lead or the copper wire.
4. The purple wire, whose end is sealed, must not be used for
electrical connection purposes.
5. Carefully place all the wires back inside the junction box
and
close the wall cover.
6. Lift the device and, tilting it towards you, engage it onto the
lower part of the back panel.
7. Hook the CONVECTAIR unit onto the mounting bracket
tabs with the unit slightly angled towards you. Push the
CONVECTAIR towards the wall until it is engaged on both
locking tabs.
4.
CONNECTION
MEASURES TO BE TAKEN
N - Black
V - Green
R - Red
C - Copper
M - Purple
R
R
DEVICE
N
N
V
M
POWER
C
*
*3/12wireorFAS10518/2
300 volts approved.
CANADA
WITH pilot wire.
N - Black
V - Green
R - Red
C - Copper
M - Purple
R
R
DEVICE
N
N
V
M
POWER
C
CANADA
WITHOUT pilot wire.
ACTIONS PRESS DISPLAY
Switch the heating
onoro.
Set the temperature.
Modes
To switch from one mode
to another.
Comfort mode
To adjust to the desired
set point.
Economy mode
Recommended for
absences of less than
24hr.
Frost protection mode
Recommended for
absencesmorethan24hr.
“Open window”
To enable or disable
the function.
5.
QUICK START
MEASURES TO BE TAKEN
Mode
Mode
Mode
AUTO
Mode
AUTO
AUTO
AUTO
AUTO
AUTO
AUTO
AUTO
AUTO
Indicateur de
consommation
0h 2 4 6 8 10 12 14 16 18 20 22 24
5h à 9h 17h à 23h
{
{
du Lundi au Vendredi
0h 2 4 6 8 10 12 14 16 18 20 22 24
5h à 9h 17h à 23h
5h à 23h
{
{
{
0h 2 4 6 8 10 12 14 16 18 20 22 24
du Lundi au Vendredi
Le week end
P1
P3
P2
{
12h à 14h
AUTO
Mode
Mode
Indicateur de
consommation
0h 2 4 6 8 10 12 14 16 18 20 22 24
5h à 9h 17h à 23h
{
{
du Lundi au Vendredi
0h 2 4 6 8 10 12 14 16 18 20 22 24
5h à 9h 17h à 23h
5h à 23h
{
{
{
0h 2 4 6 8 10 12 14 16 18 20 22 24
du Lundi au Vendredi
Le week end
P1
P3
P2
{
12h à 14h
Mode
Mode
Mode
AUTO
Mode
AUTO
AUTO
AUTO
AUTO
AUTO
AUTO
AUTO
AUTO
Indicateur de
consommation
0h 2 4 6 8 10 12 14 16 18 20 22 24
5h à 9h 17h à 23h
{
{
du Lundi au Vendredi
0h 2 4 6 8 10 12 14 16 18 20 22 24
5h à 9h 17h à 23h
5h à 23h
{
{
{
0h 2 4 6 8 10 12 14 16 18 20 22 24
du Lundi au Vendredi
Le week end
P1
P3
P2
{
12h à 14h
AUTO
Mode
Mode
Indicateur de
consommation
0h 2 4 6 8 10 12 14 16 18 20 22 24
5h à 9h 17h à 23h
{
{
du Lundi au Vendredi
0h 2 4 6 8 10 12 14 16 18 20 22 24
5h à 9h 17h à 23h
5h à 23h
{
{
{
0h 2 4 6 8 10 12 14 16 18 20 22 24
du Lundi au Vendredi
Le week end
P1
P3
P2
{
12h à 14h
Mode
Mode
Mode
AUTO
Mode
AUTO
AUTO
AUTO
AUTO
AUTO
AUTO
AUTO
AUTO
Indicateur de
consommation
0h 2 4 6 8 10 12 14 16 18 20 22 24
5h à 9h 17h à 23h
{
{
du Lundi au Vendredi
0h 2 4 6 8 10 12 14 16 18 20 22 24
5h à 9h 17h à 23h
5h à 23h
{
{
{
0h 2 4 6 8 10 12 14 16 18 20 22 24
du Lundi au Vendredi
Le week end
P1
P3
P2
{
12h à 14h
AUTO
Mode
Mode
Indicateur de
consommation
0h 2 4 6 8 10 12 14 16 18 20 22 24
5h à 9h 17h à 23h
{
{
du Lundi au Vendredi
0h 2 4 6 8 10 12 14 16 18 20 22 24
5h à 9h 17h à 23h
5h à 23h
{
{
{
0h 2 4 6 8 10 12 14 16 18 20 22 24
du Lundi au Vendredi
Le week end
P1
P3
P2
{
12h à 14h
Mode
Mode
Mode
AUTO
Mode
AUTO
AUTO
AUTO
AUTO
AUTO
AUTO
AUTO
AUTO
Indicateur de
consommation
0h 2 4 6 8 10 12 14 16 18 20 22 24
5h à 9h 17h à 23h
{
{
du Lundi au Vendredi
0h 2 4 6 8 10 12 14 16 18 20 22 24
5h à 9h 17h à 23h
5h à 23h
{
{
{
0h 2 4 6 8 10 12 14 16 18 20 22 24
du Lundi au Vendredi
Le week end
P1
P3
P2
{
12h à 14h
AUTO
Mode
Mode
Indicateur de
consommation
0h 2 4 6 8 10 12 14 16 18 20 22 24
5h à 9h 17h à 23h
{
{
du Lundi au Vendredi
0h 2 4 6 8 10 12 14 16 18 20 22 24
5h à 9h 17h à 23h
5h à 23h
{
{
{
0h 2 4 6 8 10 12 14 16 18 20 22 24
du Lundi au Vendredi
Le week end
P1
P3
P2
{
12h à 14h
Mode
Mode
Mode
AUTO
Mode
AUTO
AUTO
AUTO
AUTO
AUTO
AUTO
AUTO
AUTO
Indicateur de
consommation
0h 2 4 6 8 10 12 14 16 18 20 22 24
5h à 9h 17h à 23h
{
{
du Lundi au Vendredi
0h 2 4 6 8 10 12 14 16 18 20 22 24
5h à 9h 17h à 23h
5h à 23h
{
{
{
0h 2 4 6 8 10 12 14 16 18 20 22 24
du Lundi au Vendredi
Le week end
P1
P3
P2
{
12h à 14h
AUTO
Mode
Mode
Indicateur de
consommation
0h 2 4 6 8 10 12 14 16 18 20 22 24
5h à 9h 17h à 23h
{
{
du Lundi au Vendredi
0h 2 4 6 8 10 12 14 16 18 20 22 24
5h à 9h 17h à 23h
5h à 23h
{
{
{
0h 2 4 6 8 10 12 14 16 18 20 22 24
du Lundi au Vendredi
Le week end
P1
P3
P2
{
12h à 14h
Mode
Mode
Mode
AUTO
Mode
AUTO
AUTO
AUTO
AUTO
AUTO
AUTO
AUTO
AUTO
Indicateur de
consommation
0h 2 4 6 8 10 12 14 16 18 20 22 24
5h à 9h 17h à 23h
{
{
du Lundi au Vendredi
0h 2 4 6 8 10 12 14 16 18 20 22 24
5h à 9h 17h à 23h
5h à 23h
{
{
{
0h 2 4 6 8 10 12 14 16 18 20 22 24
du Lundi au Vendredi
Le week end
P1
P3
P2
{
12h à 14h
AUTO
Mode
Mode
Indicateur de
consommation
0h 2 4 6 8 10 12 14 16 18 20 22 24
5h à 9h 17h à 23h
{
{
du Lundi au Vendredi
0h 2 4 6 8 10 12 14 16 18 20 22 24
5h à 9h 17h à 23h
5h à 23h
{
{
{
0h 2 4 6 8 10 12 14 16 18 20 22 24
du Lundi au Vendredi
Le week end
P1
P3
P2
{
12h à 14h
6.1 SWITCHING ON AND OFF
PRESS ACTIONS DISPLAY
Switching on.
The green indicator lights up
and the screen displays
Switching o.
The orange indicator lights up
and the screen displays
This indicator shows that your device is heating
up. When the desired temperature has
stabilized,itlightsupandturnsobasedon
heating needs.
NOTE
The device stores the settings in the memory,
even in the case of a power outage.
6.
OPERATION
MEASURES TO BE TAKEN
Be sure to remove the protective lm from the display.
Mode
Mode
Mode
AUTO
Mode
AUTO
AUTO
AUTO
AUTO
AUTO
AUTO
AUTO
AUTO
Indicateur de
consommation
0h 2 4 6 8 10 12 14 16 18 20 22 24
5h à 9h 17h à 23h
{
{
du Lundi au Vendredi
0h 2 4 6 8 10 12 14 16 18 20 22 24
5h à 9h 17h à 23h
5h à 23h
{
{
{
0h 2 4 6 8 10 12 14 16 18 20 22 24
du Lundi au Vendredi
Le week end
P1
P3
P2
{
12h à 14h
AUTO
Mode
Mode
Indicateur de
consommation
0h 2 4 6 8 10 12 14 16 18 20 22 24
5h à 9h 17h à 23h
{
{
du Lundi au Vendredi
0h 2 4 6 8 10 12 14 16 18 20 22 24
5h à 9h 17h à 23h
5h à 23h
{
{
{
0h 2 4 6 8 10 12 14 16 18 20 22 24
du Lundi au Vendredi
Le week end
P1
P3
P2
{
12h à 14h
Mode
Mode
Mode
AUTO
Mode
AUTO
AUTO
AUTO
AUTO
AUTO
AUTO
AUTO
AUTO
Indicateur de
consommation
0h 2 4 6 8 10 12 14 16 18 20 22 24
5h à 9h 17h à 23h
{
{
du Lundi au Vendredi
0h 2 4 6 8 10 12 14 16 18 20 22 24
5h à 9h 17h à 23h
5h à 23h
{
{
{
0h 2 4 6 8 10 12 14 16 18 20 22 24
du Lundi au Vendredi
Le week end
P1
P3
P2
{
12h à 14h
AUTO
Mode
Mode
Indicateur de
consommation
0h 2 4 6 8 10 12 14 16 18 20 22 24
5h à 9h 17h à 23h
{
{
du Lundi au Vendredi
0h 2 4 6 8 10 12 14 16 18 20 22 24
5h à 9h 17h à 23h
5h à 23h
{
{
{
0h 2 4 6 8 10 12 14 16 18 20 22 24
du Lundi au Vendredi
Le week end
P1
P3
P2
{
12h à 14h
Selection of
manual
operation modes
Automatic
operation key
Heating
On/Okey
Desired
temperature
setting keys
Heating
On/O
indicator light
Programs
-predened(P1/P2/P3)
-user-dened(P4/P5/P6)
Behavioral
indicator
“Open window”
function
Heating
indicator
light
6.2 COMFORT TEMPERATURE SETTING
PRESS ACTIONS DISPLAY
Increase or decrease the desired
temperature set point.
Press for 3seconds to store your
favorite set point temperature.
To adjust the temperature to your ideal comfort
level, let the temperature stabilize for a few
hours, with doors closed.
NOTE
During the temperature setting, an indicator
allows you to control but also adjust the
desired temperature based on its impact on
consumption.
This setting is available in COMFORT mode
(manual or automatic).
6.3 ECONOMY MODE (“ECO”)
PRESS ACTIONS DISPLAY
Press successively to access
the “ECO” mode. The screen
displays:
Briey and simultaneously press to
visualize the “ECO” set point.
Press for 3seconds and the “ECO”
temperatureashestoenablethe
user to change it.
Press for 3seconds to
save the temperature.
NOTE
Intheeventofashort-termabsence(lessthan24hr),useofthis
operating mode is recommended for maximum savings. It lowers
the room temperature by approximately 3.5°C relative to the
COMFORT temperature.
The ECO set point cannot be set at a temperature greater than
19°C.
Mode
Mode
Mode
AUTO
Mode
AUTO
AUTO
AUTO
AUTO
AUTO
AUTO
AUTO
AUTO
Indicateur de
consommation
0h 2 4 6 8 10 12 14 16 18 20 22 24
5h à 9h 17h à 23h
{
{
du Lundi au Vendredi
0h 2 4 6 8 10 12 14 16 18 20 22 24
5h à 9h 17h à 23h
5h à 23h
{
{
{
0h 2 4 6 8 10 12 14 16 18 20 22 24
du Lundi au Vendredi
Le week end
P1
P3
P2
{
12h à 14h
AUTO
Mode
Mode
Indicateur de
consommation
0h 2 4 6 8 10 12 14 16 18 20 22 24
5h à 9h 17h à 23h
{
{
du Lundi au Vendredi
0h 2 4 6 8 10 12 14 16 18 20 22 24
5h à 9h 17h à 23h
5h à 23h
{
{
{
0h 2 4 6 8 10 12 14 16 18 20 22 24
du Lundi au Vendredi
Le week end
P1
P3
P2
{
12h à 14h
Mode
Mode
Mode
AUTO
Mode
AUTO
AUTO
AUTO
AUTO
AUTO
AUTO
AUTO
AUTO
Indicateur de
consommation
0h 2 4 6 8 10 12 14 16 18 20 22 24
5h à 9h 17h à 23h
{
{
du Lundi au Vendredi
0h 2 4 6 8 10 12 14 16 18 20 22 24
5h à 9h 17h à 23h
5h à 23h
{
{
{
0h 2 4 6 8 10 12 14 16 18 20 22 24
du Lundi au Vendredi
Le week end
P1
P3
P2
{
12h à 14h
AUTO
Mode
Mode
Indicateur de
consommation
0h 2 4 6 8 10 12 14 16 18 20 22 24
5h à 9h 17h à 23h
{
{
du Lundi au Vendredi
0h 2 4 6 8 10 12 14 16 18 20 22 24
5h à 9h 17h à 23h
5h à 23h
{
{
{
0h 2 4 6 8 10 12 14 16 18 20 22 24
du Lundi au Vendredi
Le week end
P1
P3
P2
{
12h à 14h
Mode
Mode
Mode
AUTO
Mode
AUTO
AUTO
AUTO
AUTO
AUTO
AUTO
AUTO
AUTO
Indicateur de
consommation
0h 2 4 6 8 10 12 14 16 18 20 22 24
5h à 9h 17h à 23h
{
{
du Lundi au Vendredi
0h 2 4 6 8 10 12 14 16 18 20 22 24
5h à 9h 17h à 23h
5h à 23h
{
{
{
0h 2 4 6 8 10 12 14 16 18 20 22 24
du Lundi au Vendredi
Le week end
P1
P3
P2
{
12h à 14h
AUTO
Mode
Mode
Indicateur de
consommation
0h 2 4 6 8 10 12 14 16 18 20 22 24
5h à 9h 17h à 23h
{
{
du Lundi au Vendredi
0h 2 4 6 8 10 12 14 16 18 20 22 24
5h à 9h 17h à 23h
5h à 23h
{
{
{
0h 2 4 6 8 10 12 14 16 18 20 22 24
du Lundi au Vendredi
Le week end
P1
P3
P2
{
12h à 14h
Echelle de
consommation
Mode
Mode
Mode
AUTO
Mode
AUTO
AUTO
AUTO
AUTO
AUTO
AUTO
AUTO
AUTO
Indicateur de
consommation
0h 2 4 6 8 10 12 14 16 18 20 22 24
5h à 9h 17h à 23h
{
{
du Lundi au Vendredi
0h 2 4 6 8 10 12 14 16 18 20 22 24
5h à 9h 17h à 23h
5h à 23h
{
{
{
0h 2 4 6 8 10 12 14 16 18 20 22 24
du Lundi au Vendredi
Le week end
P1
P3
P2
{
12h à 14h
AUTO
Mode
Mode
Indicateur de
consommation
0h 2 4 6 8 10 12 14 16 18 20 22 24
5h à 9h 17h à 23h
{
{
du Lundi au Vendredi
0h 2 4 6 8 10 12 14 16 18 20 22 24
5h à 9h 17h à 23h
5h à 23h
{
{
{
0h 2 4 6 8 10 12 14 16 18 20 22 24
du Lundi au Vendredi
Le week end
P1
P3
P2
{
12h à 14h
6.4 FROST PROTECTION MODE
PRESS ACTIONS DISPLAY
Press successively to access the
“FREEZE PROTECTION” mode.
The screen displays:
NOTE
Intheeventofalong-termabsence(morethan24hr),
use of this mode is recommended for maximum savings. It
helps maintain the temperature of the room above freezing
(approximately 7°C).
6.5 AUTOMATIC OPERATION
PRESS ACTIONS DISPLAY
Press for 3seconds to save
your preferred settings.
Press briey for automatic
operation based on your
heating plan (programming of
Comfort and Eco temperature
ranges) and your setting
preferences (preferred set
point temperature, Window
function, etc.).
NOTE
By default, the stored setting is: Preferred set temperature 19°C,
Open window function enabled.
Mode
Mode
Mode
AUTO
Mode
AUTO
AUTO
AUTO
AUTO
AUTO
AUTO
AUTO
AUTO
Indicateur de
consommation
0h 2 4 6 8 10 12 14 16 18 20 22 24
5h à 9h 17h à 23h
{
{
du Lundi au Vendredi
0h 2 4 6 8 10 12 14 16 18 20 22 24
5h à 9h 17h à 23h
5h à 23h
{
{
{
0h 2 4 6 8 10 12 14 16 18 20 22 24
du Lundi au Vendredi
Le week end
P1
P3
P2
{
12h à 14h
AUTO
Mode
Mode
Indicateur de
consommation
0h 2 4 6 8 10 12 14 16 18 20 22 24
5h à 9h 17h à 23h
{
{
du Lundi au Vendredi
0h 2 4 6 8 10 12 14 16 18 20 22 24
5h à 9h 17h à 23h
5h à 23h
{
{
{
0h 2 4 6 8 10 12 14 16 18 20 22 24
du Lundi au Vendredi
Le week end
P1
P3
P2
{
12h à 14h
Mode
Mode
Mode
AUTO
Mode
AUTO
AUTO
AUTO
AUTO
AUTO
AUTO
AUTO
AUTO
Indicateur de
consommation
0h 2 4 6 8 10 12 14 16 18 20 22 24
5h à 9h 17h à 23h
{
{
du Lundi au Vendredi
0h 2 4 6 8 10 12 14 16 18 20 22 24
5h à 9h 17h à 23h
5h à 23h
{
{
{
0h 2 4 6 8 10 12 14 16 18 20 22 24
du Lundi au Vendredi
Le week end
P1
P3
P2
{
12h à 14h
AUTO
Mode
Mode
Indicateur de
consommation
0h 2 4 6 8 10 12 14 16 18 20 22 24
5h à 9h 17h à 23h
{
{
du Lundi au Vendredi
0h 2 4 6 8 10 12 14 16 18 20 22 24
5h à 9h 17h à 23h
5h à 23h
{
{
{
0h 2 4 6 8 10 12 14 16 18 20 22 24
du Lundi au Vendredi
Le week end
P1
P3
P2
{
12h à 14h
6.6 MANUAL OPERATION
PRESS ACTIONS DISPLAY
All automatic functions are
disabled (programming) and
the device switches to either:
• Comfort mode
and you can adjust the set
point temperature as you wish.
• Eco mode
(this operating mode is
recommended during absences
oflessthan24hr).
• Frost protection mode
(this operating mode is
recommended during absences
ofmorethan24hr).
6.7 ABSENCE DETECTION / ENABLING
PRESS ACTIONS DISPLAY
The function is automatically
enabled in automatic mode.
It can be disabled (see the
following table).
NOTE
In the event of a prolonged absence, the device progressively
lowers the set point temperature. When it detects a presence, it
reactsandreturnstotheoperatingmodedenedbytheuser.
Mode
Mode
Mode
AUTO
Mode
AUTO
AUTO
AUTO
AUTO
AUTO
AUTO
AUTO
AUTO
Indicateur de
consommation
0h 2 4 6 8 10 12 14 16 18 20 22 24
5h à 9h 17h à 23h
{
{
du Lundi au Vendredi
0h 2 4 6 8 10 12 14 16 18 20 22 24
5h à 9h 17h à 23h
5h à 23h
{
{
{
0h 2 4 6 8 10 12 14 16 18 20 22 24
du Lundi au Vendredi
Le week end
P1
P3
P2
{
12h à 14h
AUTO
Mode
Mode
Indicateur de
consommation
0h 2 4 6 8 10 12 14 16 18 20 22 24
5h à 9h 17h à 23h
{
{
du Lundi au Vendredi
0h 2 4 6 8 10 12 14 16 18 20 22 24
5h à 9h 17h à 23h
5h à 23h
{
{
{
0h 2 4 6 8 10 12 14 16 18 20 22 24
du Lundi au Vendredi
Le week end
P1
P3
P2
{
12h à 14h
Mode
Mode
Mode
AUTO
Mode
AUTO
AUTO
AUTO
AUTO
AUTO
AUTO
AUTO
AUTO
Indicateur de
consommation
0h 2 4 6 8 10 12 14 16 18 20 22 24
5h à 9h 17h à 23h
{
{
du Lundi au Vendredi
0h 2 4 6 8 10 12 14 16 18 20 22 24
5h à 9h 17h à 23h
5h à 23h
{
{
{
0h 2 4 6 8 10 12 14 16 18 20 22 24
du Lundi au Vendredi
Le week end
P1
P3
P2
{
12h à 14h
AUTO
Mode
Mode
Indicateur de
consommation
0h 2 4 6 8 10 12 14 16 18 20 22 24
5h à 9h 17h à 23h
{
{
du Lundi au Vendredi
0h 2 4 6 8 10 12 14 16 18 20 22 24
5h à 9h 17h à 23h
5h à 23h
{
{
{
0h 2 4 6 8 10 12 14 16 18 20 22 24
du Lundi au Vendredi
Le week end
P1
P3
P2
{
12h à 14h
Mode
Mode
Mode
AUTO
Mode
AUTO
AUTO
AUTO
AUTO
AUTO
AUTO
AUTO
AUTO
Indicateur de
consommation
0h 2 4 6 8 10 12 14 16 18 20 22 24
5h à 9h 17h à 23h
{
{
du Lundi au Vendredi
0h 2 4 6 8 10 12 14 16 18 20 22 24
5h à 9h 17h à 23h
5h à 23h
{
{
{
0h 2 4 6 8 10 12 14 16 18 20 22 24
du Lundi au Vendredi
Le week end
P1
P3
P2
{
12h à 14h
AUTO
Mode
Mode
Indicateur de
consommation
0h 2 4 6 8 10 12 14 16 18 20 22 24
5h à 9h 17h à 23h
{
{
du Lundi au Vendredi
0h 2 4 6 8 10 12 14 16 18 20 22 24
5h à 9h 17h à 23h
5h à 23h
{
{
{
0h 2 4 6 8 10 12 14 16 18 20 22 24
du Lundi au Vendredi
Le week end
P1
P3
P2
{
12h à 14h
Mode
Mode
Mode
AUTO
Mode
AUTO
AUTO
AUTO
AUTO
AUTO
AUTO
AUTO
AUTO
Indicateur de
consommation
0h 2 4 6 8 10 12 14 16 18 20 22 24
5h à 9h 17h à 23h
{
{
du Lundi au Vendredi
0h 2 4 6 8 10 12 14 16 18 20 22 24
5h à 9h 17h à 23h
5h à 23h
{
{
{
0h 2 4 6 8 10 12 14 16 18 20 22 24
du Lundi au Vendredi
Le week end
P1
P3
P2
{
12h à 14h
AUTO
Mode
Mode
Indicateur de
consommation
0h 2 4 6 8 10 12 14 16 18 20 22 24
5h à 9h 17h à 23h
{
{
du Lundi au Vendredi
0h 2 4 6 8 10 12 14 16 18 20 22 24
5h à 9h 17h à 23h
5h à 23h
{
{
{
0h 2 4 6 8 10 12 14 16 18 20 22 24
du Lundi au Vendredi
Le week end
P1
P3
P2
{
12h à 14h
6.7 ABSENCE DETECTION (CONTINUED) CHOICE OF OPTIONS
PRESS ACTIONS DISPLAY
First, the device must be
turnedo.
Simultaneously press and hold
until detection options
1, 2 or OFF are displayed.
Allows you to switch from one
option to another.
Option1 Prioritizes savings
See the explanation on the
following page.
Option2 Prioritizes comfort
See the explanation on the
following page.
OFF Option
The absence
detection function is disabled.
Press for 3seconds
to save your selection. The
screen displays:
NOTE
In the event of a prolonged absence, the device progressively
lowers the set point temperature. When it detects a presence, it
reactsandreturnstotheoperatingmodedenedbytheuser.
AUTO
AUTO
6.
7 ABSENCE DETECTION (CONTINUED) EXPLANATION OF OPTIONS
OPTION 1 – PRIORITIZES COMFORT
DETECTION PILOT WIRE ORDER RESULT
COMFORT Gradual transition
inECO(90min)
ECO ECO mode
COMFORT Immediate transition
in Comfort
ECO ECO mode
OPTION2 – PRIORITIZES COMFORT
DETECTION PILOT WIRE ORDER RESULT
COMFORT Gradual transition
inECO(90min)
ECO ECO mode
COMFORT Gradual transition
inECO(90min)
ECO Immediate transition
in Comfort
NOTE
Gradual transition in ECO: In the event of a prolonged absence,
the temperature set point of the device decreases progressively
in30minstepstoCF-1thenCF-2,untilECOisdisplayed.
absence
movement
absence
movement
absence
movement
absence
movement
6.8 OPEN WINDOW DETECTION FUNCTION
PRESS ACTIONS DISPLAY
Enable the function.
Press and hold until the window
icon is displayed on the screen.
The window icon and the green
indicatorashwhenthedevice
turnsofollowingadetection
event.
Following an interruption,
press again to
restart the device.
Disable the function.
Press and hold until the window
icon disappears from the
screen.
NOTE
Thisfunctionautomaticallyturnsotheheaterintheeventofa
sharp fall in room temperature (e.g., an open window or door).
6.9 SIMPLE PARENTAL LOCK
PRESS ACTIONS DISPLAY
Lock the keypad.
Simultaneously press and hold
for3seconds.
Unlock the keypad.
Simultaneously press and hold
for3seconds.
NOTE
This function enables you to block access to device settings to
preventanyinopportunemodication.TheheatingOn/Okey
remains active, even when the parental lock is enabled.
Mode
Mode
Mode
AUTO
Mode
AUTO
AUTO
AUTO
AUTO
AUTO
AUTO
AUTO
AUTO
Indicateur de
consommation
0h 2 4 6 8 10 12 14 16 18 20 22 24
5h à 9h 17h à 23h
{
{
du Lundi au Vendredi
0h 2 4 6 8 10 12 14 16 18 20 22 24
5h à 9h 17h à 23h
5h à 23h
{
{
{
0h 2 4 6 8 10 12 14 16 18 20 22 24
du Lundi au Vendredi
Le week end
P1
P3
P2
{
12h à 14h
AUTO
Mode
Mode
Indicateur de
consommation
0h 2 4 6 8 10 12 14 16 18 20 22 24
5h à 9h 17h à 23h
{
{
du Lundi au Vendredi
0h 2 4 6 8 10 12 14 16 18 20 22 24
5h à 9h 17h à 23h
5h à 23h
{
{
{
0h 2 4 6 8 10 12 14 16 18 20 22 24
du Lundi au Vendredi
Le week end
P1
P3
P2
{
12h à 14h
6.9 PARENTAL LOCK WITH CODE
SEQUENCE FOR LOCKING WITH YOUR PERSONAL CODE
NOTE
This function enables you to block access to device settings to
preventanyinopportunemodication.TheheatingOn/Okey
remains active, even when the parental lock is enabled.
SEQUENCE FOR UNLOCKING WITH YOUR PERSONAL CODE
Conrm
with Conrm
with
Conrm
with Conrm
with
10s
3s
Conrm
with
Modify
using
Modify
using
Modify
using
Modify
using
Conrm
with
Mode
Mode
Mode
AUTO
Mode
AUTO
AUTO
AUTO
AUTO
AUTO
AUTO
AUTO
AUTO
Indicateur de
consommation
0h 2 4 6 8 10 12 14 16 18 20 22 24
5h à 9h 17h à 23h
{
{
du Lundi au Vendredi
0h 2 4 6 8 10 12 14 16 18 20 22 24
5h à 9h 17h à 23h
5h à 23h
{
{
{
0h 2 4 6 8 10 12 14 16 18 20 22 24
du Lundi au Vendredi
Le week end
P1
P3
P2
{
12h à 14h
AUTO
Mode
Mode
Indicateur de
consommation
0h 2 4 6 8 10 12 14 16 18 20 22 24
5h à 9h 17h à 23h
{
{
du Lundi au Vendredi
0h 2 4 6 8 10 12 14 16 18 20 22 24
5h à 9h 17h à 23h
5h à 23h
{
{
{
0h 2 4 6 8 10 12 14 16 18 20 22 24
du Lundi au Vendredi
Le week end
P1
P3
P2
{
12h à 14h
approx.
Mode
Mode
Mode
AUTO
Mode
AUTO
AUTO
AUTO
AUTO
AUTO
AUTO
AUTO
AUTO
Indicateur de
consommation
0h 2 4 6 8 10 12 14 16 18 20 22 24
5h à 9h 17h à 23h
{
{
du Lundi au Vendredi
0h 2 4 6 8 10 12 14 16 18 20 22 24
5h à 9h 17h à 23h
5h à 23h
{
{
{
0h 2 4 6 8 10 12 14 16 18 20 22 24
du Lundi au Vendredi
Le week end
P1
P3
P2
{
12h à 14h
AUTO
Mode
Mode
Indicateur de
consommation
0h 2 4 6 8 10 12 14 16 18 20 22 24
5h à 9h 17h à 23h
{
{
du Lundi au Vendredi
0h 2 4 6 8 10 12 14 16 18 20 22 24
5h à 9h 17h à 23h
5h à 23h
{
{
{
0h 2 4 6 8 10 12 14 16 18 20 22 24
du Lundi au Vendredi
Le week end
P1
P3
P2
{
12h à 14h
Conrm
with Conrm
with
Conrm
with
Conrm
with Conrm
with
Modify
using
Modify
using
Modify
using
Modify
using
Mode
Mode
Mode
AUTO
Mode
AUTO
AUTO
AUTO
AUTO
AUTO
AUTO
AUTO
AUTO
Indicateur de
consommation
0h 2 4 6 8 10 12 14 16 18 20 22 24
5h à 9h 17h à 23h
{
{
du Lundi au Vendredi
0h 2 4 6 8 10 12 14 16 18 20 22 24
5h à 9h 17h à 23h
5h à 23h
{
{
{
0h 2 4 6 8 10 12 14 16 18 20 22 24
du Lundi au Vendredi
Le week end
P1
P3
P2
{
12h à 14h
AUTO
Mode
Mode
Indicateur de
consommation
0h 2 4 6 8 10 12 14 16 18 20 22 24
5h à 9h 17h à 23h
{
{
du Lundi au Vendredi
0h 2 4 6 8 10 12 14 16 18 20 22 24
5h à 9h 17h à 23h
5h à 23h
{
{
{
0h 2 4 6 8 10 12 14 16 18 20 22 24
du Lundi au Vendredi
Le week end
P1
P3
P2
{
12h à 14h
- If incorrect code - If correct code
Mode
Mode
Mode
AUTO
Mode
AUTO
AUTO
AUTO
AUTO
AUTO
AUTO
AUTO
AUTO
Indicateur de
consommation
0h 2 4 6 8 10 12 14 16 18 20 22 24
5h à 9h 17h à 23h
{
{
du Lundi au Vendredi
0h 2 4 6 8 10 12 14 16 18 20 22 24
5h à 9h 17h à 23h
5h à 23h
{
{
{
0h 2 4 6 8 10 12 14 16 18 20 22 24
du Lundi au Vendredi
Le week end
P1
P3
P2
{
12h à 14h
AUTO
Mode
Mode
Indicateur de
consommation
0h 2 4 6 8 10 12 14 16 18 20 22 24
5h à 9h 17h à 23h
{
{
du Lundi au Vendredi
0h 2 4 6 8 10 12 14 16 18 20 22 24
5h à 9h 17h à 23h
5h à 23h
{
{
{
0h 2 4 6 8 10 12 14 16 18 20 22 24
du Lundi au Vendredi
Le week end
P1
P3
P2
{
12h à 14h
3s
Mode
Mode
Mode
AUTO
Mode
AUTO
AUTO
AUTO
AUTO
AUTO
AUTO
AUTO
AUTO
Indicateur de
consommation
0h 2 4 6 8 10 12 14 16 18 20 22 24
5h à 9h 17h à 23h
{
{
du Lundi au Vendredi
0h 2 4 6 8 10 12 14 16 18 20 22 24
5h à 9h 17h à 23h
5h à 23h
{
{
{
0h 2 4 6 8 10 12 14 16 18 20 22 24
du Lundi au Vendredi
Le week end
P1
P3
P2
{
12h à 14h
AUTO
Mode
Mode
Indicateur de
consommation
0h 2 4 6 8 10 12 14 16 18 20 22 24
5h à 9h 17h à 23h
{
{
du Lundi au Vendredi
0h 2 4 6 8 10 12 14 16 18 20 22 24
5h à 9h 17h à 23h
5h à 23h
{
{
{
0h 2 4 6 8 10 12 14 16 18 20 22 24
du Lundi au Vendredi
Le week end
P1
P3
P2
{
12h à 14h
OR
6.10 CONSUMPTION SCALE
INFORMATION DISPLAY
This indicator provides information about the
eectofyoursettingsonyourconsumption.
Indicator
Green = Economical
Red = Less economical
NOTE
For economical operation, it is recommended not to exceed a
temperature of 19°C on average over the entire dwelling.
6.11 SETTING OF AUXILIARY FUNCTIONS
PRESS ACTIONS DISPLAY
First, the device must be
turnedo.
Simultaneously press
andholdfor3seconds.The
screen displays:
Hold for 3seconds
toseetherst
setting screen:
Screen backlighting.
SETTINGS SCREEN1
BACKLIGHTING TIME SELECTION
Select one of these screen
options.
| =10seconds
O= permanent
Allows you to switch to the
next settings screen.
Consumption
scale
NIV

This manual suits for next models

5

Other CONVECTAIR Electric Heater manuals

CONVECTAIR CALYPSO 7825 User manual

CONVECTAIR

CONVECTAIR CALYPSO 7825 User manual

CONVECTAIR APERO 7359 BB Manual

CONVECTAIR

CONVECTAIR APERO 7359 BB Manual

CONVECTAIR SOPRANO Installation guide

CONVECTAIR

CONVECTAIR SOPRANO Installation guide

CONVECTAIR adagio 7640 Manual

CONVECTAIR

CONVECTAIR adagio 7640 Manual

CONVECTAIR OPERA Manual

CONVECTAIR

CONVECTAIR OPERA Manual

CONVECTAIR Piccolo User manual

CONVECTAIR

CONVECTAIR Piccolo User manual

CONVECTAIR APERO Installation guide

CONVECTAIR

CONVECTAIR APERO Installation guide

CONVECTAIR APERO 7358 C User manual

CONVECTAIR

CONVECTAIR APERO 7358 C User manual

CONVECTAIR FLB 5100 User manual

CONVECTAIR

CONVECTAIR FLB 5100 User manual

CONVECTAIR FOR User manual

CONVECTAIR

CONVECTAIR FOR User manual

CONVECTAIR JAZZ 7618 User manual

CONVECTAIR

CONVECTAIR JAZZ 7618 User manual

CONVECTAIR SAMBA II 7837 Manual

CONVECTAIR

CONVECTAIR SAMBA II 7837 Manual

Popular Electric Heater manuals by other brands

Sunhouse SSHE Series instruction manual

Sunhouse

Sunhouse SSHE Series instruction manual

Strend Pro IFJ 02-400 instruction manual

Strend Pro

Strend Pro IFJ 02-400 instruction manual

Dimplex CDE24ECC instructions

Dimplex

Dimplex CDE24ECC instructions

Fenix Ecosun K+ Series Installation and user guide

Fenix

Fenix Ecosun K+ Series Installation and user guide

RW Flame RFI-3601LA Service manual

RW Flame

RW Flame RFI-3601LA Service manual

Heatscope MHS-SM1600 Original installation and instruction manual

Heatscope

Heatscope MHS-SM1600 Original installation and instruction manual

Holmes HFH110 owner's guide

Holmes

Holmes HFH110 owner's guide

Gabarron RF3P Installation instructions and user guide

Gabarron

Gabarron RF3P Installation instructions and user guide

Trotec TEH 200 operating manual

Trotec

Trotec TEH 200 operating manual

Hoffman nVent DAH1002A manual

Hoffman

Hoffman nVent DAH1002A manual

Dimplex CUH05B31TG owner's manual

Dimplex

Dimplex CUH05B31TG owner's manual

ALPATEC Ligne BH2 user manual

ALPATEC

ALPATEC Ligne BH2 user manual

HeatQ HEC 1.0 Assembly instruction

HeatQ

HeatQ HEC 1.0 Assembly instruction

Sanotechnik B150 manual

Sanotechnik

Sanotechnik B150 manual

DeLonghi EW7507EBK Instructions for use

DeLonghi

DeLonghi EW7507EBK Instructions for use

Campomatic FH200 manual

Campomatic

Campomatic FH200 manual

Strend Pro IFH03-150-G instruction manual

Strend Pro

Strend Pro IFH03-150-G instruction manual

Fahrenheat FBE15002 Installation, operation & maintenance instructions

Fahrenheat

Fahrenheat FBE15002 Installation, operation & maintenance instructions

manuals.online logo
manuals.online logoBrands
  • About & Mission
  • Contact us
  • Privacy Policy
  • Terms and Conditions

Copyright 2025 Manuals.Online. All Rights Reserved.