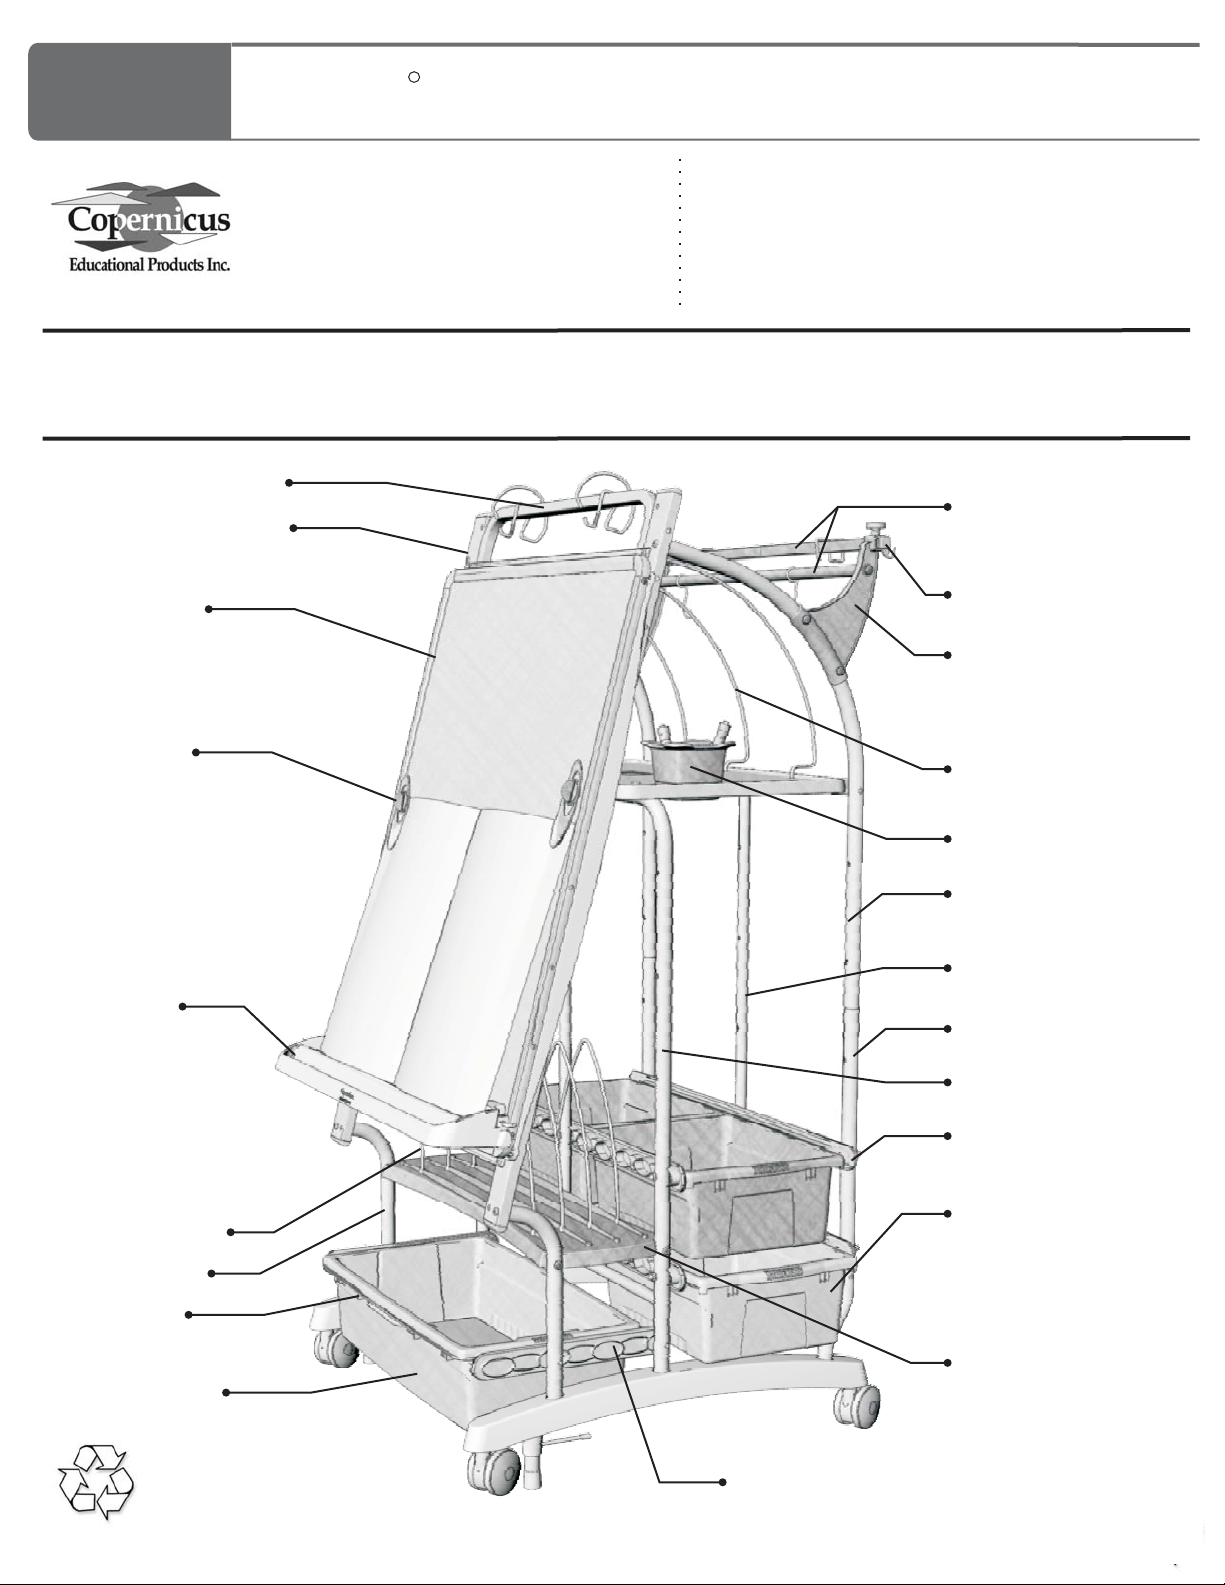
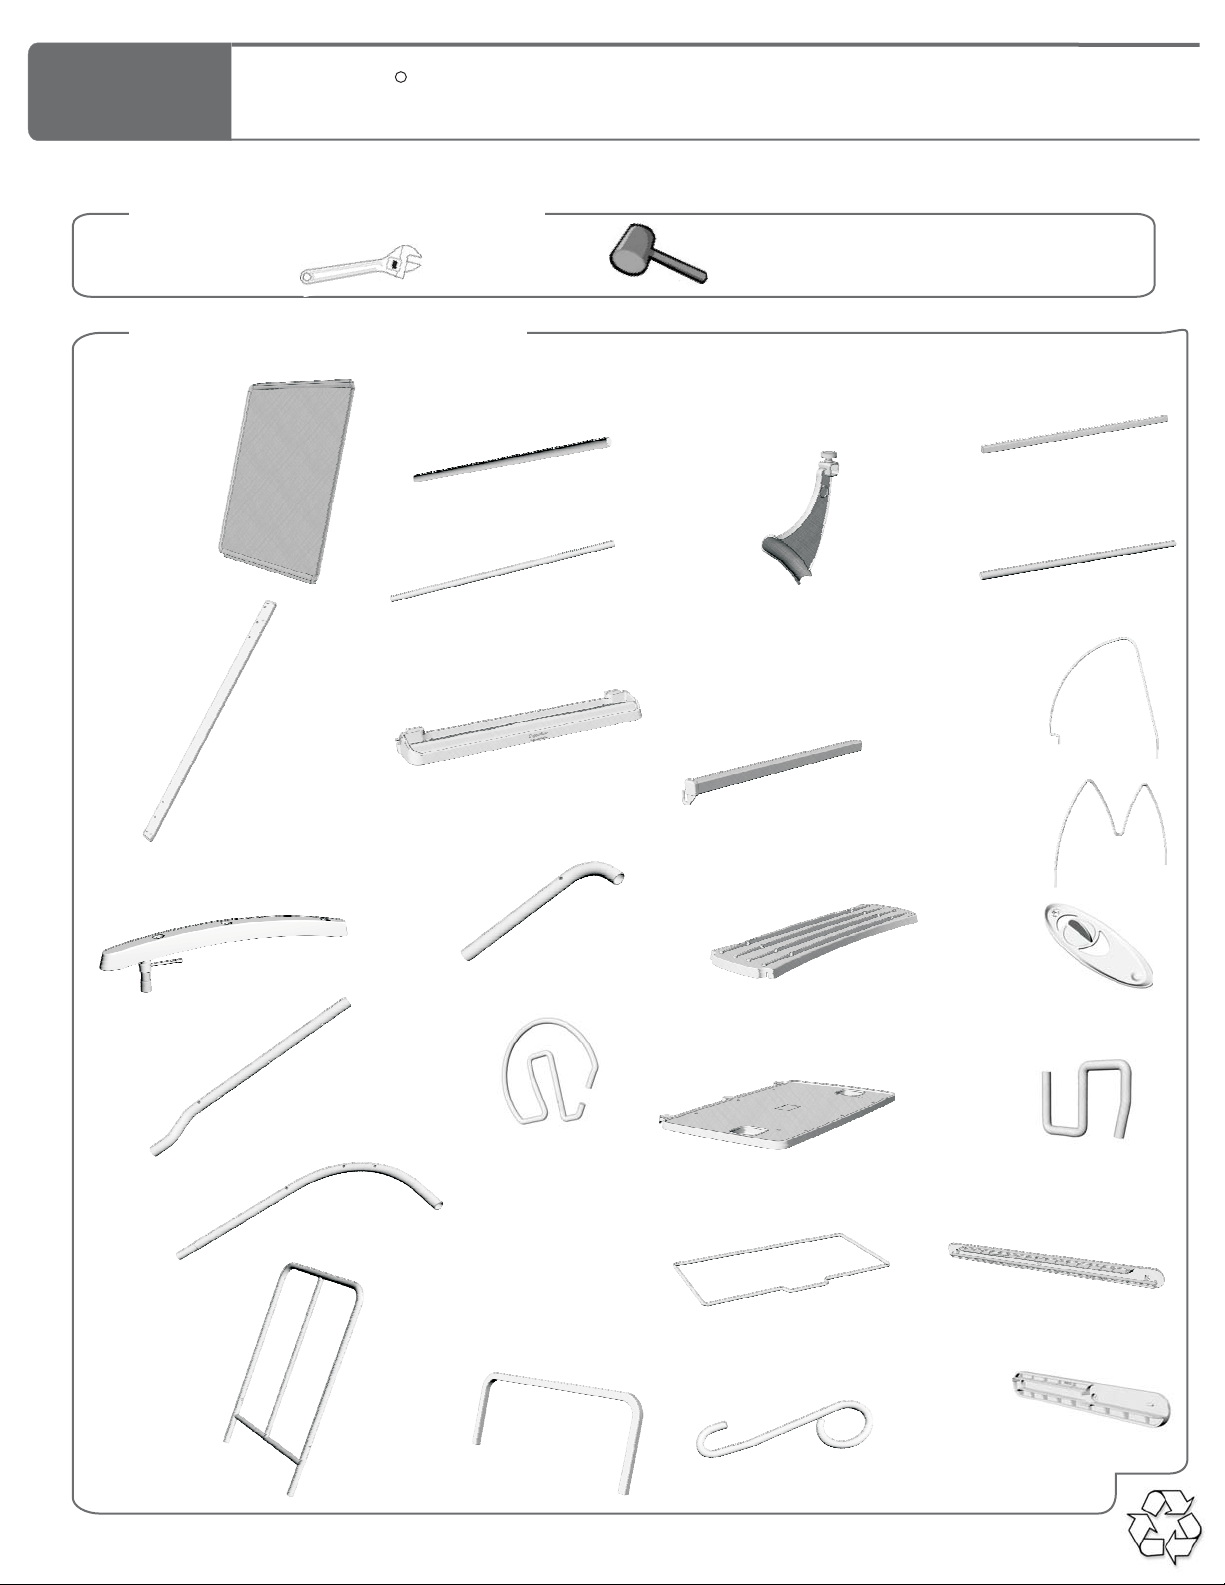
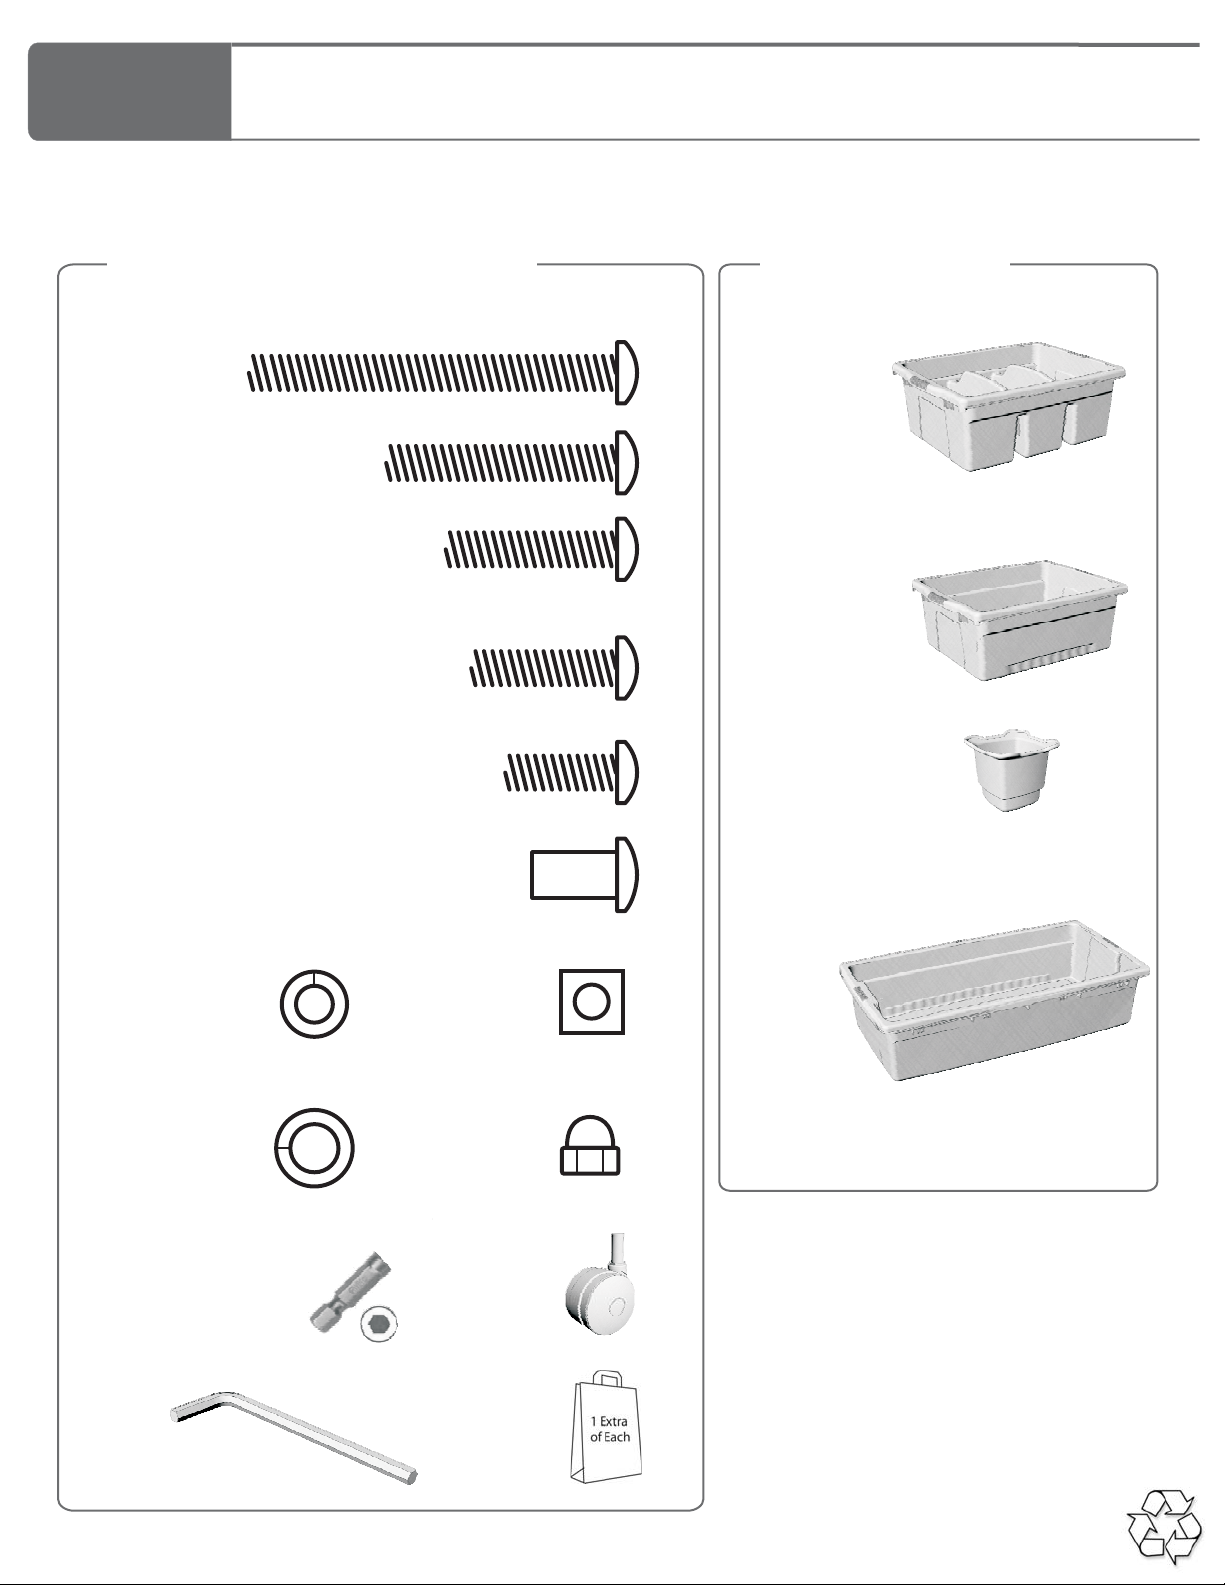
Copernicus Royal Inspiration Station User manual
Other Copernicus Educational Equipment manuals

Copernicus
Copernicus Tech Tub2 User manual

Copernicus
Copernicus BE005 User manual

Copernicus
Copernicus Royal RC005 2011 B User manual

Copernicus
Copernicus LLS100 User manual

Copernicus
Copernicus Royal Inspiration Station User manual

Copernicus
Copernicus King Royal RC146 User manual

Copernicus
Copernicus BE1 2021 B User manual

Copernicus
Copernicus Royal RC005 User manual

Copernicus
Copernicus Royal Reading Writing Center User manual

Copernicus
Copernicus PE4-EXT User manual

Copernicus
Copernicus FTT1112 User manual

Copernicus
Copernicus Tech Tub TEC600C User manual

Copernicus
Copernicus OLC1 User manual

Copernicus
Copernicus Tech Tub Premium User manual

Copernicus
Copernicus ELS2 User manual

Copernicus
Copernicus PTE78 User manual

Copernicus
Copernicus ELS1 User manual

Copernicus
Copernicus iRover2 IFP500 User manual

Copernicus
Copernicus CS700-CLR-P User manual

Copernicus
Copernicus IS2 User manual