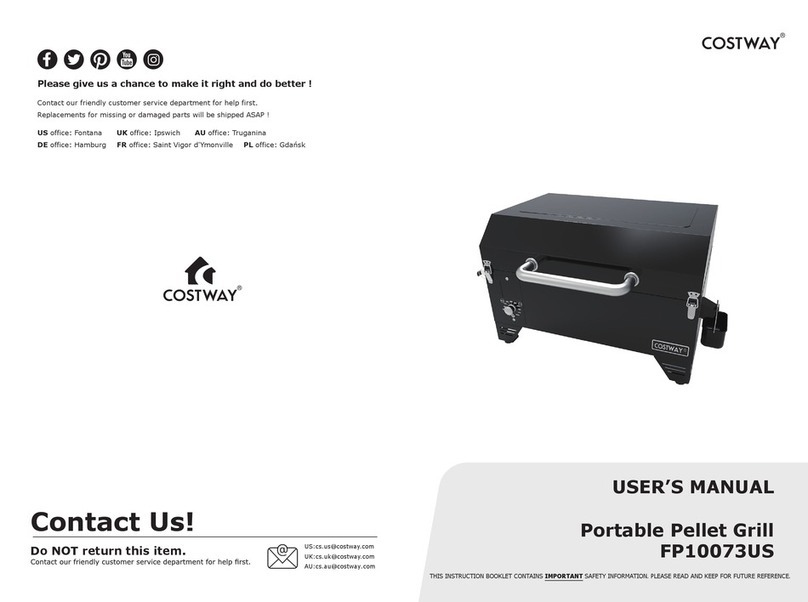
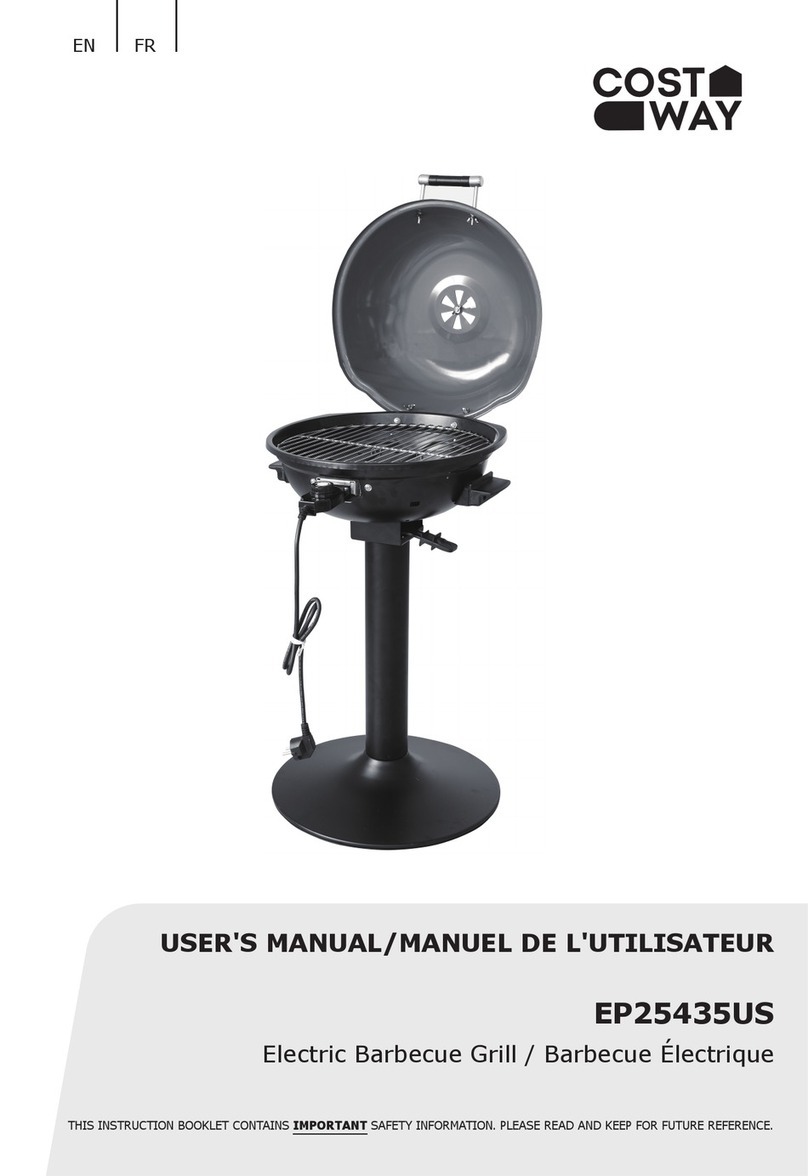
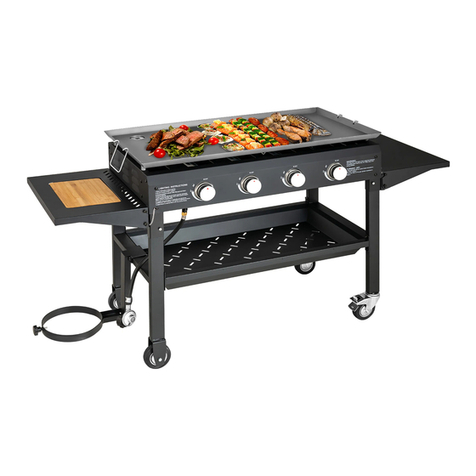
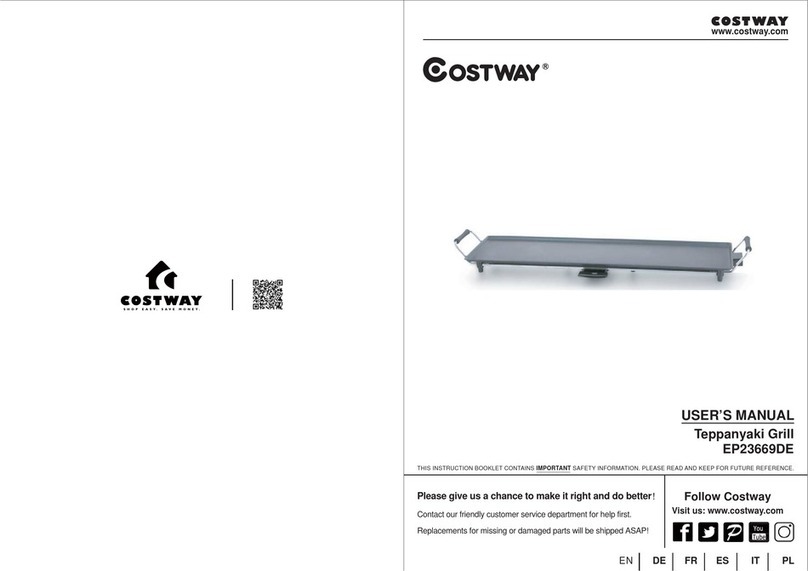
Costway FP10098US-RE User manual

Please give us a chance to make it right and do better !
Contact our friendly customer service department for help first.
Replacements for missing or damaged parts will be shipped ASAP !
Contact Us!
Do NOT return this item.
Wood Pellet Grill and Smoker
FP10098US-RE
USER’S MANUAL
THIS INSTRUCTION BOOKLET CONTAINS IMPORTANT SAFETY INFORMATION. PLEASE READ AND KEEP FOR FUTURE REFERENCE.
US office: Fontana UK office: Ipswich AU office: Truganina
DE office: Hamburg
FR office: Saint Vigor d'Ymonville
PL office: Gdańsk
US:cs.us@costway.com
UK:cs.uk@costway.com

Before You Start
Please read all instructions carefully.
Retain instructions for future reference.
Separate and count all parts and hardware.
Read through each step carefully and follow the proper order.
We recommend that, where possible, all items are assembled
near to the area in which they will be placed in use, to avoid
moving the product unnecessarily once assembled.
Always place the product on a flat, steady and stable surface.
Keep all small parts and packaging materials for this product
away from babies and children as they potentially pose a serious
choking hazard.
BEFORE YOU START
SAFETY INFORMATION
MAJOR CAUSES OF APPLIANCE FIRES ARE A RESULT OF POOR
MAINTENANCE AND A FAILURE TO MAINTAIN REQUIRED
CLEARANCE TO COMBUSTIBLE MATERIALS. IT IS OF UTMOST
IMPORTANCE THAT THIS PRODUCT SHOULD BE USED ONLY IN
ACCORDANCE WITH THE FOLLOWING INSTRUCTIONS.
1. Please read all instructions carefully.
2. Retain instructions for future reference.
3. Separate and count all parts and hardware.
4. Read through each step carefully and follow the proper order.
We recommend that, where possible, all items are assembled near
to the area in which they will be placed in use, to avoid moving the
product unnecessarily once assembled.
5. Always place the product on a flat, steady and stable surface.
6. Keep all small parts and packaging materials for this product
away from babies and children as they potentially pose a serious
choking hazard.
Please read and understand this entire manual before
attempting to assemble, operate or install the product. This
will ensure you receive the most enjoyable and trouble-free
operation of your new wood pellet grill. We also advise you
to retain this manual for future reference.
02 03

DANGERS AND WARNINGS
1. A minimum clearance of 915mm (36 inches) from combustible
constructions to the sides of the grill, and 915mm (36 inches) from
the back of the grill to combustible constructions must be maintained.
Do not install appliance on combustible floors, or floors protected with
combustible surfaces unless proper permits and permissions are
obtained by authorities having jurisdiction. Do not use this appliance
indoors or in an enclosed, unventilated area. This wood pellet
appliance must not be placed under overhead combustible ceiling or
overhang. Keep your grill in an area clear and free from combustible
materials, gasoline and other flammable vapors and liquids.
Should a grease fire occur, turn the grill OFF and leave the
lid closed until the fire is out. Unplug the power cord from
the connected outlet. Do not throw water on the unit. Do
not try to smother the fire. Use of an all-class (class ABC)
approved fire extinguisher is valuable to keep on site. If an
uncontrolled fire does occur, call the Fire Department.
2. Keep electrical supply cords and the fuel away from heated
surfaces. Do not use your grill in the rain or around any water source.
3. After a period of storage, or non-use, check the burn grate for
obstructions, the hopper for foreign objects, and any air blockage
around the fan intake, chimney, or rear barrel exhaust holes. Clean
before use. Regular care and maintenance is required to prolong the
lifespan of your unit. If the grill is stored outside during the rainy
season or seasons of high humidity, care should be taken to ensure
that water does not get into the hopper. When wet or exposed to high
humidity, wood pellets will expand greatly, decompose, and may jam
the feed system. Always disconnect the power, before performing any
service or maintenance.
4. It is recommended to use heat-resistant barbecue mitts or gloves
when operating the grill. Do not use accessories not specified for use
with this appliance. Do not put a barbecue cover or anything
flammable in the storage space area under the barbecue.
5. To prevent fingers, cloth, or other objects from encountering the
auger feed system, the appliance is equipped with a metal safety
screen, mounted to the interior of the hopper. This screen must not
be removed unless directed by Customer Service.
Do not transport your grill while in use or while the grill is hot.
Ensure the fire is completely out and that the grill is
completely cool to the touch before moving.
6. Parts of the barbecue may be very hot and serious injury may
occur. Keep young children and pets away while in use.
7. Do not enlarge igniter holes or burn pots. Failure to follow this
warning could lead to a fire hazard and bodily harm.
8. Product may have sharp edges or points. Contact may result in
injury. Handle with care.
This appliance is not recommended for children, persons with
reduced physical, sensory or mental capabilities, or lack of
experience and knowledge, unless they are under direct
supervision or instruction by a person responsible for their
safety.
DISPOSAL OF ASHES
Ashes should be placed in a metal container with a tight-fitting lid.
The closed container of ashes should be placed on a noncombustible
floor or on the ground, well away from all combustible materials,
pending final disposal. When ashes are disposed by burial in soil, or
otherwise locally dispersed, they should be retained in a closed
container until all cinders have thoroughly cooled.
04 05

O
O
O O
WOOD PELLET FUEL
This pellet cooking appliance is designed and approved for pelletized,
all natural, wood fuel only. You must only use all natural wood pellets,
designed for burning in pellet barbecue grills. Do not use fuel with
additives.
Wood pellets are highly susceptible to moisture and should always be
stored in an airtight container. If you are storing your grill, without
use for an extended period, we recommend clearing all pellets from
your grill's hopper and auger to prevent jams.
Do not use spirit, petrol, gasoline, lighter-fluid, or kerosene
for lighting or refreshing a fire in your grill. Keep all such
liquids well away from the appliance when in use.
CREOSOTE
Creosote, or soot, is a tar-like substance. When burning, it produces
black smoke with a residue which is also black in color. Soot or
creosote is formed when the appliance is operated incorrectly, such
as: blockage of the combustion fan, failure to clean and maintain the
burn area, moisture affected pellets, or poor air-to-fuel combustion.
It is dangerous to operate this appliance should the flame become
dark, sooty, or if the burn pot is overfilled with pellets. When ignited,
this creosote makes an extremely hot and uncontrolled fire, like a
grease fire. Should this happen, turn the unit OFF, let it cool
completely, then inspect for maintenance and cleaning. It commonly
accumulates along exhaust areas.
If creosote has formed within the unit, allow the unit to warm
up at a low temperature, turn off the appliance, then wipe
away any formation with a hand towel. Like tar, it is much
easier to clean when warm, as it becomes liquid.
ELECTRICAL WIRE DIAGRAM
The Digital Control Board system is an intricate and valuable piece of
technology. For protection from power surges and electrical shorts,
consult the wire diagram below to ensure your power source is
sufficient for the operation of the unit.
NOTE:
Electrical
components,
passed by
product safety
testing and
certification
services,
comply with a
testing
tolerance of ±
5-10 percent
INDEX
1. DIGITAL CONTROL BOARD
2. GRILL TEMPERATURE SENSOR
3. POWER CORD
4. GROUND
5. FIRE POT
6. IGNITER KIT (120V/60HZ/200W)
7. AUGER FEED SYSTEM (1.6RMP, 1.2 LB/H)
8. DRAFT FAN (3200RPM)
9. (G): GROUND (K): BLACK (P): PURPLE
10. (W): WHITE (O): ORANGE (R): RED
06 07

1
2
3
27
26
25 4
5
6
7
8
10
13
14
12
15
16
17
21
19
18
11
20
23
24
22
9
SECTION ONE: ASSEMBLY INSTRUCTIONS
INSTALLING THE FAT TRAY
BRACKET TO GRILL BODY:
MOUNTING THE WHEELS
AND LEGS TO GRILL BODY:
INSTALLING THE HANDLES:
COMPONENT LIST
08 09

Item
1
2
3
4
5
6
7
8
9
10
11
12
13
14
15
16
17
18
19
20
21
22
23
24
25
26
27
Qty
1
2
1
1
1
1
1
1
1
1
1
4
1
2
2
1
1
1
1
1
1
1
1
1
1
1
1
Description
Grill Lid Hinge
Grill Body Hinge
Grill Lid
Warming Rack
Cooking Rack
Drain Pan
Fire Pot
Fire Pot Support
RTD Sensor
Grill Body Right Panel
Left Handle
Grill Wheels
Fat Box Support
Fat Box
Buckle
Controller
Burner Box Assembly
Grill Body Light Panel
Auger Motor
Fan Motor
Auger Screw Rod
Strain Relief
Power Cord
Igniter
Front Handle
Hopper Guard
Hopper Lid
SECTION TWO: DIGITAL THERMOSTAT KIT
Item Description
The LED Screen is used as
the information center for
your grill.
The LED screen will display
the current grill temperature
(ACTUAL), setting
temperature and meat probe
temperature.
LED
SCREEN
Power switch, pls turn it on
before your start and don't
forget to turn it off after bbq.
ON/OFF
SWITCH
There are ten grill modes for
your choice and temperature
range is from 1 65~450°F.
You can choose your desired
temperature through the
controller knob.
Controller
Knob
The Smo ke mode is the
lowest smoking mode for the
grill. The grill operates at the
lowest temperature, without
the fire going out.
SMOKE
MODE
The High Setting on the Temperature Control Dial is the
highest heat level for the unit. The grill operates at the
highest temperature. When the lid is open, the grill will
run at this speed to compensate for the loss of heat in
the barrel.
HIGH
MODE
When the meat probe is connected, the temperature is
displayed on the LED Screen.
PROB E
INTERFACE
This button is used to indicate the meat pro be
temperature.
PROB E
SELECTOR
10 11

This pellet grill comes with an automatic shut down cycle. Pls set
Knob to the Shutdown Cycle position after grilling, the Induction
Fan will keep running for ten minutes to cool down the grill
temperature. And the controller will be shut down automatically
after 10 mins. CAUTION! Pls don’t forget to turn of the button after
cool down and check the grill totally.
(To be used on initial firing or anytime the Grill runs out of
Pellets) In order to operate the Grill properly, you must
allow the Auger Tube to be “charged” with Pellets first.
Control Shutdown cycle
The controller comes with 4 safety features that will help you to
keep the grill operating correctly.
1. ErH- High Temperature alarm- BBQ has gone over 500 degrees
for 10 seconds. This will automatically cause a shut down. Please
check to see why this error happened before restarting.
Common issues would be grease fire or overabundance of pellets in
the burn pot.
2. ErO- which means the RTD is not connected, please turn it off,
unplug the unit and check the wire connection of RTD sensor. If
problem persists, RTD sensor may need to be replaced.
3. ErL, which means the temperature dropped below the 120
degrees over 30 mins. Common issues that cause this would be a
pellet void or no pellets in the hopper.
4. ErS, which means the RTD has a short circuit, pls check the RTD
connecting situation.
1) Open the Lid and remove the Racks and Drain Pan etc parts
from the Grill.
2) Plug the Power Cord into an appropriate, grounded electrical
outlet.
3) Open the Pellet Hopper Lid and check the Auger System, make
sure there are no foreign objects. Press the “ON/OFF” button and
the turn the Controller knob to smoke mode to check the Auger is
running. At the same time, place your fingers over the Firepot and
feel the air movement from
the Draft Inducer Fan. Look to see if the Hot Rod is getting hot (it
will turn red soon). CAUTION! Do not touch it. Turn the knob to
SHUT DOWN CYCLE.
4) Fill the Pellet Hopper with BRAND WOOD PELLETS. WARNING!
Use only BRAND WOOD PELLETS. Turn the Knob to HIGH Mode.
Note: During the initial charging of the Auger, it will take a while
for the Pellets to move from the Pellet Hopper to the Firepot. When
the Pellets begin to fall into the Firepot, turn the Knob to Shut
Down Cycle.
5) Set the Knob to SMOKE Mode, once you see flames come out of
the Firepot, turn the Knob to SHUT DOWN CYCLE, and let the Grill
cool down totally. Then install the racks and Drain Pan at the
proper locations. Recommendation: For ease of clean-up, line the
Grease Drain Pan with heavyduty aluminum foil. Be sure the edges
and ends of the foil are tight against the bottom of the Grease
Drain Pan.
Control Safety Features
SECTION THREE: INITIAL FIRING INSTRUCTIONS
NOTE: While you are operating this Grill, Keep a
minimum clearance of 36 inches from combustibles
12 13

6) With the Lid open, set the Knob to SMOKE Mode. You can see
whitish-gray smoke coming out of the Grill as the Pellets ignite in
approximately 2 minutes. After assuring the Pellets have ignited,
close the Lid and set the Knob to your desired mode.
7) Note: Before cooking the first batch of food in your new Grill,
you will need to season the Grill. Turn the Knob to HIGH Mode and
run for 45 minutes at this seting with the Lid closed. This must be
done before first bbq.
HOW TO ENJOY BBQ DURING THE HOT SEASONS?
Follow these few suggestions on how to enjoy your grill during the
hot seasons:
1. Adjust your cooking temperatures downward. This helps to
avoid unwanted flare-ups.
2. Use a meat thermometer to determine the internal temperature
of your foods. This helps in preventing your meat from overcooking
and drying out.
3. Even in hot weather, it is still better to cook with the lid of your
grill down.
4. You can keep foods hot by wrapping them in foil and placing
them in an insulated cooler. Stuff crumpled up newspaper around
the foil and this will keep food hot for 3 to 4 hours.
HOW TO ENJOY BBQ DURING THE COLD SEASONS?
Follow these suggestions on how to enjoy your grill throughout the
cooler months:
1. If smoking at low temperatures fails, increase the temperature
slightly to achieve the same results.
HOW TO INCREASE SMOKE FLAVOR?
Keep the grill at the temperature range of 165~250°F as long as
you can. This range is used to slow roast, increase smoky flavor,
and to keep foods warm. Infuse more smoke flavor and keep your
meats juicy by cooking longer at a lower temperature (also known
as low and slow).
Recommended for the big turkey on Thanksgiving, juicy ham at
Easter. Smoking is a variation on true barbecuing and is truly the
main advantage of grilling on a wood pellet grill. Hot smoking,
SECTION FOUR: GRILLING TIPS
2. Preparation– Get everything you require ready in the kitchen
before you head outdoors. During the winter, move your grill to an
area that is out of the wind and direct cold. Check local bylaws
regarding the proximity of your grill in relation to your home
and/or other structures. Put everything you need on a tray, bundle
up tight, and get it done!
3. To help keep track of the outside temperature, place an outdoor
thermometer close to your cooking area. Keep a log or history of
what you cooked, the outdoor temperature, and the cooking time.
This will help later down the road to help you determine what to
cook and how long it will take.
4. In very cold weather, increase your preheating time by at least
20 minutes.
5. Avoid litiing the lid any more than necessary. Cold gusts of wind
can completely cool your grill temperature. Be flexible with your
serving time; add extra cooking time each time you open the lid.
6. Have a heated platier or a dish cover ready to keep your food
warm while making the trip back inside.
7. Ideal foods for winter cooking are those that require litile
attention, such as roasts, whole chickens, ribs, and turkey. Make
your meal preparation even easier by adding simple items such as
vegetables and potatoes.
14 15

GRILLING AND SMOKING
Smoking and grilling styles of cooking can give you different
results based on time and temperature.
For best results, keep a record of what you cooked, at what
temperature, how long you cooked for, and the results. Adjust to
your taste for the next time. Practice makes perfect.
The culinary art of hot smoking refers to longer cooking times but
results in more natural wood flavor(and a sought-after smoke ring)
on your meats.
Higher cooking temperatures result in a shorter cooking time,
locking in less smoke flavor.
COOKING PREPARATION
Be prepared, or Mise en Place. This refers to preparing the cooking
recipe, fuel, accessories, utensils, and all ingredients you require at
grill side before you start cooking. Also, read the entire recipe, start
to finish, before lighting the grill.
A BBQ floor mat is very useful. Due to food handling accidents and
cooking spatter, a BBQ floor mat would protect a deck, patio, or stone
platform from the possibility of grease stains or accidental spills.
SECTION FIVE: GRILLING GUIDELINES
Smoking and grilling styles of cooking can give you different results
based on time and temperature. For best results, keep a record of
what you cooked, at what temperature, how long you cooked for, and
the results. Adjust to your taste for the next time. Practice makes
perfect. The culinary art of hot smoking refers to longer cooking times
but results in more natural wood flavor (and a sought-after smoke
ring) on your meats. Higher cooking temperatures result in a shorter
cooking time, locking in less smoke flavor.
another name for low and slow cooking, is generally done between
165-250°F. Hot smoking works best when longer cooking time is
required, such as large cuts of meats, fish, or poultry.
ATTACHED REGUALR GRILLING GUIDELINES FOR YOUR
REFERENCE
16 17
POULTRY
Turkey
(whole)
4.5-5.0 kg /
10-11 lbs.
5.3-6.4 kg /
12-14 lbs.
6.8-7.7 kg /
15-17 lbs.
8.2-10.0 kg /
18-22 lbs.
10.4-11.3 kg /
23-25 lbs.
Chicken
(whole)
1.36-2.26 kg /
3-5 lbs.
Grill 1 - 1.5 hours
Drumsticks,
Breasts
0.45 - 0.86 kg /
1 - 1½ lbs.
Grill 30-60 minutes
Small Game
Birds
0.45 - 0.86 kg
/1 - 1½ lbs.
Grill 30-45 minutes
Duck 1.36-2.26 kg /
3-5 lbs.
Roast or grill 2 - 2.5
hours
4.5-5.0 kg /
10-11 lbs.
5.3-6.4 kg /
12-14 lbs.
6.8-7.7 kg /
15-17 lbs.
8.2-10.0 kg /
18-22 lbs.
10.4-11.3 kg /
23-25 lbs.
Size Rare -
54°C
/ 130°F
Medium -
60°C
/ 140°F
Well Done
- 77°C
/ 170°F
PORK
Ham
(Fully Cooked &
Boneless Portion,
Smoked Picnic
Whole &
Bone-In)
2.5 cm / 1"
1.36-1.81 kg / 3-4 lbs.
1.81-2.72 kg / 4-6 lbs.
2.26-3.62 kg / 5-8 lbs.
4.53-5.44 kg / 10-12 lbs.
Loin Roast 1.36-1.81 kg / 3 - 4 lbs.
12 minutes
50 minutes - 1 hour
1 - 2 hours
1 - 2½ hours 2 - 2¾ hours
Precooked to Reheat
60°C / 140°F

18 19
Tenderloin 1.9-2.5 cm / ¾" - 1"
Rib Crown Roast 1.81-2.26 kg / 4 - 5 lbs.
Chop (loin,
rib)
1.9-2.5 cm / ¾" - 1"
3.1-3.9 cm / 1¼" - 1½"
Loin Roast
(boneless)
1.36-2.26 kg / 3-5 lbs.
Boston Butt (Pork
Shoulder)
3.62-4.53 kg / 8-10 lbs.
Rib Crown Roast 1½ - 2 hours
PORK Medium 66°C / 150°F Well Done 71°C / 160°F
2 - 3 hours
2 - 3 hours
30 - 45 minutes
1¾ - 2½ hours
93 - 98°C / 200 - 210°F
Internal Temperature
Loin Roast 1 - 2 hours
Chop (loin,
rib)
10 - 12 minutes
14 - 18 minutes
Tenderloin 20 - 30 minutes
Loin Roast
(boneless)
1¼ - 1¾ hours
Boston Butt (Pork
Shoulder)
BEEF
High
Steak (New York,
Porter-house, Ribeye,
Sirloin, T-bone, or
Tenderloin)
1.9 cm / ¾"
2.5 cm / 1"
3.8 cm / 1½" 5 cm / 2"
High
Skirt Steak 0.6 - 12.7 cm / ¼" - ½"
Medium
Flank Steak 0.45 - 0.86 kg
/ 1 - 1½ lbs., 1.9 cm / ¾"
Rare - 54°C
/ 130°F
Medium - 60°C
/ 140°F
Well Done - 65°C
/ 150°F
Medium
Kabob 2.5 - 3.8 cm / 1 - 1½" cubes
High/Medium
Tenderloin, whole 1.58 - 1.81 kg / 3½ - 4 lbs.
High/Medium
Ground Beef Patty 1.9 cm / ¾"
Medium
Rib-eye Roast
(boneless)
2.26 - 2.72 kg / 5 - 6 lbs.
High/Medium
Tri-tip Roast 0.9 - 1.13 kg / 2 - 2½ lbs.
Medium
Rib Roast 5.44 - 6.35 kg / 12 - 14 lbs.
Medium
Veal Loin Chop 2.5cm / 1"
Hot Smoke
Brisket 7.25 - 3.62 kg / 16 -18 lbs.
BEEF
Steak (New York,
Porter-house, Ribeye,
Sirloin, T-bone, or
Tenderloin)
Sear 8-10 minutes
Sear 10-12 minutes
Sear 10 minutes, grill 8-10 minutes
Sear 10 minutes, grill 10-14 minutes
Skirt Steak Sear 5-7 minutes
Kabob Grill 10 - 12 minutes
Tenderloin, whole Sear 10 minutes, grill 15-20 minutes
Ground Beef Patty Sear 4 minutes, grill 4-6 minutes
Rib-eye Roast
(boneless)
Grill 1½ - 2 hours
Tri-tip Roast Sear 10 minutes, grill 20-30 minutes
Rib Roast 2½ - 2¾ hours
Veal Loin Chop 10 - 12 minutes direct
Brisket Cook until internal temperature reaches 91°C /
195°F
Flank Steak Sear 4 minutes, grill 8-10 minutes

SECTION SIX: CARE AND MAINTENANCE
CLEANING FREQUENCY TIMETABLE (NORMAL USE)
1) CREOSOTE AND GREASE: Formation and need for removal.
When wood pellets are burned slowly, they produce tar and other
organic vapors that combine with expelled moisture to form creosote.
The creosote vapors condense in the relatively cool flue exhaust of a
slow burning fire. As a result, creosote accumulates on the flue lining.
When ignited, creosote makes an extremely hot fire. Airborne grease
particles will travel through the cooking chamber and some of this
airborne grease will accumulate on the flue lining, like the creosote,
which could be contributory to a fire. so, grease drippings from the food
will fall onto the Grease Drain Pan and be channeled into the Grease
Drain and then out of the Grill through the Grease Drain Tube, to be
collected in the Grease Bucket. Grease will accumulate in all these
locations.
1. Periodically, clean the grease out of the Drain Pan Assembly and
Grease Drain Tube. If too much grease is allowed to build up in the
Grease Drain Tube, or is allowed to plug the Grease Drain Tube, a
grease fire could result. We recommend cleaning these locations
regularly.
2. Remove the Porcelain Grills and the Grease Drain Pan. Wipe up any
remaining grease residue inside the Grill Frame with paper towels or
disposable rags. Paper towels or disposable rags can also be used to
wipe some of the grease off of the interior surfaces of the Grill.
3. Line your Grease Bucket with aluminum foil for easy clean-up. Empty
it occasionally, depending on amount of use. Change the aluminum foil
on the Grease Drain Pan frequently (sometimes, after each use,
depending upon what was cooked). Clean foil on the Grease Drain Pan
will make your food taste better and reduce the risk of a grease fire.
Pls note:
1. Press the grill OFF button and disconnect the Power Cord.
2. Accumulated grease is easier to clean off when the Grill is still warm
–not hot.
3. Be careful not to burn yourself. Gloves are recommended.
20 21
Scoop Out, Shop-Vac
Excess Debris
Bottom of Main
Grill
Every 5-6 Grill Sessions
Scoop Out, Shop-Vac
Excess Debris
Burn Pot Every 2-3 Grill Sessions
Burn Off Excess, Grill
Cleaning Brush
Cooking Grids After Each Grill Session
Scrape Main Plate with
Slider, Do Not Wash
Clean
Flame Broiler Every 5-6 Grill Sessions
Scrub Pad & Soapy
Water
Grease Tray After Each Grill Session
Allow Auger to Push
Out Sawdust, Leaving
Hopper Empty
Auger Feed
System
When Pellet Bag is Empty
Dust Out Interior, Wipe
Fan Blades with Soapy
Water
Hopper Electric
Components
Once A Year
Dust, Scrub Pad &
Soapy Water
Air Intake Vent Every 5-6 Grill Sessions
Scrub Pad & Soapy
Water
Temperature
Probes
Every 2-3 Grill Sessions
CLEANING METHOD
ITEM CLEANING FREQUENCY

2) Cleaning outside surfaces:
Pls note: Press the grill OFF button and disconnect the Power Cord.
Use a disposable rag or cloth, dampened with warm soapy water to
wipe the grease from the
outside of the Grill. DO NOT use oven cleaner, abrasive cleansers, or
abrasive cleaning pads on the
outside Grill surfaces.
3) Outside Storage:
Pls note: If the Grill is stored outside during the rainy season, care
should be taken to ensure that water does not get into the Pellet
Hopper. Wood pellets, when wet, expand greatly and will jam your
Auger. A Grill Cover to protect the Grill is highly recommended!
4) Cleaning the Porcelain Grills:
Pls note: The cleaning of the Porcelain Grills works best while they are
still warm. Be careful not to burn yourself. We recommend keeping a
long-handled cleaning brush near the Grill. After removing your food,
give the Porcelain Grill a quick brushing. It takes only a minute and it
will be ready the next time you want to use the Grill.
5) Cleaning the ash from inside and around the Firepot:
Excess ash in the Firepot may cause your fire to go out, especially in the
“SMOKE” setiing. The Firepot should be inspected occasionally and
cleaned to remove the ash buildup. Again, cleaning the ash from in and
around the Firepot should be done only when the Grill is COLD.
1. Remove the Porcelain Grills and Grease Drain Pan to provide access
to the Firepot and the interior of the Grill. Much of the ash outside of the
Firepot can be swept to the open area at the right of the Firepot using a
small whisk broom. It can be removed from the Grill with a small metal
fireplace shovel or other similar tool. Dispose of the ashes per the
following instructions.
2. A vacuum cleaner is the best way to remove ashes from the
Firepot but this must be done with extreme care to avoid the risk of
fire. Again, cleaning the ash from the Firepot should be done only
when the Grill is COLD.
Pls note:
1. Press the grill OFF button and disconnect the Power Cord.
2. Make sure that the Grill is COLD before cleaning the ash.
3. Disposal of ashes should be done only per the following
instructions.
6) DISPOSAL OF ASHES:
Ashes should be placed in a metal container with a tight-fitting lid.
The closed container of ashes should be placed on a non-combustible
floor or on the ground, well away from all combustible materials,
pending final disposal. When the ashes are disposed of by burial in
soil or otherwise locally dispersed, they should be retained in the
closed container until all cinders have thoroughly cooled.
7) PROBES:
Kinks or folds in the probe wires may cause damage to the part.
Wires should be rolled up in a large, loose coil. Although the probes
are stainless steel, do not place in the dishwasher or submerge in
water. Water damage to the internal wires will cause the probe to
short-out, causing false readings. If a probe is damaged, it should be
replaced.
22 23

WHY WON’T MY GRILL IGNITE?
1) Verify power at the electrical outlet.
a) If Power Cord is connected to a GFI (Ground Fault
Interrupter), check and reset if necessary.
Initiate startup. Still no ignition – Proceed to step 2.
2) Press the grill OFF button and disconnect the Power Cord.
a) Remove the Control and check the fuse on back. Replace
the fuse if blown. Reinstall the Control!
b) Unplug Hot Rod connector (Purple/White wire pair), plug
Power Cord into an appropriate, grounded electrical outlet
and Press the ON/OFF button. NOTE: At this point the Grill
will not ignite.
c) Check the Draft Inducer Fan and the Auger Drive Motor for
operation. If both are operating -- the Hot Rod needs to be replaced.
If one or both are not operating, contact qualified technician for help.
3) If the problem is identified to be a failed Hot Rod, the Grill can still
be used to cook and smoke by following the MANUAL LIGHTING
INSTRUCTIONS in Section Three of this OWNER’S MANUAL.
SECTION SEVEN: FREQUENTLY ASKED
QUESTIONS
HOW TO REMOVE THE AUGER IF IT JAMS?
1) Press the grill OFF and disconnect the Power Cord.
2) If the Grill is still hot, allow it to thoroughly cool.
3) Remove any covers necessary to access the Auger Drive Motor.
4) Remove the screw connecting the Auger Drive Motor shaft to the
Auger shaft and the screw retaining the Auger Bushing into the Auger
Tube.
5) With a small pipe wrench or locking pliers on the Auger shaft, turn the
Auger counterclockwise. It will turn hard until it breaks free, then the
Auger will turn freely.
6) Remove the Auger and clean all Pellets, ash or foreign objects from
the Auger, Auger Tube and Firepot. (See instructions for proper handling
and disposal of ash in Section Five)
7) Sand the outside surfaces of the auger with medium grit sandpaper.
Check the inside of the Auger Tube and sand it if needed. Vacuum the
sanding grit out of the Auger Tube and Firepot when finished. Check that
the Auger rotates freely.
8) Re-attach the Auger shaft to the Auger Drive Motor shaft.
WHY DOES MY GRILL FIRE GO OUT ON “SMOKE” SETTING?
Review the Digital Thermostat Control Functions in Section Four: Operating
Tips to make an adjustment. There may be excess ash in the Firepot which
needs to be cleaned.
If the fire in the Firepot goes out while smoking, when sufficient Pellets are
still in the Pellet Hopper, it is important to follow these steps. Failure to do so
may cause a hazardous “over-firing” of your grill due to an excess of
unburned pellets in the Firepot.
a) Press the grill OFF and disconnect the Power Cord. If the Grill is still hot,
allow it to thoroughly cool. Open the Lid and remove all food, the Porcelain
Grills, Grease Drain Pan and the Heat Baffle.
24 25

b) Remove all unburned pellets and ash from inside and around the
Firepot. (See instructions for proper handling and disposal of ash in Section
Five)
c) Before replacing the Grease Drain Pan and the Porcelain Grills, plug the
Power Cord into an appropriate, grounded electrical outlet and press the
ON/OFF button. Pellets should fall into the Firepot and the Hot Rod should
begin to heat (it will start to turn red). CAUTION! Do not touch it.
d) If this procedure is successful, you will soon see flames come out of the
Firepot. Then press the grill OFF, and let the Grill cool down. Position the
Heat Baffle, the Grease Drain Pan and Porcelain Grills in their proper
locations. With the Lid open, Press the ON/OFF button and the
Temperature / Dial to SMOKE. In approximately 2 minutes you will notice
whitish-gray smoke coming out of the Grill as the Pellets ignite. After
assuring the Pellets have ignited, close the Lid, and set the Temperature /
Dial to any cooking setting desired.
WITH THE DIGITAL CONTROL, WHAT DIAL SETTING IS
RECOMMENDED FOR STARTING THE GRILL?
The auto-start procedure is the same for all Grill Controls. With the
Lid open, Press the ON/OFF button and the Temperature/Dial to
SMOKE. In approximately 2 minutes you will notice whitishgray
smoke coming out of the Grill as the Pellets ignite. After assuring the
Pellets have ignited, close the Lid, and set the Temperature Dial to
any cooking setting desired.
WHAT TEMPERATURE SETTINGS DO I USE WITH MY
DIGITAL THERMOSTATCONTROL WHEN THE COOKBOOK
RECIPES CALL FOR SMOKE, MEDIUM ANDHIGH?
This handy conversion chart will help you determine where to set the
Thermostat when the recipes call for “Smoke”, “Medium” or “High”
settings with the 3-Speed Smoker Control. Remember: Grill
temperature is affected by conditions such as outside temperature,
precipitation, and wind as well
as altitude. Please keep this in mind when determining how long it
will take food to cook on your Grill.
3-Speed Smoker Control
Settings
Digital Thermostat Suggested Settings
Smoke
Medium
High
Smoke (150-180 F.)
225-275 Degrees F.
350-450 Degrees F.
HOW DO I PROTECT MY PAINT FINISH?
1) Use a protective Cover on the Grill and touch-up paint to repair any
scratches. A GRILL COVER to protect the Grill is highly recommended!
2) Every 90 days, use a high-quality car wax on the outside surfaces of
the Grill. ONLY APPLY WAX TO A COLD GRILL.
26 27
Table of contents
Other Costway Grill manuals

Costway
Costway OP70812 User manual

Costway
Costway EP23669DE User manual

Costway
Costway NP10898 User manual

Costway
Costway NP10679DK User manual

Costway
Costway EP24757US User manual

Costway
Costway FP10073US User manual

Costway
Costway EP24926US User manual

Costway
Costway NP10876 User manual

Costway
Costway OP3455 User manual

Costway
Costway ES10197 User manual