Cricket A300 User manual

A300 User Guide

Table of contents
Safety ................................................4
About your device .......................... 4
Before using your phone ................6
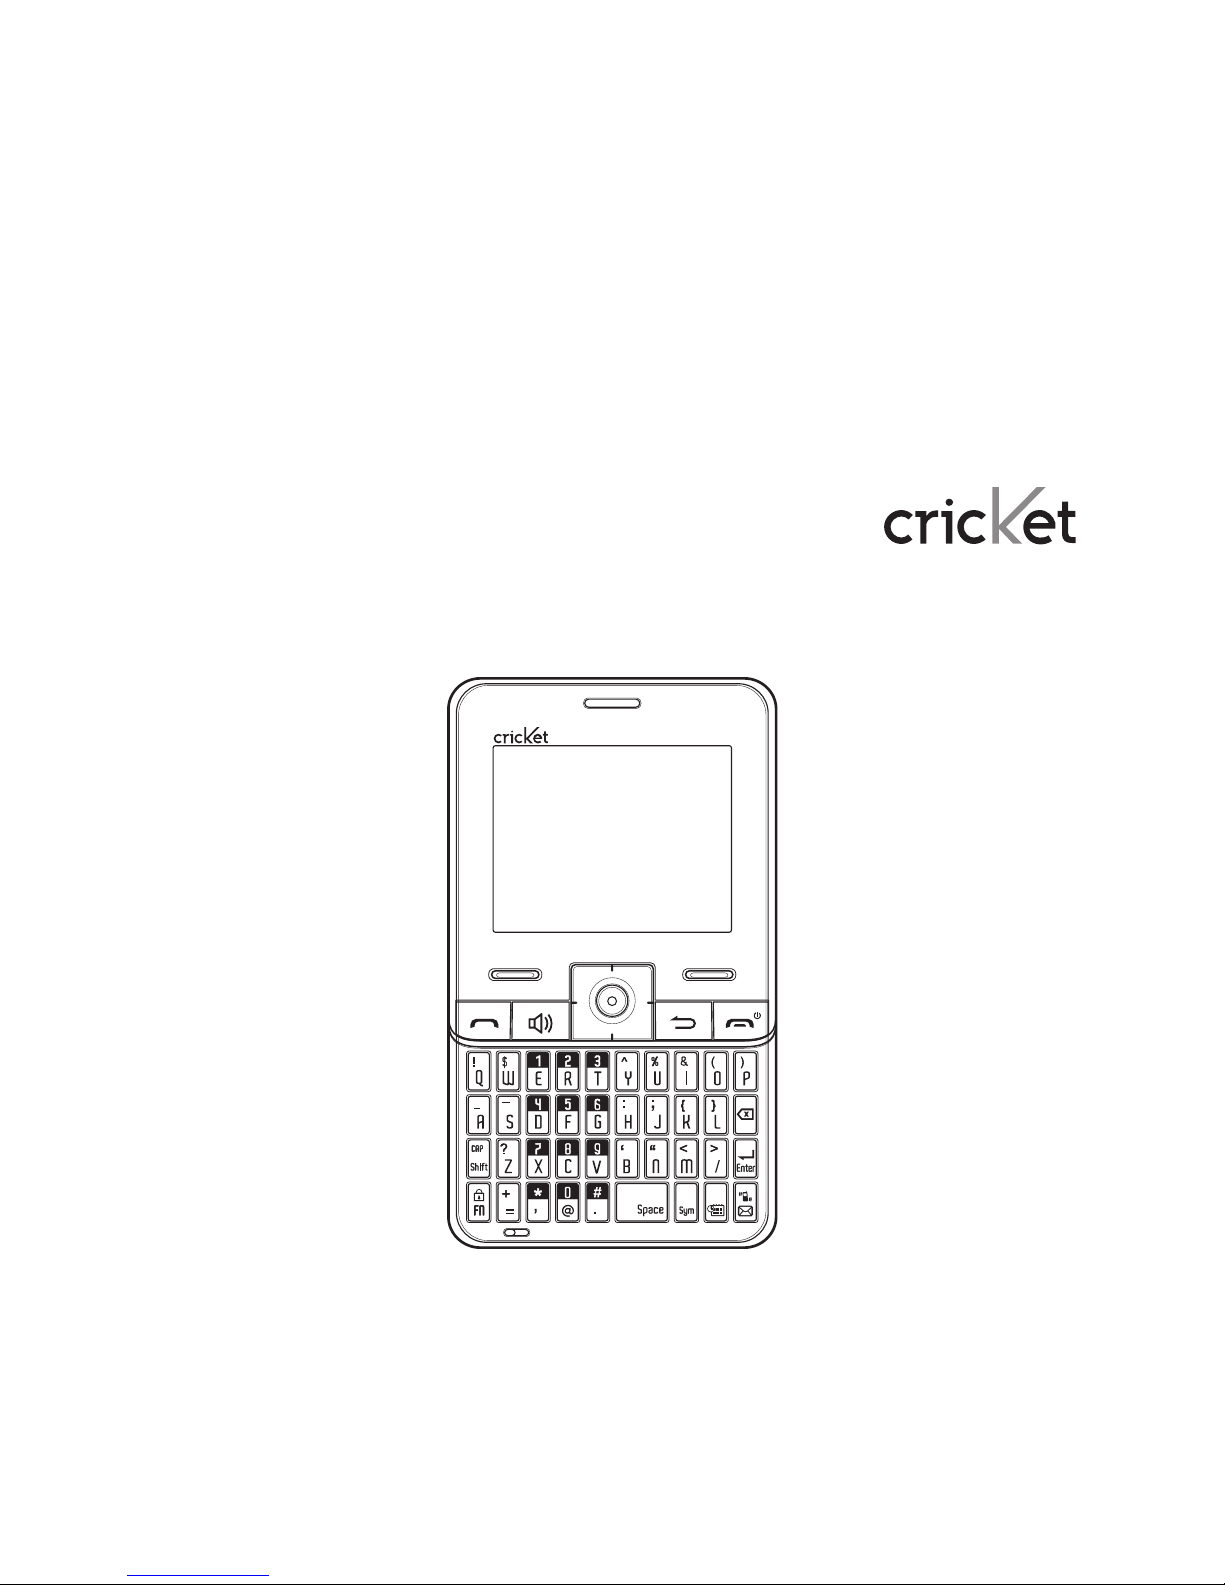
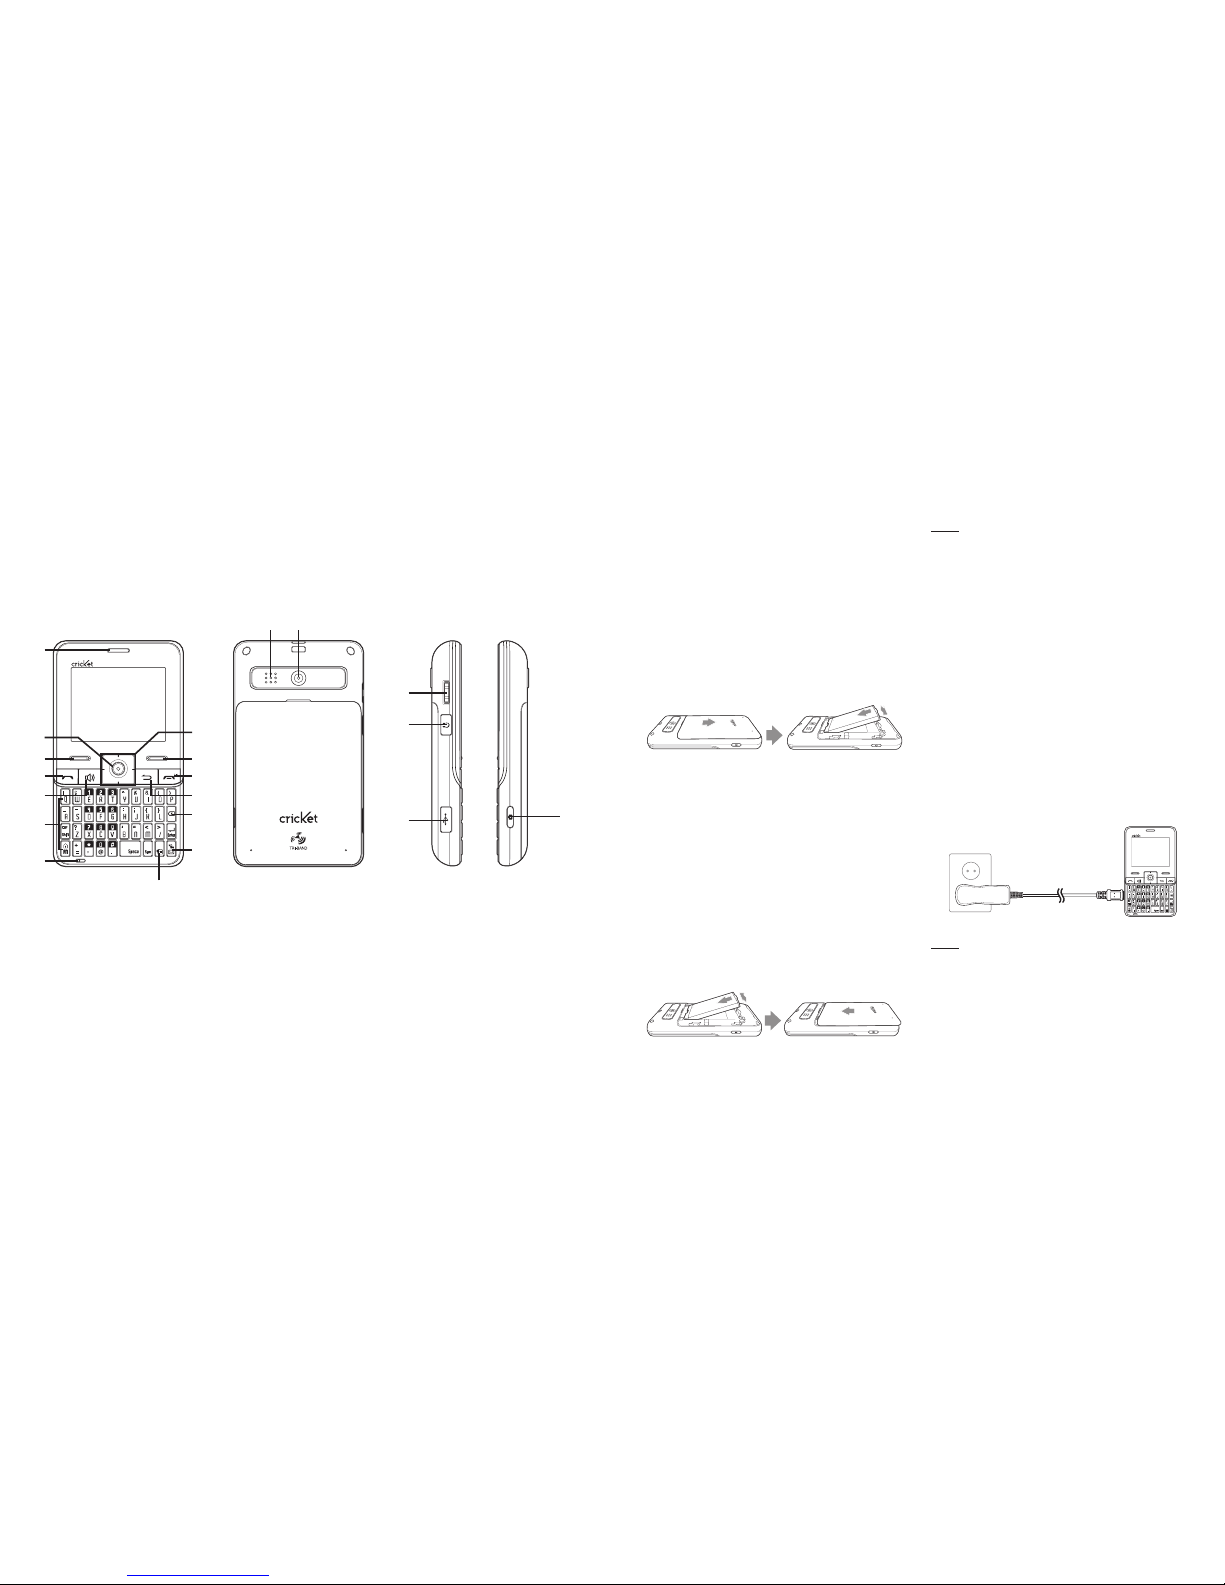
Handset description....................... 6
Battery usage ....................................7
Battery charging ...............................7
Battery handling information ....... 8
Basic operation ................................9
Turning the phone on/o .............. 9
Accessing the menu....................... 9
Using MyHomeScreen .................10
Accessing the menu map............10
Basic functions ................................. 11
Making a call through
the contact list .................................13
During a call .....................................14
Memory function............................ 15
Storing a phone number..............15
Entering letters, numbers &
symbols .............................................15
Recent calls .................................... 17
All calls............................................... 17
Missed calls...................................... 17
Incoming calls.................................. 17
Outgoing calls .................................18
Call timers .........................................18
Messages........................................ 18
Send text message........................18
Send multimedia message..........19
Inbox...................................................19
Outbox ...............................................19
Drafts ................................................ 20
Voicemail......................................... 20
Settings..............................................21
Contacts......................................... 22
My Backup.......................................22
Contacts list.....................................22
Add new entry................................22
Speed dials .....................................23
Group ................................................23
Service number..............................24
My phone number.........................24
Multimedia..................................... 24
Camera .............................................24
My picture........................................25
My image..........................................26
My sound .........................................26
My ringtone .....................................26
Browser...........................................27
Browser menu................................27
Game & Apps..................................27
2Table of contents
Tools ............................................... 28
Bluetooth..........................................28
Schedule..........................................30
Alarm ..................................................31
Memo pad .......................................32
Calculator.........................................32
World time........................................32
Tip calculator ..................................33
Stop watch.......................................3 3
Unit converter.................................33
Voice service ................................. 34
Voice command.............................34
Voice command settings ............34
Settings .......................................... 35
Display ..............................................35
Sound................................................ 37
Call .....................................................38
Security.............................................39
Phone.................................................41
Memory info ....................................42
Phone info .......................................42
Care and maintenance................. 43
Warranty......................................... 44
One (1) year limited
warranty (U.S.).................................44
Additional safety information ..... 50
Small children................................ 50
Operating environment.............. 50
Medical devices..............................51
Vehicles............................................53
Potentially explosive
environments..................................53
Emergency calls ............................54
Certification information (SAR) ..55
Safety information for fixed
wireless terminals potentially
explosive atmospheres...............56
Interference to medical
devices .............................................56
Exposure to RF energy................56
Body-worn operation ...................56
FCC compliance information.....57
U.S.A.
U.S.Federal communications
commission radio frequency
interference statement ................57
FCC hearing-aid compatibility
(HAC) regulations for wireless
devices .............................................58
Table of contents 3

Safety
Read these simple guidelines. Not
following them may be dangerous or
illegal. Read the complete user guide
for further information.
Power on safely
Do not power on the device when
and where prohibited or when it may
cause interference or danger.
Road safety comes first
Obey all local laws. Always keep your
hands free to operate the vehicle
while driving. Your first consideration
while driving should be road safety.
Interference
All wireless devices may be
susceptible to interference, which
could aect performance.
Turn device o in restricted areas
Follow all warnings. Turn device o in
aircraft, near medical equipment, fuel,
chemicals, or blasting areas.
Qualified service
Only qualified personnel may install
or repair this product.
Accessories and batteries
Use only approved accessories. Do
not connect incompatible products.
Water-resistance
Your device is not water-resistant.
Keep it dry.
About your device
The wireless device described in
this guide is approved for use on
the CDMA 800, 1700, 1900 and 2100
MHz networks. Contact your service
provider for more information about
networks.
When using the features in this
device, obey all laws and respect
local customs, privacy and legitimate
rights of others, including copyrights.
Copyright protection may prevent
some images, music, and other
content from being copied, modified,
or transferred.
4Safety Safety 5
Warning: To use any features in this
device, other than the alarm clock,
the device must be powered. Do not
power the device on when wireless
device use may cause interference
or danger.
Remember to make back-up
copies or keep a written record of all
important information stored in your
device.
When connecting to any other
device, read its user guide for
detailed safety instructions. Do not
connect incompatible products.

6Before using your phone Before using your phone 7
Before using your phone
Handset description
Battery usage
Battery installation
1. Remove the battery cover from
the unit.
2. Slide the battery into the slot
located at the bottom of the unit
and press until you hear the
“Click”.
Battery removal
1. To remove the battery, push down
on the top of the battery while
inserting your finger into the slot
and pulling up from the back of the
battery and slide it out.
2. Align the cover tabs with the slots
at the top of the device and slide
the battery cover back onto the
unit.
note If the battery is not correctly
placed in the compartment, the
handset will not turn on and/or the
battery may detach during use.
Battery charging
Power connection
1. Plug the AC Charger into a
standard outlet.
2. Plug the other end of the AC
Charger into the charging port on
your phone. The battery must be
installed in the device to charge
properly.
note
• When you charge the battery with
the phone powered o, you will
see a charging status screen. You
cannot operate the phone until it is
powered on.
1. Earpiece
2. OK key
3. Menu key
4. Send key
5. Speakerphone key
6. QWERTY keyboard
7. Microphone
8. Navigation key
9. Contacts menu
10. End key
11. Back Key
12. Delete key
13. Messages key
14. Schedule key
15. Speaker
16. Camera lens
17. Side volume scroll
key
18. Headset port
19. Charger port
20. Camera key
1615
17
18
19 20
3
7
1
4
6
5
9
10
11
13
12
28
14

• The battery is not charged at the
time of purchase.
• Fully charge the battery before use.
• It is more ecient to charge the
battery with the handset is powered
o.
• Battery operating time gradually
decreases over time.
• If the battery fails to perform
normally, you may need to replace
the battery.
Battery handling information
Do’s
• Only use the battery and charger
approved by the manufacturer.
• Only use the battery for its original
purpose.
• Try to keep batteries in a
temperature between 41oF (5oC )
and 95oF (35oC).
• If the battery is stored in
temperatures above or below the
recommended range, give it time to
warm up or cool down before using.
• Completely drain the battery before
recharging. It may take one to four
days to completely drain.
• Store the discharged battery in a
cool, dark, and dry place.
• Purchase a new battery when its
operating time gradually decreases
after fully charging.
• Properly dispose of the battery
according to local laws.
Don’ts
• Do not attempt to disassemble the
battery – it is a sealed unit with no
serviceable parts.
• Do not short circuit the battery by
carrying it in your pocket or purse
with other metallic objects such as
coins, clips and pens. This may
critically damage the battery.
• Do not leave the battery in hot or
cold temperatures. Otherwise, it
could significantly reduce the
capacity and lifetime of the battery.
• Do not dispose of the battery into
a fire.
8Before using your phone
Basic operation
Turning the phone on/o
Turning the phone on
1. Press the END Key until the Cricket
logo appears and the tone sounds.
note
• If “Password” appears on the dis-
play enter your 4-digit password to
unlock your phone.
• The default password is the last 4
digits of your phone number.
Turning the phone o
1. Press and hold the END Key until
the Cricket logo appears.
note
• Immediately recharge or replace
the battery when the warning
“Please recharge battery soon”
appears on the display.
• Turn the phone o before
removing or replacing the battery.
If the phone is on, unsaved data
may be lost.
Accessing the menu
Your phone can be customized via
the menu. Each function can be
accessed by scrolling with the
Navigation Key or by pressing the
number that corresponds with the
menu item.
1. To access the menu in the idle
mode, press the Left Soft Key
Menu.
2. Press the Navigation Key left, right,
up or down to choose the menu
item, then press the OK Key. Press
the Navigation Key up or down to
scroll through the submenus for
each menu item.
note If you are in menu item, press
the Navigation Key left or right to
choose the other menu item.
3. To return to the previous page,
press the Back Key. To exit the
current menu and return to the idle
mode, press the END Key.
4. Press the OK Key to enter ODP
Menu. To scroll thru the widgets,
Basic operation 9

press the up or down Navigation
Key.
note
• Navigation Key up or down : To
scroll through the Widgets Menu.
• Navigation Key left : Browser
• Navigation Key right : Messages
Using MyHomeScreen (widgets)
The MyHomeScreen menu (located
at the bottom of the Idle screen)
provides quick access to features
like Weather, Personalize, My
Account, Storefront, Horoscope,
Weblinks, Social Networking, News
and keeps them organized and
always accessible.
1. To access the MyHomeScreen
menu in the idle mode, press the
Navigation Key up or down to scroll
through the MyHomeScreen Menu
or press the OK Key and then press
the Navigation Key up or down to
scroll thru the menu options.
2. To scroll through the Widget sub
options, press the Navigation Key
left, right, up or down. Press the
OK Key to select an option.
3. To exit the Widget sub menu and
return to the idle mode, press the
END Key. To exit a Widget, press
the Back or END Key.
note
• The default Widget Menu items -
Personalize, My Account and
Storefront - cannot be changed,
deleted, or moved.
Accessing the menu map
1. Recent Calls
1. All Calls
2. Missed Calls
3. Incoming Calls
4. Outgoing Calls
5. Call Timers
2. Messages
1. Send Message
2. Inbox
3. Outbox
4. Drafts
5. Voicemail
6. Settings
3. Contacts
1. Contacts List
2. Add New Entry
3. Speed Dials
4. Group
5. Service Number
6. My Phone
Number
4. Multimedia
1. Camera
2. My Picture
3. My Image
4. My Sound
5. My Ringtone
10 Basic operation
5. Browser
6. Game & Apps
7. Tools
1. Bluetooth
2. Schedule
3. Alarm
4. Memo Pad
5. Calculator
6. World Time
7. Tip Calculator
8. Stop Watch
9. Unit Converter
8. Voice Service
1.
Voice Command
2.
Voice Command
Setting
9. Settings
1. Display
2. Sound
3. Call
4. Security
5. Phone
6. Memory Info
7. Phone Info
Basic functions
Making a call
1. Enter a phone number.
note To modify the phone number
you have entered :
• To erase one digit at a time press
the Delete Key.
• To erase the entire number, press
and hold the Delete Key.
2. Press the SEND Key.
note
• If “CALL FAILED” appears on the
display or the line is busy, press the
END Key.
• If you activate the “AUTO RETRY”
function, the phone will
automatically retry for the number
until you select the END Key.
• If “Please Enter Lock Code” appears
on the display enter your 4-digit
password to unlock your phone.
• Your default password is the last 4
digits of your phone number.
3. To end a call, press the END Key.
Call answer
1. When your phone rings or vibrates,
press the SEND Key to answer the
incoming call. (Depending on your
phone’s settings, you may also
answer incoming calls by pressing
any key. See page 38 for details.)
note To reject incoming calls, press
the Right Soft Key Reject. Also, it can
be rejected by pressing the End Key
twice.
2. To end a call, press the END Key.
Basic operation 11

Wait/pause feature
Pauses are used for automated
systems (i.e., Voicemail, calling cards).
Insert a pause after a phone number
then enter another group of numbers.
The second set of numbers is dialed
automatically after the pause. This
feature is useful for dialing systems
that require a code.
1. To insert a wait/pause, enter a
phone number then press the Right
Soft Key Options. Select either a
Type ‘P’ (“P” appears) or a Type ‘T’
(“T” appears).
note
• Type “P”: A hard pause stops the
calling sequence until further input
from you.
• Type “T”: A two second pause stops
the calling sequence for two
seconds and then automatically
sends the remaining digits.
2. Press the SEND Key to dial or Left
Soft Key Save to save the number.
3-way calling
With 3-Way Calling, you can talk to
two people at the same time.
1. Enter a number you wish to call
then press the SEND Key.
2. Once you have established the
connection, enter the second
number you wish to call then press
the SEND Key.
3. When you’re connected to the
second party, press the SEND Key
again to begin your 3-Way call.
note 3-way calling is a system
dependent feature. Please contact
your service provider for details.
Caller ID function
Identifies caller by displaying their
phone number. If the caller’s name
and number are already stored in
your phone book, their name will
appear. This is a system dependent
feature. Please contact your service
provider for details.
12 Basic operation
Call waiting function
Notifies you of an incoming call when
you are already on a call by sounding
a beep tone and displaying the
caller’s phone number.
1. To answer another call while on the
phone, press the SEND Key. This
places the first call on hold.
To switch back to the first caller,
press the SEND Key again.
note Call Waiting is a system
dependent feature. Please contact
your service provider for details.
Adjusting volume
1. During a call, press Side Volume
Scroll Key up or down to adjust the
earpiece volume.
Making a call through the contact
list
One-touch/two-touch dialing
Ideal for frequently dialed numbers,
this feature allows entries in your
contact list to be dialed via the
keypad with only one or two key
presses. In order for One-Touch/
Two-Touch Dialing to properly work, it
must be enabled.
One-touch dialing
2-9: Press and hold the
corresponding memory number for
more than 1 second.
Two-touch dialing
10-99: Press and the first digit and
second digits of the memory number
short and long respectively.
note
• If no phone number is stored in the
location entered, “Speed dial is
empty” will appear on the screen.
• If One Touch Dial is set to O: Enter
the speed dial location number then
press the SEND Key.
• Location 1 is reserved for voicemail.
Location 2-99 are unassigned.
To assign a speed dial location,
please see page 23.
Basic operation 13

During a call
1. Press the Left Soft Key Mute.
• Mute (Unmute) : If you press
Mute during a call, the person
you are speaking with cannot
hear you or any sounds from
your side of the conversation.
However, you can still hear them.
note
• To deactivate, press the Left Soft
Key Unmute.
• The phone will automatically
unmute in Emergency Call or
Callback Mode.
2. Press the Right Soft Key Options.
• 3Way call : To try outgoing call
in conversation state.
• Voice Memo : To record a voice
memo during a call.
• Recent Calls : To select a phone
number from your Recent Calls
List during a call.
• Contacts : To view a phone
number from your Contact list
during a call.
• Messaging : To send a text
message (SMS) during a call.
• Bluetooth : When user is calling
with A300 mobile phone, user
can select Bluetooth in order to
call with Bluetooth headset.
Making an emergency call
The 911 feature puts the phone in the
Emergency Call Mode when you dial
the preprogrammed emergency
number, 911. It also operates in Lock
Mode and outside the service area.
911 in lock mode
The 911 call service is available even
in Lock Mode.
1. Enter “911”, then press the SEND
Key.
2. The call connects.
3. When the call ends, the phone
returns to Lock Mode.
911 using any available system
1. Enter “911”, then press the SEND
Key.
14 Basic operation
2. The call connects.
3. The phone maintains the
Emergency Mode and the phone
can receive an incoming call from
any available system. However,
it cannot make a call while still in
Emergency Callback Mode.
Memory function
Storing a phone number
The phone book stores up to 1000
entries.
1. Enter phone number then press the
Left Soft Key Save.
2. Select “New Entry” or “Existing
Entry”.
3. If “Existing Entry” is selected, your
contact list is displayed. Choose
the entry to add the number, then
press the OK Key. Select the type
of Phone you are adding from the
list, then press the OK. If a phone
number is already assigned to
the category you selected type of
Phone, “Over Write?” will be
displayed. Select “Yes” and press
the OK Key. Press the OK Key
Save.
If “New Entry” is selected, the New
entry list appears. Press the
Navigation Key up or down to
choose the type of Phone you
are adding. Enter a name. Press
the Navigation Key down to enter
information in other fields for the
contact. Fields include “Photo”,
“Name”, “Mobile”, “Home”, “Oce”,
“Fax”, “Other Number”, “Email”,
“Ringtone”, “Group”, “Birthday”,
“Memo”.
4. To store the entry in your contact
list, press the OK Key Save. “Save”
will be displayed.
Entering letters, numbers &
symbols
Your device has a specifically
designed QWERTY Keyboard that
provides a superior typing
experience on a small handheld for
Basic operation / Memory function 15

easy and comfortable input. You
can use all of the handset functions
with the keyboard either closed or
open. When you open the keyboard
you have the extra benefit of a full
messaging keyboard. The handheld
includes a fully-functional QWERTY
Keyboard you can use to compose
text for email messages, notes, and
so on.
1. Cap/Shift Key : To type upper-case
letters, press the CAP/Shift Key and
then press one or more letter keys.
To type upper-case letters only,
press the FN Key and then press
the CAP/Shift Key. The CAP icon
will appear on the screen. To return
to typing lower-case letters, press
the FN Key again. To type a upper-
case for the first letter of a word
only, simply press the CAP/Shift Key
once. Then, the first letter you type
will be a upper-case while the rest
will be normal letters.
2. FN Key : To type the special
character or numbers that appear
in red on the keys, press the FN
Key and then press one or more
special character or numbers
keys. To type special characters
or numbers consecutively, use
the FN-LOCK mode. To change to
the FN-LOCK mode, press the FN
Key twice. You can type special
characters or numbers only in this
mode. To deactivate, press the FN
Key again. To type a special
character or number for the first
letter of a word only, simply press
the FN Key once. Then, the first
letter you type will be a special
character or number while the rest
will be normal letters.
3. Space Key : Press the Space Key
to type a blank space.
4. Sym Key : Press to open symbols
list.
5. Enter Key : Press the Enter Key to
insert a line break.
6. Delete Key : Press the Delete Key
to delete a character to the left of
the text cursor. Press and hold to
delete the entire entry.
Recent calls
All calls
1. Press the Left Soft Key Menu >
Recent Calls > All Calls.
If the number is already stored in
your contact list, only the name
appears. If the number is not
stored, the number appears.
2. To view details, press the OK Key.
note After the 240th missed, incoming
or outgoing calls, the oldest call will
automatically be erased from the
history.
Missed calls
1. Press the Left Soft Key Menu >
Recent Calls > Missed Calls. If the
number is already stored in your
contact list, only the name appears.
If the number is not stored, the
phone number appears.
2. To view missed call details, press
the OK Key.
note After 80 missed calls, the oldest
call will be automatically erased from
the history.
Incoming calls
1. Press the Left Soft Key Menu >
Recent Calls > Incoming Calls.
If the number is already stored in
your contact list, only the name
appears. If the number is not
stored, the number appears.
2. To view incoming call details, press
the OK Key.
note After 80 incoming calls, the
oldest call will automatically be
erased from the history.
16 Memory function Memory function / Recent calls 17
2
1
6
7
5
3 4

Outgoing calls
1. Press the Left Soft Key Menu >
Recent Calls > Outgoing Calls.
If the number is already stored in
your contact list, only the name
appears. If the number is not
stored, the number appears.
2. To view outgoing call details, press
the OK Key.
note After 80 outgoing calls, the
oldest call will automatically be
erased from the history.
Call timers
Checks the usage time and manages
your calls within the limit you set.
The 11 timers include (Last Call, Dialed
Calls, Received Calls, Home Calls,
Roam Calls, All Calls, Lifetime Calls,
Transmit Kb, Received Kb, Total Kb,
Lifetime Data Counter, Last Reset):
1. Press the OK Key Menu > Recent
Calls > Call Timers.
2. To reset all timers, press the Right
Soft Key Reset All. “Reset All?”
will be displayed. Select “Yes” and
press the OK Key.
Messages
Send text message
To send a new text message:
1. Press the Left Soft Key Menu >
Messages > Send Message.
2. Under “SMS”, input your message.
• Press the Right Soft Key Options.
(Preset Msg., Add Photo, Add
Sound, Add vCard, Attach
Contact, Preview, Save as Draft,
Delivery)
3. Press the OK Key Recipient. Under
“Send To”, input the recipient’s
phone number.
• Press the Right Soft Key Options.
(Recent Calls, Contacts, Group
Lists)
4. To send the message, press the
Left Soft Key Send.
Send multimedia message
To send a new multimedia message:
1. Press the Left Soft Key Menu >
Messages > Send Message.
2. Under “SMS”, input your message.
3. Press the Right Soft Key Options.
Select “Add Photo”, “Add Sound” or
“Add vCard”.
4. Select the contents and press the
OK Key.
5. Select a photo or sound, press the
Left Soft Key Check.
6. Press the OK Key Recipient. Under
“Send To”, input the recipient’s
phone number and subject.
• Press the Right Soft Key Options.
(Recent Calls, Contacts, Group
Lists)
7. To send the multimedia message,
press the Left Soft Key Send.
Inbox
The Inbox manages received text/
picture messages. To access:
1. Press the Left Soft Key Menu >
Messages > Inbox.
2. To delete a message, press the
Right Soft Key Options, and
select 5. Erase, then select “Yes”
and press the OK Key. To delete all
messages, press the Right Soft Key
Options, and select 6. Erase All,
then then select “Yes” and press
the OK Key.
Outbox
Manages sent messages.
1. Press the Left Soft Key Menu >
Messages > Outbox.
2. To delete a message, press the
Right Soft Key Options, and select
4. Erase, then select “Yes” and
press the OK Key. To delete all
messages, press the Right Soft
Key Options, and select 5. Erase
All, then select “Yes” and press the
OK Key.
18 Recent calls / Messages Messages 19

3. Select a message, then press the
OK Key. The message is displayed.
Press the Left Soft Key Send to
send the selected message.
• Press the Right Soft Key Options.
(Edit/Resend, Forward, Save
Contact, Erase, Erase All)
Drafts
Draft Folder contains any draft
messages. If message composition is
interrupted by a voice call or other
interrupting event, the text of the
current composition is automatically
saved in the drafts folder.
1. Press the Left Soft Key Menu >
Messages > Drafts.
2. Select a message then press the
OK Key.
• Press the Right Soft Key Options.
(Edit/Send, Forward, Save
Contact, Erase)
3. To edit the message. Press the
Right Soft Key Options. Select
“Edit/Send”. Edit the message.
4. Under “Send To”, input the phone
number. Press the Left Soft Key
Next.
5. To send the message, press the
Left Soft Key Send.
Voicemail
Voicemail allows callers to leave
voice messages in your voice
mailbox, and lets you review, play,
and delete your voice messages any
time you are in your Carrier’s network
coverage area.
Call voice Mail
1. Press the Left Soft Key Menu >
Messages > Voicemail > Call
Voice Mail.
To quickly access voicemail, press
and hold the 1 key. Follow voice
prompts.
Details
View last voicemail information.
1. Press the Left Soft Key Menu >
Messages > Voicemail > Details.
Clear notification
Delete the voicemail icon.
1. Press the Left Soft Key Menu >
Messages > Voicemail > Clear
Notification.
Settings
1. Press the Left Soft Key Menu >
Messages > Settings.
• Notication : To set a notication.
Select “Msg & ICON” or “ICON
Only”.
• Message Remind : To set a
message remind. Select “O” or
“1 Min”.
• Auto Save : To automatically
save a message after sending,
select “Auto Save”, “Prompt” or
“Do Not Save”.
• Auto Erase : Automatically
erases Inbox messages when
new messages arrive. Select
“On” or “O”. Oldest message
erased from Inbox automatically
when Inbox is full.
• Auto View : To set Auto View.
Select “On” or “O”.
• Callback # : Allows you to input
a specific callback number.
Callback numbers are used in
text messaging so the other
party knows how to get back to
you. Select “None”, “MDN” or
“Custom”.
• Voice Mail # : To set your
voicemail number. Press the
Right Soft Key Edit. Enter the
desired voicemail access
number, then press the OK Key.
(Default setting is *99)
• Signature : To create a signature
that can be automatically inserted
at the end of a text message.
Select “None” or “Custom”. If you
select “Custom”, the signature
input screen appears.
• Preset Message. : The preset
messages are displayed.
2. Press the OK Key to save the
setting.
20 Messages Messages 21

Contacts
My Backup
My Backup application will backup
your contact list, perform regular
updates and download contacts.
Please contact your Service Provider
for details including associated
service costs.
Contacts list
Retrieves an entry by name and calls
the primary number by simply
pressing the SEND Key. You can
review all the entries stored in your
contacts list or quickly find an entry
by entering a name or its character
string.
1. Press the Left Soft Key Menu >
Contacts > Contacts List.
2. The list of names in your contacts
is displayed alphabetically.
3. Enter a name or its character string
or scroll through the list by
pressing the Navigation Key up or
down.
note My Backup, which is the first item
at Contacts List, can backup and
restore your Contacts to and from
the server. Selecting My Backup will
launch this preloaded application at
Game & Apps.
Add new entry
To add a new entry:
1. Press the Left Soft Key Menu >
Contacts > Add New Entry.
2. Fill in the fields as they are
selected. Press the Navigation Key
up or down to select a field.
• Phone book elds : Photo, Name,
Phone number (Mobile, Home,
Oce, Fax, Other Number), Email,
Ringtone, Group (No Group,
Family, Friends, Work), Birthday,
Memo
note See page 15 for more detailed
information about storing a number.
Speed dials
In idle mode, calls can be placed
to numbers stored in speed dial by
pressing & holding the location
number on the key pad. For a 2-digit
location number, press the first
number, then press and hold the
second number.
note Speed Dial must be activated.
1. Press the Left Soft Key Menu >
Contacts > Speed Dials.
2. To assign a phone number to a
speed dial location, select the
speed dial location, then press the
OK Key Assign.
• Press the Right Soft Key Options.
(Msg., Prepend, Erase)
note “Prepend” option is to allow
you to add additional number prior
to the phone number you want to
call from Contacts when dialing. You
can prepend the international dialing
number, area code or calling card
number before the phone number
you try to call.
note
• “Empty” appears if the location is
available.
• Location 1 is reserved for voicemail.
3. Scroll to the contact in the list.
4. If more than one number exists for
the contact, press the Navigation
Key left or right to select the phone
number for the speed dial location.
The numbers will be displayed
above the contact list.
5. Press the OK Key Assign to set the
speed dial location.
Group
Allows you to classify phone entries
into groups. Existing groups include
No Group, Family, Friends, Work.
Add new group
1. Press the Left Soft Key Menu >
Contacts > Group.
2. Press the Left Soft Key Add to add
a new group name.
3. Input a new group name.
22 Contacts Contacts 23

4. To save it, press the OK Key OK.
• Press the Right Soft Key Options.
(Ringtone, Add Member, Rename,
Erase)
Change group name
1. Press the Left Soft Key Menu >
Contacts > Group.
2. Select an existing group name.
Only groups you created can be
renamed.
3. Press the Right Soft Key Options,
then scroll to “Rename”, press the
OK Key.
4. Input a new group name.
5. Press the OK Key OK to save the
setting.
Service number
Your Contacts list is preprogrammed
with contact numbers for various
services.
1. Press the Left Soft Key Menu >
Contacts > Service Number.
2. Select the number (Info. “411” /
Cust. Svc. “611” / Cust. Care “*611”
/ *PAY “*729”) then press the OK
Key.
3. Press the SEND Key to call.
My phone number
Displays your phone number.
1. Press the Left Soft Key Menu >
Contacts > My Phone Number.
2. Your phone number will be
displayed.
Multimedia
Camera
Take picture
1. Press the Left Soft Key Menu >
Multimedia > Camera, or press the
Side Camera Key.
2. Point the camera lens at your
subject. You can check the picture
framing through the display screen.
• Press the Navigation Key up/
down : Zoom
3. Pressing the Right Soft Key
Options, you can choose from the
following:
• Resolution : 1280 x 960, 640 x
480, 320 x 240, 220 x 176
• Self Timer : O, 2 Seconds, 5
Seconds, 10 Seconds
• Mirror : Normal, Vertical,
Horizontal
• Quality : Economy, Normal, Fine
• White Balance : Auto, Sunny,
Cloudy, Fluorescent,
Incandrescent
• Image Eect : O, Gray, Negative,
Sepia
• Fun Frame : O, Image1, Image2,
Image3, Image4, Image5, Image
6, Image7, Image8, Image9
• Setting & Helps : Settings, Reset
Settings, Helps
note To view captured images, press
the Left Soft Key My pic.
4. Press the Side Camera Key or
press the OK Key to take the
picture.
5. Picture will be saved automatically.
My picture
In my Images you can view all the
images you have taken.
1. Press the Left Soft Key Menu >
Multimedia > My Picture.
2. Press the Navigation Key up,
down, left or right to select your
desired images, then press the
Right Soft Key Options.
3. Select one of the following options:
• Camera : Take a new picture.
• Assign : Assigns image as
wallpaper to a contact, main
display or front display. (Contacts,
Wallpaper, Incoming Calls)
• Edit Title : Rename the selected
picture.
• Icon/List : Select Icon style or
List style.
• Lock/Protect : Select to lock/
unlock or protect/unprotect the
selected picture.
24 Contacts / Multimedia Multimedia 25

• Multi Check : To check multiple
images.
• Erase : To erase the pictures in
your phone.
• Erase All : To erase all the
pictures in your phone.
• Picture Info : Displays information
about the selected picture.
4. To send, press the Left Soft Key
Msg..
note See page 19 for more detailed
information about send multimedia
message.
My image
This menu displays the list of
downloaded images.
1. Press the Left Soft Key Menu >
Multimedia > My Image.
2. Scroll through the downloaded
images to display the image you
want.
• Get New : To get new wallpapers
and/or screensavers.
note Additional charges apply for
downloads.
My sound
Allows you to record a reminder
message that can be up to 4 minutes.
1. Press the Left Soft Key Menu >
Multimedia > My Sound.
2. To record a voice, scroll to
“Record”, press the OK Key.
3. To start recording, press the Right
Soft Key Record. To stop recording
and save your sound, press the
OK Key.
4. Enter a name or press the OK Key
to save the sound.
• Press the Left Soft Key Options.
(Record, Assign, Edit Title, Lock/
Protect, Multi Check, Erase, Erase
All, Sound Info)
My ringtone
This menu displays the list of
downloaded ringtones.
1. Press the Left Soft Key Menu >
Multimedia > My Ringtone.
26 Multimedia
2. Scroll through the downloaded
ringtones to play the ringtone you
want.
• Get New : To get new ringtone
and/or ringtones.
note Additional charges apply for
downloads.
Browser
To access the browser:
1. Press the Left Soft Key Menu >
Browser.
Browser menu
• Home : When the “Home” item is
selected from the Browser Menu,
the phone displays the homepage.
• Open Page : Allows you to manually
enter the URL address of a WAP
site. After entering an address,
press the OK Key to go there
directly.
• Search : Takes user to Search page.
• Mark Page : To save the page as
a bookmark. Press the OK Key to
save current website address.
• Forward : When the “Forward” item
is selected from the Browser Menu,
the phone displays the next page in
the history. This is only available if
the user has navigated backward in
the history.
• Reload : Selecting the “Reload” item
from the Browser Menu refreshes
the current page.
Game & Apps
To access Game & Apps (note:
charges apply to download games
and applications):
1. Press the Left Soft Key Menu >
Game & Apps.
2. You will see MobileShop. If you
want to download games or etc.,
in idle mode, press the Navigation
Key Left.
3. Select from “Catalog” and press
the OK Key. The server will launch.
Browse through the catalog and
press the OK Key to select an
Multimedia / Browser / Game & Apps 27

application and price plan. Then
follow the prompts to download
the application. Repeat this
process for each additional
application.
4. To exit “Game & Apps”, press the
END Key.
Tools
Bluetooth
Using Bluetooth wireless, you
can connect the phone wirelessly
to other Bluetooth devices and
exchange data with them, talk hands-
free or control the phone remotely.
Bluetooth technology allows free
wireless connections between all
Bluetooth-compliant devices within
a range of up to 30 feet. Since the
devices communicate using radio
waves, they do not need to be in line
of sight to each other.
Bluetooth ON/OFF
To toggle Bluetooth® power On/O.
1. Press the Left Soft Key Menu >
Tools > Bluetooth > Setting.
2. Under “Set”, then select “O” or
“On” by pressing the Navigation
Key left or right.
3. Press the OK Key.
New device
Pairing is the process that allows the
handset to locate, establish and
register a 1-to-1 connection with the
target device.
1. Press the Left Soft Key Menu >
Tools > Bluetooth > My Device.
2. “Bluetooth is disabled. Enable?”
will be displayed. Select “Yes” and
press the OK Key.
3. Press the Right Soft Key Options.
4. Select “1. Add New” and press the
OK Key.
5. The handset will automatically
enable Bluetooth functionality and
search for nearby Bluetooth
devices.
6. Device found will appear in the
28 Game & Apps / Tools
“New Device” list. Press the
Navigation Key up or down to
select a device, press the Left Soft
Key Pair.
7. The handset will prompt you for the
password. Consult the Bluetooth®
accessory (sold separately)
instructions for the appropriate
password (typically “0000”—4
zeroes). Enter the password, then
press the OK Key.
8. Once connected, you can see the
Bluetooth device name in the My
Device list. If the phone is
connected with Bluetooth device,
then Bluetooth icon will be appear
at the top of the LCD screen.
note
• In the My Device list, to disconnect,
press “Disconnected”. To reconnect,
press the OK Key again.
• When an audio device is
connected, you can select another
device and the connection is
automatically transferred from that
audio device to the other one.
• If multiple devices are displayed,
select the device you want to
connect.
Settings
To change Bluetooth settings:
1. Press the Left Soft Key Menu >
Tools > Bluetooth > Setting.
• Set : To select Bluetooth® power
On/O.
• Visibility : To select Shown to All
or Hidden.
• Device Name : To edit the
Bluetooth® name of your phone
2. Press the OK Key.
Support service
To view brief descriptions of the
Services supported by the phone:
1. Press the Left Soft Key Menu
> Tools > Bluetooth > Support
Service.
2. Press the Navigation Key up or
down to select one of the following
Services, then press the OK Key.
(Headset Service/Hands Free
Tools 29

Service)
Information
Displays the bluetooth information
(Name, Class, Address):
1. Press the Left Soft Key Menu >
Tools > Bluetooth > Information.
2. View information. To return to the
previous page, press the OK Key.
Schedule
Sets an event and reminds you of
that event.
Add new event
1. Press the Left Soft Key Menu >
Tools > Schedule.
2. Press the Navigation Key to
choose a date in the calendar, then
press the Left Soft Key Add.
3. The “Add New” screen will be
displayed.
• Title : Enter the event name.
• Start Date : You can edit the start
date for the event.
• Start Time : Enter the start time.
Press the Left Soft Key for am
or pm.
• End Date : You can edit the end
date for the event.
• End Time : Enter the end time.
Press the Left Soft Key for am
or pm.
• Contents : Enter any notes for
the event.
• Repeat : Press the Navigation
Key left or right to select “None”,
“Daily”, “Weekly”, “Monthly” or
“Yearly”.
• Notice : Enter when the alert
should sound for the event (On
Time, Before 10 min, Before 20
min, Before 1 hour, Before one
day, O).
• Snooze eld, set the snooze
time (5 min, 10 min, 15 min, 20
min, O).
• Ring Type : Press the Right Soft
Key List to select a ringer for the
event. Press the OK Key when
the ringer is selected.
4. Press the OK Key Save to save the
30 Tools
event or the Back Key to return to
the calendar.
5. The date of the event will be
marked on your calendar.
View added events
1. Press the Left Soft Key Menu >
Tools > Schedule.
2. Scroll to a date in the calendar and
press the OK Key to view the event
for that day.
3. Press the OK Key View to see the
details for the event.
• Press the Right Soft Key Options.
(Add New, Go to Date, Erase,
Erase All)
Press the Left Soft Key Edit to edit
the event, then press the OK Key
Save to save the event.
note
• Schedule/Calendar - To quickly
access your schedule/calendar,
press the Calendar Key. To scroll
thru the schedule/calendar, press
the right, left, up or down
Navigation Key to a specific date.
Press the OK Key to select that date
and entry events.
Alarm
1. Press the Left Soft Key Menu >
Tools > Alarm.
2. Select Alarm #1, 2 or 3 to set a new
alarm. To edit an existing alarm,
select the alarm name. Press the
OK Key or Left Soft Key Add.
3. To save an alarm setting press the
OK Key Save.
• Set: Press the Navigation Key
left or right to select alarm “On”
or “O”.
• Time: Use the keypad to set a
time for the alarm and the Left
Soft Key to select am or pm.
• Repeat: Press the Navigation Key
left or right to select “Once”,
“Daily”, “Mon to Fri” or “Sat to
Sun”.
• Snooze: Press the Navigation
Key left or right to select “5min”,
“10min”, “15min”, “20min” or
Tools 31

“OFF”.
• Ring Type: Press the Right Key
List to select a ringtone for the
alarm sound. Press the OK Key
when the ringer is selected.
Memo pad
Your phone includes an internal
memo pad that can be used to
compose and store reminders and
memos.
Add new memo
To compose a memo:
1. Press the Left Soft Key Menu >
Tools > Memo Pad.
2. To add a new memo, press the
Left Soft Key Add. Input a new text
memo.
3. To save memo, press the OK Key
Save.
View memo
To view a saved memo:
1. Press the Left Soft Key Menu >
Tools > Memo Pad.
2. The Memo pad list of memos is
displayed in the order they were
saved. To add a new memo, press
the Left Soft Key Add.
• Highlight a memo and press the
Right Soft Key Options. (Erase,
Erase All)
3. To view a memo, highlight it and
press the OK Key. Press the Right
Soft Key Erase to erase the memo
or press the Left Soft Key Edit to
edit the text, then press the OK
Key Save to save the changes.
Calculator
To access the calculator:
1. Press the Left Soft Key Menu >
Tools > Calculator.
2. To reset, press the Left Soft Key
Clear.
World time
To access the World Time:
1. Press the Left Soft Key Menu >
Tools > World Time.
32 Tools
2. The world map appears with the
city, date and time. Press the
Navigation Key left or right to
select another city.
• DST: Press the Right Soft Key
DST, specifies whether the
current time of the selected
place is adjusted to Daylight
Savings Time.
• Dual: Press the Left Soft Key Dual
to set dual time. To display, Dual
Clock feature must be turned on.
See page 36.
Tip calculator
To access the Tip calculator:
1. Press the Left Soft Key Menu >
Tools > Tip Calculator.
2. Enter the amount of your “Bill”.
• Press the Right Soft Key Point(.)
to enter a decimal point.
3. Enter the percentage “Rate”.
4. Enter the “# of people”. Press the
OK Key to calculate the result.
• Press the Right Soft Key Erase.
Stop watch
To access the Stop Watch:
1. Press the Left Soft Key Menu >
Tools > Stop Watch.
2. Press the OK Key Start to start the
stopwatch.
3. Press the OK Key Lap to save Lap
time and start counting another.
Up to 20 laps can be saved.
4. Press the Right Soft Key Stop to
stop the stopwatch.
5. Press the OK Key Reset to reset
the stopwatch.
Unit converter
To access the Unit converter:
1. Press the Left Soft Key Menu >
Tools > Unit Converter.
2. Select the desired type of
measurement, and then press the
OK Key. (Length, Weight, Volume,
Area, Temperature, Speed)
Tools 33

Voice service
Voice command
To use Voice Command:
1. Press the Left Soft Key Menu >
Voice Service > Voice Command.
• Call <Name or #> : Use the Call
command to voice dial a name
from your Contact list or a phone
number. When dialing a number,
pronounce each digit, but do not
pause noticeably between the
digits.
• Lookup <Name> : Use the
Lookup command to retrieve and
display information for any name
stored in your Contact list.
• Check <Item> : The Check
command lets you check status
information for your phone
(Status, Signal Strength, Battery).
You can say “Check” or “Check
Status” to see and hear all status
information.
• Press the Left Soft Key Tutorial.
Voice Commands menu
information appears. To return to
the previous page, press the Left
Soft Key Skip.
• Press the Right Soft Key Settings.
(Confirmation, Adaptation, Audio
Modes, About)
note
• Voice Commands – To use the
voice command, press and hold the
Speaker Key for 3 seconds. To exit
Voice Command, press END Key.
- Speaker Phone - To use the
speaker phone, press and release
the Speaker Key. The Speaker
phone icon is displayed in indicator
area. To exit speaker mode, press
and release the Speaker Key.
Voice command settings
1. Press the Left Soft Key Menu >
Voice Service > Voice Command
Settings.
• Conrmation : You can control
when the system asks you to
34 Voice service
confirm a name or number. You
can adapt the system to your
voice for optimal recognition
accuracy. During adaptation,
the system will prompt you to
speak a series of short phrases.
If you need to erase adaptation
data and set the system back to
the factory default, select Reset
Voice.
• Adaptation : You can adapt the
system to your voice for optimal
recognition accuracy. During
adaptation, the system will
prompt you to speak a series
of short phrases. If you need to
erase adaptation data and set
the system back to the factory
default, select Reset Voice.
• Audio Modes : You can control
the level of audio guidance
provided by the system. In
prompt mode (the default), the
system prompts for required
information. In readout mode,
the system prompts for required
information and reads out the
contents of the screen. In expert
mode, audio guidance is
provided by beeps only.
• About : It’s shown a Vsuite
information.
Settings
Display
Menu style
To select how the Menu appears on
your phone:
1. Press the Left Soft Key Menu >
Settings > Display > Menu Style.
2. Select “Icon”, “Tab” or “List”.
3. Press the OK Key to save the
setting.
Wallpaper
1. Press the Left Soft Key Menu >
Settings > Display > Wallpaper.
2. Select “Preset Image”, “My
Pictures” or “My Image”.
3. Press the Navigation Key to scroll
Voice service / Settings 35

through the images.
4. Press the OK Key View to view the
image full screen. Press the Left
Soft Key Check to save the image
as your wallpaper.
Theme Color
1. Press the Left Soft Key Menu >
Settings > Display > Theme Color.
2. Select “Opera”, “Violet”, “Blue”,
“Green” or “Orange”.
3. Press the OK Key to save the
setting.
Clock format
1. Press the Left Soft Key Menu >
Settings > Display > Clock Format.
• “Digital Clock”, “Analog Clock”,
“Dual Clock” or “Calendar Clock”
2. Press the OK Key to save the
setting.
Incoming calls
1. Press the Left Soft Key Menu >
Settings > Display > Incoming
Calls.
2. Select “Preset Image”, “My
Pictures” or “My Image”.
3. Press the Navigation Key to scroll
through the images.
4. Press the OK Key View to view the
image full screen. Press the Left
Soft Key Check to save the image
as your images.
Banner
1. Press the Left Soft Key Menu >
Settings > Display > Banner.
2. Select “On” or “O”.
note The edit banner, turn Banner on,
then enter desired text.
3. Press the OK Key to save the
setting.
Backlight
1. Press the Left Soft Key Menu >
Settings > Display > Backlight.
• Display : 7 Sec, 15 Sec, 30 Sec,
Always On, Always O
• Keypad : 7 Sec, 15 Sec, 30 Sec,
Always On, Always O
36 Settings
• Charger : On, O
2. Press the OK Key to save the
setting.
Brightness
1. Press the Left Soft Key Menu >
Settings > Display > Brightness.
2. Select a setting by pressing the
Navigation Key left or right.
3. Press the OK Key to save the
setting.
Sound
Ringtone
1. Press the Left Soft Key Menu >
Settings > Sound > Ringtone.
2. Select “Incoming Calls”,
“Messages” or “Voice Mail”.
3. Press the OK Key to save the
setting.
Volume
1. Press the Left Soft Key Menu >
Settings > Sound > Volume.
• Voice Calls : To adjust voice calls
volume.
• Incoming Call : To adjust
incoming calls volume.
• Message : To adjust message
volume.
• Speaker Phone : To adjust
Speaker Phone volume.
• Headset & Earpiece : To adjust
headset & earpiece volume.
• Alarms & Schedule : To adjust
alarms & schedule volume.
• Key Tone : To adjust key tone
volume.
2. Select a setting by pressing the
Navigation Key left or right.
note Press the Left Soft Key Vib. to
always vibrate.
3. Press the OK Key to save the
setting.
Alerts
1. Press the Left Soft Key Menu >
Settings > Sound > Alerts.
• Minute Beep : Sounds an alert
every minute during a call.
Settings 37

• Roaming : Sounds an alert when
leaving a service area and
entering a roaming service area.
• Call Connect : Noties you that
a call has been successfully
placed.
• Power On/O : To set phone to
sound a tone when the phone is
powered on/o.
2. Select “On” or “O”.
3. Press the OK Key to save the
setting.
Tone length
1. Press the Left Soft Key Menu >
Settings > Sound > Tone Length.
2. Select “Short” or “Long”.
3. Press the OK Key to save the
setting.
Call
1. Press the Left Soft Key Menu >
Settings > Call
Contacts match
This function will match your
abbreviated dialed number with an
entry from your phone’s contact list.
After dialing 4 numbers, the phone
will display contacts with the same
sequence of numbers. Use the up/
down Navigation Key to scroll to the
desired contact.
1. Select “On” or “O”.
2. Press the OK Key to save the
setting.
Call answer
To select an answer mode:
1. Select “Send Key” or “Any Key”.
2. Press the OK Key to save the
setting.
Auto retry
Automatically redials a call up to 5
times after a set time interval.
1. Select “On” or “O”.
2. Press the OK Key to save the
setting.
38 Settings
TTY mode
Your phone is able to operate with a
TTY (Teletypewriter) device in digital
modes. This feature is system
dependent and may not be available
in all areas.
1. Select “TTY Full”, “TTY + Talk”,
“TTY + Hear” or “TTY O”.
2. Press the OK Key to save the
setting.
note Press the Left Soft Key Info.
Security
Prevents unauthorized use of your
phone. The following settings can be
restricted:
Phone lock
Prevents the phone from being used
without entering the password first.
1. Press the Left Soft Key Menu >
Settings > Security > Enter your
password. > Phone Lock.
note The default Lock code is the last
4 digits of your phone number.
2. Select “Lock Now”, “Unlock” or “On
Power Up”.
3. Press the OK Key to save the
setting.
Change lock code
Changes your 4-digit password.
1. Press the Left Soft Key Menu >
Settings > Security > Enter your
password. > Change Lock Code.
note The default Lock code is the last
4 digits of your phone number.
2. Enter your lock code.
3. “Create your new lock code”
screen appears. Enter your new
lock code.
4. “Re-enter your new lock code”
screen appears. Enter your new
lock code again.
Special number
This feature allows you to set 3
phone numbers that can be called
even when the phone is locked.
Settings 39
Table of contents
Other Cricket Cell Phone manuals

Cricket
Cricket CAPTR II User manual

Cricket
Cricket Vision Plus User manual

Cricket
Cricket EZ User manual

Cricket
Cricket UTStarcom mini User manual

Cricket
Cricket MSGM8 II User manual

Cricket
Cricket TXTM8 User manual

Cricket
Cricket A100 User manual

Cricket
Cricket Alcatel APPRISE User manual

Cricket
Cricket moto g User manual

Cricket
Cricket M615 User manual

Cricket
Cricket CAPTR User manual

Cricket
Cricket Icon 2 User manual

Cricket
Cricket Vision User manual

Cricket
Cricket A200 User manual

Cricket
Cricket TXTM8 3G User manual

Cricket
Cricket Wave User manual

Cricket
Cricket TXTM8 User manual

Cricket
Cricket TXTM8 User manual

Cricket
Cricket SL101AE User manual

Cricket
Cricket A100 User manual