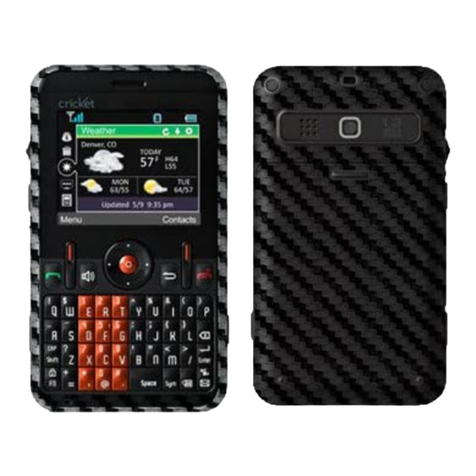
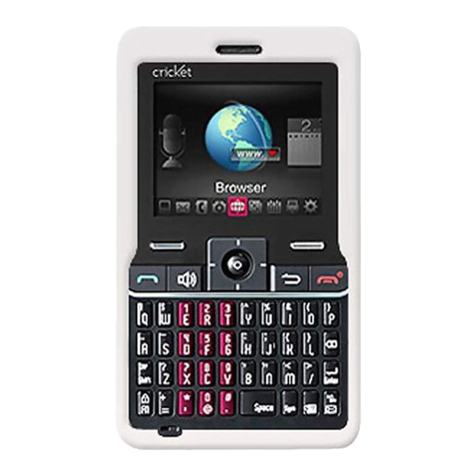
Cricket TXTM8 User manual

CRICKET TXTM8™
Manual Lite
CRICKET TXTM8™
5U000196C0A REV.04
Manual Lite
CRICKET TXTM8™

ZZZP\FULFNHWFRP &RQWHQWV
BEFORE USING TXTM8............................ 2
INSIDE THE PACKAGE ..................................................... 2
HANDSET DESCRIPTION................................................. 2
DISPLAY INDICATORS..................................................... 4
INSTALL BATTERY.......................................................... 5
REMOVE BATTERY.......................................................... 6
CHARGING YOUR BATTERY............................................. 6
BATTERY HANDLING INFORMATION............................... 7
BASIC OPERATION.................................. 8
USING THE WIDGETS MENU........................................... 8
VIBRATE ON/OFF MODE............................................... 11
SPEAKERPHONE MODE................................................ 11
USING AUTO KEYPAD LOCK FUNCTION ......................... 11
AVAILABLE OPTIONS DURING A CALL........................... 12
MAKING AN EMERGENCY CALL.................................... 13
MAKING A CALL WITH LETTERS (EX. 1-800-CRICKET) .. 13
USING THE microSD CARD ........................................... 14
CAMERA...............................................15
TAKE PICTURE.............................................................. 15
PICTURE GALLERY ....................................................... 16
VOICE COMMANDS................................17
VOICE COMMANDS...................................................... 17
VOICE COMMANDS SETTINGS ...................................... 20
VOICE COMMANDS INFO.............................................. 22
VOICE MEMO ........................................23
VOICE MEMO............................................................... 23
MEDIA GALLERY....................................24
MY SOUNDS ................................................................ 24
MY IMAGES ................................................................. 24
MY MUSIC................................................................... 25
MEMORY SETTING.................................26
SAVE OPTIONS............................................................. 26
INTERNAL MEMORY..................................................... 26
EXTERNAL MEMORY.................................................... 26
FORMAT CARD............................................................. 27
BLUETOOTH..........................................28
BLUETOOTH ON/OFF.................................................... 28
NEW DEVICE................................................................ 28
OPTIONS...................................................................... 29
SETTINGS .................................................................... 30
PHONE INFORMATION...........................32
MY NUMBER................................................................ 32
pESN ........................................................................... 32
MEID........................................................................... 32
SW VERSION................................................................ 32
EMAIL ..................................................33
EMAIL ......................................................................... 33
SAFETY AND WARRANTY .......................34
NOTE: Please see the full User’s Manual for your TXTM8 by
going to www.pcdphones.com and downloading a .pdf
version.
Contents

ZZZP\FULFNHWFRP ZZZP\FULFNHWFRP 0DQXDO/LWH0DQXDO/LWH
Before Using TXTM8
1. Display Screen: This screen displays all the information needed to operate your phone.
2. [ ] Menu/Left Soft Key: Press to display the Main menu or access the function listed
above the key.
3. [ ] SEND Key: Press to make or receive a call. From idle mode, press to access the All Calls list.
4. [ ] Speakerphone Key: Press to turn Speakerphone On or Off.
5. [ ] Voicemail Key: Press and hold to automatically dial your voicemail system.
6. Dialing Keypad: In idle mode, press to enter phone numbers.
7. [ ] Mode Change Key: Allows you to change between entering numbers and letters.
8. [ ] Vibrate Mode Key: Press and hold to turnVibrate mode On or Off.
9. [ ] OK Key: Allows you to accept choices when navigating through a menu.
10. [ ] My Messaging Key: Press to access the My Messages Menu.
11. Microphone: Allows the other caller to hear you clearly when you are speaking to them.
12. QWERTY Keyboard: Press to enter numbers, letters, and characters using a full QWERTY
keyboard interface.
13. [ ] CLR Key: When entering a phone number or text, press to delete a single space or
character. Press and hold to delete entire words. Press this key once in a menu to go back one
level. InWAP applications mode, press to retrieve the last URL or press and hold to retrieve the
home page URL. During download mode, press to cancel the download.
14. [ ] END Key: Press and hold to turn the phone on/off or press to end a call or browser.
Within a menu, press to return to idle mode.
15. [ ] Contacts/Right Soft Key: Press to display Contacts or to access the function listed
above the key.
16. [ ] Directional Key: The Directional Key allows you to scroll through phone menu options
or Widgets menu options.
17. Earpiece: The earpiece allows you to hear the other caller.
18. Headset Jack: Plug in the Headset Connector here to use a headset.
19. [ ] Volume Keys: Allows you to adjust the master volume in idle mode or adjust the voice
volume during a call.
20. External Speaker: Music, Ringtones and Sounds are played through the speaker.
INSIDE THE PACKAGE
This package should include all items pictured below. If any are missing or different, immediately
contact the retailer where you purchased the phone.
HANDSET DESCRIPTION
Before Using TXTM8
Handset Battery Cover
Standard Battery
Wall Charger
MANUAL LITE
Manual Lite
20 21 22
23
24
25
26
27
18
19
17
1
2
3
4
5
6
7
8910
16
15
14
13
12
11

0DQXDO/LWH ZZZP\FULFNHWFRP ZZZP\FULFNHWFRP 0DQXDO/LWH
Before Using TXTM8
Icon Icon Descriptions
Bluetooth Discovery: Indicates Bluetooth Discovery Mode is on.
Battery Level: Battery charging level — the more blocks, the stronger the charge.
AVR Active: Voice Commands are ready.
AVR Listening: Indicates the AVR system is providing you with audible instructions.
Silent: Indicates the ringer volume is set to Silent.
Vibrate On: Indicates the ringer is set to Vibrate On.
Speakerphone: Speakerphone mode is active.
Message: Indicates you have new message(s)/urgent message(s).
Voicemail: Indicates you have voicemail message(s)/urgent voicemail message(s).
Text Voicemail: Indicates you have text voicemail message(s)/urgent text voicemail message(s).
Alarm On: Appears when an alarm is set.
Numeric Entry Mode: Enter numbers by pressing the corresponding key on the keypad.
Alphabetical Entry Mode: Enter characters by pressing the key with the desired characters.
INSTALL BATTERY
.Push down the top of the battery cover slot with your finger tip and slide it out to remove from
the unit.
.Slide the battery into the slot located at the bottom of the unit and press until it lays flat in the
battery cavity.
.Replace the battery cover by sliding the battery cover up until it snaps into place.
Before Using TXTM8
21. Self-Portrait Mirror: Displays your reflection when taking pictures.
22. Camera Lens: The lens of your built-in camera.
23. Wrist Strap Eyelet: Accessory eyelet (optional straps and lanyards - purchased separately).
24. Charging/Data Jack: Plug in the Wall Charger or USB Cable here.
25. [ ] AVR Key: In idle mode, press to activate ”Nuance VSuite 3.2“.
26. [ ] Camera Key: Press to access CameraViewfinder mode.
27. microSD Card Slot: You can insert a microSDTM memory card here to increase memory
capacity.
DISPLAY INDICATORS
Icon Icon Descriptions
1X Signal Strength: 1X service is available.
Airplane Mode: Transmitting and receiving information is restricted.
Roaming: The phone is outside of the home service area.
Data Call: Data Session in progress.
Dormant: Phone is in a dormant state during a data call. Phone reverts to Dormant mode when there hasn’t
been activity on a page for some time — the connection is still active and you can make and receive calls.
No Service: Phone cannot receive a signal from the system.
TTY: TTY mode is active.
Voice Call: A call is in progress. * No icon indicates the phone is in idle mode.
GPS Icon: Location Service of your phone is Location On.
Bluetooth: Indicates Bluetooth power is on.
Bluetooth Active: Indicates Bluetooth Active mode.
Bluetooth Connected: Indicates Bluetooth Device is connected.
;
;

0DQXDO/LWH ZZZP\FULFNHWFRP ZZZP\FULFNHWFRP 0DQXDO/LWH
Before Using TXTM8
•When you charge the battery with the phone power off, you will see a charging status screen.You cannot operate
the phone until it is powered on.
•The battery is not fully charged at the time of purchase. Fully charge the battery before use.
•It is more efficient to charge the battery with the handset powered off.
•Battery operating time gradually decreases over time.
•If the battery fails to perform normally, you may need to replace the battery.
BATTERY HANDLING INFORMATION
DO’S
• Only use the battery and charger approved for use with theTXTM8.
• Only use the battery for its original purpose.
• Try to keep batteries in a temperature between 41 °F (5 °C) and 95 °F (35 °C). If the battery is
stored in temperatures above or below the recommended range, give it time to warm up or cool
down before using.
• Store the discharged battery in a cool, dark, and dry place.
• Purchase a new battery when its operating time gradually decreases after fully charging.
• Properly dispose of the battery according to local laws.
DON’TS
• Don’t attempt to disassemble the battery – it is a sealed unit with no serviceable parts.
• Don’t accidentally short circuit the battery by carrying it in your pocket or purse with other
metallic objects such as coins, clips and pens.This may critically damage the battery.
• Don’t leave the battery in extremely hot or cold temperatures. Otherwise, it could significantly
reduce the capacity and lifetime of the battery.
• Don’t dispose of the battery by placing into a fire.
Before Using TXTM8
If the battery is not correctly placed in the compartment, the handset will not turn on and/or the battery may detach
during use.
REMOVE BATTERY
.To remove the battery cover, push down the top of the battery cover slot with your finger tip
and slide the battery cover out from the unit.
.Push the bottom of battery upwards while inserting your finger into the slot (1) and remove (2)
the battery.
.Replace the battery cover by sliding the battery cover up until it snaps into place.
CHARGING YOUR BATTERY
.To charge the phone, open the Charging/Data Jack cover on the right side of the phone, and
connect the charger adapter. Plug the other end into a standard outlet.
.To remove the adapter connection, squeeze the adapter’s side buttons (1) and pull (2).
;
;
X
Y
CORRECT INCORRECT
CORRECT INCORRECT

0DQXDO/LWH ZZZP\FULFNHWFRP ZZZP\FULFNHWFRP 0DQXDO/LWH
Basic Operation Basic Operation
.To return to the previous step, press the CLR Key . To exit the currentWidget sub menu and
return to the idle mode, press the END Key or press the Directional Key up, down, left or
right to select icon . Press the OK Key .
Examples:
ADD NEW WIDGET MENU ITEMS
.From idle mode, press the Directional Key up or down to select the Personalize Icon, then
press the OK Key [OK].
.Press the Directional Key right to select the Configure Widgets option, then press the OK
Key [OK].
.Press the Directional Key left or right to select Add Widget location, then press the OK
Key .
USING THE WIDGETS MENU
TheWidget scroll menu (located at the left of the Idle screen) provides quick access toWidget features (features
like Horoscope, Storefront, My Account, Personalize, Weblinks, Weather and News) and keeps them organized
and always accessible.
.From idle mode, press the Directional Key up or down to scroll through theWidgets Menu,
then press the OK Key [OK] to select the feature.
Widget
Menu Icon Widget Menu Descriptions
Horoscope: View your daily horoscope.
Storefront: Download your favorite Graphics, Ringtones, Themes and even Ringback tones.
My Account: This option provides you with account specific information such as Balance Due, Date Due,
Last Payment, Last Date and Flex Bucket.
Personalize: You can Add, Delete, Change and Move from your Widgets Menu.
Weblinks: Access Web services menu.
Weather: Check out the current forecast in your city.
News: Instantly access breaking news and top stories.
Information Sub Menu: Select
to minimize information screen.
Select
to refresh information. Select
to launch Browser and then setting to Personalize features.
.The selected Widget menu will be displayed. The Widget menu icon is displayed on the left
hand side of the display.
.To scroll through the Widget sub options, press the Directional Key up, down, left or right,
then press the OK Key .
;
Press the Directional
Key up or down
to scroll through the
Widgets Menu Icon
To scroll through the options,
press the Directional Key up,
down, left or right, then press
the OK Key .
to refresh icon
to minimize icon
to settings icon.
Press the OK Key .

0DQXDO/LWH ZZZP\FULFNHWFRP ZZZP\FULFNHWFRP 0DQXDO/LWH
Basic Operation Basic Operation
REMOVE WIDGET MENU ITEMS
.From idle mode, press the Directional Key up or down to select the
Personalize Icon,
then press the OK Key [OK].
.Press the Directional Key right to select the Configure Widgets option, then press the OK
Key [OK].
.Press the Directional Key left or right to select the feature you want to remove.
.Press the Directional Key up or down to select Delete, then press the OK Key .
.A confirmation window appears.
.Press the Directional Key up or down to select Delete, then press the OK Key .
The default Widget Menu items - Personalize, My Account and Storefront - cannot be Deleted.
VIBRATE ON/OFF MODE
Vibrate Mode mutes key tones and activates an alert for an incoming call or message.To activateVibrate Mode:
.From idle mode, slide out the QWERTY keyboard, then press and hold the # Key .
.To disable Vibrate Mode, from the idle screen press and hold the # Key again.
SPEAKERPHONE MODE
The Speakerphone feature lets you hear audio through the speaker and talk without holding the phone.
.To activate the Speakerphone in idle mode or while on a call, press the Speakerphone Key
. Conversely, press the Speakerphone Key again to deactivate the Speakerphone.
USING AUTO KEYPAD LOCK FUNCTION
To lock/unlock the keypad:
.When the Slide is closed, all your device keys are locked. To unlock them, press any key, “Press
and hold OK Key to unlock keypad”displays, then press and hold the OK Key [OK].
You can also open the slide to unlock the keypad.
.Press the Directional Key up or down to scroll to the Widgets Catalog list.
.Select the feature to add, then press the OK Key .
.Press the Directional Key up or down to select the Add [Features Name], then press the OK
Key .
REPLACE WIDGET MENU ITEM
.From idle mode, press the Directional Key up or down to select the
Personalize Icon,
then press the OK Key [OK].
.Press the Directional Key right to select the Configure Widgets option, then press the OK
Key [OK].
.Press the Directional Key left or right to select the feature you want to replace.
.Press the Directional Key up or down to select Change, then press the OK Key .
.Press the Directional Key up or down to scroll through the Widgets Catalog list.
.Select the feature to replace, then press the OK Key .
.Press the Directional Key up or down to select the Change to [Features Name], then press
the OK Key .
The default Widget Menu items - Personalize, My Account and Storefront - cannot be Replaced.
MOVE WIDGET MENU ITEM
.From idle mode, press the Directional Key up or down to select the
Personalize Icon,
then press the OK Key [OK].
.Press the Directional Key right to select the Configure Widgets option, then press the OK
Key [OK].
.Press the Directional Key left or right to select the feature you want to move.
.Press the Directional Key up or down to select Move, then press the OK Key .
.Press the Directional Key left or right to scroll to change the position.
.Press the Directional Key up or down to select Place, then press the OK Key .
The default Widget Menu items - Personalize, My Account and Storefront - cannot be Moved.

0DQXDO/LWH ZZZP\FULFNHWFRP ZZZP\FULFNHWFRP 0DQXDO/LWH
Basic OperationBasic Operation
MAKING AN EMERGENCY CALL
The 911 feature automatically places the phone in the Emergency Call Mode when you dial the preprogrammed
emergency number, 911. It also operates in Lock Mode and out of the service area.
911 IN LOCK MODE
To make an Emergency Call in Lock Mode:
.Slide out the QWERTY keyboard, enter“911”, then press the SEND Key .
.The call connects.
.The phone maintains Emergency Mode for 5 minutes. When the call ends, the phone returns to
Lock Mode.
911 USING ANY AVAILABLE SYSTEM
To make an Emergency Call using any available system:
.Slide out the QWERTY keyboard, enter“911”, then press the SEND Key .
.The call connects.
.The phone will stay in Emergency Mode for 5 minutes.While the phone is in Emergency Mode,
the phone can receive an incoming call from any available system or you can make outgoing
calls even in Emergency Callback Mode. In this case, making a call can automatically end the
Emergency Callback Mode.
The 911 call does not appear in the Recent Call list.
MAKING A CALL WITH LETTERS EX. 1800CRICKET
.Slide out the QWERTY keyboard and from idle mode enter the phone number including letters.
Press the SEND Key .
While entering the phone number, press and hold the Mode Change Key
to lock in alphabetical entry mode. To
change alphabetical entry mode to numeric mode, press and hold the Mode Change Key
again. If you enter the
key that is not assigned to number, it shall not be displayed on the screen.
AVAILABLE OPTIONS DURING A CALL
During a phone call, you can access the following features by pressing the Right Soft Key [Options]:
MUTE/UNMUTE
If you press Mute during a call, the person you are speaking with cannot hear you or any sounds from your side of the conversa-
tion. However, you can still hear them.
.Press the Left Soft Key [Mute/Unmute].
MESSAGES
To send Messages during a call:
.Press the Right Soft Key [Options], slide out the QWERTY keyboard, and press
“1. Messages”.
CONTACTS
To view your Contacts list during a call:
.Press the Right Soft Key [Options], slide out the QWERTY keyboard, and press“2. Contacts”.
RECENT CALLS
To view your Recent Calls list during a call:
.Press the Right Soft Key [Options], slide out the QWERTY keyboard, and press
“3. Recent Calls”.
CONNECT BLUETOOTH
To access the Bluetooth menu during a call:
.Press the Right Soft Key [Options], slide out the QWERTY keyboard, and press
“4. Connect Bluetooth”.
If an Audio device is connected,“To Phone/To Headset”is displayed in the options menu instead of“Connect
Bluetooth”.
SPEAKER PHONE ON/OFF
To activate the Speakerphone during a call:
.Press the Right Soft Key [Options], slide out the QWERTY keyboard, and press
“5. Speaker Phone On/Off”.

0DQXDO/LWH ZZZP\FULFNHWFRP ZZZP\FULFNHWFRP 0DQXDO/LWH
CameraBasic Operation
TAKE PICTURE
.From idle mode, press and hold the OK Key [OK] to unlock the keypad, press the Left Soft
Key [Menu], the Directional Key to select“Camera”, then slide out the QWERTY key-
board and press 1.Take a Picture. Or, to access the camera, press the Side Camera Key
when
slide is opened.
When the slide is closed and you press the Side Camera Key
, you may get the message that you need to unlock the
keypad. Press and hold the OK Key [OK].
.Point the camera lens at your subject. You can check the picture framing through the display
screen.
•Press the Directional Key left/right: Zoom Down/Up. (Except 1280X960 mode).
•Pressing the Right Soft Key [Options], you can choose from the following:
1. Self Timer: To activate the camera’s timer function. (Off/3 Seconds/5 Seconds/10 Seconds)
2. Image Controls...:
• Brightness: To adjust brightness up/down( -2, -1, 0, 1, 2).
• White Balance: To select a white tone balance. (Auto/Sunny/Cloudy/Tungsten/Fluorescent)
• Color Effects: To select picture effects. (Normal/Gray/Sepia/Negative)
3. Settings...:
• Resolution: To select a resolution for a picture. (1280x960/640x480/320x240/160x120)
• Quality: To select a picture quality. (High/Medium/Low)
• Shutter Sound: To select a shutter sound. (Default/Say“Cheese”/Ready! 123)
To view captured images, press the Left Soft Key [Gallery].
.Press the Side Camera Key
or press the OK Key [CAPTURE] to take the picture.
.After taking the picture it will be displayed.
To save the picture, press the Left Soft Key [Save].
To take another picture without saving the picture you just took,
press the Right Soft Key [Erase].
To send the picture to someone, press the OK Key [SEND].
USING THE microSD CARD
The microSD card stores sounds, images, photos, music, and other files.
The microSD card is sold separately and is not included with your phone.
INSTALLING THE microSD CARD
To install a microSD card:
.With the microSD card slot opened and the gold contacts facing down,
insert the microSD card into the slot.
.Push the card in until it clicks into place.“Memory card detected”will
appear on the display. Close the microSD card slot.
To prevent possible damages, please keep microSD card slot closed at all times regardless of whether the microSD card
is inserted or not.
REMOVING THE microSD CARD
To remove the microSD card:
.Open the microSD card slot. Use your thumb to press and release the
microSD card. It will pop-out allowing you to remove the card.
.Remove the card and close the microSD card slot.
•When you insert the microSD card, make sure contact terminals are facing down.
•Do not remove the microSD card while reading or writing files. Otherwise it could be damaged.
•Only use a microSD card with yourTXTM8.
•microSD cards with more than 4GB storage capacity may cause a decrease in the phone performance.
HOW IS MUSIC TRANSFERRED?
Transfer from PC to Handset via USB Cable Transfer from PC to Handset via Memory
card
MP3 Songs Yes Yes
0DQXDO/LWH ZZZP\FULFNHWFRP ZZZP\FULFNHWFRP 0DQXDO/LWH
Voice CommandsCamera
VOICE COMMANDS
Your phone is equipped with an AVR (AdvancedVoice Recognition) feature. This feature allows you to make calls
or use the phone’s functions by simply using your voice. All you have to do is talk into the phone, and the phone
will recognize your voice and complete tasks by itself.
.From idle mode, press and hold the OK Key [OK] to unlock the keypad, press the Left Soft
Key [Menu], the Directional Key to select“Tools/Utilities”, then slide out the QWERTY
keyboard and press 7. Voice Commands.
Shortcut: In idle mode, press and hold the Side AVR Key
to access theVoice Commands menu.
.The phone displays theVoice Commands menu and prompts you to say the name of the com-
mand you want to use. To complete your task, simply follow the voice prompts. You can speak
the name of the command after you hear a beep.
.Select one of the following options by pressing the Directional Key up or down, press the
OK Key .
•Call <Name or #>
•Send Text <Name or #>
•Send Picture <Name or #>
•Lookup <Name>
•Go To <Menu>
•Check <Item>
.When it recognizes one of these commands, the phone launches the associated application. If
the phone does not hear a command within approximately eight seconds, AVR mode will turn
itself off.
PICTURE GALLERY
In Picture Gallery you can view all the pictures you have taken, store selected images in your phone, delete
images and access additional picture options.
.From idle mode, press and hold the OK Key [OK] to unlock the keypad, press the Left Soft
Key [Menu], the Directional Key to select“Camera”, then slide out the QWERTY
keyboard and press 2. Picture Gallery.
.Press the Directional Key up, down, left or right to select your desired pictures, then press
the Right Soft Key [Options].
.Select one of the following options:
•Set As: Assigns the selected picture to display for specific tasks. (Wallpaper, Screensaver, Picture ID)
•Send by Picture Message: To send a picture message.
•Send by Bluetooth: To send the selected picture to another Bluetooth device.
•Rename: Rename the selected picture.
•Lock/Unlock: Select to lock or unlock the selected picture.
•Move: To move the picture to another location.This only appears when a memory card is inserted.
•Erase All: To erase all the pictures in your phone. (Internal Memory/External Memory)
•File Info: Displays information about the selected picture. (File Name/File Type/Date/Time/Resolution/
Size)
TO ERASE THE CURRENT PICTURE
.From idle mode, press and hold the OK Key [OK] to unlock the keypad, press the Left Soft
Key [Menu], the Directional Key to select“Camera”, then slide out the QWERTY key-
board and press 2. Picture Gallery.
.Press the Directional Key up, down, left or right to select the picture you want to erase,
then press the Left Soft Key [Erase].“Erase Picture file?”will appear on your display.
.Press the Right Soft Key [Yes]. A confirmation message appears.

0DQXDO/LWH ZZZP\FULFNHWFRP ZZZP\FULFNHWFRP 0DQXDO/LWH
Voice Commands Voice Commands
GO TO <MENU>
Use the Go To command to open an application on your phone.You can say ”Go To”by itself and be prompted to say the applica-
tion name, or you can skip the prompt by saying ”Go To”followed by the application name.
.You will hear“Say a command”and the Voice Commands menu will be displayed.
.Say“Go To”followed immediately by one of the following items:
•Recent Calls
•Messages
•Contacts
•Camera
•Browser
•Games & Apps
•More Options (Tools & Utilities, Media Gallery, Settings)
CHECK <ITEM>
The Check command lets you check status information for your phone. You can say“Check“ to see and hear all status
information.
.You will hear“Say a command”and the Voice Commands menu will be displayed.
.Say“Check”followed immediately by one of the following items:
•Status
•Voicemail
•Messages
•Missed Calls
•Time
•Signal Strength
•More Options (Network, Battery, My Phone Number, Volume)
CALL <NAME OR #>
Use the Call command to voice dial a name from your Contact list or a phone number. When dialing a number, pronounce each
digit, but do not pause noticeably between the digits.
.You will hear“Say a command”and the Voice Commands menu will be displayed.
.If calling a contact from your list, say Call <Name>. Your phone will ask you to confirm the
name you said. Say“Yes”if it was repeated correctly. That phone number will be dialed. If there
is more than one number saved for that Contacts, you will be asked to confirm which number
to dial.
Examples: - CallTom Smith, - Call 617-555-1212, - Call Bob Carson’s mobile,
- Call Dee Harper at Home.
SEND TEXT <NAME OR #>
Use the Send command to send a text message to a specified name or number.
.You will hear“Say a command”and the Voice Commands menu will be displayed.
.Say“Send Text <Name or #>”.
Examples: -“Send Text to Dee Harper’s Mobile“, - “Send Text Tom Smith“,
-“Send Text to Tom Smith’s Mobile”, -“Send Text to 617-555-1212”.
SEND PICTURE <NAME OR #>
Use the Send command to send a picture message to a specified name or number.
.You will hear“Say a command”and the Voice Commands menu will be displayed.
.Say“Send Picture <Name or #>”.
Examples: -“Send Picture to Dee Harper’s Mobile“, -“Send Picture Tom Smith“,
-“Send Picture toTom Smith’s Mobile”, -“Send Picture to 617-555-1212”.
LOOKUP <NAME>
Use the Lookup command to retrieve and display information for any name stored in your Contact list.
.You will hear“Say a command”and the Voice Commands menu will be displayed.
.Say“Lookup <Name>”.
Examples: - LookupTom Jones.
.TheView Entry page will be displayed for that entry name.

0DQXDO/LWH ZZZP\FULFNHWFRP ZZZP\FULFNHWFRP 0DQXDO/LWH
Voice CommandsVoice Commands
.When you finished with a full session, you will reach a screen that reads Adaptation complete.
AUDIO MODES
You can control the level of audio guidance provided by the system. In Prompt Mode (the default), the system prompts you for
required information. In Readout Mode, the system prompts you for required information and reads out the contents of the
screen. In Expert Mode, audio guidance is provided by beeps only.
.From idle mode, press and hold the OK Key [OK] to unlock the keypad, press the Left Soft
Key [Menu], the Directional Key to select“Tools/Utilities”, then slide out the QWERTY
keyboard and press 7. Voice Commands.
.Press the Right Soft Key [Settings],“3. Audio Modes”.
.Select “Expert Mode”, “ Prompt Mode”or “Readout Mode”by pressing the Directional Key
up or down, then press the Left Soft Key [OK].To view help for Audio Modes, press the
Right Soft Key [Help].
SPEAKERPHONE
You can control how the system uses the speakerphone. Select Always On to have outgoing audio play through the speaker-
phone. Select Always Off to have outgoing audio play through the internal speaker. Select Automatic to use the speakerphone
setting of the phone.
.From idle mode, press and hold the OK Key [OK] to unlock the keypad, press the Left Soft
Key [Menu], the Directional Key to select“Tools/Utilities”, then slide out the QWERTY
keyboard and press 7. Voice Commands.
.Press the Right Soft Key [Settings],“4. Speakerphone”.
.Select “Automatic”, “Always On”or “Always Off”by pressing the Directional Key up or down,
then press the Left Soft Key [OK].To view help for Speakerphone, press the Right Soft Key
[Help].
ABOUT
To view your voice recognition software information:
.From idle mode, press and hold the OK Key [OK] to unlock the keypad, press the Left Soft
Key [Menu], the Directional Key to select“Tools/Utilities”, then slide out the QWERTY
keyboard and press 7. Voice Commands.
.Press the Right Soft Key [Settings],“5. About”.
VOICE COMMANDS SETTINGS
CONFIRMATION
When the phone does not recognize your voice command, it will ask you to repeat your voice command. If it does not recognize
the name or number, it will display a list of up to three choices and speak each one in turn.You can control how often the phone
asks you to confirm the recognized name or number.
.From idle mode, press and hold the OK Key [OK] to unlock the keypad, press the Left Soft
Key [Menu], the Directional Key to select“Tools/Utilities”, then slide out the QWERTY
keyboard and press 7. Voice Commands.
.Press the Right Soft Key [Settings],“1. Confirmation”.
.Select “Automatic”, “Always Confirm”or “Never Confirm”by pressing the Directional Key up
or down, then press the Left Soft Key [OK].To view help for Confirmation, press the Right
Soft Key [Help].
ADAPTATION
Voice Command is speaker independent, which means that no training or adaptation is required. Some users with heavy accents
or unusual voice characteristics may find difficulty in achieving high accuracy with speaker independentVoice Command, so the
AdaptVoice feature allows users to dramatically improve the recognition accuracy through adaptation. Users who get acceptable
recognition accuracy will find no additional benefit to performing the Adapt Voice adaptation.
.From idle mode, press and hold the OK Key [OK] to unlock the keypad, press the Left Soft
Key [Menu], the Directional Key to select“Tools/Utilities”, then slide out the QWERTY
keyboard and press 7. Voice Commands.
.Press the Right Soft Key [Settings],“2. Adaptation”.
.Scroll to select“1. Adapt Voice”or “2. Reset Voice”and press the Left Soft Key [Select]. To
view help for Adaptation, press the Right Soft Key [Help].
•Adapt Voice: Requires that you make recordings of your voice to customize the voice recognitions
system. It will take a few minutes.
•Reset Voice: Once you finish the adaptation process, you can reset the adaptation to the factory default
settings.
Reset Voice menu option only appears after you finish the Adapt Voice process.
.Wait for the beep, and then repeat the sentences using a normal tone of voice.

0DQXDO/LWH ZZZP\FULFNHWFRP ZZZP\FULFNHWFRP 0DQXDO/LWH
Voice Commands Voice Memo
VOICE MEMO
Voice Memo allows you to record a reminder message that can be up to 60 seconds.To record a memo:
.From idle mode, press and hold the OK Key [OK] to unlock the keypad, press the Left Soft
Key [Menu], the Directional Key to select“Tools/Utilities”, then slide out the QWERTY
keyboard and press 8. Voice Memo.
.Press the Left Soft Key [New] to record a new voice memo. When finished, press the Left
Soft Key [Save].
PLAY SAVED VOICE MEMO
To play a saved voice memo:
.From idle mode, press and hold the OK Key [OK] to unlock the keypad, press the Left Soft
Key [Menu], the Directional Key to select“Tools/Utilities”, then slide out the QWERTY
keyboard and press 8. Voice Memo.
.Press the Directional Key up or down to select the savedVoice Memo you want to play,
then press the OK Key [PLAY].
.To stop playing the Voice Memo, press OK Key [PAUSE]. When the Voice Memo is paused,
press OK Key [PLAY] to play the Voice Memo continuously.
.Press the Right Soft Key [Options] to choose from the following:
1. Rename: Rename the selected voice memo.
2. Erase: Erase the selected voice memo.
3. Lock/Unlock: Select to lock or unlock the selected voice memo.
4. Erase All: Erase all the saved voice memo.
5. Send by Picture Message: To send a picture message.
6. Send by Bluetooth: To send the selected voice memo to another Bluetooth device.
.The ”Nuance VSuite 3.2“ version appears.
.To return to the previous page, press the Right Soft Key [Back].
VOICE COMMANDS INFO
.From idle mode, press and hold the OK Key [OK] to unlock the keypad, press the Left Soft
Key [Menu], the Directional Key to select“Tools/Utilities”, then slide out the QWERTY
keyboard and press 7. Voice Commands.
.Press the Left Soft Key [Tutorial].
.Voice Commands menu information appears.
.To return to the previous page, press the Left Soft Key [Skip].

0DQXDO/LWH ZZZP\FULFNHWFRP ZZZP\FULFNHWFRP 0DQXDO/LWH
Media Gallery Media Gallery
.Press the Right Soft Key [Options] to choose from the following:
•Set As: Assigns the selected image for specific tasks (Wallpaper, Screensaver, Picture ID).
•Send by Picture Message: To send a MMS message.
•Send by Bluetooth: To send selected image to another Bluetooth device.
•Rename: Rename the selected image.
•Lock/Unlock: Select to lock or unlock the selected image.
•Move: To move the image to another location.
•Erase All: To erase all the image files in your phone. (Internal Memory/External Memory)
•File Info: Displays information about the selected image.
With microSD card inserted, you can browse all folders and image files saved in the microSD card by searching the
Back folder . indicates that current file is stored in the external memory. indicates that current file is
stored in the phone memory. indicates that you have sub directory for the current folder.
MY MUSIC
You can play music with this menu when a microSD card is inserted and a music file is stored in the microSD
card.To play music through your phone, copy downloaded music from your PC to My_Music folder of the
microSD card then insert the card into your phone.
.From idle mode, press and hold the OK Key [OK] to unlock the keypad, press the Left Soft
Key [Menu], the Directional Key to select“Media Gallery”, then slide out the QWERTY
keyboard and press 3. My Music.
.To play a song, press the Left Soft Key [Mark] to select desired songs, then press the OK
Key [PLAY].
.Press the Right Soft Key [Options] to choose from the following:
•Setting: To select music file playback options(1. Normal, 2. Repeat, 3. Repeat All, 4. Shuffle).
•Set As: Assigns the selected music for specific tasks (Ringtone, Contact ID, Alert Tone).
•Mark All/Unmark All: Check or uncheck to select or unselect all the listed files.
•Erase: To erase a selected music file.
•Erase All: To erase all the listed music files.
•File Info: Displays information about the selected music.
MY SOUNDS
This menu displays music files saved in your phone and microSD card.
.From idle mode, press and hold the OK Key [OK] to unlock the keypad, press the Left Soft
Key [Menu], the Directional Key to select“Media Gallery”, then slide out the QWERTY
keyboard and press 1. My Sounds.
.Scroll through the downloaded or saved sounds to select the sound and press the OK Key
[PLAY] to listen to the highlighted sound. To erase the selected sound, press the Left Soft Key
[Erase], then press the Right Soft Key [Yes].
.Press the Right Soft Key [Options] to choose from the following:
•Send by Picture Message: To send a MMS message.
•Send by Bluetooth: To send selected sound to another Bluetooth device.
•Set As: Assigns the selected sound for specific tasks (Ringtone, Contact ID, Alert Tone).
•Rename: Rename the selected sound.
•Lock/Unlock: Select to lock or unlock the selected sound.
•Move: To move the sound to another location.
•Erase All: To erase all the sound files in your phone. (Internal Memory/External Memory)
•File Info: Displays information about the selected sound.
Since you can’t Send or Move a DRM file, the Send/Move options will not appear when working with these type of
files.With microSD card inserted, you can browse all folders and sound files saved in the microSD card by searching
the Back folder . indicates that current file is stored in the external memory. indicates that current file is
stored in the phone memory. indicates that you have sub directory for the current folder.
MY IMAGES
This menu displays image files saved in your phone and microSD card.
.From idle mode, press and hold the OK Key [OK] to unlock the keypad, press the Left Soft
Key [Menu], the Directional Key to select“Media Gallery”, then slide out the QWERTY
keyboard and press 2. My Images.
.Scroll through the downloaded or saved image files to select the image and press the OK Key
[VIEW] to view the highlighted image.To erase the selected image, press the Left Soft Key
[Erase], then press the Right Soft Key [Yes].

0DQXDO/LWH ZZZP\FULFNHWFRP ZZZP\FULFNHWFRP 0DQXDO/LWH
FORMAT CARD
To format the available External Memory:
.From idle mode, press and hold the OK Key [OK] to unlock the keypad, press the Left Soft
Key [Menu], the Directional Key to select“Settings”, then slide out the QWERTY key-
board and press 5. Memory,4. Format Card.
.Press the OK Key [OK], then“All data in card will be lost, Continue?”will appear on the LCD
screen.
.Press the Right Soft Key [Yes]. A confirmation message appears.
SAVE OPTIONS
To select whether to save to Internal Memory or to External Memory when saving a file:
.From idle mode, press and hold the OK Key [OK] to unlock the keypad, press the Left Soft
Key [Menu], the Directional Key to select“Settings”, then slide out the QWERTY key-
board and press 5. Memory,1. Save Options.
.Press the OK Key [OK] to select“1. Picture”.
.Press the Directional Key up or down to select“Internal Memory”or “External Memory”,
then press the OK Key [OK].
INTERNAL MEMORY
To check the available Internal Memory capacity, used capacity, and total capacity:
.From idle mode, press and hold the OK Key [OK] to unlock the keypad, press the Left Soft
Key [Menu], the Directional Key to select“Settings”, then slide out the QWERTY key-
board and press 5. Memory,2. Internal Memory.
.Press the OK Key [OK] to return to the previous screen.
EXTERNAL MEMORY
To check the available External Memory capacity, used capacity, and total capacity:
Memory card must be inserted into the phone to perform these functions.
.From idle mode, press and hold the OK Key [OK] to unlock the keypad, press the Left Soft
Key [Menu], the Directional Key to select“Settings”, then slide out the QWERTY key-
board and press 5. Memory,3. External Memory.
.Press the OK Key [OK] to return to the previous screen.
Memory SettingMemory Setting

0DQXDO/LWH ZZZP\FULFNHWFRP ZZZP\FULFNHWFRP 0DQXDO/LWH
Bluetooth Bluetooth
keyboard and press 6. Bluetooth. Press the OK Key [OK] or select“1. New Device”.
.If the Bluetooth® power is switched off, the following message will appear on the LCD screen:
“Turn bluetooth power on?”. Press the Right Soft Key [Yes].
.The handset will prompt you with the following message on the LCD screen:“Place device you
are connecting to in discoverable mode”. Press the OK Key [OK].
.The device will appear in the“New Device ”menu. Press the Directional Key up or down to
select the device you wish to pair to, then press the Left Soft Key [Pair]. Before pairing to
the device, press the Right Soft Key [Info] to view the device information.
.The handset will prompt you for the password. Consult the Bluetooth® accessory (sold sepa-
rately) instructions for the appropriate password (typically“0000”—4 zeroes). Enter the pass-
word, then press the OK Key [OK].
You do not need to input the password for pairing when the password of the Bluetooth® Headset or hands-free kit is
0000.
.Once connected, you will see the device listed in the Bluetooth and the Bluetooth® device con-
nected icon will appear at the top of the LCD screen when connected to the Bluetooth® device.
You can also check out the connection with an Arrow icon on the Bluetooth.
•In the Bluetooth, you can disconnect the connected device with an icon by pressing the OK Key [Drop].
Conversely, you can reconnect by pressing the OK Key [OK] again.
•When an audio device is connected, you can select another device and the connection is automatically transferred
from that audio device to the other one.
•If multiple devices are displayed, select the devices you want to connect.
OPTIONS
.From idle mode, press and hold the OK Key [OK] to unlock the keypad, press the Left Soft
Key [Menu], the Directional Key to select“Settings”, then slide out the QWERTY
keyboard and press 6. Bluetooth.
.Press the Directional Key up or down to select the paired device.
.Press the Right Soft Key [Options].
.Press the Directional Key up or down to select one of the following options, then press the
OK Key [OK].
Bluetooth technology connectivity enables wireless connections between electronic devices. If connected with
a Bluetooth Handsfree device, you can use your phone more freely. Since devices with Bluetooth connectivity
communicate using radio waves, your phone and the other device do not need to be in direct line-of-sight.
The two devices only need to be within 10 meters (30 feet) of each other.The connection can be subject to
interference from obstructions such as walls or other electronic devices. This device is compliant with Bluetooth
specification 2.0, supporting the following profiles: HSP V1.0 (headset profile), AVRCP V1.0 (stereo profile), HFP
V1.5 (handsfree car kit profile) and File Transfer. To ensure interoperability between other devices supporting
Bluetooth technology, use approved enhancements for this model. Check with the manufacturers of other
devices to determine their compatibility with this phone. There may be restrictions on using Bluetooth technol-
ogy in some locations. Check with your local authorities or service provider. If you want more information on this
function, visit the Bluetooth Technology organizationWeb site: https://www.bluetooth.org/.
Important: Features using Bluetooth technology or allowing such features to run in the background while using other
features, increase the demand on battery power and reduce the battery life.
BLUETOOTH ON/OFF
To toggle Bluetooth® power On/Off:
.From idle mode, press and hold the OK Key [OK] to unlock the keypad, press the Left Soft
Key [Menu], the Directional Key to select“Settings”, then slide out the QWERTY
keyboard and press 6. Bluetooth.
.Press the Right Soft Key [Options].
.Press“1. Power On/Off”.
If Bluetooth power is not on, you will be prompted to turn it on in order to proceed.
.Press the Directional Key up or down to select“On”or“Off”, then press the OK Key
[OK]. A Confirmation window appears.
NEW DEVICE
Pairing is the process that allows the handset to locate, establish and register a 1-to-1 connection with the
target device.
.Follow the Bluetooth® accessory instructions to set the device to pairing mode.
.From idle mode, press and hold the OK Key [OK] to unlock the keypad, press the Left Soft
Key [Menu], the Directional Key to select“Settings”, then slide out the QWERTY

0DQXDO/LWH ZZZP\FULFNHWFRP ZZZP\FULFNHWFRP 0DQXDO/LWH
Bluetooth Bluetooth
.Press“3. Discovery Mode”.
If Bluetooth power is not on, you will be prompted to turn it on in order to proceed.
.Press the Directional Key up or down to select“On”or“Off”, then press the OK Key
[OK].
SUPPORTED PROFILES
To view brief descriptions of the profiles supported by the phone:
.From idle mode, press and hold the OK Key [OK] to unlock the keypad, press the Left Soft
Key [Menu], the Directional Key to select“Settings”, then slide out the QWERTY
keyboard and press 6. Bluetooth.
.Press the Right Soft Key [Options].
.Press“4. Supported Profiles”.
.Press the Directional Key up or down to select one of the following profiles, then press the
OK Key [VIEW].
Headset/Handsfree/Stereo/Object Push/File Transfer
AUTO PAIR HANDSFREE
To set Auto Pair Handsfree On/Off:
.From idle mode, press and hold the OK Key [OK] to unlock the keypad, press the Left Soft
Key [Menu], the Directional Key to select“Settings”, then slide out the QWERTY
keyboard and press 6. Bluetooth.
.Press the Right Soft Key [Options].
.Press“5. Auto Pair Handsfree”.
.Press the Directional Key up or down to select“On”or“Off”, then press the OK Key
[OK].
•Remove Device: Removes a device from the pairing list.
•Rename Device: Renames a paired device.
•Service Discovery: To search for the services that the selected device supports.
•Send Name Card: Send name cards stored in Contacts to a selected device.
•Send Picture: Send photos stored in My Images to a selected device.
•Send Ringtone: Send sound files stored in My Sounds to a selected device.
•Get Name Card: Get name cards from the selected device.
•Device Info: Displays device information.
•Any files that have copyright or content protection can not be transferred from your phone.
•If ”Send Picture“ is selected, FILETRANSFER supports jpg(jpeg), gif, bmp and png file formats.
•If ”Send Ringtone“ is selected, FILE TRANSFER supports mp3, pmd, sp-midi, evrc, evrc-b, qcp 13k and mmf file
formats.
•Received mp3, pmd, sp-midi, evrc, evrc-b, qcp 13k and mmf files are saved in the My Sounds.
SETTINGS
MY PHONE NAME
To edit the Bluetooth® name of your phone:
.From idle mode, press and hold the OK Key [OK] to unlock the keypad, press the Left Soft
Key [Menu], the Directional Key to select“Settings”, then slide out the QWERTY
keyboard and press 6. Bluetooth.
.Press the Right Soft Key [Options].
.Press“2. My Phone Name”.
.Use the numeric keypad to enter a new custom name.
.Press the OK Key [OK] to save and exit.
DISCOVERY MODE
To set whether your device is able to be searched for by other Bluetooth® devices in the area:
.From idle mode, press and hold the OK Key [OK] to unlock the keypad, press the Left Soft
Key [Menu], the Directional Key to select“Settings”, then slide out the QWERTY
keyboard and press 6. Bluetooth.
.Press the Right Soft Key [Options].

0DQXDO/LWH ZZZP\FULFNHWFRP ZZZP\FULFNHWFRP 0DQXDO/LWH
Phone Information Email
EMAIL
Allows you to download an Email application from BREW®Application Download Server. Once, you have setup
the Email application, you can send and receive Email messages with your device.
.From idle mode, press and hold the OK Key [OK] to unlock the keypad, press the Left Soft
Key [Menu], the Directional Key to select“Messages”, then slide out the QWERTY
keyboard and press 4. Email.
.BREW®application manager will launch a link and provide the download for Email
applications.
.Follow the instructions on your screen to setup the Email application.
.After you have download and setup the Email application, you can start to use it with step 1.
MY NUMBER
To view your phone number:
.From idle mode, press and hold the OK Key [OK] to unlock the keypad, press the Left Soft
Key [Menu], the Directional Key to select“Settings”, then slide out the QWERTY
keyboard and press 7. Phone Info,1. My Number.
.The following information appears:
Mobile Device Number (MDN)/Mobile Identifications Number (MIN)/Cricket
pESN
.From idle mode, press and hold the OK Key [OK] to unlock the keypad, press the Left Soft
Key [Menu], the Directional Key to select“Settings”, then slide out the QWERTY
keyboard and press 7. Phone Info,2. pESN.
.The pESN for both Hexadecimal and Decimal values appear.
MEID
.From idle mode, press and hold the OK Key [OK] to unlock the keypad, press the Left Soft
Key [Menu], the Directional Key to select“Settings”, then slide out the QWERTY
keyboard and press 7. Phone Info,3. MEID.
.The MEID for both Hexadecimal and Decimal values appear.
SW VERSION
.From idle mode, press and hold the OK Key [OK] to unlock the keypad, press the Left Soft
Key [Menu], the Directional Key to select“Settings”, then slide out the QWERTY
keyboard and press 7. Phone Info,4. SW Version.
.Displays the Software Version/Hardware Version/PRL Version/Browser Version/Games & Apps
Version.
.Press the OK Key [OK] to return to the previous screen.

0DQXDO/LWH ZZZP\FULFNHWFRP ZZZP\FULFNHWFRP 0DQXDO/LWH
Safety and Warranty Safety and Warranty
•Give full attention to driving. Driving safely is your first responsibility.
•Use hands-free operation, if available.
•Pull off the road and park before making or answering a call, if driving conditions so require.
If you must use the phone while driving, please use one-touch, speed dialing, and auto answer modes.
An airbag inflates with great force. DO NOT place objects, including both installed or portable wireless
equipment, in the area over the airbag or in the air bag deployment area. If in-vehicle wireless equipment is
improperly installed and the air bag inflates, serious injury could result.
WARNING: Failure to follow these instructions may lead to serious personal injury and possible property damage.
ELECTRONIC DEVICES
Your wireless handheld portable telephone is a low power radio transmitter and receiver. When it is ON, it
receives and also sends out radio frequency (RF) signals.
Most modern electronic equipment is shielded from RF energy. However, certain electronic equipment may not
be shielded against the RF signals from your wireless phone. Therefore, use of your phone must be restricted in
certain situations.
PACEMAKERS
The Health Industry Manufacturers Association recommends that a minimum separation of six (6”) inches be
maintained between a handheld wireless phone and a pacemaker to avoid potential interference with the
pacemaker. These recommendations are consistent with the independent research by and recommendations of
Wireless Technology Research. Persons with pacemakers:
•ALWAYS keep the phone more than six inches from your pacemaker when the phone is turned on.
•Do not carry the phone in a breast pocket.
•Use the ear opposite the pacemaker to minimize the potential for interference.
•If you have any reason to suspect that interference is taking place, turn your phone OFF immediately.
HEARING AIDS
Some digital wireless phones may interfere with some hearing aids. In the event of such interference, you may
want to consult your service provider (or call the customer service line to discuss alternatives).
OTHER MEDICAL DEVICES
If you use any other personal medical device, consult the manufacturer of your device to determine if they are
adequately shielded from external RF energy. Your physician may be able to assist you in obtaining this
information.
SAFETY INFORMATION FOR WIRELESS HANDHELD PHONES
READ THIS INFORMATION BEFORE USINGYOUR HANDHELD PORTABLE CELLULAR TELEPHONE
EXPOSURE TO RADIO FREQUENCY SIGNALS
Your wireless handheld portable telephone is a low power radio transmitter and receiver. When it is ON, it
receives and also sends out radio frequency (RF) signals.
In August 1996, the Federal Communications Commissions (FCC) adopted RF exposure guidelines with safety
levels for handheld wireless phones. Those guidelines are consistent with the safety standards previously set by
both U.S. and international standards bodies:
ANSI C95.1 (1992) *
NCRP Report 86 (1986) *
ICNIRP (1996) *
Those standards were based on comprehensive and periodic evaluations of the relevant scientific literature.
For example, over 120 scientists, engineers, and physicians from universities, government health agencies, and
industry reviewed the available body of research to develop the ANSI Standard (C951).
The design of your phone complies with the FCC guidelines (and those standards).
1* : American National Standards Institute.
2* : National Council on Radiation protection and measurements.
3* : International Commission on Nonionizing Radiation Protection.
ANTENNA SAFETY
Use only the supplied or an approved replacement antenna. Unauthorized antennas, modifications, or attach-
ments could impair call quality, damage the phone, or result in violation of FCC regulations. Please contact your
local dealer for replacement antenna.
Do not use the phone with a damaged antenna. If a damaged antenna comes into contact with the skin, a
minor burn may result. Please contact your local dealer for replacement antenna.
DRIVING SAFETY
Talking on the phone while driving is extremely dangerous and is illegal in some states. Remember, safety
comes first. Check the laws and regulations on the use of phones in the areas where you drive. Always obey
them. Also, if using your phone while driving, please:

0DQXDO/LWH ZZZP\FULFNHWFRP ZZZP\FULFNHWFRP 0DQXDO/LWH
Failure to follow the directions below could result in serious bodily injury and/or property damage due to
battery liquid leakage, fire or rupture.
•DO NOT use this equipment in an extreme environment where high temperature or high humidity exists.
•DO NOT abuse the equipment. Avoid striking, shaking or shocking. When not using, lay down the unit to
avoid possible damage due to instability.
•DO NOT expose this equipment to rain or spilled beverages.
•DO NOT use unauthorized accessories.
•DO NOT disassemble the phone or its accessories. If service or repair is required, return unit to an autho-
rized PCD Personal Communications cellular service center. If unit is disassembled, the risk of electric
shock or fire may result.
•DO NOT short-circuit the battery terminals with metal items etc.
SAFETY INFORMATION FOR FCC RF EXPOSURE
WARNING! READTHIS INFORMATION BEFORE USING
CAUTIONS
In August 1996 the Federal Communications Commission (FCC) of the United States with its action in Report and
Order FCC 96-326 adopted an updated safety standard for human exposure to radio frequency electromagnetic
energy emitted by FCC regulated transmitters. Those guidelines are consistent with the safety standard pre-
viously set by both U.S. and international standards bodies.The design of this phone complies with the FCC
guidelines and these international standards.
BODY-WORN OPERATION
This device was tested for typical body-worn operations with the back of the phone kept 20 mm. from the body.
To maintain compliance requirements, use only belt-clips, holsters or similar accessories that maintain a 20
mm separation distance between the user’s Body and the back of the phone, including the antenna. The use
of belt-clips, holsters and similar accessories should not contain metallic components in its assembly.The use
of accessories that do not satisfy these requirements may not comply with FCC RF exposure requirements, and
should be avoided.
For more information about RF exposure, please visit the FCC website at www.fcc.gov.
Turn your phone OFF in health care facilities when any regulations posted in these areas instruct you to do so.
Hospitals or health care facilities may be using equipment that could be sensitive to external RF energy.
VEHICLES
RF signals may affect improperly installed or inadequately shielded electronic systems in motor vehicles. Check
with the manufacturer or its representative regarding your vehicle. You should also consult the manufacturer of
any equipment that has been added to your vehicle.
POSTED FACILITIES
Turn your phone OFF where posted notices so require.
OTHER SAFETY GUIDELINES
AIRCRAFT
FCC regulations prohibit using your phone while in the air. Turn your phone OFF before boarding an aircraft.
Always request and obtain prior consent and approval of an authorized airline representative before using your
phone aboard an aircraft. Always follow the instructions of the airline representative whenever using your
phone aboard an aircraft, to prevent any possible interference with airborne electronic equipment.
BLASTING AREAS
To avoid interfering with blasting operations, turn your phone OFF when in a“blasting area”or in areas posted:
“Turn off two-way radio.”Obey all signs and instructions.
POTENTIALLY EXPLOSIVE ATMOSPHERES
Turn your phone OFF when in any area with a potentially explosive atmosphere and obey all signs and instruc-
tions. Sparks in such areas could cause an explosion or fire resulting in bodily injury or even death.
Areas with a potentially explosive atmosphere are often, but not always, clearly marked.They include fueling
areas such as gas stations; below deck on boats; fuel or chemical transfer or storage facilities; vehicles using
liquefied petroleum gas (such as propane or butane); areas where the air contains chemicals or particles, such
as grain, dust, or metal powders; and any other area where you would normally be advised to turn off your
vehicle’s engine.
ELECTRONIC DEVICES
Your Handheld Portable Telephone is a high quality piece of equipment. Before operating, read all instructions
and cautionary markings on (1) AC/DC Travel Adaptor (2) Battery and (3) Product Using Battery.
Safety and Warranty Safety and Warranty
Other manuals for TXTM8
2
Table of contents
Other Cricket Cell Phone manuals

Cricket
Cricket A300 User manual

Cricket
Cricket A100 User manual

Cricket
Cricket EZ User manual

Cricket
Cricket moto g User manual

Cricket
Cricket TXTM8 3G User manual

Cricket
Cricket A200 User manual

Cricket
Cricket UTStarcom mini User manual

Cricket
Cricket Vision Plus User manual

Cricket
Cricket A100 User manual

Cricket
Cricket A150 User manual

Cricket
Cricket SL101AE User manual

Cricket
Cricket CAPTR II User manual

Cricket
Cricket Icon 2 User manual

Cricket
Cricket TXTM8 User manual

Cricket
Cricket M615 User manual

Cricket
Cricket Alcatel APPRISE User manual

Cricket
Cricket TXTM8 User manual

Cricket
Cricket MSGM8 II User manual

Cricket
Cricket Wave User manual

Cricket
Cricket CAPTR User manual