manuals.online logo
Brands
  1. Home
  2. •
  3. Brands
  4. •
  5. Crivit
  6. •
  7. Bicycle Accessories
  8. •
  9. Crivit Z31433 User manual

Crivit Z31433 User manual

GB
GB GB GB GB GB GB GB GB GB GB
GB GB GB GB HR
GB
HR
Pritisnite tipku SET i držite je pritisnutu kako
biste štopericu vratili na 0.
CAL RATE: trenutna potrošnja kalorija
CALORIE: brojač kalorija
Pritisnite tipku SET i držite je pritisnutu kako biste
brojač kalorija vratili na 0.
FAT-BURN: sagorijevanje masnoća u gramima
Pritisnite tipku SЕТ i držite je pritisnutu kako biste
prikaz sagorijevanja masnoća vratili na 0.
KM: brojač kilometara
Pritisnite tipku SET i držite je pritisnutu kako
biste proveli podešenja na brojaču kilometara.
Na LCD zaslonu 7pojavljuje se simbol za
brojač, odn. odbrojavač (+, odn. -). Pritišćite
sada tipku MODE 11 sve dok se ne pojavi
željeni simbol.
Potvrdite Vaš unos pritiskom na tipku SET. Sada
ulazite u namještanje dionice brojača kilometara.
Na LCD zaslonu pojavljuje se 5-znamenkasti
broj. Unesite sada željenu dionicu. U tu svrhu
HR HR HR HR
Izvadite bateriju iz uređaja ako ga nećete upo-
trebljavati duže vrijeme.
OPREZ! OPASNOST OD
EKSPLOZIJE! Nikada nemojte
ponovno puniti baterije!
OPREZ! OPASNOST OD
EKSPLOZIJE! Uvijek istovremeno
zamijenite sve baterije i upotrijebite
samo baterije istog tipa.
Istrošenu bateriju odmah izvadite iz uređaja.
Inače prijeti povećana opasnost curenja sadr-
žaja baterije!
Prilikom umetanja pripazite na pravilan polaritet!
Čuvajte bateriju izvan dohvata djece, nemojte
bacati bateriju u vatru, nemojte kratko spajati
bateriju i nemojte je rastavljati.
Ukoliko je sadržaj baterije u vašem uređaju
iscurio, omdah ih izvadite kako biste spriječili
oštećenje uređaja!
Problem Solution
Empty LC-display or no
response after putting
the battery in again
-
+
RESET
Remove battery. In the
area marked RESET of
the battery compartment,
touch the plus and minus
terminals at the same
time using a screwdriver.
Insert a 3V battery into
the battery compartment
in such a way
that the +
terminal points upwards.
Replace the battery cover
on the battery compart-
ment. The microprocessor
is reset and restarted.
reactivate the computer. The function indicator
8shows the current mode.
Press the MODE button 11 repeatedly to
page through the various modes.
Press the SET button 13 to change into the sec-
ondary function for any function.
Press the SET button and keep it pressed to call
or reset up any saved values.
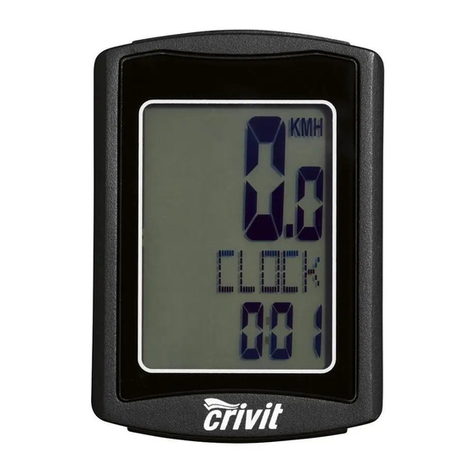
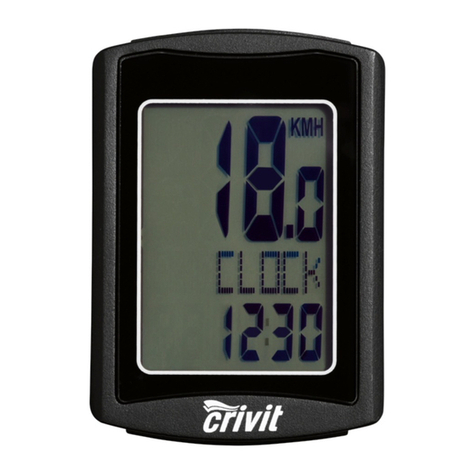
The bike computer has the following
functions:
Advanced users’ functions:
CLOCK > TOTALODO > TOTAL-TM >
TRIPDIST >
MAXSPEED
> AVGSPEED > TRIPTIME > TEMP >
STPWATCH >
CAL RATE > CALORIE > FAT-BURN >
KM+/- > TIME+/- > SCAN
Beginners’ functions:
TRIPDIST > AVGSPEED > TRIPTIME
7LC display
8Function indicator
9Secondary function value display
10 Primary function value display
11 MODE button
12 Light button
13 SET button
14 SCAN indicator
15 Servicing interval indicator
16
Speed comparison indicato
r
17 Acceleration/deceleration indicator:
Acceleration – anticlockwise
rotation
Decelerat
ion – clockwise rotation
18 Battery state indicator
Technical data
Battery: 3 V (CR2032 button cell)
GB
HR HR HR HR HR HR HR HR HR
HR
– Odometer (countdown or forwards)
– Total odometer and total cycling time display
– Calories
– Fat-burning
– Scan indicator (functions displayed in
continuous loop)
– Automatic switch to clock mode
– Backlight
Description of parts
1a Bracket
1b Bracket cushion plate
2a Sensor
2b Sensor battery compartment cover
3Magnet
4Cable tie
5Battery 3 V , type CR2032 button cell
6a Bike computer
6b Bike computer’s battery compartment cover
Included items
1 Bike computer
1 Bike computer bracket
1 Magnet
1 Sensor
4 Cable ties
2 Batteries 3V , type CR2032 button cell
1 Operating instructions
General safety advice
KEEP ALL THE SAFETY ADVICE AND INSTRUC-
TIONS IN A SAFE PLACE FOR FUTURE REFERENCE!
Children or persons who lack the knowledge or
experience to use the device or whose physical,
sensory or intellectual capacities are limited must
never be allowed to use the device without
supervision or instruction by a person responsible
for their safety. Children must be supervised so
that they do not play with the product.
Please note that the warranty does not cover
damage arising from improper treatment, non-
observance of the operating instructions and
safety advice or unauthorised use.
Safety advice concerning
batteries
RISK OF LOSS OF LIFE!
If batteries are swallowed, it can lead to loss of
life. Seek medical attention if a battery is swal
lowed.
Remove the battery if the product is not to be
used for a long period.
CAUTION! RISK OF EXPLO-
SION! Never recharge single-use
batteries!
CAUTION! DANGER OF EXPLO-
SION! Always replace all batteries
at the same time and only use batte
ries
of the same type.
If the battery is exhausted, remove it from the
device immediately. Otherwise the battery is
more likely to leak.
Make sure you insert the battery the right way
round (polarity).
Keep the battery away from children. Do not
throw the battery into a fire. Never short-circuit
it or take it apart.
If your battery leaks, remove it from the device
immediately to prevent the device from being
damaged.
Do not let the fluid from a leaking battery come
into contact with your skin, eyes or mucous
membranes. In the event of contact with fluid
leaking from a battery, thoroughly flush the
affected area with water and/or seek the
advice of a doctor!
Before use
Remove the protective foil from the LC display 7
before first use.
Inserting the battery
To insert the battery 5, proceed as shown in
Fig. A.
Attaching the bike computer
To attach the device, proceed as shown in
Figs. B to G.
Preparing for use
Basic settings
Note: The LC display 7comes on automatically
approx. 2 seconds after the battery 5is inserted.
You are immediately offered a choice of languages.
Press the MODE-button 11 repeatedly until the
desired language appears.
Confirm your choice by pressing the SET but-
ton 13 . You move on automatically to select
the user profile.
Press the MODE button repeatedly until the
desired
user profile (ADVANCE or EASY)
appears.
Confirm your choice by pressing the SET but-
ton. Now you can choose the wheel size (SET
WS).
A four-digit number appears in the LC display.
Now enter the tyre circumference of your wheel
in mm. Press the MODE button repeatedly until
the desired number appears as the first digit.
Confirm your choice by pressing the SET button.
Repeat this process for each of the three
remaining digits.
Note: You can calculate your tyre
circumference
by multiplying your
tyre diameter by 3.1416.
The following list contains the tyre circumfer
ences
of the most common cycle tyres.
Tyre diameter Tyre circumference
20” 1598mm
22” 1759mm
24” 1916mm
26” (650A) 2073mm
26.5” (tubular) 2117mm
26.6” (700x25C) 2124mm
26.8” (700x28C) 2136mm
27” (700x32C) 2155mm
28” (700B) 2237mm
ATB24”x1.75 1888mm
ATB26 x1.4 1995 mm
ATB26 x1.5 2030 mm
ATB26 x1.75 2045mm
ATB26x2 (650B) 2099mm
27”x1 2138mm
27”x1 1/4 2155mm
Now select your desired unit of distance. Press
the MODE button repeatedly until SET KM or
SET MILE appears in the LC display.
Confirm your choice by pressing the SET button.
You move on to entering your age.
A two-digit number appears in the LC display.
Now enter your age. Press the MODE button
repeatedly until the desired number appears
as the first digit.
Confirm your choice by pressing the SET butto
n.
Repeat this process for the remaining digit. You
move on to selecting the unit of weight.
Press the MODE button repeatedly until SET
KG or SET LB appears in the LC display.
Confirm your choice by pressing the SET button.
You move on to entering your weight.
A three-digit number appears in the LC display.
Now enter your weight. Press the MODE button
repeatedly until the desired number appears
as the first digit.
Confirm your choice by pressing the SET button.
Repeat this process for all the remaining digits.
You move on to selecting the time format.
Press the MODE button repeatedly until 12 for
the 12-hour format or 24 for the 24-hour format
appears in the LC display.
Confirm your choice by pressing the SET button.
You move on to setting the time.
A four-digit number appears in the LC display.
Enter the current time. Press the MODE button
repeatedly until the desired number appears
as the first digit.
Confirm your choice by pressing the SET button.
Repeat this process for all the remaining digits.
You move on to selecting the servicing interval.
Press the MODE button repeatedly until the
desired
number of units of distance to your next
in
tended bicycle service appears in the LC
display.
Note: You have the choice of 200, 400, 600
or 800km or miles.
Confirm your choice by pressing the SET button.
You move on to selecting the unit of temperature.
Press the MODE button repeatedly until °C or
°F appears in the LC display.
Confirm your choice by pressing the SET button.
You have now completed the the basic settings.
Using the bike computer
Note: If the bike computer remains unused for
more than 5 minutes, it automatically switches
into the stand-by mode. Press any button to
Using functions
Note: All the functions and secondary functions
are described in the following list.
CLOCK: - Displays the time
Press the SET button
13
and keep it
pressed for
3 seconds to access the time settings.
TOTALODO: - Total odometer
Press the SET button and keep it pressed for
3seconds to access the wheel size settings
and total distance.
TOTAL-TM: Total time cycling
Press the SET button and keep it pressed for
3seconds to make changes to the saved total
time cycling.
TRIPDIST: Trip distance
Press the SET button and keep it pressed for
3seconds to reset the trip distance, the
average speed and the trip time displays to 0.
MAXSPEED: Highest speed
Press the SET button and keep it pressed for
3seconds to reset the maximum speed display
to 0.
AVGSPEED: Average speed
TRIPTIME: Trip time
TEMP: Thermometer
Press the SET button and keep it pressed to
switch between °C and °F.
Press the SET button to display the highest tem-
perature (HI) measured so far.
Press the SET button again to display the low-
est temperature (LO) measured so far.
Press and hold down the SET button while the
highest or lowest temperature is displayed to
switch back to the current temperature to
reset the saved data.
STPWATCH: Stopwatch
Press the SET button to start the stopwatch.
Press the SET button again to stop the stop-
watch.
Press the SET button and keep it pressed to
reset the stopwatch to 0.
CAL RATE: Current calorie consumption
CALORIE: Calorie meter
Press the SET button and keep it pressed to
reset the calorie counter to 0.
FAT-BURN: Fat burning in grams
Press the SET button and keep it pressed to
reset the fat burning value to 0.
KM: Odometer
Press the SET button and keep it pressed to
change the odometer settings.
The LC display 7shows the symbol for count-
ing forwards or
backwards (+ or - respectively).
Press the MODE button 11 repeatedly until the
desired symbol is shown.
Confirm your choice by pressing the SET button.
You move on to setting the distance on the
odometer.
A 5-digit number appears in the LC display. En
ter
the desired distance. Press the MODE button
repeatedly until the desired number appears
as the first digit.
Confirm your choice by pressing the SET button.
Repeat this process for all the remaining digits.
TIME: Timer
Press the SET button and keep it pressed to
change the timer settings.
The LC display shows the symbol for counting
forwards or backwards (+ or - respectively).
Press the MODE button repeatedly until the
desired symbol is shown.
Confirm your choice by pressing the SET button.
You move on to the time settings of the timer.
A 5-digit number appears in the LC display.
Enter the desired time. Press the MODE button
repeatedly until the desired number appears
as the first digit.
Confirm your choice by pressing the SET button.
Repeat this process for all the remaining digits.
SCAN: Scan
Note: The scan mode automatically switches
between the trip distance, highest speed, average
speed and trip time displays.
Note: Refer to the section on “Basic settings” to
see how you make or change settings.
CUSTOMIZE mode
Apart from the ADVANCE and EASY mode, you
can make your individual adjustments in the
CUSTOMIZE mode (see procedure).
Press and hold the light button 12 to enter the
CUSTOMIZE mode.
Note: By repeatedly pressing the MODE
button 11 , you can toggle between the
ADVANCE and EASY modes.
In the EASY mode, press and hold the SET
button 13 . Press the MODE button to switch
the settings on or off (e.g. time). Choose „On“,
to add the chosen adjustment to the EASY
modes. Choose „Off“, if you do not want to
add the adjustments.
Press the SET button, to confirm your entry.
Using the backlight
Press the light button 12 to switch on the back-
light temporarily. The backlight automatically
extinguishes after a short period.
Resetting the bike computer
Press the MODE button 11 and SET button 13
at the same time and keep them pressed until
{{----}} appears in the LC display 7.
Now press the MODE button and keep it
pressed. This resets all the settings.
Note: All stored data will be deleted.
Changing the battery
Note: The battery of the bike computer must be
replaced when the battery symbol 18 appears on
the LC display 7.
Note: The battery of the sensor must be replaced
when the speed symbol 17 of the LC display can
no longer or hardly be seen when riding the bicycle.
Press the MODE key 11 and the SET key 13
at the same time and keep them pressed until
the {{-----}} symbol appears in the LC display 7.
To replace the battery, proceed as shown in
figure A. Make sure you fit the battery the right
way round (polarity). This is shown inside the
battery compartment.
Press the SET key and keep it pressed to return
to normal operating mode.
Note: Once the batteries are removed, all stored
data will be erased after approx. 20 seconds.
Troubleshooting
Note: This device has delicate electronic compo-
nents. Therefore interference may occur when it is
near devices which transmit radio signals.
- If errors occur in the display, remove any such
devices from the vicinity of the product. In the case
of such malfunctions, remove the battery briefly and
then reinsert again.
Speed or distance are
not displayed.
Adjust magnet and
sensor correctly.
- Check that the battery
is inserted with the
poles arranged the
right way round.
Display is black The ambient temperature
is too high or the bicycle
computer was exposed
to direct sunlight for too
long. Remove appliance
from direct sunlight and
let it cool off for a while.
The LC-display shows
irregular symbols.
Remove battery and
replace it again.
Cleaning and care
Do not use any liquids or cleaning agents for
cleaning. Otherwise there is a risk of damaging
the device.
The device should only be cleaned on the out-
side with a soft dry cloth.
Disposal
The packaging is wholly composed of
environmentally friendly materials that
can
be disposed of at a local recycling centre.
Contact your local refuse disposal authority for more
details of how to dispose of your worn-out product.
In the interest of the environment, do not
throw out your product with your house-
hold refuse. Take it to a suitable centre
where it can be disposed of properly.
Your local council will be able to tell you
where the collection centres are located
and their opening times.
Defective or exhausted batteries mu
st be recycled
in accordance with Directive 2006/ 66/ EC
. Return
the batteries and/ or the device through the appro-
priate collection facilities.
Improper disposal of batteries
can damage the environment!
Batteries must not be disposed of with the house-
hold refuse. They may contain toxic heavy metals
and require to be handled as special waste. The
chemical symbols of heavy metals are: Cd = cad-
mium, Hg = mercury, Pb = lead For this reason,
you must dispose of discarded batteries at a com-
munal disposal centre.
EMC Računalo za bicikl
Namjenska uporaba
Proizvod se smije upotrebljavati kao računalo za
bicikl. Nije namijenjen za komercijalne svrhe.
Funkcije
– Jezici izbornika: GB, DE, FR, NL, IT, ES
– Sat
– Štoperica
– Prikaz temperature °C/ °F
– Funkcija memorije za min. i maks. temperaturu
– Prikaz brzine (0–99,9km/ h)
– Prikaz prosječne brzine (0–99,9km/h)
– Prikaz maksimalne brzine (0–99,9km/h)
– Usporedba brzine
– Prikaz ubrzanja i usporavanja
– Kontrolni sat vremena vožnje (maks. 9:59:59)
(odbrojavanje ili brojanje)
– Brojač kilometara (odbrojavanje ili brojanje)
– Prikaz ukupne kilometraže i ukupnog vremena
vožnje
– Brojač kalorija
– Prikaz sagorijevanja masnoća
– Prikaz režima Scan (prolaz kroz sve funkcije)
– Automatsko isključivanje funkcije sata
– Pozadinsko osvjetljenje
Opis dijelova
1a Držač
1b Presvlaka za držač
2a Senzor
2b Poklopac pretinaca za baterije senzora
3Magnet
4Poveznik kabela
5Bateriija 3V , tip CR2032 gumbasta
6a Računalo za bicikl
6b Poklopac pretinca za baterije računlaa za bicikl
7LCD zaslon
8Prikaz funkcija
9Prikaz vrijednosti sporedne funkcije
10 Prikaz vrijednosti glavne funkcije
11 Tipka MODE
12 Tipka Svjetlo
13 Tipka SET
14 Prikaz SCAN
15 Prikaz servisnog intervala
16 Prikaz usporedbe brzina
17 Prikaz ubrzavanja i usporavanja:
Ubrzanje – okretanje suprotno od smjera
kretanje kazaljke na satu
Usporavanje – okretanje u smjeru kretanja
kazaljke na satu
18 Prikaz napunjenosti baterija
Tehnički podaci
Baterija: 3V (CR2032 gumbasta)
Opseg isporuke
1 računalo za bicikl
1 držač računala za bicikl
1 magnet
1 sensor
4 poveznika kabela
2 baterije 3V , tip CR2032 gumbasta
1 upute za uporabu
Opće sigurnosne
napomene
SAČUVAJTE SVE SIGURNOSNE NAPOMENE I
UPUTE ZA BUDUĆNOST!
Djeca ili osobe kojima nedostaje znanja ili
iskustva u uporabi uređaja ili čije su tjelesne,
senzoričke ili mentalne sposobnosti ograni-
čene, ne smiju upotrebljavati uređaj bez nad-
zora ili uputa osobe zadužene za njihovu
sigurnost. Djeca trebaju biti pod nadzorom
kako se ne bi igrala s proizvodom.
Molimo vodite računa da jamstvo ne pokriva
štete koje su uzrokovali nepravilno rukovanje,
nepoštivanje uputa za uporabu i sigurnosnih
napomena ili osobe koje ne bi smjele upotre-
bljavati proizvod.
Sigurnosne upute
za baterije
OPASNOST PO
ŽIVOT! Moglo bi se progutati baterije, što je
opasno po život. Ako netko proguta bateriju,
odmah potražite liječničku pomoć.
Izbjegavajte dodir s kožom, očima i sluznicom.
U slučaju dodira baterijske kiseline, isperite
dotično mjesto sa dostatno vode i/ ili obratite
se liječniku!
Prije puštanja u rad
Prije prve uporabe skinite zaštitnu foliju s LCD
zaslona 7.
Umetanj baterije
Prilikom umetanja baterije 5postupite kako
je opisano u sl. A.
Postavljanje računala
za bicikl
Prilikom postavljanja uređaja postupite kako je
prikazano na slikama B do G.
Puštanje u rad
Provedba osnovnih
namještanja
Napomena: Nakon umetanja baterije 5LCD
zaslon 7se automatski uključuje nakon oko 2
sekunde. Ulazite izravno u izbor jezika.
Pritišćite tipku MODE 11 sve dok se ne pojavi
željeni jezik.
Potvrdite Vaš unos pritiskom na tipku SET 13 .
Automatski ulazite u izbor profila uporabe.
Pritišćite tipku MODE sve dok se ne pojavi
željeni profil uporabe ADVANCE (Napredni)
ili EASY (Jednostavan).
Potvrdite Vaš unos pritiskom na tipku SET. Sada
automatski ulazite u izbor profila guma
(SET WS).
Na LCD zaslonu pojavljuje se četveroznamen-
kasti broj. Unesite sada opseg guma svog bici-
kla u mm. U tu svrhu pritišćite tipku MODE sve
dok se ne pojavi prva znamenka željenog broja.
Potvrdite Vaš unos pritiskom na tipku SET.
Ponovite postupak za svaku od sljedeće tri
znamenke.
Napomena: Opseg gume možete izračunati
tako da promjer gume pomnožite 3,1416. Na
sljedećem popisu možete pronaći opsege naj-
češćih bicklističkih guma.
Promjer guma Opseg guma
20” 1598mm
22” 1759mm
24” 1916mm
26” (650A) 2073mm
26,5” (Tubular) 2117mm
26,6” (700x25C) 2124 mm
26,8” (700x28C) 2136 mm
27” (700x32C) 2155mm
28” (700B) 2237mm
ATB24”x1,75 1888mm
ATB26 x1,4 1995 mm
ATB26 x1,5 2030 mm
ATB26 x1,75 2045 mm
ATB26x2 (650B) 2099mm
27”x1 2138mm
27”x1 1/4 2155mm
Nakon toga odaberite željenu mjernu jedinicu
za duljinu. Za to pritišćite tipku MODE sve dok
se na LCD zaslonu ne pojavi SET KM ili SET
MILE.
Potvrdite Vaš unos pritiskom na tipku SET. Sada
ulazite u unos starosne dobi.
Na LCD zaslonu pojavljuje se dvoznamenkasti
broj. Unesite sada svoju dob. U tu svrhu priti-
šćite tipku MODE sve dok se ne pojavi prva
znamenka željenog broja.
Potvrdite Vaš unos pritiskom na tipku SET.
Ponovite postupak za sljedeću znamenku.
Sada ulazite u izbor jedinice za težinu.
Za to pritišćite tipku MODE sve dok se na
LC-displeju ne pojavi SET KG ili SET LB.
Potvrdite Vaš unos pritiskom na tipku SET. Sada
ulazite u unos težine.
Na LC-displeju pojavljuje se troznamenkasti
broj. Unesite sada svoju težinu. U tu svrhu priti-
šćite tipku MODE sve dok se ne pojavi prva
znamenka željenog broja.
Potvrdite Vaš unos pritiskom na tipku SET.
Ponovite postupak za sve sljedeće znamenke.
Sada ulazite u izbor formata sata.
Pritišćite tipku MODE sve dok se na LCD
zaslonu ne pojavi 12 za 12-satni format ili 24
za 24-satni format.
Potvrdite Vaš unos pritiskom na tipku SET. Sada
ulazite u namještanje vremena.
Na LCD zaslonu pojavljuje se četveroznamen-
kasti broj. Unesite sada trenutno vrijeme. U tu
svrhu pritišćite tipku MODE sve dok se ne
pojavi prva znamenka željenog broja.
Potvrdite Vaš unos pritiskom na tipku SET.
Ponovite postupak za sve sljedeće znamenke.
Sada ulazite u izbor servisnog intervala.
Pritišćite tipku MODE sve dok se ne prikaže
željeni broj kilometara nakon kojeg želite oba-
viti sljedeći servis svog bicikla.
Napomena: Možete birati između 200,
400, 600 i 800km, odn. milja.
Potvrdite Vaš unos pritiskom na tipku SET. Sada
ulazite u izbor jedinice za temperaturu.
Za to pritišćite tipku MODE sve dok se na
LC-displeju ne pojavi °C ili °F.
Potvrdite Vaš unos pritiskom na tipku SET.
Osnovno namještanje ovime je završeno.
Uporaba računala za bicikl
Napomena: Računalo za bicikl koje se ne
upotrebljava duže od 5 minute, automatski
prelazi u režim pripravnosti (Stand-By).
Pritisnite neku tipku kako biste ga ponovno
aktivirali. Prikaz funkcije 8prikazuje režim u
kojem se trenutno nalazite.
Ponovnim pritiskanjem tipke MODE 11 možete
listati kroz različite režime.
Pritiskom tipke SET 13 možete prebaciti u
sekundarnu funkciju svake funkcije.
Pritiskom i držanjem tipke SET možete dobiti
uvid u pohranjene vrijednosti ili ih možete rese-
tirati.
Računalo za bicikl raspolaže sljedećim
funkcijama:
Funkcije za napredne:
CLOCK > TOTALODO > TOTAL-TM > TRIPDIST >
MAXSPEED > AVGSPEED > TRIPTIME > TEMP >
STPWATCH > CAL RATE > CALORIE > FAT-BURN >
KM+/- > TIMER+ / - > SCAN
Funkcije za početnike:
TRIPDIST > AVGSPEED > TRIPTIME
Uporaba funkcija
Napomena: Sljedeći popis opisuje sve funkcije i
podfunkcije.
CLOCK: - prikaz vremena
Pritisnite tipku SET 13 i držite je pritisnutu 3
sekunde kako biste ušli u namještanje vremena.
TOTALODO: - ukupni prijeđeni broj kilometara
Pritisnite tipku SET i držite je pritisnutu 3
sekunde kako biste ušli u namještanje veličine
guma i ukupnog broja prijeđenih kilometara.
TOTAL-TM: ukupno vrijeme vožnje
Pritisnite tipku SET i držite je pritisnutu 3 sekunde
kako biste proveli izmjene na pohranjenom
ukupnom vremenu vožnje.
TRIPDIST: dnevni prijeđeni broj kilometara
Pritisnite tipku SET i držite je pritisnutu 3 sekunde
kako biste prikaz prijeđenog broja kilometara,
prosječnu brzinu i vrijeme vožnje vratili na 0.
MAXSPEED: najveća brzina
Pritisnite tipku SET i držite je pritisnutu 3 sekunde
kako biste maksimalnu brzinu vratili na 0.
AVGSPEED: prosječna brzina
TRIPTIME: vrijeme vožnje
TEMP: termometa
Pritisnite tipku SET i držite je pritisnutu kako
biste prebacili sa °C na °F ili obrnuto.
Pritisnite tipku SET kako biste prikazali dosad
izmjerenu najvišu temperaturu (HI).
Ponovno pritisnite tipku SET kako biste prikazali
do sad izmjerenu najnižu temperaturu (LO).
Pritisnite tipku SET i držite je pritisnutu dok se
prikazuju najviša, odn. najniža temperatura
kako biste resetirali pohranjene vrijednosti.
STPWATCH: štoperica
Pritisnite tipku SET, kako biste pokrenuli štopericu.
Ponovno pritisnite tipku SET kako biste zausta-
vili štopericu.
Z31433
BIKE COMPUTER
Operation and Safety Notes
RAČUNALO ZA BICIKL
Upute za posluživanje i za Vašu sigurnost
COMPUTER PENTRU BICICLETĂ
Instrucţiuni de utilizare şi de siguranţă
C D
E
2mm max.
F
G
ca. 70 cm
Fig. C
Fig. D
Fig. E
B
A
H
6b
5
6a
4
32a1a
1b
5
2b
5
2a
6a
2a
3
1a 4
1b 2a
4
3
3
2a3
2a
8
7
14
9
10
11
12
13
15
16
17
18
Bike Computer
Proper use
The product is intended for use as a cycle computer.
Not for commercial use.
Functions
– Menu languages: GB, DE, FR, NL, IT, ES
– Clock
– Stopwatch
– Temperature °C/ °F
– Memory function for min. and max. temperature
– Current speed (0–99.9km/ h)
– Mean speed (0–99.9km/ h)
– Highest speed (0–99.9km/ h)
– Speed comparison
– Acceleration and deceleration
– Trip timer (max. 9:59:59) (countdown or forwards)
approx. 70 cm
87309_cri_Fahrradcomputer_HR-RO.indd 1 04.02.13 09:55
HR HR HR HR HR HR HR
HR RO
RO
chimice ale metalelor grele sunt următoarele:
Cd = cadmiu, Hg = mercur, Pb = plumb. De aceea,
predaţi bateriile consumate la un punct de colec-
tare local.
EMC
RO
Pe ecran se afişează simbolul pentru numără-
toarea normală sau inversă (+ respectiv -).
Apăsaţi acum butonul MODE în mod repetat
până când apare simbolul dorit.
Confirmaţi alegerea dumneavoastră prin apă-
sarea butonului SET. Ajungeţi acum la setarea
timpului timerului.
Pe ecran se afişează un număr de 5 cifre.
Introduceţi acum timpul dorit. Apăsaţi butonul
MODE în mod repetat până când apare
prima cifră dorită.
Confirmaţi alegerea dumneavoastră prin apă-
sarea butonului SET.
Repetaţi procedura pentru toate cifrele.
SCAN: Scan
Notă: Modul Scan comută automat între afişajul
funcţiilor Număr de kilometri parcurşi pe zi, Viteza
maximă, Viteza medie şi Timpul de mers.
Notă: În capitolul „Efectuarea setărilor de bază”
aflaţi cum puteţi efectua, respectiv modifica setările.
Confirmaţi alegerea dumneavoastră prin apă-
sarea butonului SET. Ajungeţi acum la meniul
pentru alegerea mărimii cauciucurilor (SET WS).
Pe ecran se afişează un număr de patru cifre.
Introduceţi acum circumferinţa cauciucului
dumneavoastră în mm. Apăsaţi butonul MODE
în mod repetat până când apare prima cifră
dorită.
Confirmaţi alegerea dumneavoastră prin apă-
sarea butonului SET.
Repetaţi procedura pentru fiecare dintre urmă-
toarele trei cifre.
Notă: Puteţi determina circumferinţa cauciu-
cului dumneavoastră înmulţind diametrul cau-
ciucului cu 3,1416. În următoarea listă puteţi
găsi circumferinţele celor mai uzuale cauciucuri
de bicicletă.
Diametrul cauciucului Circumferinţa cauciucului
20” 1598mm
22” 1759mm
RORORORORORORO
Zbog zaštite okoliša ne bacajte dotrajali
proizvod u kućni otpad, već ga predajte
stručnom zbrinjavanju. Informacije o
mjestima za sakupljanje otpada i njiho-
vom radnom vremenu možete doznati u
lokalnoj, nadležnoj ustanovi.
Oštećene ili istrošene baterije potrebno je sukladno
smjernici 2006/ 66 / EZ predati sustavu reciklaže.
Vratite baterije i/ ili uređaj preko ponuđenih sabir-
nih mjesta.
Pogrešno zbrinjavanje baterija
ugrožava okoliš!
Baterije se ne smiju uklanjati zajedno s kućnim otpa-
dom. Iste mogu sadržavati otrovne teške metale i
obavezno ih uklanjajte sukladno odredbama za
poseban otpad. Kemijski znakovi teških metala su
slijedeći: Cd = kadmij, Hg = živa, Pb = olovo.
HRHR
RO
RO
RO
RO RO RO RO
RORORO RORORORO
RO RO RO RO
HR
RO
pritišćite tipku MODE sve dok se ne pojavi
prva znamenka željenog broja.
Potvrdite Vaš unos pritiskom na tipku SET.
Ponovite postupak za sve sljedeće znamenke.
TIME: kontrolni sat
Pritisnite tipku SET i držite je pritisnutu kako
biste proveli podešenja na kontrolnom satu.
Na LCD zaslonu pojavljuje se simbol za bro-
jač, odn. odbrojavač (+, odn. -). Pritišćite sada
tipku MODE sve dok se ne pojavi željeni simbol.
Potvrdite Vaš unos pritiskom na tipku SET. Sada
ulazite u namještanje vremena kontrolnog sata.
Na LCD zaslonu pojavljuje se 5-znamenkasti
broj. Unesite sada željeno vrijeme. U tu svrhu
pritišćite tipku MODE sve dok se ne pojavi
prva znamenka željenog broja.
Potvrdite Vaš unos pritiskom na tipku SET.
Ponovite postupak za sve sljedeće znamenke.
SCAN: pregledavanje
Napomena: Režim rada Scan (pregledavanje)
automatski prebacuje između prikaza funkcija,
pohranjenog broja dnevnih kilometara, najveće
brzine, prosječne brzine i vremena vožnje.
Napomena: Način provođenja, odn. mijenjanja
postavki potražite u poglavlju “Provedba osnovnih
namještanja”.
CUSTOMIZE-modus
Osim ADVANCE- i EASY-modusa možete si podesiti
Vaše osobno namještanje u CUSTOMIZE-modusu
(vidi plan odvijanja).
Držite tipku Svjetlo 12 pritisnutom, kako bi
dospjeli u CUSTOMIZE-modus.
Napomena: Vi možete MODE-tipku 11
ponovo pritisnuti, kako bi prebacivali između
prikaza ADVANCE- i EASY-modusa.
Držite u EASY-modusu tipku SET 13 pritisnutu.
Pritisnite tipku MODE, kako biste namještenja
uključili odnosno isključili (npr. satno vrijeme).
Odaberite „On“, kako bi u EASY-modusu
dodali izabrano namještenje. Odaberite „Off“,
ako namještenje ne želite dodati.
Pritisnite tipku SET, za potvrdu unosa.
Uporaba pozadinskog
svjetla
Pritisnite tipku Svjetlo 12 kako biste privremeno
uključili pozadinsko svjetlo. Pozadinsko svjetlo
automatski se gasi nakon nekog vremena.
Reset računala za bicikl
Pritisnite tipku MODE 11 i tipku SET 13 i držite
ih istovremeno pritisnute sve dok se na LCD
zaslonu 7ne pojavi {{----}}.
Sada pritisnite tipku MODE i držite je pritisnutu.
Resetirane su sve postavke.
Napomena: Svi pohranjeni podaci se brišu.
Zamjena baterija
Napomena: Baterija računala za bicikl mora se
zamijeniti kada se prikaz baterije 18 pojavi na
LCD zaslonu 7.
Napomena: Baterija senzora mora se zamijeniti
kada je prikaz brzine 17 na LCD zaslonu tijekom
vožnje bicikla jedva vidljiv.
Pritisnite tipku MODE 11 i tipku SET 13 i
držite ih istovremeno pritisnute sve dok se na
LCD zaslonu 7ne pojavi {{----}}.
Zamijenite baterije kako je prikazano na sl. A.
Pazite kod umetanja na ispravna polaritet. Isto
je prikazano u pretincu za baterije.
Pritisnite tipku SET i držite je pritisnutu, kako
biste vratili u normalan režim rada.
Napomena: Oko 20 sekundi nakon vađenja
baterija brišu se svi pohranjeni podaci.
Uklanjanje smetnji
Napomena: Uređaj sadrži elektronske dijelove.
Stoga može izazvati smetnje ako se nalazi u blizini
uređaja koji odašiljaju radiosignale.
-Ako se na zaslonu pokaže krivi prikaz, uklonite
takve uređaje iz okoline proizvoda. Uklonite pri
takvim funkcijskim smetnjama na kratko baterije i
umetnite ih ponovno.
Problem Rješenje
Prazan LC-zaslon ili
nema odgovora dok se
baterija ponovo umetne
-
+
RESET
Izvadite bateriju. S odvi-
jačem dodirnite istovre-
meno plus i minus pol
na označenom mjestu
RESET u polju pretinca
za baterije.
Umetnite 3V
bateriju u pretincu za
bateriju, tako, da
+-pol
pokazuje prema gore.
Postavite poklopac pre-
tinca za baterije opet
na pretinac za baterije.
Mikroprocesor se rese-
tira i ponovo starta.
Nema prikaza brzine ili
kilometara
Ispravno usmjerite
magnet i senzor.
- Provjerite, da li je
baterija umetnuta s
ispravnim polovima.
Crni zaslon Temperatura okoline je
previsoka ili biciklističko
računalo je bilo predugo
izloženo direktnom suncu.
Uklonite uređaj iz direk-
tnog sunca i ostavite ga
da se ohladi
.
LC-zaslon pokazuje
nepravilne simbole.
Izvadite bateriju i onda
je ponovo umetnite.
Čišćenje i njega
Za čišćenje nemojte upotrebljavati tekućine ili
sredstva za čišćenje. U suprotnom prijete štete
na uređaju.
Čistite uređaj isključivo izvana mekom, suhom
krpom.
Zbrinjavanje otpada
Pakiranje se sastoji od ekološki prihvatlji-
vog materijala, kojeg možete odložiti
preko lokalnih mjesta za reciklažu.
O mogućnostima zbrinjavanja dotrajalog proi-
zvoda možete se informirati pri vašem općinskom
ili gradskom komunalnom uredu.
Stoga predajte istrošene baterije na komunalno
mjesto za sabiranje otpada.
Izjava o sukladnosti za ovaj proizvod dostupna je
na internet stranici www.lidl.hr.
EMC
Computer pentru bicicletă
Utilizare conform destinaţiei
Produsul este destinat utilizării drept calculator de
bicicletă. Nu este destinat utilizării comerciale.
Funcţii
– limbile meniului: GB, DE, FR, NL, IT, ES
– ceas
– cronometru
– afişarea temperaturii °C/°F
– funcţie de memorare pentru temperatura min. şi
max.
– afişarea vitezei de mers (0–99,9km /h)
– afişarea vitezei medii (0–99,9km/h)
– afişarea vitezei maxime (0–99,9km/h)
– comparaţia vitezelor
– afişarea accelerării şi decelerării
– timer pentru timpul de deplasare (max. 9:59:59)
(numărătoare inversă sau normală)
– contor kilometric (numărătoare inversă sau
normală)
– afişarea numărului total de kilometri parcurşi şi a
timpului de deplasare total
– contor de calorii
– afişarea grăsimii arse
– indicator SCAN (se comută toate funcţiile)
– oprire automată a funcţiei de ceas
– lumină de fundal
Descrierea componentelor
1a suport
1b tampon pentru suport
2a senzor
2b capacul compartimentului pentru baterii la senzor
3magnet
4benzi zimţate
5baterie 3V , baterie tip buton CR2032
6a calculator de bicicletă
6b capacul compartimentului pentru baterii
calculator de bicicletă
7ecran
8afişaj de funcţionare
9afişarea valorii funcţiei secundare
10 afişarea valorii funcţiei primare
11 butonul MODE
12 butonul pentru lumină
13 butonul SET
14 indicator SCAN
15 indicator pentru intervalul de întreţinere
16 afişarea comparaţiei vitezelor
17 indicator de accelerare/decelerare:
accelerare – rotirea în sens antiorar
decelerare – rotirea în sens orar
18 simbol baterie
Date tehnice
Baterie: 3V (baterie tip buton CR2032)
Condiţii de livrare
1 calculator de bicicletă
1 suport pentru calculator de bicicletă
1 magnet
1 senzor
4 benzi zimţate
2 baterii 3V , tip CR2032
1 manual de utilizare
Indicaţii generale
de siguranţă
PĂSTRAŢI TOATE INDICAŢIILE DE SIGURANŢĂ
ŞI INSTRUCŢIUNILE PENTRU CONSULTAREA
ULTERIOARĂ!
Copiilor sau persoanelor care nu deţin cunoş-
tinţele sau experienţa necesară pentru utiliza-
rea aparatului sau care au capacităţile fizice,
senzoriale sau mintale limitate le este permis
să utilizeze aparatul numai sub supravegherea
sau îndrumarea de către o persoană responsa-
bilă pentru siguranţa acestora. Copiii trebuie
supravegheaţi pentru a nu se juca cu produsul.
Vă rugăm să aveţi în vedere că garanţia nu
acoperă daune cauzate prin manipularea
necorespunzătoare, nerespectarea indicaţiilor
de funcţionare şi de siguranţă sau utilizarea de
către persoane neautorizate.
Indicaţii de siguranţă
referitoare la baterii
PERICOL DE
MOARTE! Bateriile pot fi înghiţite, ceea ce
poate pune viaţa în pericol. Solicitaţi imediat
ajutor medical, dacă aţi înghiţit o baterie.
Scoateţi bateria dacă nu folosiţi produsul timp
îndelungat.
ATENŢIE! PERICOL DE EXPLO-
ZIE! Nu încărcaţi niciodată bateriile!
ATENŢIE! PERICOL DE EXPLO-
ZIE! Înlocuiţi întotdeauna toate
bateriile concomitent şi folosiţi
numai baterii de acelaşi tip.
Scoateţi bateriile goale din aparat. Există peri-
col mărit de scurgere!
La introducerea bateriilor aveţi grijă la polari-
tatea corectă!
Nu ţineţi bateriile la îndemâna copiilor, nu
aruncaţi bateriile în foc, nu scurtcircuitaţi bate-
riile şi nu le dezasamblaţi.
Dacă bateria s-a scurs în aparatul dumnea-
voastră, scoateţi-o imediat pentru a evita dete-
riorarea aparatului!
Evitaţi contactul cu pielea, ochii şi mucoasele.
În cazul unui contact cu acidul din baterie clă-
tiţi locul respectiv cu multă apă şi/sau apelaţi
la un medic!
Anterior punerii în funcţiune
Înainte de prima utilizare îndepărtaţi folia de pro-
tecţie de pe ecran 7.
Introducerea bateriei
Pentru introducerea bateriei 5procedaţi
conform fig. A.
Fixarea calculatorului
de bicicletă
Pentru fixarea aparatului procedaţi conform
figurilor B până la G.
Punerea în funcţiune
Efectuarea setărilor de bază
Notă: După introducerea bateriei 5ecranul 7
porneşte automat după aprox. 2 secunde. Ajungeţi
direct la meniul de selectare a limbii.
Apăsaţi butonul MODE 11 în mod repetat
până când apare limba dorită.
Confirmaţi alegerea dumneavoastră prin apă-
sarea butonului SET 13 . Ajungeţi automat la
meniul de selectare a profilului de utilizator.
Apăsaţi butonul MODE în mod repetat până
când apare profilul de utilizator dorit ADVANCE
(avansat) sau EASY (uşor).
24” 1916mm
26” (650A) 2073mm
26,5” (Tubular) 2117 mm
26,6” (700x25C) 2124 mm
26,8” (700x28C) 2136 mm
27” (700x32C) 2155 mm
28” (700B) 2237 mm
ATB24”x1,75 1888mm
ATB26 x1,4 1995 mm
ATB26 x1,5 2030 mm
ATB26 x1,75 2045mm
ATB26x2 (650B) 2099 mm
27”x1 2138 mm
27”x1 1/4 2155mm
În continuare alegeţi unitatea de măsură pentru
lungime. Apăsaţi butonul MODE în mod repe-
tat până când se afişează SET KM sau SET
MILE.
Confirmaţi alegerea dumneavoastră prin apă-
sarea butonului SET. Acum ajungeţi la meniul
de introducere a vârstei.
Pe ecran se afişează un număr de două cifre.
Introduceţi acum vârsta dumneavoastră. Apă-
saţi butonul MODE în mod repetat până când
apare prima cifră dorită.
Confirmaţi alegerea dumneavoastră prin apă-
sarea butonului SET.
Repetaţi procedura pentru următoarea cifră.
Ajungeţi acum la meniul pentru alegerea unită-
ţii de măsură pentru greutate.
Apăsaţi butonul MODE în mod repetat până
când se afişează SET KG sau SET LB.
Confirmaţi alegerea dumneavoastră prin apă-
sarea butonului SET. Acum ajungeţi la meniul
de introducere a greutăţii.
Pe ecran se afişează un număr de trei cifre.
Introduceţi acum greutatea dumneavoastră.
Apăsaţi butonul MODE în mod repetat până
când apare prima cifră dorită.
Confirmaţi alegerea dumneavoastră prin apă-
sarea butonului SET.
Repetaţi procedura pentru toate cifrele. Ajungeţi
acum la meniul pentru alegerea formatului orei.
Apăsaţi butonul MODE în mod repetat până
când se afişează pe ecran 12 pentru formatul
de 12 ore sau 24 pentru formatul de 24 de ore.
Confirmaţi alegerea dumneavoastră prin apă-
sarea butonului SET. Ajungeţi acum la meniul
de setare a orei.
Pe ecran se afişează un număr de patru cifre.
Introduceţi acum ora actuală. Apăsaţi butonul
MODE în mod repetat până când apare
prima cifră dorită.
Confirmaţi alegerea dumneavoastră prin apă-
sarea butonului SET.
Repetaţi procedura pentru toate cifrele. Ajun-
geţi acum la meniul pentru alegerea intervalu-
lui de întreţinere.
Apăsaţi acum butonul MODE în mod repetat
până când se afişează numărul de kilometri
parcurşi după care doriţi efectuarea lucrărilor
de întreţinere la bicicleta dumneavoastră.
Notă: Puteţi alege 200, 400, 600 şi 800 km,
respectiv mile.
Confirmaţi alegerea dumneavoastră prin apă-
sarea butonului SET. Ajungeţi acum la meniul
pentru alegerea unităţii pentru temperatură.
Apăsaţi butonul MODE în mod repetat până
când se afişează °C sau °F pe ecran.
Confirmaţi alegerea dumneavoastră prin apă-
sarea butonului SET. Cu aceasta se finalizează
setarea de bază.
Utilizarea calculatorului
de bicicletă
Notă: Dacă nu utilizaţi calculatorul de bicicletă
timp de peste 5 minute, acesta intră automat în
modul Stand-By. Apăsaţi orice buton pentru a-l
activa din nou. Afişajul de funcţionare 8arată
în ce mod vă aflaţi în prezent.
Apăsaţi în mod repetat butonul MODE 11
pentru a naviga prin diferitele moduri.
Apăsaţi butonul SET 13 pentru a trece la funcţia
secundară a fiecărei funcţii.
Apăsaţi şi ţineţi apăsat butonul SET pentru a
vizualiza sau reseta valorile memorate.
Calculatorul de bicicletă dispune de
următoarele funcţii:
Funcţii pentru avansaţi:
CLOCK > TOTALODO > TOTAL-TM > TRIPDIST >
MAXSPEED > AVGSPEED > TRIPTIME > TEMP >
STPWATCH > CAL RATE > CALORIE > FAT-BURN >
KM+/- > TIME+ / - > SCAN
Funcţii pentru începători:
TRIPDIST > AVGSPEED > TRIPTIME
Utilizarea funcţiilor
Notă: Următoarea listă descrie toate funcţiile şi
subfuncţiile.
CLOCK: - afişarea orei
Apăsaţi şi ţineţi apăsat butonul SET 13 timp de
aprox. 3secunde pentru a ajunge în meniul de
setare a orei.
TOTALODO: - numărul total de kilometri parcurşi
Apăsaţi şi ţineţi apăsat butonul SET timp de
aprox. 3secunde pentru a ajunge în meniul de
setare a mărimii cauciucurilor şi la numărului
total de kilometri parcurşi.
TOTAL-TM: timpul total de mers
Apăsaţi şi ţineţi apăsat butonul SET timp de
aprox. 3secunde pentru a modifica timpul
total de mers salvat.
TRIPDIST: numărul total de kilometri parcurşi pe zi
Apăsaţi şi ţineţi apăsat butonul SET timp de
3secunde pentru a reseta numărul de kilometri
parcurşi, viteza medie şi timpul de mers la
valoarea 0.
MAXSPEED: viteza maximă
Apăsaţi şi ţineţi apăsat butonul SET timp de
3secunde pentru a reseta viteza maximă la
valoarea 0.
AVGSPEED: viteza medie
TRIPTIME: timpul de mers
TEMP: termometru
Apăsaţi şi ţineţi apăsat butonul SET pentru a
comuta între °C şi °F.
Apăsaţi butonul SET pentru a afişa cea mai
mare temperatură (HI) măsurată până acum.
Apăsaţi din nou butonul SET pentru a afişa cea
mai mică temperatură (LO) măsurată până
acum.
Apăsaţi şi ţineţi apăsat butonul SET în timp ce
se afişează cea mai mare, respectiv cea mai
mică temperatură pentru a reseta valorile
memorate.
STPWATCH: cronometru
Apăsaţi butonul SET pentru a porni cronometrul.
Apăsaţi din nou butonul SET pentru a opri cro-
nometrul.
Apăsaţi şi ţineţi apăsat butonul SET pentru a
reseta cronometrul la valoarea 0.
CAL RATE: consumul actual de calorii
CALORIE: contor de calorii
Apăsaţi şi ţineţi apăsat butonul SET pentru a
reseta contorul de calorii la valoarea 0.
FAT-BURN: arderea grăsimilor, în grame
Apăsaţi şi ţineţi apăsat butonul SET pentru a
reseta numărul de calorii arse la valoarea 0.
KM: contor kilometric
Apăsaţi şi ţineţi apăsat butonul SET pentru a
seta contorul kilometric.
Pe ecran 7se afişează simbolul pentru numă-
rătoarea normală sau inversă (+ respectiv -).
Apăsaţi acum butonul MODE 11 în mod repe-
tat până când apare simbolul dorit.
Confirmaţi alegerea dumneavoastră prin apă-
sarea butonului SET. Ajungeţi acum la setarea
traseului pentru contorul kilometric.
Pe ecran se afişează un număr de 5 cifre.
Introduceţi acum traseul dorit. Apăsaţi butonul
MODE în mod repetat până când apare
prima cifră dorită.
Confirmaţi alegerea dumneavoastră prin apă-
sarea butonului SET.
Repetaţi procedura pentru toate cifrele.
TIME: timer
Apăsaţi şi ţineţi apăsat butonul SET pentru a
seta timerul.
Modul CUSTOMIZE
În afară de modul ADVANCE şi EASY puteţi intro-
duce setările dvs. personale şi să optaţi pentru
modul CUSTOMIZE (vedeţi desfăşurătorul).
Ţineţi tasta indicator luminos 12 apăsată
pentru a trece în modul CUSTOMIZE.
Indicaţie: Puteţi apăsa în mod repetat tasta
MODE 11 pentru a comuta între modul
ADVANCE şi EASY.
Ţineţi apăsat în modul EASY tasta SET 13 .
Apăsaţi tasta MODE pentru a opri sau a porni
setările (de ex. ora). Selectaţi „Off” (Pornit),
pentru a introduce setarea dorită în modul
EASY. Selectaţi „On” (Oprit), dacă nu doriţi să
introduceţi setarea.
Apăsaţi tasta SET pentru a confirma intrarea
dumneavoastră.
Utilizarea luminii de fundal
Apăsaţi butonul pentru lumină 12 pentru a
aprinde temporar lumina de fundal. Lumina de
fundal se stinge automat după câteva minute.
Resetarea calculatorului
de bicicletă
Apăsaţi şi ţineţi apăsate concomitent butoanele
MODE 11 şi SET 13 până când se afişează
{{----}} pe ecran 7.
Apăsaţi şi ţineţi apăsat acum butonul MODE.
Se resetează toate setările.
Notă: Toate datele salvate se şterg.
Schimbarea bateriei
Notă: Bateria calculatorului de bicicletă trebuie
schimbată când apare simbolul pentru baterie 18
pe ecran 7.
Notă: Bateria senzorului trebuie schimbată dacă
nu se mai vede sau dacă se vede cu greu viteza
afişată 17 pe ecran în timpul mersului.
Apăsaţi şi ţineţi apăsate concomitent butoanele
MODE 11 şi SET 13 până când se afişează
{{----}} pe ecran 7.
Schimbaţi bateria conform figurii A. La introdu-
cerea bateriilor aveţi grijă la polaritatea corectă.
Aceasta este indicată în compartimentul pentru
baterii.
Apăsaţi şi ţineţi apăsat butonul SET pentru a
reveni la modul normal de funcţionare.
Notă: La aproximativ 20 de secunde după scoa-
terea bateriei se şterg toate datele salvate.
Remedierea defecţiunilor
Notă: Aparatul conţine componente electronice.
Prin urmare, el poate cauza interferenţe, dacă se
află în apropierea aparatelor care emit semnale
radio.
-Dacă apar afişaje eronate pe ecran, înlăturaţi ase-
menea aparate din apropierea produsului. În caz
de asemenea defecţiuni, scoateţi pentru scurt timp
bateria din aparat şi introduceţi-o la loc.
Problemă Remediere
Ecranul LCD fără afişaj
sau niciun răspuns după
introducerea bateriilor.
-
+
RESET
Scoateţi bateria. Atingeţi
cu o şurubelniţă în ace-
laşi timp polul Plus şi
Minus în zona marcată
RESET a compartimentu-
lui pentru baterii.
Intro-
duceşi bateria de 3 V în
compartimentul pentru
baterii cu polul + în sus.
Puneţi capacul bateriei
pe compartimentul pen-
tru baterii. Microproce-
sorul este resetat şi
pornit din nou.
Viteza şi numărul de
kilometri nu sunt afişaţi.
Îndreptaţi corect magne-
tul şi senzorul.
- Verificaţi dacă bateria
este introdusă corect.
Display negru Temperatura mediului
înconjurător este prea
ridicată sau computerul
pentru bicicletă a fost
expus un timp prea
îndelungat razelor solare.
Luaţi aparatul din acţiu-
nea razelor solare şi
lăsaţi-l să se răcească
un timp.
Afişajul LCD indică
simboluri neregulate.
Scoateţi bateria şi apoi
introduceţi-o din nou.
Curăţare şi întreţinere
Pentru curăţare nu folosiţi lichide sau agenţi de
curăţare. În caz contrar există pericol de dete-
riorare a aparatului.
Curăţaţi aparatul numai în exterior cu o lavetă
moale şi uscată.
Eliminarea ca deşeu
Ambalajul este produs din materiale
ecologice, care pot fi eliminate la punc-
tele locale de reciclare.
Administraţia locală vă poate oferi mai multe
informaţii cu privire la posibilităţile de eliminare a
produsului.
Pentru a proteja mediul înconjurător nu
eliminaţi produsul dumneavoastră la
gunoiul menajer atunci când nu mai
poate fi folosit, ci predaţi-l la un punct
de colectare. Vă puteţi informa cu pri-
vire la punctele de colectare şi orarul
acestora la administraţia competentă.
Bateriile defecte sau consumate trebuie reciclate
conform Directivei 2006/66/CE. Înapoiaţi bateri-
ile şi/sau aparatul prin intermediul punctelor de
colectare indicate.
Daune ale mediului înconjurător
cauzate prin eliminarea necores-
punzătoare a bateriilor!
Este interzisă eliminarea bateriilor la gunoiul mena-
jer. Ele pot conţine metale grele toxice şi se supun
tratamentului deşeurilor periculoase. Simbolurile
IAN 87309
OWIM GmbH & Co. KG
Stiftsbergstraße 1
D-74167 Neckarsulm
Model No. Z31433
Version: 03/ 2013
© by ORFGEN Marketing
Last Information Update · Stanje informacija
Versiunea informaţiilor: 01/ 2013
Ident.-No.: Z31433012013-HR/ RO
87309_cri_Fahrradcomputer_HR-RO.indd 2 04.02.13 09:55

Other manuals for Z31433

7

Other Crivit Bicycle Accessories manuals

Crivit Z31433 User manual

Crivit

Crivit Z31433 User manual

Crivit 68643 User manual

Crivit

Crivit 68643 User manual

Crivit 26211 User manual

Crivit

Crivit 26211 User manual

Crivit 56074 User manual

Crivit

Crivit 56074 User manual

Crivit 103920 Installation and operating instructions

Crivit

Crivit 103920 Installation and operating instructions

Crivit SP-91 User manual

Crivit

Crivit SP-91 User manual

Crivit 292230 User manual

Crivit

Crivit 292230 User manual

Crivit Z31433 User manual

Crivit

Crivit Z31433 User manual

Crivit HG00734A User manual

Crivit

Crivit HG00734A User manual

Crivit Z31433 User manual

Crivit

Crivit Z31433 User manual

Crivit FT-2882 User manual

Crivit

Crivit FT-2882 User manual

Crivit Z31433 User manual

Crivit

Crivit Z31433 User manual

Crivit SP - 33 User manual

Crivit

Crivit SP - 33 User manual

Crivit Z31335 User manual

Crivit

Crivit Z31335 User manual

Crivit SP-61 User manual

Crivit

Crivit SP-61 User manual

Crivit 14177 User manual

Crivit

Crivit 14177 User manual

Crivit SP-107 User manual

Crivit

Crivit SP-107 User manual

Crivit 93746 User manual

Crivit

Crivit 93746 User manual

Crivit SP - 33 User manual

Crivit

Crivit SP - 33 User manual

Crivit 68643 User manual

Crivit

Crivit 68643 User manual

Crivit 298895 Technical specifications

Crivit

Crivit 298895 Technical specifications

Crivit 89267 User manual

Crivit

Crivit 89267 User manual

Crivit SP-61 User manual

Crivit

Crivit SP-61 User manual

Crivit 307553 User manual

Crivit

Crivit 307553 User manual

Popular Bicycle Accessories manuals by other brands

Shimano E8000 STEP installation manual

Shimano

Shimano E8000 STEP installation manual

TFK velobaby operating manual

TFK

TFK velobaby operating manual

kLite ULTRA quick start guide

kLite

kLite ULTRA quick start guide

EUFAB 16408 manual

EUFAB

EUFAB 16408 manual

Pioneer SGY-PM910H2 installation manual

Pioneer

Pioneer SGY-PM910H2 installation manual

Bryton Rider 420 manual

Bryton

Bryton Rider 420 manual

Powerfix Profi KH 4260 operating instructions

Powerfix Profi

Powerfix Profi KH 4260 operating instructions

Yolin YL90V-V user manual

Yolin

Yolin YL90V-V user manual

Cateye Loop 2 SL-LD140RC-R manual

Cateye

Cateye Loop 2 SL-LD140RC-R manual

Bosch Kiox 300 Original operating instructions

Bosch

Bosch Kiox 300 Original operating instructions

Nashbar TEMPO CADENCE BN-T11C user manual

Nashbar

Nashbar TEMPO CADENCE BN-T11C user manual

Bell Dashboard 100 user manual

Bell

Bell Dashboard 100 user manual

Raze-Cat POWER MOUNT SLIM Assembly instructions

Raze-Cat

Raze-Cat POWER MOUNT SLIM Assembly instructions

Shimano SI-TIREB Technical Service Instructions

Shimano

Shimano SI-TIREB Technical Service Instructions

HASE Bikes 24298 quick guide

HASE Bikes

HASE Bikes 24298 quick guide

Bosch Kiox BUI330 Original operating instructions

Bosch

Bosch Kiox BUI330 Original operating instructions

SRAM RockShox Super Deluxe Coil Service manual

SRAM

SRAM RockShox Super Deluxe Coil Service manual

Custom Built eBikes VLCD-6 user guide

Custom Built eBikes

Custom Built eBikes VLCD-6 user guide

manuals.online logo
manuals.online logoBrands
  • About & Mission
  • Contact us
  • Privacy Policy
  • Terms and Conditions

Copyright 2025 Manuals.Online. All Rights Reserved.