manuals.online logo
Brands
  1. Home
  2. •
  3. Brands
  4. •
  5. Croplands
  6. •
  7. Farm Equipment
  8. •
  9. Croplands WEED-IT Quadro User manual

Croplands WEED-IT Quadro User manual

BT-OMWEED-TRANS (V3B) Page 1of 10
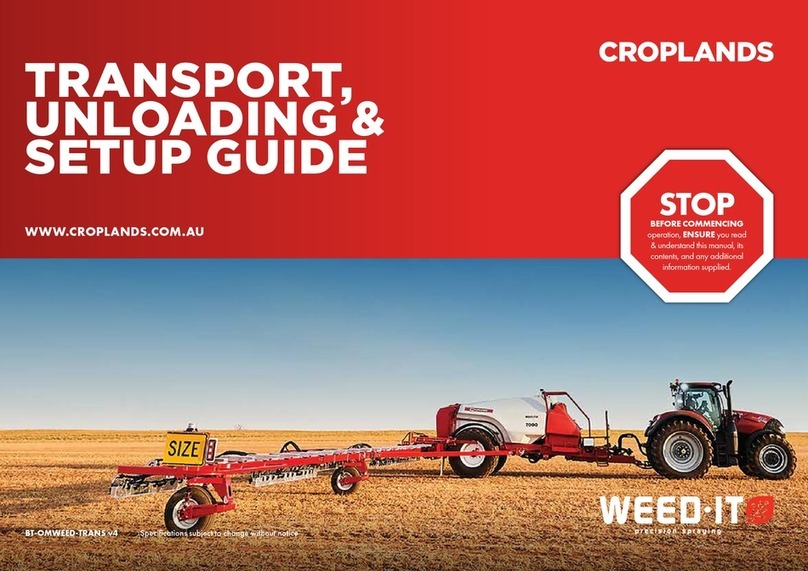
WEEDit Transport Unloading & Setup Guide (as shown for a 36 metre boom)
Please read this guide, MP-375 kit information and Croplands
Safety booklet before unloading the WEED-IT sprayer.
Items required for assembly and set up.
•Suitable lifting equipment to remove upper 6 meter
boom tip from the transport position, (approximate
weight of the 6 meter boom is 500kgs).
•Tension wrenches capable of 800 Nm and 250Nm
tension.
•Tyre inflation equipment and pressure gauge to suit.
•WEEDit Transport Kit (MP-375) information sheet (2
pages) (should be in the red box with controllers etc).
From late 2019 onwards 36m WEED-
IT sprayers are being delivered with
the castor wheels installed into
individual frames which are also
used to support the boom to the
trailer’s bed.
(1) Prepare to unload from the
truck. Remove all tie downs etc.
(2) Unload both castor wheel &
frame assemblies.
(3) Connect suitable size tractor to WEEDit unit and tow off the truck - slowly and carefully. Check the clearance
between the spray rails and truck ramps as the machine is unloaded. This is not a 1 man job.
Maximum transport distance of 1 km below 5 KM/H until upper boom is removed.
Version 3B for WEED-IT Quadro
BT-OMWEED-TRANS (V3B) Page 2of 10
(4) Loosen hardware for the yellow transport stands that are attaching the upper boom to the lower boom.
Place suitable lifting device under the boom, remove the mounting hardware.
(5) Raise the boom and tow the WEEDit forwards and lower outer boom to a suitable working height.
(6) Remove front & rear transport stands.
IMPORTANT – be very careful re
stability, especially as the support
brackets are removed. Ideally use
slings rather than fork tynes.
Note some of the transport
brackets picture on this page and
next have not been painted yellow.
BT-OMWEED-TRANS (V3B) Page 3of 10
(7) Reverse the WEEDit unit (or very carefully take outer boom to the unit) to connect the booms together.
(8) Join boom together. Add all of the bolts and washers leave them loose to assist with the boom alignment.
Remove half of the bolts to make
joining easier. The bolts may need
to be loose to assist with
alignment of holes.
BT-OMWEED-TRANS (V3B) Page 4of 10
(9) Fit all nuts and washers, adjust top outer bolts first to get 1000mm spacing between the centre lines of
the cameras at the join point.
(10) Fit outer castor wheels while outer boom is supported by the forklift. Position as per the diagram below,
and is the same for 36, 32 or 30m boom. Note the pivot pin is to the front of the main boom section.
The “Intermediate” section is
only used on the 36m boom.
Note older boom
structure shown.
Start with
these 2 first
BT-OMWEED-TRANS (V3B) Page 5of 10
(11) Adjust the top inner bolts to align all camera brackets.
(12) Adjust all 4 lower bolts to get the boom parallel to the ground at the join point.
Tension all nuts to 800Nm.
(13) Remove yellow inner pivot brace. Remember to return all “Yellow” Transport kit components, including
nuts, bolts and washers to Croplands for credit.
BT-OMWEED-TRANS (V3B) Page 6of 10
Place all hardware and plates in the red crate in
preparation for return to Croplands along with all
“Yellow” items.
Collect and pack all “Yellow” items for return. See the
transport kit guide.
(14) Connect all spray lines (spot, blanket (if applicable) and fence line) and all WEED-IT / electrical
connections between the main boom and tip sections.
BT-OMWEED-TRANS (V3B) Page 7of 10
(15) Fit boom bumper bars. The Horizontal bar is fitted to the left hand boom, and the 3 single arms are
fitted to the right hand boom.
Preferred position for 36m boom is now on the intermediate arm (as shown at bottom). Shorter booms will
require mounting on the inner arm.
Shown is all of AB243000-700A
plus bolt kit, BK-2502.
Spray cart
Note older boom
structure shown.
BT-OMWEED-TRANS (V3B) Page 8of 10
(16) Fit and connect all controllers to the tractor as per the operator’s manuals supplied with each
controller.
(17) Connect all electrical and hydraulic fittings between the tractor and WEEDit unit.
(18) Adjust WEEDit chassis air bags if fitted.
(19) Adjust all boom tyre pressures to 15 psi
(20) Before inflating air shockers, the boom wheel MUST be raised clear of the ground to do this, add 80 psi
to all shockers, use the quick start folding guide to fold the boom out to the working position and drain
air evenly from both shockers to achieve a camera working height of 1100 mm. There needs to be a
minimum of 10psi in the shocker at all times! Both shockers in each set must be the same pressure.
(21) Tension boom wheel bolts to 250Nm
BT-OMWEED-TRANS (V3B) Page 9of 10
(22) The boom steering wheel bolts will require adjustment. The wheels should have a small amount of toe
out when travelling forward to keep the booms apart when cornering. Set the boom to the transport
position and drive forward slowly, there should be a minimum of 200 mm clearance between the bash
bars, rotate the top steer wheel stop bolt out to increase the clearance between the boom “bumper”
bars, check that one side is not wider at the rear than the other side.
This stop bolt is used to align
the “steer” wheel in the
transport position.
Correctly set up boom.
This picture is an example of an
incorrectly set boom.
The left boom is too wide;
Rotate the
top bolt in half a turn
on the left boom and test.
This is the old position for the boom
bumpers – correct (v2) position is on the
intermediate section, closer to the tip.
BT-OMWEED-TRANS (V3B) Page 10 of 10
(23) Adjust the drawbar to achieve 1100mm camera height on the central cameras – as a guide, the main
chassis sits approximately 6 degrees nose down from horizontal, and the upright tank supports are 90
degrees from horizontal, when correctly adjusted.
Before operating please read the Boom Parking
Quick Start Guide, BT-OMWEED-QSG-B (version 2),
as shown here.
Carry out the set up and pre-delivery of the machine using
the supplied manuals for the WEEDit system and blanket
spray line (if equipped) using the supplied manuals.
Notes:
•Never operate the boom when the wheels are at right angles to the direction of travel.
•Be very careful to follow the (manual) instructions for setting up the boom stay arms (it’s a little counter
intuitive and easy to get wrong if not following instructions).
Use a spirit level to get tank level
bar horizontal. Adjust the rear
WEEDit drawbar to achieve this.

Other manuals for WEED-IT Quadro

2

Other Croplands Farm Equipment manuals

Croplands US200C/25/100R3 User manual

Croplands

Croplands US200C/25/100R3 User manual

Croplands Quantum Mist QM-500 User manual

Croplands

Croplands Quantum Mist QM-500 User manual

Croplands PEGASUS 7000 Standard User manual

Croplands

Croplands PEGASUS 7000 Standard User manual

Croplands WEED-IT Quadro User manual

Croplands

Croplands WEED-IT Quadro User manual

Croplands PEGASUS 8000 User manual

Croplands

Croplands PEGASUS 8000 User manual

Croplands QUANTUM FUSION User manual

Croplands

Croplands QUANTUM FUSION User manual

Croplands WEED-IT User manual

Croplands

Croplands WEED-IT User manual

Croplands PEGASUS 4000 User manual

Croplands

Croplands PEGASUS 4000 User manual

Croplands CROPAIR 300 User manual

Croplands

Croplands CROPAIR 300 User manual

Croplands WEED-IT Quadro User manual

Croplands

Croplands WEED-IT Quadro User manual

Croplands PEGASUS 8000 Programming manual

Croplands

Croplands PEGASUS 8000 Programming manual

Croplands US20F/252/HR30 User manual

Croplands

Croplands US20F/252/HR30 User manual

Croplands AgriPak LA300 User manual

Croplands

Croplands AgriPak LA300 User manual

Croplands XR11001 AI11001 User manual

Croplands

Croplands XR11001 AI11001 User manual

Croplands Cropliner 1500XL User manual
Croplands

Croplands Cropliner 1500XL User manual

Popular Farm Equipment manuals by other brands

Moore UNIDRILL 300 manual

Moore

Moore UNIDRILL 300 manual

KUHN FC244R Operator's manual

KUHN

KUHN FC244R Operator's manual

Tajfun EGV 35 A operating instructions

Tajfun

Tajfun EGV 35 A operating instructions

Kubota AP-SGC2072 Operator's manual

Kubota

Kubota AP-SGC2072 Operator's manual

LEMKEN Vega 12 operating instructions

LEMKEN

LEMKEN Vega 12 operating instructions

MacDon M1240 Operator's manual

MacDon

MacDon M1240 Operator's manual

Maschio GASPARDO CIRO E USE AND MAINTENANCE - OPERATOR'S MANUAL

Maschio

Maschio GASPARDO CIRO E USE AND MAINTENANCE - OPERATOR'S MANUAL

AGT AGT-SSRPB80 product manual

AGT

AGT AGT-SSRPB80 product manual

LELY HIBISCUS 735 Vario Handleiding Operator's Manual

LELY

LELY HIBISCUS 735 Vario Handleiding Operator's Manual

LUCLAR INTERNATIONAL MiniStraw UNIBALL 1500 Use and maintenance

LUCLAR INTERNATIONAL

LUCLAR INTERNATIONAL MiniStraw UNIBALL 1500 Use and maintenance

KMC Controls 68 Series Operator's manual

KMC Controls

KMC Controls 68 Series Operator's manual

MacDon M105 2011 Operator's manual

MacDon

MacDon M105 2011 Operator's manual

aivituvin AIR46 instruction manual

aivituvin

aivituvin AIR46 instruction manual

Ferrari FUTURA 2016 Operating and service manual

Ferrari

Ferrari FUTURA 2016 Operating and service manual

horsch Taro 6 SL operating instructions

horsch

horsch Taro 6 SL operating instructions

Schiller CLASSEN TR-20H Operating & parts manual

Schiller

Schiller CLASSEN TR-20H Operating & parts manual

Amazone ZA-M premiS Operation manual

Amazone

Amazone ZA-M premiS Operation manual

enorossi DM Series User and maintenance manual

enorossi

enorossi DM Series User and maintenance manual

manuals.online logo
manuals.online logoBrands
  • About & Mission
  • Contact us
  • Privacy Policy
  • Terms and Conditions

Copyright 2025 Manuals.Online. All Rights Reserved.